
J Spicey Gifts
  • Home
  • Recipes
    • Breakfast & Brunch
    • Appetizers & Snacks
    • Main Dishes
    • Soups & Salads
    • Desserts & Baking
    • Drinks & Beverages
  • Categories
    • Vegetarian
    • Vegan
    • Gluten-Free
    • Quick & Easy (30-Min)
    • Slow Cooker & Instant Pot
    • Grilling & BBQ
    • Healthy & Low-Calorie
    • Holiday & Seasonal
    • Kid-Friendly
  • About
  • Contact
Top Posts
Refreshing Golden Turmeric Citrus Cooler with a Twist
Bubbling Cucumber Basil Bliss Fizz
Delicious Chocolate-Dipped Pistachio Biscotti Bites
Raspberry Coconut Macaroon Tart with Swirls
Vibrant Sweet Potato and Kale Detox Salad with...
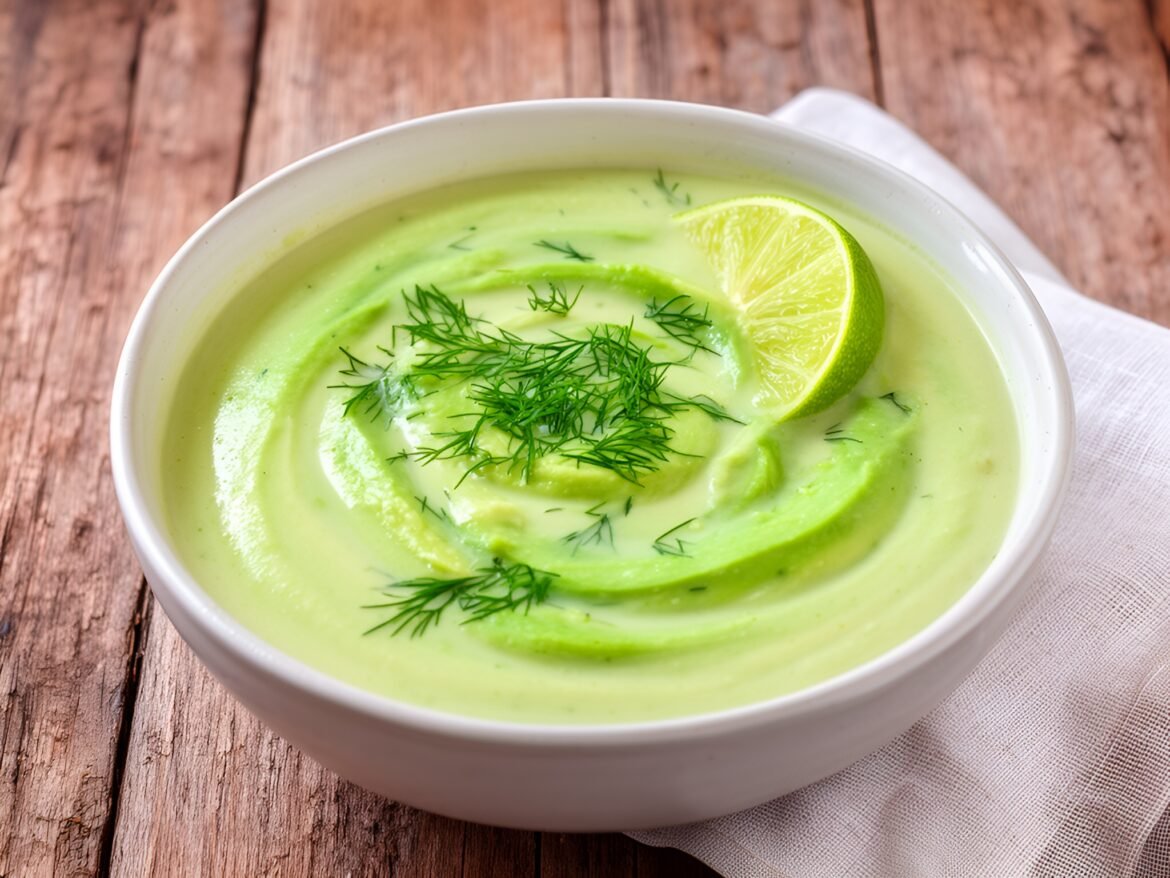
Creamy Avocado and Dill Chicken Soup
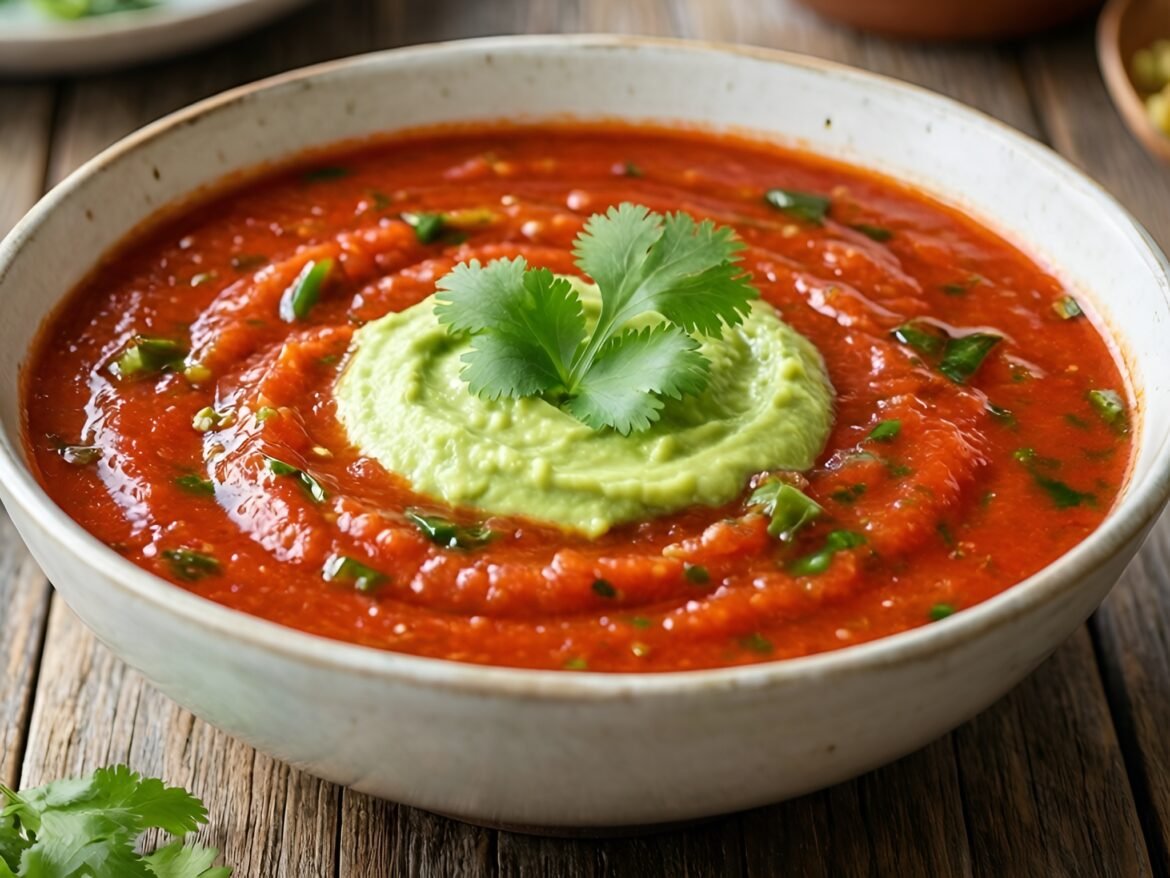
Spicy Tom Yum Gazpacho with Avocado Cream
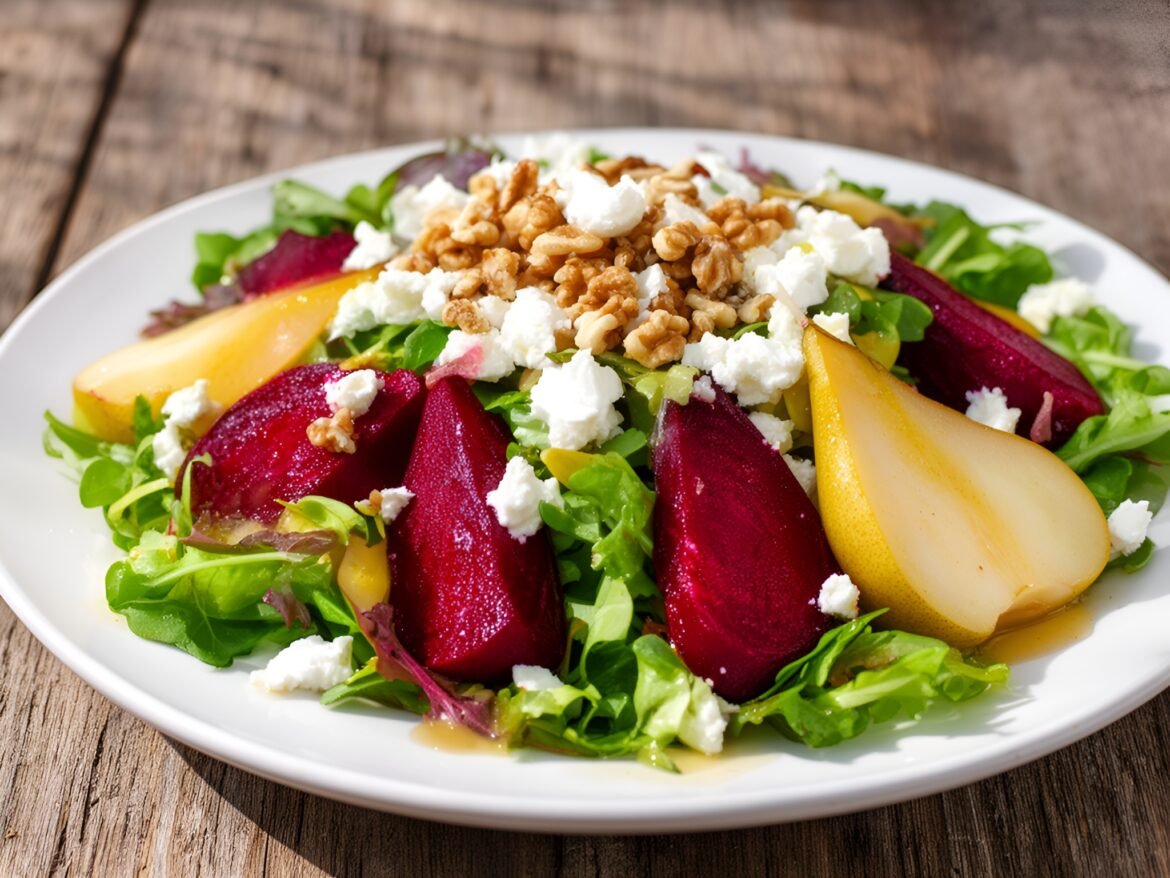
Vibrant Roasted Beet and Pear Salad with Citrus...
Creamy Pumpkin Sage Chicken Skillet with Spinach
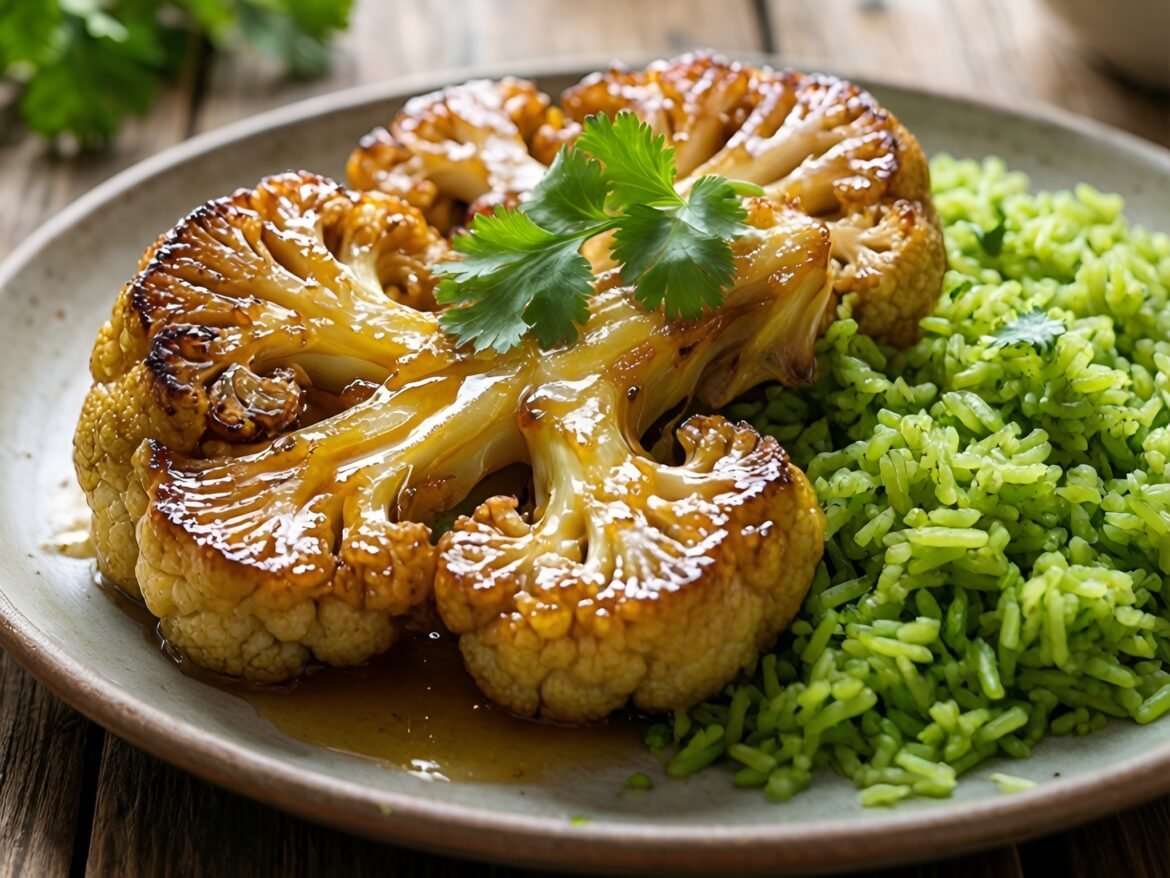
Sweet and Spicy BBQ Cauliflower Steaks with Cilantro-Lime...
J Spicey Gifts
  • Home
  • Recipes
    • Breakfast & Brunch
    • Appetizers & Snacks
    • Main Dishes
    • Soups & Salads
    • Desserts & Baking
    • Drinks & Beverages
  • Categories
    • Vegetarian
    • Vegan
    • Gluten-Free
    • Quick & Easy (30-Min)
    • Slow Cooker & Instant Pot
    • Grilling & BBQ
    • Healthy & Low-Calorie
    • Holiday & Seasonal
    • Kid-Friendly
  • About
  • Contact
J Spicey Gifts
J Spicey Gifts
  • Home
  • Recipes
    • Breakfast & Brunch
    • Appetizers & Snacks
    • Main Dishes
    • Soups & Salads
    • Desserts & Baking
    • Drinks & Beverages
  • Categories
    • Vegetarian
    • Vegan
    • Gluten-Free
    • Quick & Easy (30-Min)
    • Slow Cooker & Instant Pot
    • Grilling & BBQ
    • Healthy & Low-Calorie
    • Holiday & Seasonal
    • Kid-Friendly
  • About
  • Contact
Copyright 2021 - All Right Reserved
Refreshing Golden Turmeric Citrus Cooler with a Twist
Drinks & BeveragesHealthy & Low-CalorieQuick & Easy (30-Min)Vegan

Refreshing Golden Turmeric Citrus Cooler with a Twist

by Linda October 30, 2026
written by Linda

Beat the heat with this invigorating Golden Turmeric Citrus Cooler, a drink that combines the zesty brightness of citrus with the earthy warmth of turmeric. This refreshing beverage not only delights your taste buds but also offers numerous health benefits, thanks to the anti-inflammatory properties of turmeric and the vitamin C boost from fresh citrus.

Perfect for summer gatherings or a quiet afternoon at home, this cooler is quick to prepare and can easily be made in large batches. With its vibrant golden hue and refreshing taste, it’s sure to be a hit whether served at a party or enjoyed on your patio.

Refreshing Golden Turmeric Citrus Cooler with a Twist

Refreshing Golden Turmeric Citrus Cooler with a Twist

Serves: 4 Prep Time: 10 minutes Cooking Time: 0 minutes 0 minutes
Nutrition facts: 80 calories 0g fat
Rating: 5.0/5
( 1 voted )
Pin
Print

Ingredients

INGREDIENTS

  • 2 cups fresh orange juice
  • 1 cup fresh lemon juice
  • 2 teaspoons ground turmeric
  • 1 tablespoon honey or maple syrup
  • 4 cups sparkling water
  • Ice cubes
  • Orange slices and lemon wedges for garnish

Instructions

  1. In a large pitcher, combine fresh orange juice, lemon juice, and ground turmeric.
  2. Add honey or maple syrup, and stir well until the turmeric is dissolved.
  3. Pour in the sparkling water and mix gently to combine.
  4. Serve over ice cubes in chilled glasses, garnishing with orange slices and lemon wedges. Enjoy!

Notes

Tip: Use freshly squeezed juice for the best flavor and benefits. Adjust sweetness to taste, and feel free to experiment with different citrus fruits!

For an extra kick, consider adding a splash of ginger ale or soda water for fizz. If you prefer a sweeter drink, a drizzle of honey or maple syrup can enhance the flavor without overpowering the freshness of the citrus. This cooler is best served fresh but can be stored in the refrigerator for up to 24 hours. Just give it a good stir before serving to mix any settled ingredients.

October 30, 2026 0 comments
0 FacebookTwitterPinterestPocketEmail
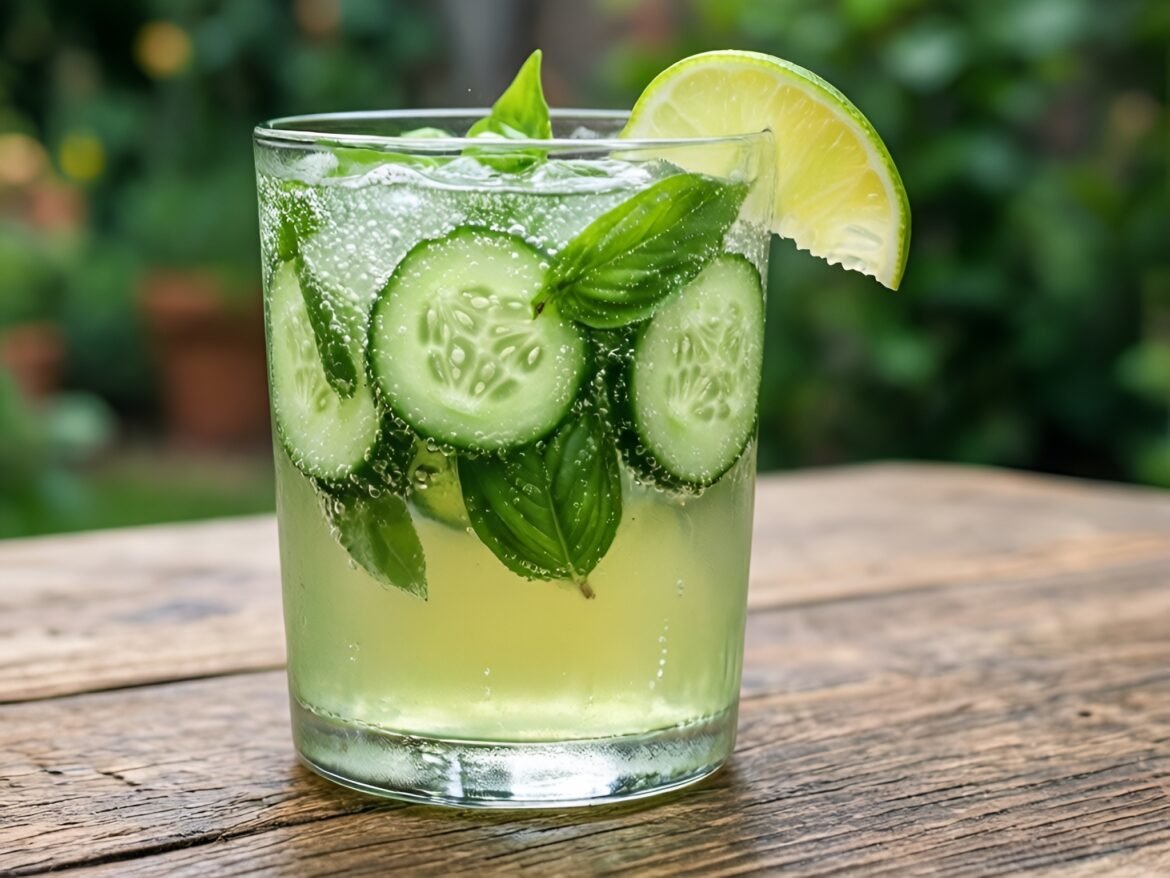
Bubbling Cucumber Basil Bliss Fizz
Drinks & BeveragesGluten-FreeQuick & Easy (30-Min)Vegan

Bubbling Cucumber Basil Bliss Fizz

by Linda October 30, 2026
written by Linda

Experience a delightful refreshment with this Bubbling Cucumber Basil Bliss Fizz! This vibrant drink combines the crispness of cucumber with the aromatic flavor of fresh basil, making it not only refreshing but also incredibly invigorating.

The addition of sparkling water gives it a bubbly lift, perfect for summer gatherings or a cozy night in. Whether you’re serving it at a brunch or enjoying it solo, this drink is sure to impress with its unique flavor profile and beautiful presentation.

Bubbling Cucumber Basil Bliss Fizz

Bubbling Cucumber Basil Bliss Fizz

Serves: 2 Prep Time: 10 minutes Cooking Time: 0 minutes 0 minutes
Nutrition facts: 45 calories 0g fat
Rating: 5.0/5
( 1 voted )
Pin
Print

Ingredients

INGREDIENTS

  • 1 large cucumber, thinly sliced
  • 10-12 fresh basil leaves
  • 1 tablespoon lime juice
  • 2 cups sparkling water
  • Ice cubes
  • Lime wedges for garnish

Instructions

  1. Muddle the cucumber slices and basil leaves together in a pitcher until fragrant.
  2. Add lime juice and fill the pitcher with ice cubes.
  3. Pour in the sparkling water and stir gently to combine.
  4. Serve immediately in glasses and garnish with a lime wedge. Enjoy!

Notes

Tip: For a fun twist, experiment with flavored sparkling waters or add a splash of your favorite fruit juice!

For an extra kick, feel free to muddle in some fresh mint along with the basil. If you prefer a sweeter drink, add a splash of simple syrup or honey to taste. This fizz can be made ahead of time; just mix the cucumber and basil, and add the sparkling water right before serving to keep the fizz intact.

Store any leftover drink in the fridge, but be aware that the fizz might reduce over time. Serve in chilled glasses for an extra refreshing experience!

October 30, 2026 0 comments
0 FacebookTwitterPinterestPocketEmail
Delicious Chocolate-Dipped Pistachio Biscotti Bites
Desserts & BakingQuick & Easy (30-Min)Vegetarian

Delicious Chocolate-Dipped Pistachio Biscotti Bites

by Linda October 30, 2026
written by Linda

These Chocolate-Dipped Pistachio Biscotti Bites are the ultimate combination of crunchy, nutty, and chocolaty goodness. Biscotti, known for their dry and crunchy texture, are ideal for dipping in coffee or tea, making them a great snack or dessert. The addition of pistachios adds a unique flavor and delightful crunch that pairs perfectly with rich chocolate.

Making biscotti is simpler than you might think; they require a double-baking process that results in their signature texture. Once baked to perfection, these bites are dipped in luscious chocolate, making them an irresistible treat for any occasion.

Delicious Chocolate-Dipped Pistachio Biscotti Bites

Delicious Chocolate-Dipped Pistachio Biscotti Bites

Serves: 24 Prep Time: 20 minutes Cooking Time: 40 minutes 40 minutes
Nutrition facts: 150 calories 8g fat
Rating: 5.0/5
( 1 voted )
Pin
Print

Ingredients

INGREDIENTS

  • 2 cups all-purpose flour
  • 1 cup sugar
  • 1/2 cup unsalted butter, softened
  • 3 large eggs
  • 1 cup pistachios, shelled and chopped
  • 1 teaspoon vanilla extract
  • 1 teaspoon baking powder
  • 1/2 teaspoon salt
  • 8 ounces semi-sweet chocolate, chopped
  • 1 tablespoon coconut oil (optional)

Instructions

  1. Preheat your oven to 350°F (175°C) and line a baking sheet with parchment paper.
  2. In a large bowl, cream together the softened butter and sugar until light and fluffy.
  3. Add the eggs one at a time, mixing well after each addition. Stir in the vanilla extract.
  4. In a separate bowl, whisk together the flour, baking powder, and salt.
  5. Gradually mix the dry ingredients into the wet mixture until fully combined. Fold in the chopped pistachios.
  6. Divide the dough in half and shape each half into a log about 12 inches long and 2 inches wide on the prepared baking sheet.
  7. Bake in the preheated oven for 25 minutes, or until lightly golden. Let cool for 10 minutes, then slice logs into 1/2-inch thick pieces.
  8. Place the sliced biscotti back on the baking sheet and bake for an additional 15 minutes, flipping halfway, until crisp and dry.
  9. Remove from the oven and let cool completely on a wire rack.
  10. Melt the chocolate and coconut oil together in a heatproof bowl over simmering water or in the microwave in short bursts until smooth.
  11. Dip the cooled biscotti into the melted chocolate, allowing excess chocolate to drip off. Place on parchment paper to set.
  12. Once the chocolate has hardened, serve or package your biscotti bites for a delightful treat!

Notes

Tip: For a touch of flavor, drizzle additional melted chocolate on top of the biscotti after dipping.

When making biscotti, ensure your dough is not too wet; it should be firm enough to hold its shape during baking. If you want to switch things up, you can substitute pistachios with almonds or walnuts. For an extra flavor twist, consider adding a teaspoon of almond extract to the dough.

Store your biscotti in an airtight container at room temperature for up to two weeks. They also freeze well, so you can make a big batch and save some for later! Serve them fresh out of the oven or pair with a hot cup of coffee or tea for the perfect treat.

October 30, 2026 0 comments
0 FacebookTwitterPinterestPocketEmail
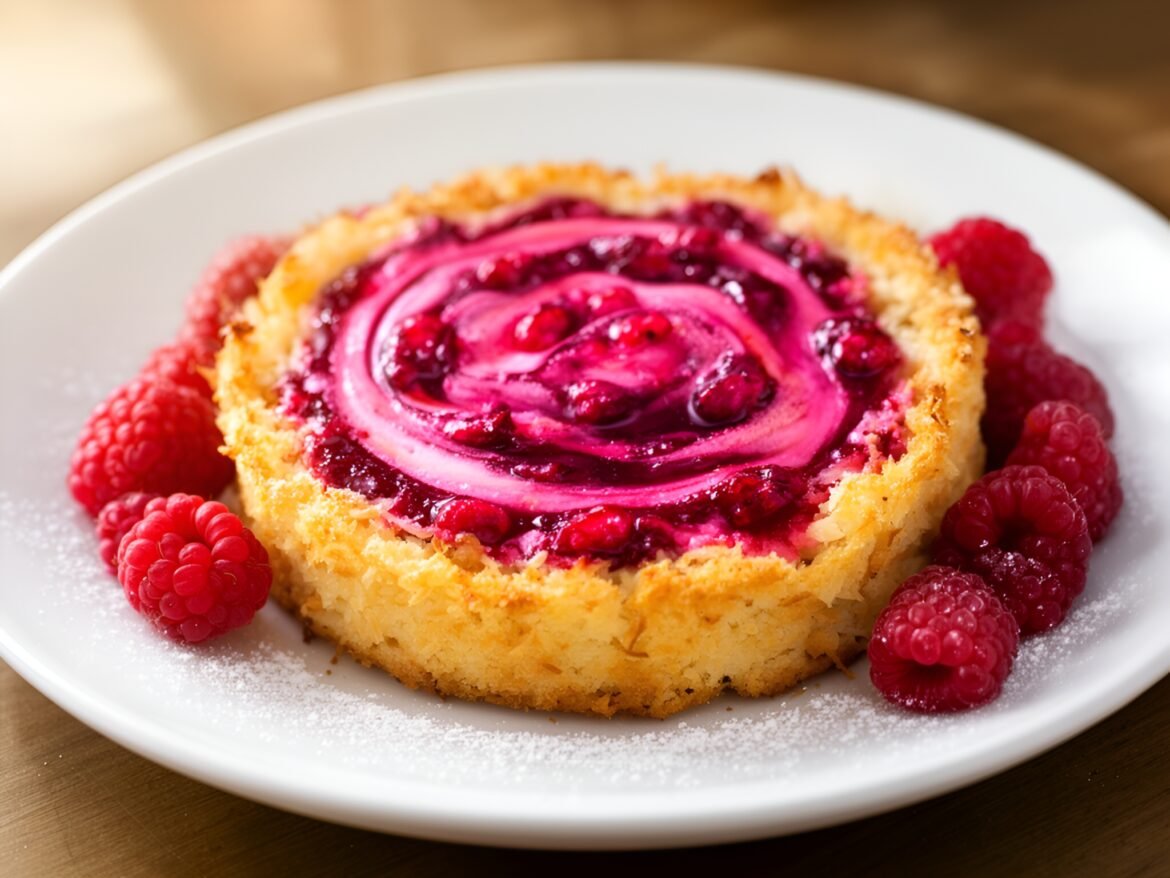
Raspberry Coconut Macaroon Tart with Swirls
Desserts & BakingQuick & Easy (30-Min)Vegetarian

Raspberry Coconut Macaroon Tart with Swirls

by Linda October 30, 2026
written by Linda

Elevate your dessert game with this Raspberry Coconut Macaroon Tart. The tart features a chewy, toasted coconut base that perfectly balances the vibrant raspberry swirl, creating an irresistible sweet and tart combination. This dessert is not only easy to make but also offers a beautiful presentation that will impress your guests.

The use of fresh raspberries in the swirl adds a burst of flavor and color, making each slice visually appealing. Plus, the texture of the coconut macaroon crust provides a satisfying crunch that complements the creamy filling.

Raspberry Coconut Macaroon Tart with Swirls

Raspberry Coconut Macaroon Tart with Swirls

Serves: 8 Prep Time: 20 minutes Cooking Time: 30 minutes 30 minutes
Nutrition facts: 280 calories 12g fat
Rating: 5.0/5
( 1 voted )
Pin
Print

Ingredients

INGREDIENTS

  • 1 1/2 cups unsweetened shredded coconut
  • 1/2 cup sugar
  • 1/4 cup all-purpose flour
  • 1/4 teaspoon salt
  • 2 large egg whites
  • 1 teaspoon vanilla extract
  • 1 cup fresh raspberries
  • 1/4 cup raspberry jam
  • 1 tablespoon lemon juice

Instructions

  1. Preheat the oven to 350°F (175°C).
  2. In a bowl, mix shredded coconut, sugar, flour, and salt until combined.
  3. Add egg whites and vanilla extract to the coconut mixture, stirring until fully incorporated.
  4. Press the coconut mixture into a tart pan evenly, covering the bottom and up the sides. Bake for 15-20 minutes until golden brown.
  5. While the crust is baking, blend fresh raspberries, raspberry jam, and lemon juice until smooth to create the raspberry swirl mixture.
  6. Remove the tart crust from the oven and let it cool for a few minutes. Pour the raspberry mixture into the crust, swirling it gently with a knife to create a marbled effect.
  7. Return the tart to the oven and bake for an additional 10-15 minutes until the raspberry mixture is set.
  8. Let the tart cool completely before slicing and serving.

Notes

Tip: For a gluten-free option, substitute all-purpose flour with almond flour.

For best results, make sure your coconut is finely shredded for an even texture in the crust. If you prefer a more intense raspberry flavor, feel free to add more pureed raspberries to the filling. This tart can be topped with whipped cream or a dusting of powdered sugar for extra flair.

Store leftovers in an airtight container in the refrigerator for up to three days. To serve, let it come to room temperature for the best flavor and texture.

October 30, 2026 0 comments
0 FacebookTwitterPinterestPocketEmail
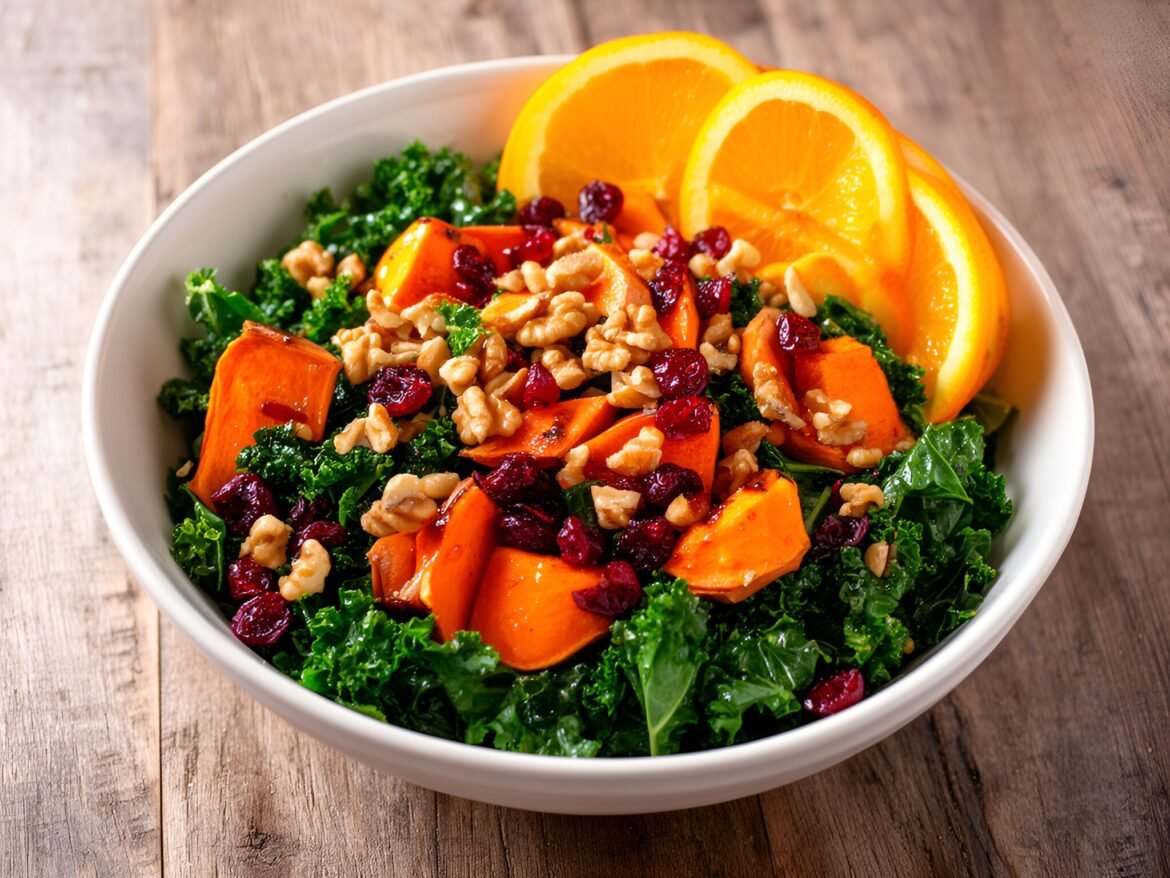
Vibrant Sweet Potato and Kale Detox Salad with Citrus Dressing
Gluten-FreeHealthy & Low-CalorieSoups & SaladsVegetarian

Vibrant Sweet Potato and Kale Detox Salad with Citrus Dressing

by Linda October 30, 2026
written by Linda

Revitalize your meal routine with this vibrant Sweet Potato and Kale Detox Salad. Bursting with colors and nutrients, this salad is a delightful way to enjoy wholesome ingredients while giving your body a refreshing cleanse.

Roasted sweet potatoes add a natural sweetness and creamy texture, perfectly complemented by the hearty kale. The zesty citrus dressing ties everything together, providing a bright flavor that elevates this dish to a new level. Perfect for lunch or as a side dish, this salad is sure to become a favorite in your healthy eating repertoire.

Vibrant Sweet Potato and Kale Detox Salad with Citrus Dressing

Vibrant Sweet Potato and Kale Detox Salad with Citrus Dressing

Serves: 4 Prep Time: 15 minutes Cooking Time: 25 minutes 25 minutes
Nutrition facts: 320 calories 14g fat
Rating: 5.0/5
( 1 voted )
Pin
Print

Ingredients

INGREDIENTS

  • 2 medium sweet potatoes, peeled and cubed
  • 4 cups kale, stems removed and chopped
  • 1/2 cup quinoa, rinsed
  • 1/4 cup red onion, thinly sliced
  • 1/4 cup walnuts, chopped
  • 1/4 cup dried cranberries
  • 2 tablespoons olive oil
  • Salt and pepper to taste
  • For the Citrus Dressing:
  • 1/4 cup freshly squeezed orange juice
  • 2 tablespoons lemon juice
  • 1 tablespoon honey (or maple syrup for vegan version)
  • 1 teaspoon Dijon mustard
  • Salt and pepper to taste

Instructions

  1. Preheat your oven to 400°F (200°C).
  2. Toss the cubed sweet potatoes with 1 tablespoon of olive oil, salt, and pepper; spread them on a baking sheet and roast for 20-25 minutes until fork-tender.
  3. While the sweet potatoes are roasting, cook the quinoa according to package instructions; let it cool after cooking.
  4. In a small bowl, whisk together the orange juice, lemon juice, honey, Dijon mustard, salt, and pepper for the dressing.
  5. In a large mixing bowl, massage the chopped kale with the remaining tablespoon of olive oil until softened, about 2-3 minutes.
  6. Once the sweet potatoes and quinoa are cooled, add them to the kale along with red onion, walnuts, and cranberries.
  7. Drizzle the citrus dressing over the salad and toss gently to combine all ingredients thoroughly. Serve immediately.

Notes

Tip: For added protein, consider including chickpeas or grilled chicken to the salad.

Make sure to massage the kale with a little olive oil before adding the other ingredients; this will help soften the leaves and make them more palatable. You can also substitute the sweet potatoes with roasted butternut squash for a different flavor twist.

This salad can be stored in an airtight container in the fridge for up to three days, but it’s best enjoyed fresh. For meal prep, keep the dressing separate until you’re ready to eat to maintain the salad’s crunch.

October 30, 2026 0 comments
0 FacebookTwitterPinterestPocketEmail
Creamy Avocado and Dill Chicken Soup
Healthy & Low-CalorieQuick & Easy (30-Min)Soups & Salads

Creamy Avocado and Dill Chicken Soup

by Linda October 30, 2026
written by Linda

This Creamy Avocado and Dill Chicken Soup is the perfect blend of creamy texture and fresh flavors. The avocado lends a silky richness, while dill adds a refreshing herbal note, making it a delightful choice for a comforting meal.

Loaded with tender chicken and vegetables, this soup is not only healthy but also incredibly satisfying. It’s an excellent way to incorporate avocados into your diet beyond just guacamole, and it’s great for both lunch and dinner.

Creamy Avocado and Dill Chicken Soup

Creamy Avocado and Dill Chicken Soup

Serves: 4 Prep Time: 15 minutes Cooking Time: 30 minutes 30 minutes
Nutrition facts: 320 calories 22g fat
Rating: 5.0/5
( 1 voted )
Pin
Print

Ingredients

INGREDIENTS

  • 2 cups cooked chicken, shredded
  • 2 ripe avocados, diced
  • 1 medium onion, chopped
  • 3 cloves garlic, minced
  • 4 cups chicken broth
  • 1 cup heavy cream
  • 1/4 cup fresh dill, chopped
  • 1 cup carrots, diced
  • 1 cup celery, diced
  • Salt and pepper to taste
  • Juice of 1 lime

Instructions

  1. In a large pot over medium heat, sauté onions and garlic until translucent.
  2. Add carrots and celery, cooking until softened, about 5 minutes.
  3. Pour in chicken broth and bring to a boil.
  4. Stir in shredded chicken, avocado, and heavy cream, then reduce heat to low.
  5. Add dill, lime juice, salt, and pepper; simmer for 15 minutes.
  6. Using an immersion blender, blend the soup slightly for a creamier texture, if desired.
  7. Serve hot, garnished with additional dill and lime wedges. Enjoy!

Notes

Tip: For added nutrition, consider throwing in some leafy greens like spinach or kale just before serving.

For a thicker consistency, blend a portion of the soup and return it to the pot. You can also experiment with different herbs, such as basil or cilantro, if dill isn’t your preference.

To store leftovers, keep them in an airtight container in the fridge for up to 3 days. Reheat gently on the stove, adding a splash of water or broth to loosen it up.

October 30, 2026 0 comments
0 FacebookTwitterPinterestPocketEmail
Spicy Tom Yum Gazpacho with Avocado Cream
Gluten-FreeQuick & Easy (30-Min)Soups & SaladsVegan

Spicy Tom Yum Gazpacho with Avocado Cream

by Linda October 30, 2026
written by Linda

Transform your summer gatherings with this Spicy Tom Yum Gazpacho with Avocado Cream. This dish combines the classic chilled Spanish soup with the bold, aromatic flavors of the beloved Thai soup, Tom Yum. Perfect for hot days, the gazpacho is both refreshing and invigorating, offering a delightful balance of heat and zest.

The addition of creamy avocado on top creates a rich contrast to the spicy, tangy base, making each spoonful a luxurious experience. This recipe is not only a feast for the senses but also a quick and easy way to impress your guests at any occasion.

Spicy Tom Yum Gazpacho with Avocado Cream

Spicy Tom Yum Gazpacho with Avocado Cream

Serves: 4-6 Prep Time: 15 minutes Cooking Time: 0 minutes 0 minutes
Nutrition facts: 180 calories 12g fat
Rating: 5.0/5
( 1 voted )
Pin
Print

Ingredients

INGREDIENTS

  • 4 ripe tomatoes, chopped
  • 1 cucumber, peeled and chopped
  • 1 red bell pepper, chopped
  • 1 small red onion, chopped
  • 2 cloves garlic, minced
  • 1 red chili, chopped (adjust to taste)
  • 2 tablespoons fish sauce
  • 1 tablespoon lime juice
  • 1 teaspoon sugar
  • 1 cup vegetable broth
  • 1 tablespoon Thai chili paste (Nam Prik Pao)
  • Salt and pepper to taste
  • 1 ripe avocado, for cream
  • 1 tablespoon lemon juice (for avocado cream)
  • Fresh cilantro, for garnish

Instructions

  1. In a blender, combine the chopped tomatoes, cucumber, red bell pepper, red onion, garlic, and chili.
  2. Add the fish sauce, lime juice, sugar, vegetable broth, and chili paste to the blender. Blend until smooth.
  3. Taste and adjust seasoning with salt and pepper, if needed. Chill the gazpacho in the refrigerator for at least 2 hours.
  4. While the gazpacho chills, prepare the avocado cream by blending the ripe avocado with lemon juice until smooth. Season with salt to taste.
  5. Once ready to serve, pour the gazpacho into bowls and top each with a generous dollop of avocado cream.
  6. Garnish with fresh cilantro leaves and serve cold.

Notes

Storage: This gazpacho can be stored in an airtight container in the fridge for up to 2 days. The avocado cream is best made fresh, but can be prepared a few hours ahead of serving.

To enhance the flavors of your gazpacho, let it chill in the fridge for at least two hours before serving. This allows the ingredients to meld beautifully. If you prefer a milder version, reduce the chili or omit it entirely.

For added texture, consider garnishing with crunchy toasted peanuts or fresh herbs like cilantro or mint. This dish can also be made a day in advance, making it perfect for meal prep or entertaining.

October 30, 2026 0 comments
0 FacebookTwitterPinterestPocketEmail
Vibrant Roasted Beet and Pear Salad with Citrus Vinaigrette
Healthy & Low-CalorieSoups & SaladsVegetarian

Vibrant Roasted Beet and Pear Salad with Citrus Vinaigrette

by Linda October 30, 2026
written by Linda

Elevate your salad game with this vibrant Roasted Beet and Pear Salad featuring a zesty citrus vinaigrette. The earthy sweetness of roasted beets paired with juicy pears creates an unforgettable flavor combination that’s perfect for any season.

The bright colors and contrasting textures make this salad not only a treat for the taste buds but also a feast for the eyes. Drizzled with a refreshing citrus vinaigrette, this dish is sure to impress at your next dinner party or festive gathering.

Vibrant Roasted Beet and Pear Salad with Citrus Vinaigrette

Vibrant Roasted Beet and Pear Salad with Citrus Vinaigrette

Serves: 4 Prep Time: 15 minutes Cooking Time: 45 minutes 45 minutes
Nutrition facts: 250 calories 12g fat
Rating: 5.0/5
( 1 voted )
Pin
Print

Ingredients

INGREDIENTS

  • 4 medium beets, roasted
  • 2 ripe pears, sliced
  • 4 cups mixed greens (arugula, spinach, or kale)
  • 1/2 cup crumbled goat cheese (optional)
  • 1/4 cup walnuts, toasted (optional)

FOR THE CITRUS VINAIGRETTE

  • 1/4 cup olive oil
  • 2 tablespoons orange juice
  • 1 tablespoon lemon juice
  • 1 tablespoon honey
  • Salt and pepper to taste

Instructions

  1. Preheat the oven to 400°F (200°C).
  2. Wash and trim the beets, then wrap each beet in aluminum foil. Place them on a baking sheet and roast in the preheated oven for about 45 minutes or until tender.
  3. Once roasted, let the beets cool, then peel and slice them into wedges.
  4. In a small bowl, whisk together olive oil, orange juice, lemon juice, honey, salt, and pepper to create the citrus vinaigrette.
  5. In a large bowl, combine the mixed greens, sliced pears, roasted beets, and walnuts. Drizzle with the citrus vinaigrette and toss gently to coat.
  6. Top with crumbled goat cheese if desired and serve immediately.

Notes

Storage Tip: Store any leftovers in an airtight container in the refrigerator for up to 2 days.

For the best flavor, allow the beets to cool completely before slicing them. This will help them retain their moisture and sweetness. If you’re short on time, you can use pre-cooked beets from the grocery store.

Feel free to customize this salad by adding nuts like walnuts or pecans for an extra crunch or crumbled cheese for a creamy element. The salad can be stored in the refrigerator for up to 2 days, but it’s best enjoyed fresh!

October 30, 2026 0 comments
0 FacebookTwitterPinterestPocketEmail
Creamy Pumpkin Sage Chicken Skillet with Spinach
Kid-FriendlyMain DishesQuick & Easy (30-Min)

Creamy Pumpkin Sage Chicken Skillet with Spinach

by Linda October 30, 2026
written by Linda

This Creamy Pumpkin and Sage Chicken Skillet with Spinach is a deliciously comforting dish that highlights the rich flavors of fall. The combination of tender chicken, savory sage, and creamy pumpkin creates a hearty yet elegant meal that’s sure to impress any dinner guest.

One of the standout elements of this recipe is the creamy pumpkin sauce. It’s not only velvety and rich, but it also adds a subtle sweetness that balances beautifully with the earthy sage. The addition of fresh spinach not only adds a pop of color but also boosts the nutritional value, making this dish a complete meal in one skillet.

Creamy Pumpkin Sage Chicken Skillet with Spinach

Creamy Pumpkin Sage Chicken Skillet with Spinach

Serves: 4 Prep Time: 10 minutes Cooking Time: 30 minutes 30 minutes
Nutrition facts: 450 calories 22g fat
Rating: 5.0/5
( 1 voted )
Pin
Print

Ingredients

INGREDIENTS

  • 1 lb chicken breast, diced
  • 1 cup pumpkin puree
  • 1 cup fresh spinach
  • 1 medium onion, chopped
  • 3 cloves garlic, minced
  • 1 tablespoon fresh sage, chopped
  • 1 cup chicken broth
  • 1/2 cup heavy cream
  • Salt and pepper to taste
  • 2 tablespoons olive oil

Instructions

  1. Heat olive oil in a large skillet over medium heat.
  2. Add diced chicken and season with salt and pepper; sauté until browned and cooked through, about 6-8 minutes. Remove chicken and set aside.
  3. In the same skillet, add chopped onion and cook until translucent, about 5 minutes. Stir in minced garlic and sage, cooking for an additional minute until fragrant.
  4. Add pumpkin puree and chicken broth to the skillet, stirring to combine. Bring to a simmer.
  5. Return the chicken to the skillet and reduce heat to low. Stir in heavy cream and let the mixture simmer until slightly thickened, about 5 minutes.
  6. Add fresh spinach to the skillet, stirring until wilted. Adjust seasoning if necessary and serve hot.

Notes

Substitution: You can use coconut cream instead of heavy cream for a dairy-free version of this dish.

For added flavor, consider marinating the chicken in garlic and a splash of lemon juice for 30 minutes before cooking. You can also substitute the spinach with kale or Swiss chard if you prefer.

If you have leftovers, they store well in an airtight container in the fridge for up to three days. Simply reheat on the stovetop over low heat, adding a splash of chicken broth or water to loosen the sauce if needed.

October 30, 2026 0 comments
0 FacebookTwitterPinterestPocketEmail
Sweet and Spicy BBQ Cauliflower Steaks with Cilantro-Lime Rice
Main DishesQuick & Easy (30-Min)VeganVegetarian

Sweet and Spicy BBQ Cauliflower Steaks with Cilantro-Lime Rice

by Linda October 30, 2026
written by Linda

Experience a burst of flavor with these spicy honey-glazed BBQ cauliflower steaks, perfectly complemented by fluffy cilantro-lime rice. This dish is not only vibrant and visually appealing but also packs a punch with its sweet and spicy marinade that enhances the natural flavors of the cauliflower.

Grilled to perfection, the cauliflower steaks develop a smoky char while the honey glaze caramelizes beautifully, creating a delicious contrast in texture. Paired with the zesty rice, this recipe is a fantastic plant-based option that is sure to impress at any dinner table.

Sweet and Spicy BBQ Cauliflower Steaks with Cilantro-Lime Rice

Sweet and Spicy BBQ Cauliflower Steaks with Cilantro-Lime Rice

Serves: 4 Prep Time: 15 minutes Cooking Time: 20 minutes 20 minutes
Nutrition facts: 280 calories 6g fat
Rating: 5.0/5
( 1 voted )
Pin
Print

Ingredients

INGREDIENTS

  • 1 large head of cauliflower, sliced into 1-inch thick steaks
  • 1/4 cup honey
  • 2 tablespoons soy sauce
  • 1 tablespoon sriracha
  • 2 tablespoons olive oil
  • 1 teaspoon smoked paprika
  • Salt and pepper, to taste
  • 1 cup jasmine rice
  • 1 1/2 cups water
  • 1/4 cup fresh cilantro, chopped
  • Juice of 1 lime

Instructions

  1. Preheat your grill or grill pan over medium-high heat.
  2. In a small bowl, whisk together honey, soy sauce, sriracha, olive oil, smoked paprika, salt, and pepper to create the glaze.
  3. Brush both sides of the cauliflower steaks generously with the honey mixture.
  4. Grill the cauliflower steaks for about 5-7 minutes on each side, or until they are tender and have nice grill marks.
  5. While the cauliflower is grilling, rinse the jasmine rice under cold water until the water runs clear.
  6. In a medium saucepan, combine the rice and water; bring to a boil, then reduce heat to low, cover, and simmer for 15 minutes or until rice is fluffy and water is absorbed.
  7. Remove the rice from heat and stir in chopped cilantro and lime juice. Fluff with a fork.
  8. Serve the grilled cauliflower steaks over a bed of cilantro-lime rice, drizzling any remaining honey glaze on top. Enjoy!

Notes

Substitution: Use agave syrup instead of honey for a vegan version of the glaze.

For a richer flavor, marinate the cauliflower steaks for at least 30 minutes before grilling. You can also add red pepper flakes to the honey glaze if you’re looking for an extra kick!

Leftover cauliflower can be stored in an airtight container in the refrigerator for up to 3 days. Reheat in the oven for a few minutes to restore its crispiness.

October 30, 2026 0 comments
0 FacebookTwitterPinterestPocketEmail
Newer Posts
Older Posts

Recent Posts

  • Refreshing Golden Turmeric Citrus Cooler with a Twist

    October 30, 2026
  • Bubbling Cucumber Basil Bliss Fizz

    October 30, 2026
  • Delicious Chocolate-Dipped Pistachio Biscotti Bites

    October 30, 2026
  • Raspberry Coconut Macaroon Tart with Swirls

    October 30, 2026
  • Vibrant Sweet Potato and Kale Detox Salad with Citrus Dressing

    October 30, 2026

About Me

About Me

I'm Linda, a health professional, university graduate, and author sharing tested, easy-to-follow recipes made from simple, everyday ingredients. Based in Finland, I bring together my culinary training, love of travel, and home-cooked roots to help you cook confidently, on any budget.

Products

  • Spooky Creative Starry Sky Ceramic Mug Spooky Creative Starry Sky Ceramic Mug 10,00 €

Categories

  • Appetizers & Snacks (321)
  • Breakfast & Brunch (268)
  • Desserts & Baking (343)
  • Drinks & Beverages (259)
  • Gluten-Free (413)
  • Grilling & BBQ (12)
  • Healthy & Low-Calorie (368)
  • Holiday & Seasonal (34)
  • Kid-Friendly (463)
  • Main Dishes (356)
  • Quick & Easy (30-Min) (1,416)
  • Slow Cooker & Instant Pot (4)
  • Soups & Salads (212)
  • Vegan (350)
  • Vegetarian (1,140)

About Me

I'm Linda, a health professional and food writer sharing tested, easy-to-follow recipes made from simple ingredients.

Email: jspiceygiftstv@gmail.com

Useful Links

  • Home
  • About
  • Contact
  • Free Cookbooks
  • Terms and Conditions
  • Privacy Policy

Newsletter

Subscribe to to our Newsletter to stay updated with all our recipes.

Recent Posts

  • Refreshing Golden Turmeric Citrus Cooler with a Twist

    October 30, 2026
  • Bubbling Cucumber Basil Bliss Fizz

    October 30, 2026
  • Instagram
  • Pinterest
  • Youtube
  • Tiktok

@2026 - All Right Reserved. Designed and Developed by JSpiceyGifts

J Spicey Gifts
  • Home
  • Recipes
    • Breakfast & Brunch
    • Appetizers & Snacks
    • Main Dishes
    • Soups & Salads
    • Desserts & Baking
    • Drinks & Beverages
  • Categories
    • Vegetarian
    • Vegan
    • Gluten-Free
    • Quick & Easy (30-Min)
    • Slow Cooker & Instant Pot
    • Grilling & BBQ
    • Healthy & Low-Calorie
    • Holiday & Seasonal
    • Kid-Friendly
  • About
  • Contact

Shopping Cart

Close

No products in the cart.

Close