J Spicey Gifts
  • Home
  • Recipes
    • Breakfast & Brunch
    • Appetizers & Snacks
    • Main Dishes
    • Soups & Salads
    • Desserts & Baking
    • Drinks & Beverages
  • Categories
    • Vegetarian
    • Vegan
    • Gluten-Free
    • Quick & Easy (30-Min)
    • Slow Cooker & Instant Pot
    • Grilling & BBQ
    • Healthy & Low-Calorie
    • Holiday & Seasonal
    • Kid-Friendly
  • About
  • Contact
Top Posts
Zesty Lemon-Lavender Ricotta Toasts
Coconut Chai Oatmeal Paradise Bowls
Refreshing Minty Pineapple Coconut Bliss
Festive Spiced Apple Cider Sparkler
Chilled Cucumber Melon Delight
Sparkling Zesty Berry Citrus Fizz
Tropical Mango Sunrise Smoothie
Cinnamon Chocolate Swirl Cloud Cake
Delicate Lavender Honey Almond Biscotti Bites
Vibrant Citrus-Watermelon Feta Salad with Refreshing Minty Lime...
J Spicey Gifts
  • Home
  • Recipes
    • Breakfast & Brunch
    • Appetizers & Snacks
    • Main Dishes
    • Soups & Salads
    • Desserts & Baking
    • Drinks & Beverages
  • Categories
    • Vegetarian
    • Vegan
    • Gluten-Free
    • Quick & Easy (30-Min)
    • Slow Cooker & Instant Pot
    • Grilling & BBQ
    • Healthy & Low-Calorie
    • Holiday & Seasonal
    • Kid-Friendly
  • About
  • Contact
J Spicey Gifts
J Spicey Gifts
  • Home
  • Recipes
    • Breakfast & Brunch
    • Appetizers & Snacks
    • Main Dishes
    • Soups & Salads
    • Desserts & Baking
    • Drinks & Beverages
  • Categories
    • Vegetarian
    • Vegan
    • Gluten-Free
    • Quick & Easy (30-Min)
    • Slow Cooker & Instant Pot
    • Grilling & BBQ
    • Healthy & Low-Calorie
    • Holiday & Seasonal
    • Kid-Friendly
  • About
  • Contact
Copyright 2021 - All Right Reserved
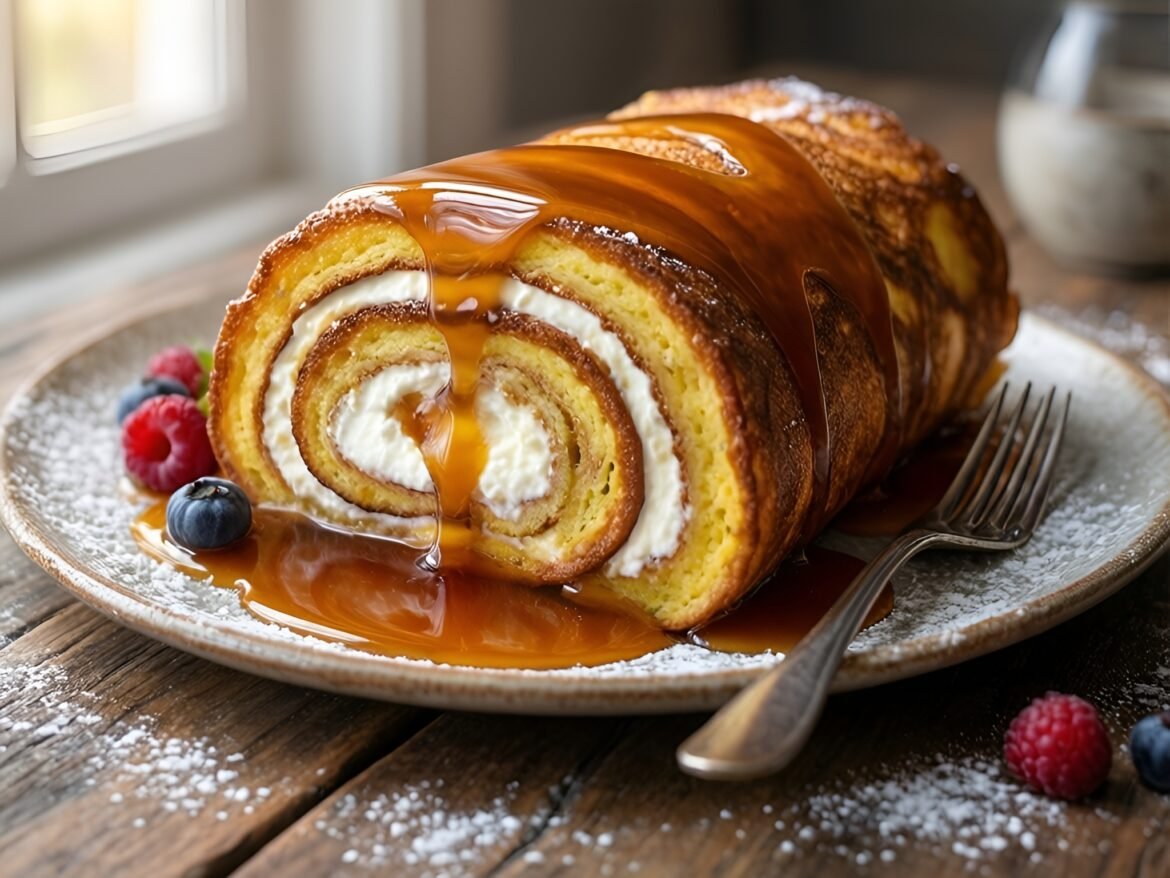
Decadent Maple-Ricotta Stuffed French Toast Roulade
Breakfast & BrunchKid-FriendlyQuick & Easy (30-Min)Vegetarian

Decadent Maple-Ricotta Stuffed French Toast Roulade

by Linda August 20, 2026
written by Linda

Elevate your brunch game with this indulgent Maple-Ricotta Stuffed French Toast Roulade. This dish combines the comforting flavors of French toast with a creamy, sweet filling, making it a perfect centerpiece for your breakfast table. The roulade technique not only adds a beautiful presentation but also ensures every bite is filled with deliciousness.

The rich ricotta mixed with pure maple syrup creates a luscious filling that pairs perfectly with the golden-brown exterior. Drizzle it with maple syrup and dust with powdered sugar for a delightful finish. Your guests will be impressed by both the flavor and the stunning appearance!

Decadent Maple-Ricotta Stuffed French Toast Roulade

Decadent Maple-Ricotta Stuffed French Toast Roulade

Serves: 4 Prep Time: 20 minutes Cooking Time: 15 minutes 15 minutes
Nutrition facts: 350 calories 15g fat
Rating: 5.0/5
( 1 voted )
Pin
Print

Ingredients

INGREDIENTS

  • 4 large eggs
  • 1 cup milk
  • 1 teaspoon vanilla extract
  • 1/2 teaspoon ground cinnamon
  • 8 slices of thick bread (like brioche or challah)
  • 1 cup ricotta cheese
  • 1/3 cup pure maple syrup
  • 1 tablespoon lemon zest
  • Butter, for cooking
  • Powdered sugar, for garnish
  • Extra maple syrup, for serving

Instructions

  1. In a bowl, whisk together eggs, milk, vanilla extract, and cinnamon until well combined.
  2. Spread the ricotta cheese evenly over each slice of bread, then drizzle with maple syrup and sprinkle with lemon zest.
  3. Roll each slice of bread tightly from one end to the other to create a roulade. Secure with toothpicks if needed.
  4. Heat a large skillet over medium heat and add a pat of butter.
  5. Dip each roulade in the egg mixture, allowing it to soak for a few seconds on each side before placing in the skillet.
  6. Cook the roulades for 2-3 minutes on each side, or until golden brown and cooked through. Remove from skillet and let cool slightly.
  7. Slice the roulades into pinwheels and serve warm, garnished with powdered sugar and extra maple syrup. Enjoy!

Notes

Tip: For an added crunch, sprinkle some chopped nuts between the layers before rolling.

For a lighter version, consider using low-fat ricotta cheese or substituting half of the ricotta with Greek yogurt. You can also experiment with different flavorings by adding a pinch of cinnamon or vanilla extract to the filling.

Make it ahead of time by preparing the roulade and refrigerating it overnight. Just slice and cook in the morning for a fuss-free brunch. To store leftovers, wrap slices tightly in plastic wrap and refrigerate for up to 2 days. Reheat in the oven or microwave before serving.
August 20, 2026 0 comments
0 FacebookTwitterPinterestPocketEmail
Breakfast & BrunchQuick & Easy (30-Min)Vegetarian

Fluffy Chia Seed Pancakes with Tropical Mango-Basil Compote

by Linda August 20, 2026
written by Linda

Elevate your breakfast game with these fluffy chia seed pancakes, perfect for a tropical morning. Infused with the goodness of chia seeds, they offer a delightful texture and added nutrition. The star of this dish is the vibrant mango-basil compote, which brings an exotic flair and a refreshing sweetness that perfectly balances the pancakes.

Whether you’re cooking for yourself or hosting a brunch gathering, these pancakes are sure to impress. The combination of flavors not only tantalizes your taste buds but also provides a healthy start to your day.

Fluffy Chia Seed Pancakes with Tropical Mango-Basil Compote

Serves: 4 Prep Time: 10 minutes Cooking Time: 15 minutes 15 minutes
Nutrition facts: 250 calories 8g fat
Rating: 5.0/5
( 1 voted )
Pin
Print

Ingredients

INGREDIENTS

  • 1 cup all-purpose flour
  • 2 tablespoons sugar
  • 2 tablespoons chia seeds
  • 2 teaspoons baking powder
  • 1/2 teaspoon salt
  • 1 cup milk (or plant-based milk)
  • 1 large egg
  • 2 tablespoons melted coconut oil (or butter)
  • 1 ripe mango, peeled and diced
  • 1/4 cup fresh basil, chopped
  • 1 tablespoon honey (or maple syrup)

Instructions

  1. In a mixing bowl, combine the flour, sugar, chia seeds, baking powder, and salt.
  2. In another bowl, whisk together the milk, egg, and melted coconut oil until well combined.
  3. Pour the wet ingredients into the dry ingredients and stir until just combined; do not overmix.
  4. Heat a non-stick skillet over medium heat and lightly grease it with oil or butter.
  5. Pour 1/4 cup of batter onto the skillet for each pancake. Cook until bubbles form on the surface, then flip and cook until golden brown on the other side.
  6. While pancakes are cooking, prepare the compote by combining diced mango, chopped basil, and honey in a small saucepan over medium heat. Cook for about 5-7 minutes until the mango softens and the mixture thickens slightly.
  7. Serve pancakes warm, topped with the mango-basil compote.

Notes

Tip: For a vegan version, replace the egg with a flax egg (1 tablespoon ground flaxseed mixed with 2.5 tablespoons water) and use a plant-based milk.

For best results, allow the pancake batter to rest for about 10 minutes before cooking to let the chia seeds absorb some moisture and swell up. This will result in thicker and fluffier pancakes.

If you don’t have fresh mango, you can substitute it with other fruits like peaches or pineapple. Additionally, try adding a squeeze of lime juice to the compote for an extra zing!

Store leftover pancakes in an airtight container in the refrigerator for up to three days. Reheat them in a toaster or microwave before serving.

August 20, 2026 0 comments
0 FacebookTwitterPinterestPocketEmail
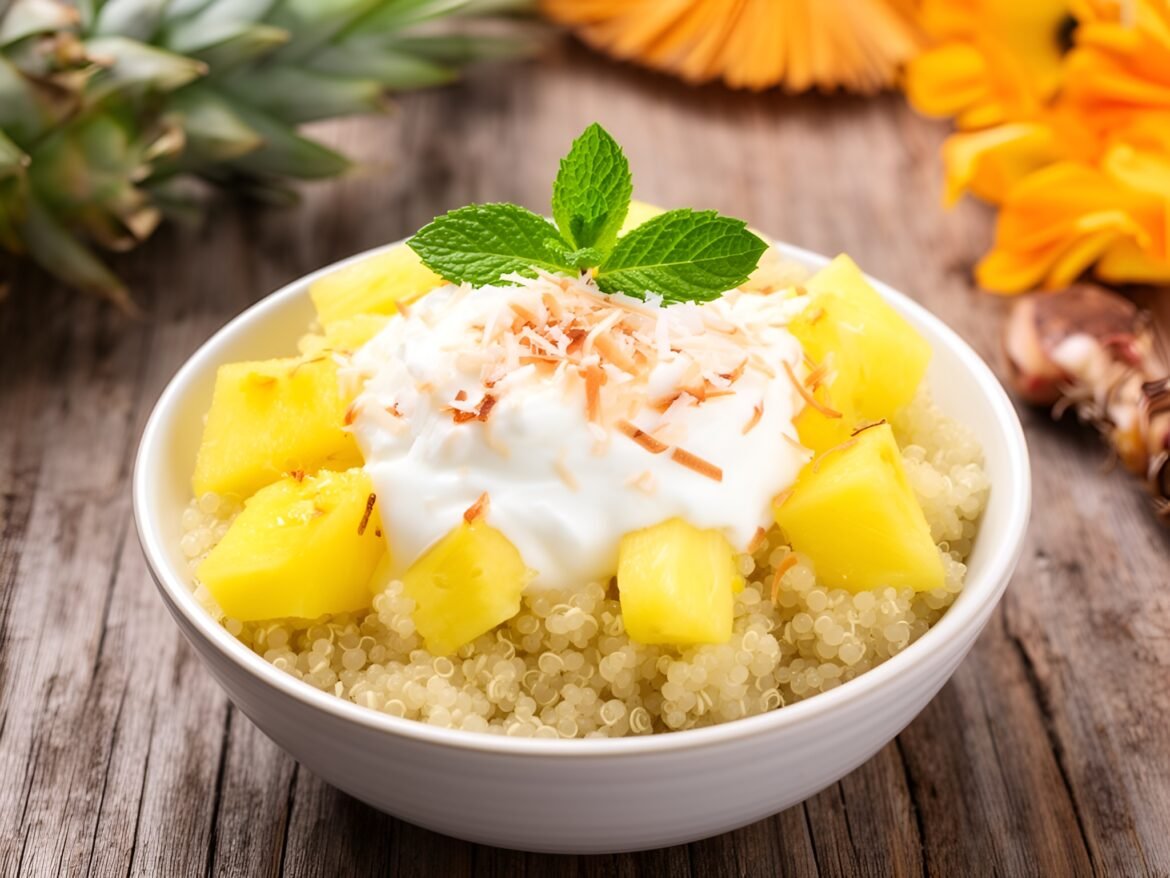
Tropical Coconut-Pineapple Breakfast Quinoa Bowls
Breakfast & BrunchQuick & Easy (30-Min)VeganVegetarian

Tropical Coconut-Pineapple Breakfast Quinoa Bowls

by Linda August 20, 2026
written by Linda

Say goodbye to boring breakfasts with these Tropical Coconut-Pineapple Breakfast Quinoa Bowls! This colorful bowl is not only visually appealing but also packed with the goodness of quinoa, fresh pineapple, and creamy coconut. The delightful combination of flavors will transport you to a tropical paradise with every bite.

Perfect for busy mornings, these bowls are quick to prepare and can even be customized with your favorite toppings. Whether you enjoy it as a nutritious breakfast or a refreshing snack, this dish is sure to become a favorite in your morning routine.

Tropical Coconut-Pineapple Breakfast Quinoa Bowls

Tropical Coconut-Pineapple Breakfast Quinoa Bowls

Serves: 2 Prep Time: 15 minutes Cooking Time: 20 minutes 20 minutes
Nutrition facts: 350 calories 14g fat
Rating: 5.0/5
( 1 voted )
Pin
Print

Ingredients

INGREDIENTS

  • 1 cup quinoa
  • 2 cups coconut milk
  • 1 cup diced fresh pineapple
  • 2 tablespoons honey or maple syrup
  • 1 teaspoon vanilla extract
  • 1/4 teaspoon salt
  • 1/2 cup Greek yogurt (or dairy-free alternative)
  • 1/4 cup toasted shredded coconut
  • Fresh mint leaves for garnish

Instructions

  1. Rinse quinoa under cold water and drain well.
  2. In a medium saucepan, combine quinoa, coconut milk, honey or maple syrup, vanilla extract, and salt. Bring to a boil over medium heat.
  3. Reduce heat to low, cover, and simmer for about 15 minutes, or until quinoa is fluffy and liquid is absorbed.
  4. Remove from heat and let it sit covered for 5 minutes before fluffing with a fork.
  5. Divide the quinoa between two bowls and top with diced pineapple and a dollop of Greek yogurt.
  6. Sprinkle toasted shredded coconut on top and garnish with fresh mint leaves before serving.

Notes

Store leftovers in the fridge for up to 3 days. Reheat gently before enjoying.

To make this recipe even more nutritious, consider adding a handful of nuts or seeds for extra crunch and healthy fats. If you don’t have quinoa on hand, you can substitute it with cooked brown rice or millet.

For a vegan option, ensure that your yogurt and toppings are plant-based. You can store any leftovers in an airtight container in the fridge for up to 3 days, making it easy to prep ahead for busy mornings.

August 20, 2026 0 comments
0 FacebookTwitterPinterestPocketEmail
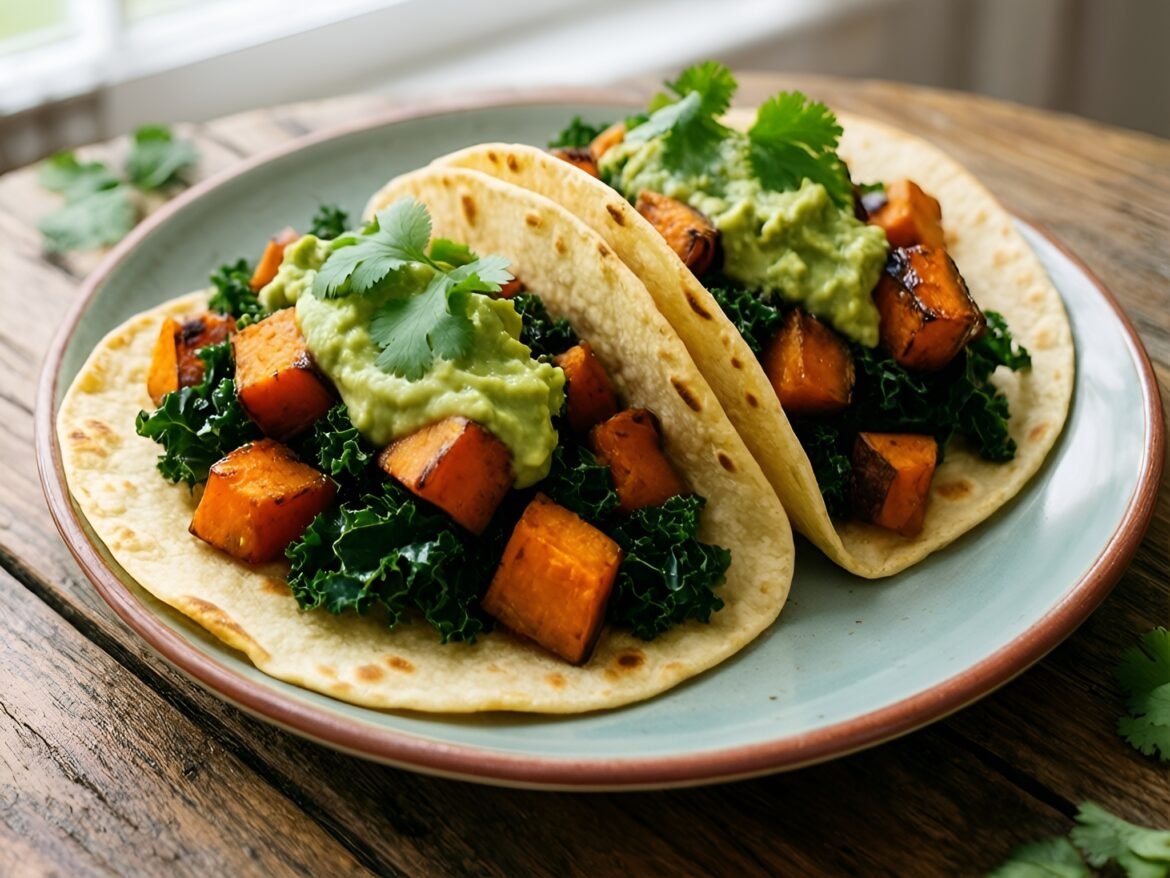
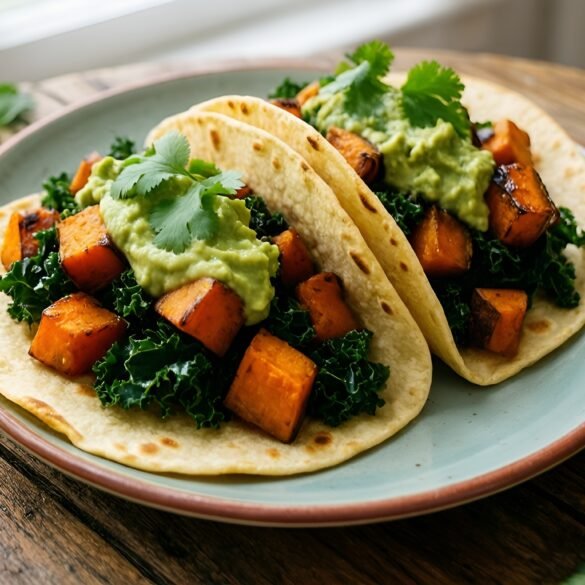
Savory Sweet Potato and Kale Breakfast Tacos
Breakfast & BrunchHealthy & Low-CalorieQuick & Easy (30-Min)Vegetarian

Savory Sweet Potato and Kale Breakfast Tacos

by Linda August 20, 2026
written by Linda

Transform your breakfast routine with these Savory Sweet Potato and Kale Breakfast Tacos! Loaded with hearty sweet potatoes, nutrient-rich kale, and topped with a zesty avocado crema, these tacos offer a delightful start to your day.

Not only are they quick to prepare, making them perfect for busy mornings, but they also bring a burst of color and flavor to your plate. The combination of sweet and savory elements makes each bite a satisfying experience.

Savory Sweet Potato and Kale Breakfast Tacos

Savory Sweet Potato and Kale Breakfast Tacos

Serves: 4 Prep Time: 15 minutes Cooking Time: 20 minutes 20 minutes
Nutrition facts: 300 calories 12g fat
Rating: 5.0/5
( 1 voted )
Pin
Print

Ingredients

INGREDIENTS

  • 2 medium sweet potatoes, peeled and diced
  • 1 tablespoon olive oil
  • 1 teaspoon chili powder
  • 1/2 teaspoon cumin
  • Salt and pepper to taste
  • 4 cups kale, chopped
  • 8 small corn tortillas
  • 1 avocado
  • 1 lime, juiced
  • 1/4 cup Greek yogurt or sour cream
  • Fresh cilantro for garnish

Instructions

  1. Preheat the oven to 400°F (200°C).
  2. Toss the diced sweet potatoes with olive oil, chili powder, cumin, salt, and pepper in a baking dish.
  3. Roast sweet potatoes in the oven for 20 minutes or until tender and slightly caramelized.
  4. In a skillet over medium heat, sauté the chopped kale until wilted, about 5 minutes; season with salt and pepper.
  5. In a small bowl, mash the avocado and mix it with lime juice, Greek yogurt or sour cream until smooth.
  6. Warm the corn tortillas in a dry skillet or directly over the flame until pliable.
  7. Assemble the tacos by placing roasted sweet potatoes and sautéed kale on each tortilla, topping with avocado crema and garnishing with fresh cilantro. Serve immediately.

Notes

Tip: You can add a protein like scrambled eggs or black beans for a heartier breakfast!

For an extra kick, feel free to add some diced jalapeños or a sprinkle of red pepper flakes while sautéing the kale. You can easily substitute the kale with spinach or Swiss chard if you prefer. These tacos are best served fresh, but leftovers can be stored in an airtight container in the fridge for up to 2 days.

To reheat, simply warm them in a skillet over medium heat until heated through. Enjoy them with a side of salsa or hot sauce for added flavor!

August 20, 2026 0 comments
0 FacebookTwitterPinterestPocketEmail
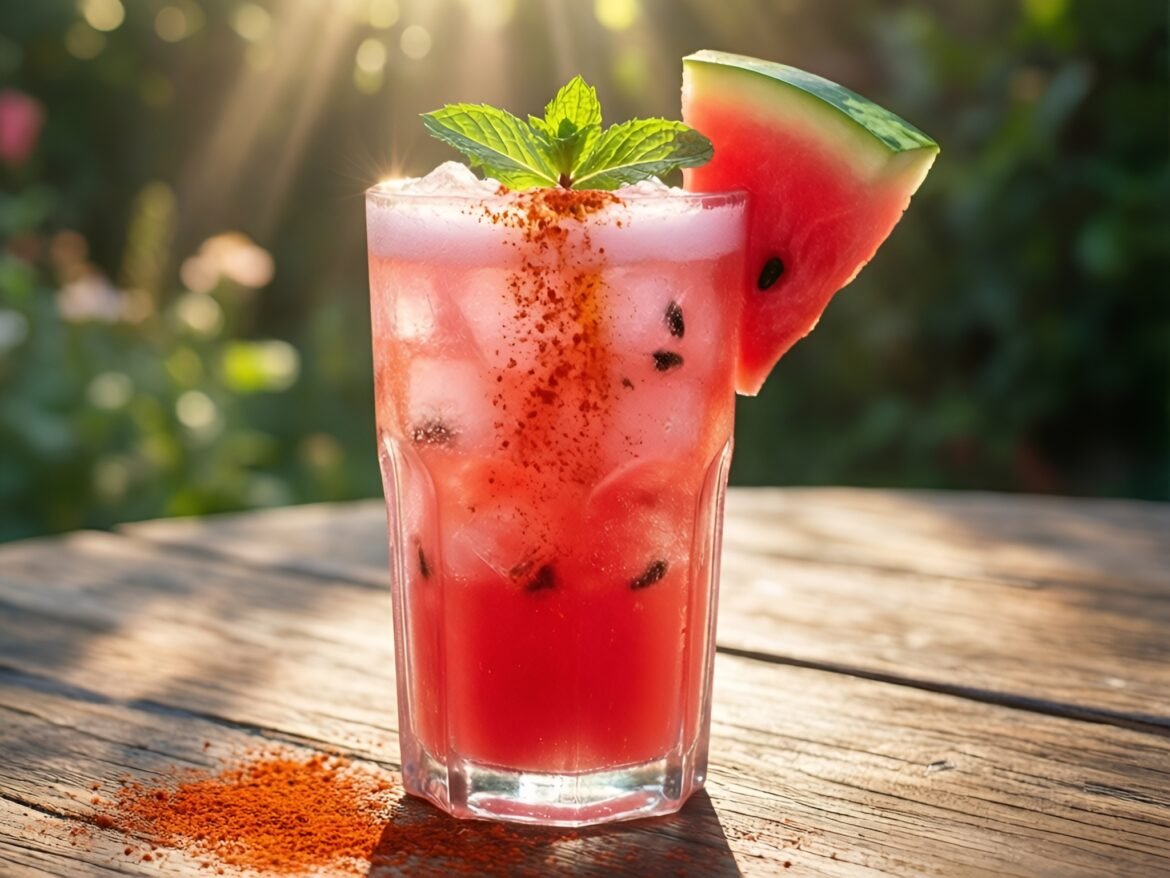
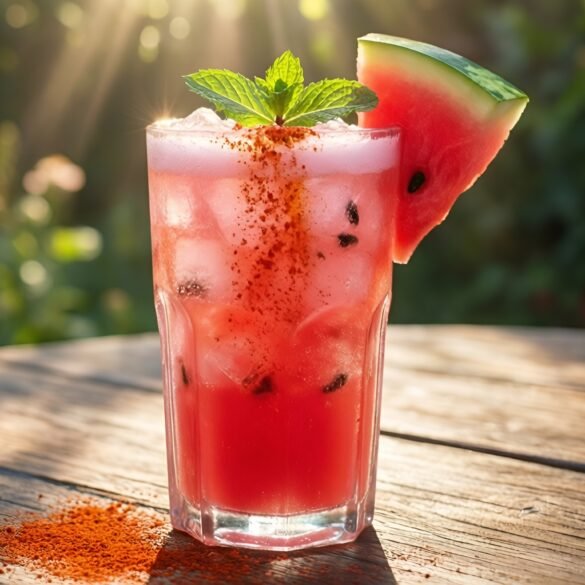
Spicy Mint-Chili Watermelon Refresher
Drinks & BeveragesKid-FriendlyQuick & Easy (30-Min)Vegetarian

Spicy Mint-Chili Watermelon Refresher

by Linda August 20, 2026
written by Linda

This Spicy Mint-Chili Watermelon Refresher is the perfect way to cool down on a hot day. The juicy sweetness of fresh watermelon pairs beautifully with a zesty kick from chili powder, creating a unique flavor combination that’s both refreshing and invigorating.

With the addition of fresh mint, this drink not only quenches your thirst but also offers a vibrant aroma and a delightful herbal twist. It’s an easy-to-make cooler that’s sure to impress at summer gatherings or pool parties!

Spicy Mint-Chili Watermelon Refresher

Spicy Mint-Chili Watermelon Refresher

Serves: 4 Prep Time: 10 minutes Cooking Time: 0 minutes 0 minutes
Nutrition facts: 80 calories 0g fat
Rating: 5.0/5
( 1 voted )
Pin
Print

Ingredients

INGREDIENTS

  • 4 cups watermelon, cubed
  • 1 lime, juiced
  • 1/2 teaspoon chili powder
  • 1/4 cup fresh mint leaves, finely chopped
  • 1-2 tablespoons honey (optional)
  • Ice cubes

Instructions

  1. In a blender, combine the watermelon cubes and lime juice. Blend until smooth.
  2. Strain the mixture through a fine mesh sieve into a pitcher to remove pulp, if desired.
  3. Stir in the chili powder and honey (if using) until well combined.
  4. Add the chopped mint leaves and stir gently to combine.
  5. Serve over ice in glasses, garnished with extra mint leaves and a sprinkle of chili powder on top, if desired.

Notes

Note: Adjust the chili powder to your taste preference for more or less heat!

For a sweeter taste, opt for ripe watermelon and adjust the chili level according to your spice preference. If you’re looking to add a little fizz, top with sparkling water or club soda just before serving!

To store leftovers, keep the watermelon juice in the refrigerator for up to two days. Give it a good stir before serving again, as the ingredients may settle. This drink can also be served over ice for a chilled effect.

August 20, 2026 0 comments
0 FacebookTwitterPinterestPocketEmail
Citrus Zing Refresher with Mint
Drinks & BeveragesGluten-FreeQuick & Easy (30-Min)Vegan

Citrus Zing Refresher with Mint

by Linda August 20, 2026
written by Linda

Beat the heat with a vibrant Citrus Zing Refresher that combines the zesty flavors of oranges, lemons, and limes with a refreshing mint infusion. This drink is not only thirst-quenching but also packed with vitamin C, making it a healthy choice for any occasion.

Ideal for summer gatherings or a simple afternoon pick-me-up, this refresher is quick to prepare and sure to impress guests. The bright colors and invigorating flavors make it a delightful addition to any table.

Citrus Zing Refresher with Mint

Citrus Zing Refresher with Mint

Serves: 4 Prep Time: 10 minutes Cooking Time: 0 minutes 0 minutes
Nutrition facts: 80 calories 0g fat
Rating: 5.0/5
( 1 voted )
Pin
Print

Ingredients

INGREDIENTS

  • 2 oranges, juiced
  • 1 lemon, juiced
  • 1 lime, juiced
  • 2 cups cold water
  • 1/4 cup fresh mint leaves, plus extra for garnish
  • 1-2 tablespoons honey or agave syrup (optional)
  • Ice cubes

Instructions

  1. Juice the oranges, lemon, and lime into a large pitcher.
  2. Add the cold water to the citrus juice and stir well to combine.
  3. Muddle the fresh mint leaves in a separate bowl with a spoon to release their oils.
  4. Add the muddled mint to the pitcher and stir. Taste the mixture and add honey or agave syrup if desired.
  5. Chill in the refrigerator for about 30 minutes to let the flavors meld.
  6. Serve over ice, garnished with extra mint leaves. Enjoy!

Notes

Tip: For an adult twist, add a splash of vodka or rum to the refresher for a refreshing cocktail.

For a smoother drink, strain the citrus juice through a fine mesh sieve before mixing with the mint. If you prefer a sweeter drink, add a splash of simple syrup or honey to taste. You can also experiment with other citrus fruits like grapefruit or tangerine for different flavor profiles.

Store any leftover refresher in the refrigerator for up to 2 days. Serve over ice for an icy, refreshing treat. Garnish with extra mint leaves for a lovely presentation!

August 20, 2026 0 comments
0 FacebookTwitterPinterestPocketEmail
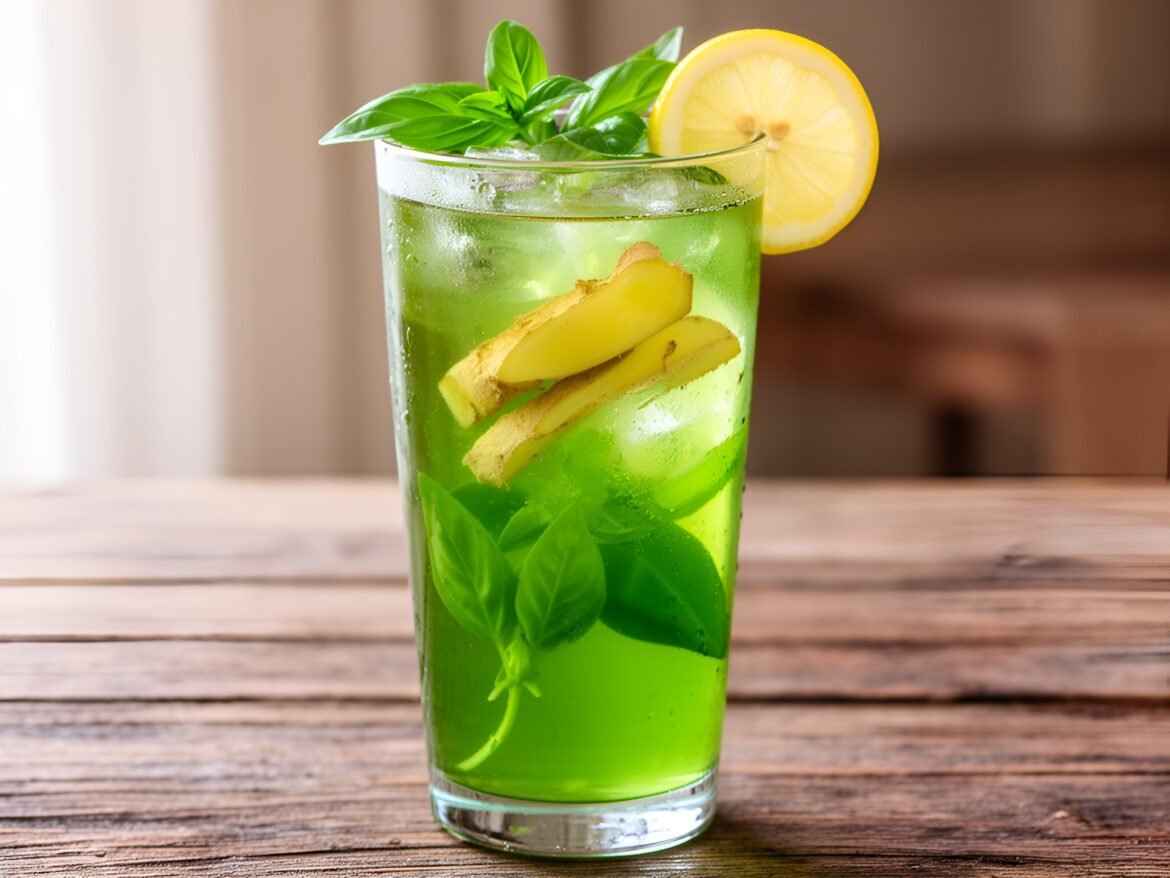
Refreshing Ginger-Basil Infused Iced Green Tea
Drinks & BeveragesHealthy & Low-CalorieQuick & Easy (30-Min)

Refreshing Ginger-Basil Infused Iced Green Tea

by Linda August 20, 2026
written by Linda

Beat the heat with a glass of Ginger-Basil Infused Iced Green Tea. This refreshing beverage combines the earthy notes of green tea with the zesty warmth of ginger and the aromatic freshness of basil. It’s not just a drink; it’s a delightful way to hydrate and invigorate your senses.

The infusion process allows for a harmonious blend of flavors, making each sip a perfect balance of sweet, spicy, and herbal. This easy recipe will have you sipping on refreshing iced tea in no time, ideal for gatherings or a quiet afternoon at home.

Refreshing Ginger-Basil Infused Iced Green Tea

Refreshing Ginger-Basil Infused Iced Green Tea

Serves: 4 Prep Time: 10 minutes Cooking Time: 10 minutes 10 minutes
Nutrition facts: 50 calories 0g fat
Rating: 5.0/5
( 1 voted )
Pin
Print

Ingredients

INGREDIENTS

  • 4 cups water
  • 2 tablespoons fresh ginger, sliced
  • 4 green tea bags
  • 1/4 cup fresh basil leaves
  • 1/4 cup honey (optional)
  • Ice cubes
  • Lemon slices (for garnish)

Instructions

  1. Boil 4 cups of water in a saucepan.
  2. Remove from heat and add the fresh ginger slices. Let it steep for about 10 minutes.
  3. Add the green tea bags and steep for an additional 3-5 minutes, depending on desired strength.
  4. Remove the tea bags and strain the liquid into a pitcher. Discard the ginger.
  5. Stir in honey if using, and add fresh basil leaves.
  6. Let the tea cool to room temperature, then refrigerate until chilled.
  7. Serve over ice and garnish with lemon slices and additional basil if desired.

Notes

Tip: For a fun twist, experiment with adding different herbs like mint or lemon balm alongside the basil.

To enhance the flavor, consider using fresh ginger slices instead of powdered ginger, as it provides a more vibrant taste. If you prefer a sweeter tea, feel free to add honey or agave syrup to taste after steeping.

For a more intense basil flavor, muddle a few basil leaves before adding them to the tea. This drink can be stored in the refrigerator for up to three days, but it’s best enjoyed fresh!

August 20, 2026 0 comments
0 FacebookTwitterPinterestPocketEmail
Fiery Mango and Chili Sparkler
Drinks & BeveragesKid-FriendlyQuick & Easy (30-Min)Vegan

Fiery Mango and Chili Sparkler

by Linda August 20, 2026
written by Linda

Get ready to tantalize your taste buds with the Fiery Mango and Chili Sparkler! This vibrant drink combines the sweetness of fresh mangoes with a kick of chili, creating a refreshingly unique beverage that’s perfect for hot summer days or lively gatherings.

The bright orange hue of this fizzy drink is inviting, and the blend of flavors is sure to impress your guests, making it a standout at any fiesta. Using sparkling water adds a delightful fizz that enhances the tropical flavors, while a hint of lime balances out the sweetness beautifully.

Fiery Mango and Chili Sparkler

Fiery Mango and Chili Sparkler

Serves: 4 Prep Time: 10 minutes Cooking Time: 0 minutes 0 minutes
Nutrition facts: 150 calories 0g fat
Rating: 5.0/5
( 1 voted )
Pin
Print

Ingredients

INGREDIENTS

  • 2 ripe mangoes, peeled and diced
  • 1-2 fresh red chilies, finely chopped (adjust to taste)
  • Juice of 1 lime
  • 2 cups sparkling water
  • 2 ounces vodka (optional)
  • Ice cubes
  • Fresh mint leaves for garnish

Instructions

  1. Blend the diced mangoes in a blender until smooth to create a puree.
  2. In a large pitcher, combine the mango puree, finely chopped chilies, and lime juice. Stir well to incorporate.
  3. Fill glasses with ice cubes, then pour the mango mixture evenly into each glass.
  4. Top off each glass with sparkling water and gently stir to combine.
  5. If using, add vodka to each glass for an alcoholic version and garnish with mint leaves before serving.

Notes

Tip: For a fun twist, rim the glasses with chili powder or Tajín before serving!

For a non-alcoholic version, simply omit the vodka and increase the sparkling water proportion. You can also adjust the chili level according to your spice preference—add less for a milder drink or more for an extra kick!

Store any leftover mango puree in an airtight container in the refrigerator for up to 3 days, and use it in smoothies or as a yogurt topping. This drink is best served fresh, but you can prepare the mango puree in advance.

August 20, 2026 0 comments
0 FacebookTwitterPinterestPocketEmail
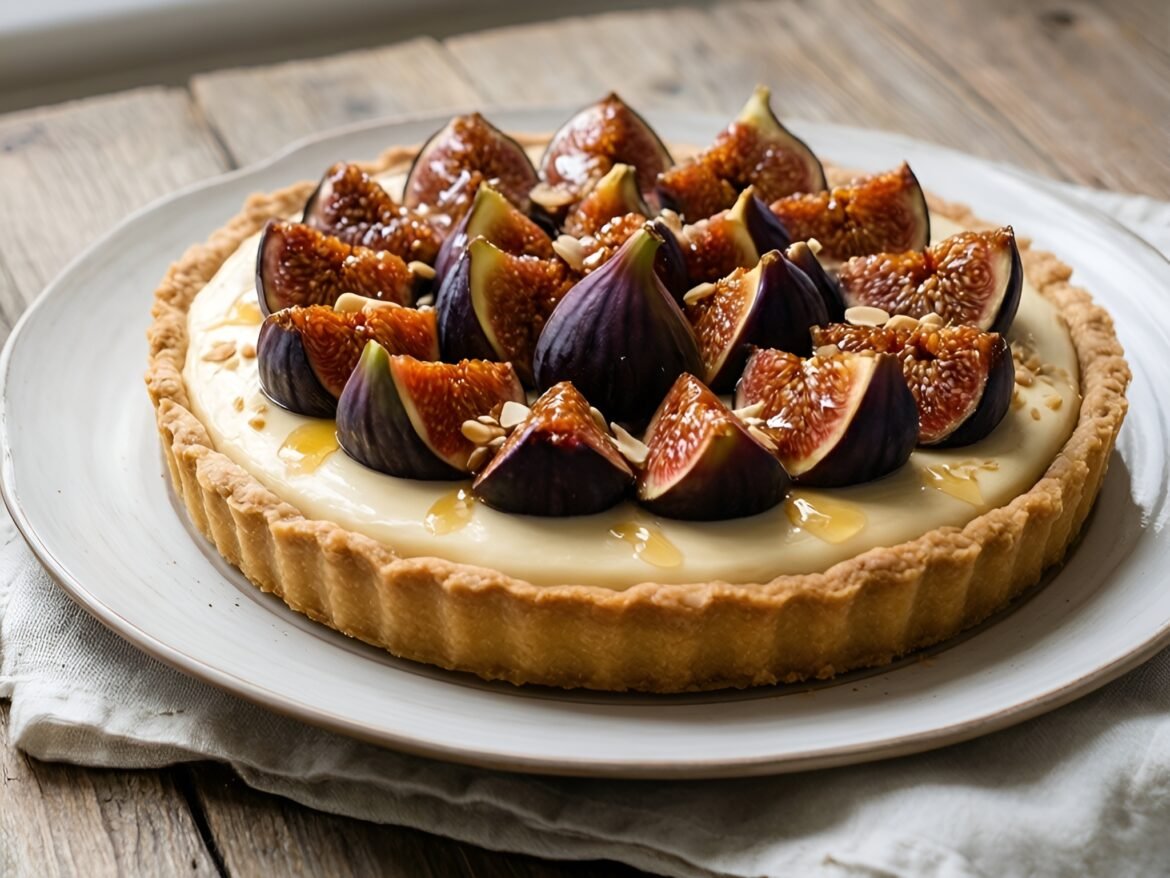
Luscious Caramelized Fig Tart with Almond Cream
Desserts & BakingQuick & Easy (30-Min)Vegetarian

Luscious Caramelized Fig Tart with Almond Cream

by Linda August 19, 2026
written by Linda

Indulge in the rich flavors of this Luscious Caramelized Fig Tart with Almond Cream, a perfect harmony of sweet figs and smooth almond cream. The tart crust provides a delightful crunch that perfectly complements the luscious filling.

Caramelizing the figs enhances their natural sweetness, creating a gorgeous topping that glistens with a golden hue. This dessert is not only visually stunning but also easy to prepare, making it an excellent choice for gatherings or a special treat at home.

Luscious Caramelized Fig Tart with Almond Cream

Luscious Caramelized Fig Tart with Almond Cream

Serves: 8 Prep Time: 30 minutes Cooking Time: 45 minutes 45 minutes
Nutrition facts: 320 calories 18g fat
Rating: 5.0/5
( 1 voted )
Pin
Print

Ingredients

INGREDIENTS

  • 1 pre-made tart crust
  • 10 fresh figs, halved
  • 1/4 cup honey
  • 1 tablespoon unsalted butter
  • 1 cup almond flour
  • 1/2 cup sugar
  • 3 large eggs
  • 1 teaspoon vanilla extract
  • 1/4 teaspoon almond extract
  • 1/2 cup heavy cream

Instructions

  1. Preheat the oven to 350°F (175°C).
  2. Place the tart crust in a tart pan and set aside.
  3. In a skillet over medium heat, melt the butter and add the honey, stirring until combined.
  4. Add the halved figs to the skillet, cut side down, and cook for about 5-7 minutes until caramelized. Remove from heat and set aside.
  5. In a mixing bowl, combine the almond flour, sugar, eggs, vanilla extract, and almond extract. Mix until smooth and creamy.
  6. Pour the almond cream mixture into the prepared tart crust and smooth the top.
  7. Gently arrange the caramelized figs over the almond cream, cut side up, in a decorative pattern.
  8. Bake in the preheated oven for 30-35 minutes or until the almond cream is set and lightly golden.
  9. Remove from the oven and allow to cool before serving. Drizzle with heavy cream if desired. Enjoy!

Notes

Tip: For a richer flavor, use a combination of honey and brown sugar for caramelizing the figs.

For an extra touch, consider adding a sprinkle of sea salt on top of the caramelized figs to enhance their sweetness. If fresh figs are not available, dried figs can be rehydrated in warm water and used as a substitute.

Store any leftovers in an airtight container in the fridge for up to two days. Reheat gently in the oven to restore the crust’s crispness before serving.

August 19, 2026 0 comments
0 FacebookTwitterPinterestPocketEmail
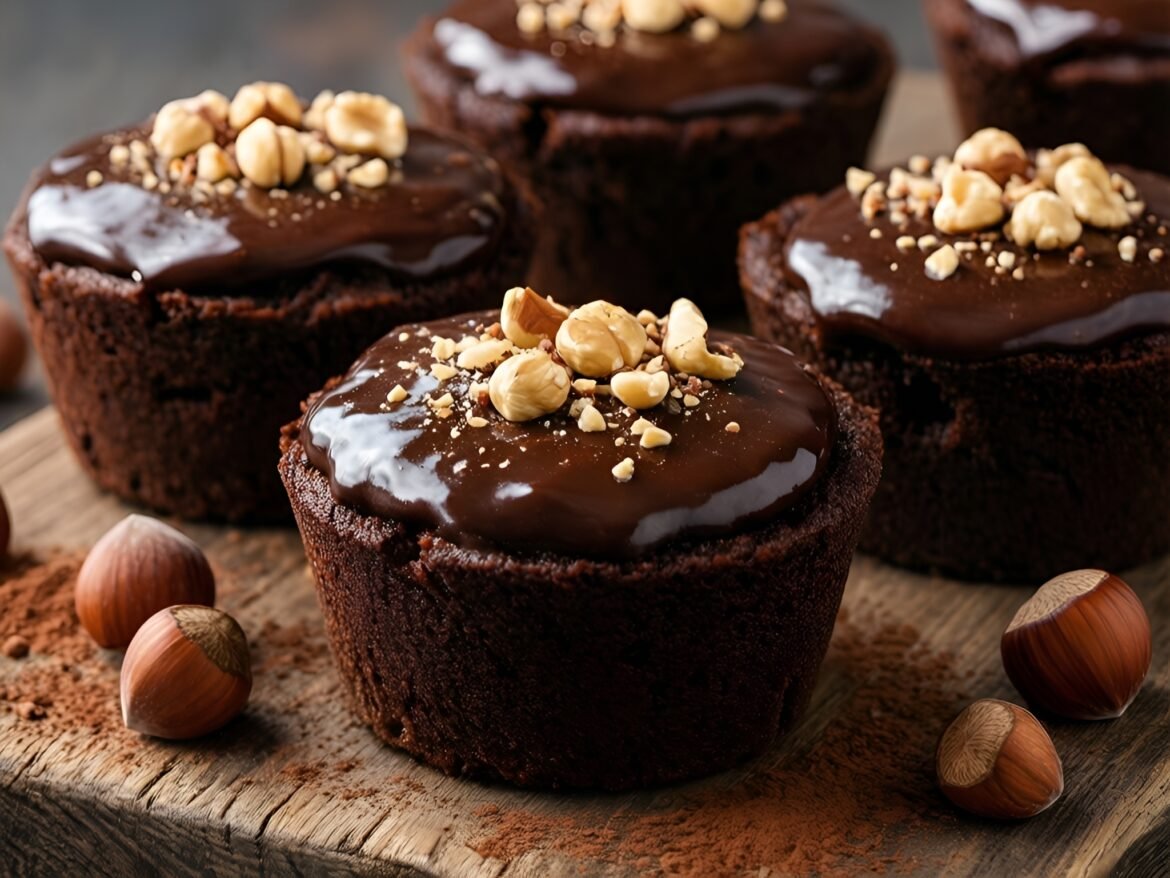
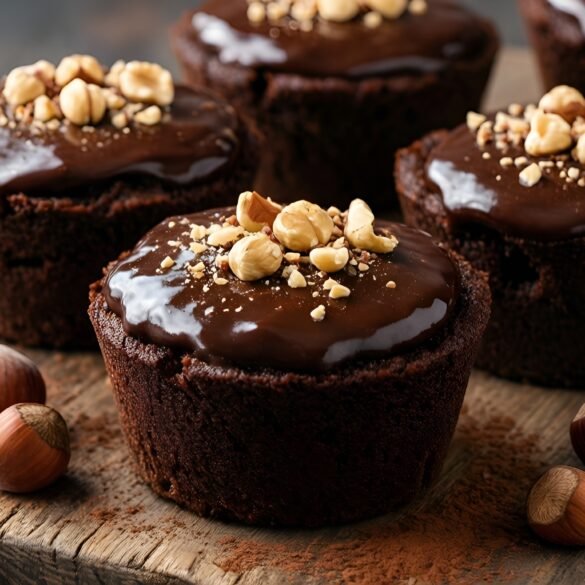
Decadent Mocha Hazelnut Brownie Cups with Creamy Ganache
Desserts & BakingQuick & Easy (30-Min)Vegetarian

Decadent Mocha Hazelnut Brownie Cups with Creamy Ganache

by Linda August 19, 2026
written by Linda

These decadent mocha hazelnut brownie cups are the perfect blend of rich chocolate and aromatic coffee, delivering a delightful bite-sized treat. The fudgy brownie base is enhanced with crunchy hazelnuts, creating a texture that’s both chewy and satisfying. Each cup is topped with a glossy chocolate ganache, adding a luxurious finish that makes these brownies irresistible.

Whether for a special occasion or a cozy dessert after dinner, these brownie cups are sure to impress. They are quick to make and can easily be adapted for different tastes, making them a versatile addition to your dessert repertoire.

Decadent Mocha Hazelnut Brownie Cups with Creamy Ganache

Decadent Mocha Hazelnut Brownie Cups with Creamy Ganache

Serves: 12 Prep Time: 20 minutes Cooking Time: 25 minutes 25 minutes
Nutrition facts: 220 calories 12g fat
Rating: 5.0/5
( 1 voted )
Pin
Print

Ingredients

INGREDIENTS

  • 1/2 cup unsalted butter
  • 1 cup granulated sugar
  • 2 large eggs
  • 1 teaspoon vanilla extract
  • 1/3 cup unsweetened cocoa powder
  • 1/2 cup all-purpose flour
  • 1/4 teaspoon salt
  • 1/4 teaspoon baking powder
  • 1/2 cup finely chopped hazelnuts
  • 1/2 cup semi-sweet chocolate chips

FOR THE GANACHE

  • 1/2 cup heavy cream
  • 4 ounces semi-sweet chocolate, chopped
  • 1 tablespoon unsalted butter

Instructions

  1. Preheat the oven to 350°F (175°C) and line a muffin tin with paper liners.
  2. In a saucepan, melt the butter over medium heat. Remove from heat and stir in sugar, eggs, and vanilla until smooth.
  3. In a separate bowl, whisk together cocoa powder, flour, salt, and baking powder.
  4. Gradually add the dry ingredients to the butter mixture, stirring until just combined. Fold in the chopped hazelnuts and chocolate chips.
  5. Spoon the brownie batter into the prepared muffin tin, filling each liner about 2/3 full.
  6. Bake for 20-25 minutes, or until a toothpick inserted into the center comes out with moist crumbs. Let cool completely.
  7. For the ganache, heat the heavy cream in a small saucepan until just simmering. Pour over the chopped chocolate and butter in a bowl and let sit for 2 minutes.
  8. Stir the mixture until smooth and glossy. Let it cool slightly before pouring over the cooled brownie cups.
  9. Allow the ganache to set before garnishing with additional crushed hazelnuts, if desired. Serve and enjoy!

Notes

Tip: For a mocha twist, add 1 tablespoon of coffee or espresso to the batter for an additional boost of flavor.

To achieve the best texture, be careful not to overbake the brownie cups; they should be soft in the center. You can substitute the hazelnuts with walnuts or almonds for a different flavor profile. For an extra kick, consider adding a teaspoon of espresso powder to the brownie batter.

These brownie cups can be stored in an airtight container at room temperature for up to three days, or refrigerated for up to a week. They also freeze well—simply thaw before serving and enjoy!

August 19, 2026 0 comments
0 FacebookTwitterPinterestPocketEmail
Newer Posts
Older Posts

Recent Posts

  • Zesty Lemon-Lavender Ricotta Toasts

    November 5, 2026
  • Coconut Chai Oatmeal Paradise Bowls

    November 5, 2026
  • Refreshing Minty Pineapple Coconut Bliss

    November 4, 2026
  • Festive Spiced Apple Cider Sparkler

    November 4, 2026
  • Chilled Cucumber Melon Delight

    November 4, 2026

About Me

About Me

I'm Linda, a health professional, university graduate, and author sharing tested, easy-to-follow recipes made from simple, everyday ingredients. Based in Finland, I bring together my culinary training, love of travel, and home-cooked roots to help you cook confidently, on any budget.

Products

  • Spooky Creative Starry Sky Ceramic Mug Spooky Creative Starry Sky Ceramic Mug 10,00 €

Categories

  • Appetizers & Snacks (339)
  • Breakfast & Brunch (286)
  • Desserts & Baking (360)
  • Drinks & Beverages (279)
  • Gluten-Free (433)
  • Grilling & BBQ (12)
  • Healthy & Low-Calorie (385)
  • Holiday & Seasonal (37)
  • Kid-Friendly (495)
  • Main Dishes (370)
  • Quick & Easy (30-Min) (1,498)
  • Slow Cooker & Instant Pot (4)
  • Soups & Salads (223)
  • Vegan (370)
  • Vegetarian (1,207)

About Me

I'm Linda, a health professional and food writer sharing tested, easy-to-follow recipes made from simple ingredients.

Email: jspiceygiftstv@gmail.com

Useful Links

  • Home
  • About
  • Contact
  • Free Cookbooks
  • Terms and Conditions
  • Privacy Policy

Newsletter

Subscribe to to our Newsletter to stay updated with all our recipes.

Recent Posts

  • Zesty Lemon-Lavender Ricotta Toasts

    November 5, 2026
  • Coconut Chai Oatmeal Paradise Bowls

    November 5, 2026
  • Instagram
  • Pinterest
  • Youtube
  • Tiktok

@2026 - All Right Reserved. Designed and Developed by JSpiceyGifts

J Spicey Gifts
  • Home
  • Recipes
    • Breakfast & Brunch
    • Appetizers & Snacks
    • Main Dishes
    • Soups & Salads
    • Desserts & Baking
    • Drinks & Beverages
  • Categories
    • Vegetarian
    • Vegan
    • Gluten-Free
    • Quick & Easy (30-Min)
    • Slow Cooker & Instant Pot
    • Grilling & BBQ
    • Healthy & Low-Calorie
    • Holiday & Seasonal
    • Kid-Friendly
  • About
  • Contact

Shopping Cart

Close

No products in the cart.

Close