J Spicey Gifts
  • Home
  • Recipes
    • Breakfast & Brunch
    • Appetizers & Snacks
    • Main Dishes
    • Soups & Salads
    • Desserts & Baking
    • Drinks & Beverages
  • Categories
    • Vegetarian
    • Vegan
    • Gluten-Free
    • Quick & Easy (30-Min)
    • Slow Cooker & Instant Pot
    • Grilling & BBQ
    • Healthy & Low-Calorie
    • Holiday & Seasonal
    • Kid-Friendly
  • About
  • Contact
Top Posts
Zesty Lemon-Lavender Ricotta Toasts
Coconut Chai Oatmeal Paradise Bowls
Refreshing Minty Pineapple Coconut Bliss
Festive Spiced Apple Cider Sparkler
Chilled Cucumber Melon Delight
Sparkling Zesty Berry Citrus Fizz
Tropical Mango Sunrise Smoothie
Cinnamon Chocolate Swirl Cloud Cake
Delicate Lavender Honey Almond Biscotti Bites
Vibrant Citrus-Watermelon Feta Salad with Refreshing Minty Lime...
J Spicey Gifts
  • Home
  • Recipes
    • Breakfast & Brunch
    • Appetizers & Snacks
    • Main Dishes
    • Soups & Salads
    • Desserts & Baking
    • Drinks & Beverages
  • Categories
    • Vegetarian
    • Vegan
    • Gluten-Free
    • Quick & Easy (30-Min)
    • Slow Cooker & Instant Pot
    • Grilling & BBQ
    • Healthy & Low-Calorie
    • Holiday & Seasonal
    • Kid-Friendly
  • About
  • Contact
J Spicey Gifts
J Spicey Gifts
  • Home
  • Recipes
    • Breakfast & Brunch
    • Appetizers & Snacks
    • Main Dishes
    • Soups & Salads
    • Desserts & Baking
    • Drinks & Beverages
  • Categories
    • Vegetarian
    • Vegan
    • Gluten-Free
    • Quick & Easy (30-Min)
    • Slow Cooker & Instant Pot
    • Grilling & BBQ
    • Healthy & Low-Calorie
    • Holiday & Seasonal
    • Kid-Friendly
  • About
  • Contact
Copyright 2021 - All Right Reserved
Zesty Spiced Hibiscus Berry Elixir with Citrus Twist
Drinks & BeveragesHealthy & Low-CalorieQuick & Easy (30-Min)Vegan

Zesty Spiced Hibiscus Berry Elixir with Citrus Twist

by Linda August 21, 2026
written by Linda

This Zesty Spiced Hibiscus Berry Elixir is a vibrant and refreshing drink that’s perfect for any occasion. The deep ruby hue from the hibiscus flowers combined with the tartness of mixed berries creates a delightful beverage that not only looks appealing but is also packed with antioxidants.

The infusion of warming spices such as cinnamon and ginger adds a unique depth of flavor, making this elixir a perfect choice for warm summer days or cozy winter evenings. Serve it chilled over ice or warm for a comforting drink.

Zesty Spiced Hibiscus Berry Elixir with Citrus Twist

Zesty Spiced Hibiscus Berry Elixir with Citrus Twist

Serves: 4 Prep Time: 10 minutes Cooking Time: 15 minutes 15 minutes
Nutrition facts: 80 calories 0g fat
Rating: 5.0/5
( 1 voted )
Pin
Print

Ingredients

INGREDIENTS

  • 4 cups water
  • 1/2 cup dried hibiscus flowers
  • 1 cup mixed berries (strawberries, blueberries, raspberries)
  • 1/4 cup honey or agave syrup (optional)
  • 1 cinnamon stick
  • 1 inch piece of fresh ginger, sliced
  • Juice of 1 orange
  • Juice of 1 lemon
  • Fresh mint leaves for garnish

Instructions

  1. Boil the water in a saucepan.
  2. Once boiling, remove from heat and add the dried hibiscus flowers, cinnamon stick, and fresh ginger slices.
  3. Let the mixture steep for about 10-15 minutes until it turns a deep ruby color.
  4. Strain the hibiscus infusion into a pitcher, discarding the solids.
  5. Stir in the mixed berries, orange juice, lemon juice, and sweetener if using.
  6. Chill the elixir in the refrigerator for at least an hour or serve immediately over ice.
  7. Garnish with fresh mint leaves before serving. Enjoy!

Notes

Tip: Adjust sweetness to your preference with honey or agave syrup, and feel free to experiment with different berry combinations for varied flavors.

For a sweeter flavor, feel free to add honey or agave syrup to your taste. If you prefer a stronger spice profile, increase the amount of cinnamon and ginger.

This elixir can be easily made ahead of time and stored in the refrigerator for up to a week. Just give it a good shake before serving, and enjoy it as a refreshing alternative to sugary sodas!
August 21, 2026 0 comments
0 FacebookTwitterPinterestPocketEmail
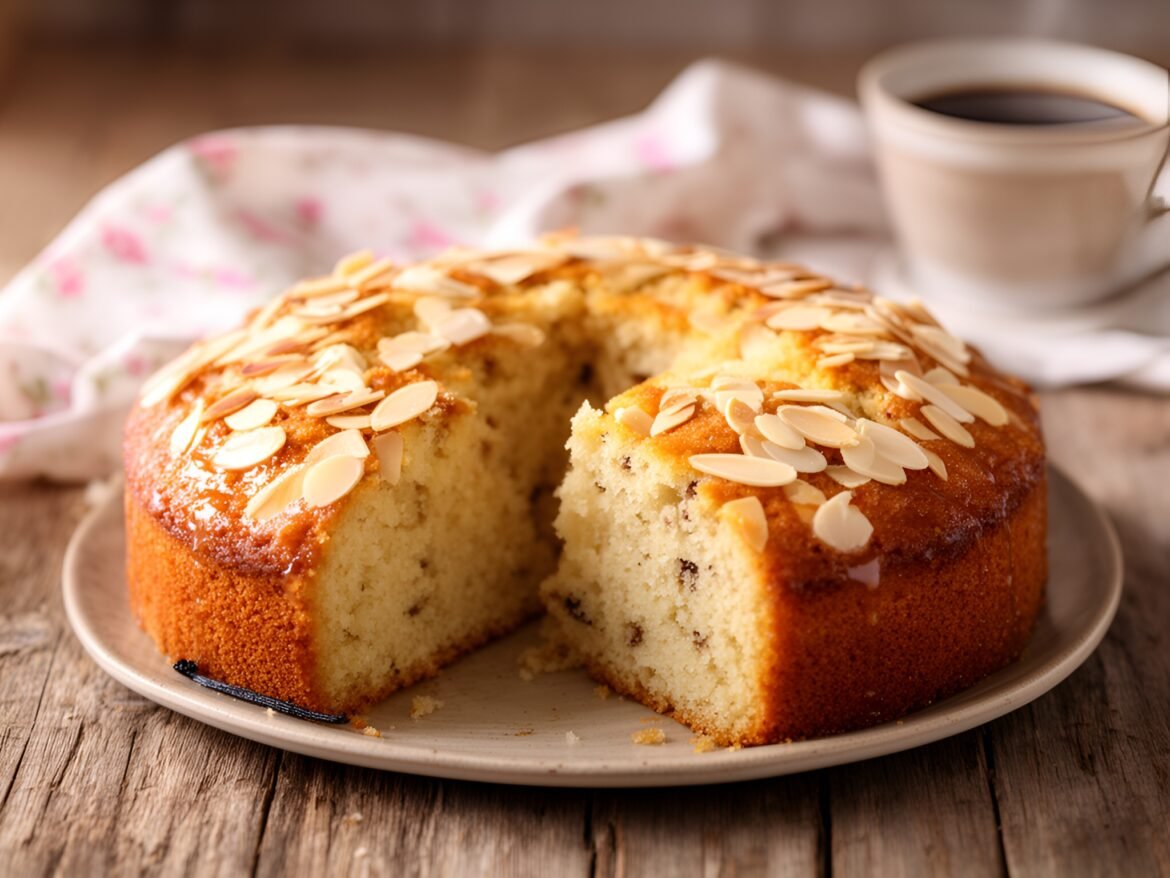
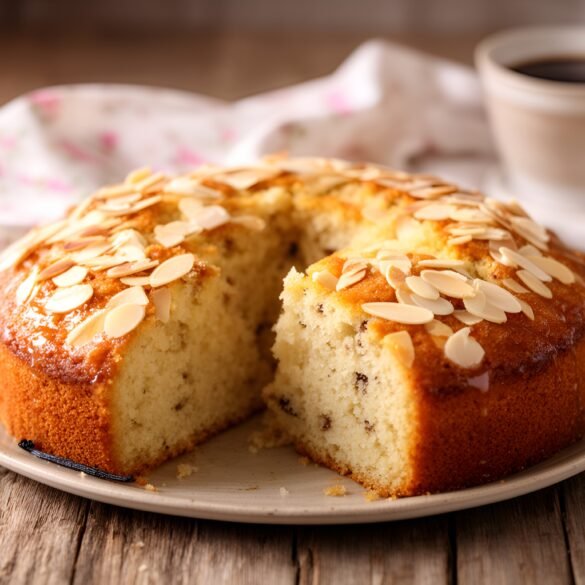
Decadent Velvety Vanilla Bean Coffee Cake with Almond Crunch
Desserts & BakingQuick & Easy (30-Min)Vegetarian

Decadent Velvety Vanilla Bean Coffee Cake with Almond Crunch

by Linda August 21, 2026
written by Linda

This Velvety Vanilla Bean Coffee Cake is a delightful treat that combines a rich, buttery base with the warm, aromatic notes of vanilla bean. Each slice is not only moist but also features a heavenly almond crunch topping that adds the perfect textural contrast, making it ideal for breakfast or an afternoon coffee break.

What sets this coffee cake apart is the use of real vanilla beans that elevate its flavor profile. The almond topping provides a satisfying crunch that beautifully complements the soft cake beneath. Whether served at brunch or as a dessert, this cake is sure to impress your guests and leave them craving more!

Decadent Velvety Vanilla Bean Coffee Cake with Almond Crunch

Decadent Velvety Vanilla Bean Coffee Cake with Almond Crunch

Serves: 8 Prep Time: 25 minutes Cooking Time: 40 minutes 40 minutes
Nutrition facts: 350 calories 18g fat
Rating: 5.0/5
( 1 voted )
Pin
Print

Ingredients

INGREDIENTS

  • 1 ¾ cups all-purpose flour
  • 1 teaspoon baking powder
  • ½ teaspoon baking soda
  • ¼ teaspoon salt
  • ¾ cup unsalted butter, softened
  • 1 cup granulated sugar
  • 2 large eggs
  • 1 tablespoon vanilla bean paste or seeds from 1 vanilla bean
  • ½ cup sour cream
  • ½ cup sliced almonds, for topping
  • 1 tablespoon brown sugar, for topping

Instructions

  1. Preheat your oven to 350°F (175°C) and grease a 9-inch round cake pan.
  2. In a mixing bowl, whisk together the flour, baking powder, baking soda, and salt. Set aside.
  3. In a separate large bowl, cream the softened butter and granulated sugar until light and fluffy.
  4. Beat in the eggs one at a time, then add the vanilla bean paste and sour cream, mixing until well combined.
  5. Gradually add the dry ingredients to the wet ingredients, mixing until just combined.
  6. Pour the batter into the prepared cake pan, smoothing the top with a spatula.
  7. In a small bowl, combine the sliced almonds and brown sugar. Sprinkle this mixture evenly over the batter.
  8. Bake in the preheated oven for 35-40 minutes, or until a toothpick inserted into the center comes out clean.
  9. Allow the cake to cool in the pan for about 10 minutes before transferring it to a wire rack to cool completely. Slice and serve. Enjoy!

Notes

Tip: For an added flavor boost, consider adding a teaspoon of almond extract to the batter.

When making this coffee cake, be sure to cream the butter and sugar thoroughly for a light and fluffy texture. If you don’t have vanilla bean, you can substitute it with good quality vanilla extract, but the flavor will be slightly different.

For an extra touch, consider adding a layer of fresh berries between the cake layers or on top for a burst of flavor and color. Store any leftovers in an airtight container at room temperature for up to three days, or refrigerate for a longer shelf life. Reheat individual slices in the microwave for a few seconds before serving to bring back its fresh-baked warmth!

August 21, 2026 0 comments
0 FacebookTwitterPinterestPocketEmail
Decadent Chocolate Hazelnut Whirlwind Tart with Sea Salt Caramel
Desserts & BakingQuick & Easy (30-Min)Vegetarian

Decadent Chocolate Hazelnut Whirlwind Tart with Sea Salt Caramel

by Linda August 21, 2026
written by Linda

This Chocolate Hazelnut Whirlwind Tart is a showstopper dessert that combines the rich flavors of chocolate and hazelnuts with a surprising twist of sea salt caramel. The crunchy tart shell provides the perfect base for a creamy chocolate filling, creating a delightful contrast with the smooth caramel drizzled on top.

Perfect for special occasions or simply to satisfy a sweet craving, this tart is not only beautiful but also surprisingly easy to make. The balance of sweet chocolate and salty caramel makes every bite irresistible!

Decadent Chocolate Hazelnut Whirlwind Tart with Sea Salt Caramel

Decadent Chocolate Hazelnut Whirlwind Tart with Sea Salt Caramel

Serves: 8 Prep Time: 30 minutes Cooking Time: 40 minutes 40 minutes
Nutrition facts: 450 calories 30g fat
Rating: 5.0/5
( 1 voted )
Pin
Print

Ingredients

INGREDIENTS

  • 1 ½ cups all-purpose flour
  • ½ cup unsweetened cocoa powder
  • ½ cup powdered sugar
  • ½ teaspoon salt
  • ½ cup unsalted butter, chilled and cubed
  • 1 large egg yolk
  • 3 tablespoons chilled water
  • 1 cup hazelnuts, toasted and chopped
  • 1 cup heavy cream
  • 8 ounces dark chocolate, chopped
  • 2 large eggs
  • ½ cup granulated sugar
  • 1 teaspoon vanilla extract
  • 1 cup caramel sauce
  • 1 teaspoon sea salt

Instructions

  1. Preheat the oven to 350°F (175°C).
  2. In a bowl, mix flour, cocoa powder, powdered sugar, and salt. Add the chilled butter and mix until crumbly.
  3. Stir in the egg yolk and water until the dough forms. Press it into a tart pan and trim the edges.
  4. Prick the base with a fork and bake for 15 minutes. Let it cool.
  5. In a saucepan, heat the cream until simmering. Pour over the chopped chocolate and let sit for 2 minutes, then stir until smooth.
  6. Whisk in the eggs, sugar, and vanilla extract until combined. Stir in the chopped hazelnuts.
  7. Pour the chocolate mixture into the cooled tart shell and bake for an additional 25 minutes or until set.
  8. Allow the tart to cool completely before drizzling with caramel sauce and sprinkling with sea salt.
  9. Slice and serve, enjoying the delightful combination of flavors.

Notes

Tip: For an extra crunch, reserve some chopped hazelnuts to sprinkle on top before serving.

For the best flavor, use high-quality dark chocolate and freshly roasted hazelnuts. If you’re short on time, store-bought caramel sauce can be used, but homemade is always better!

To make this tart ahead of time, prepare the shell and filling, then refrigerate. Add the caramel just before serving for the best texture. Enjoy leftovers chilled, or let them come to room temperature for a softer bite.

August 21, 2026 0 comments
0 FacebookTwitterPinterestPocketEmail
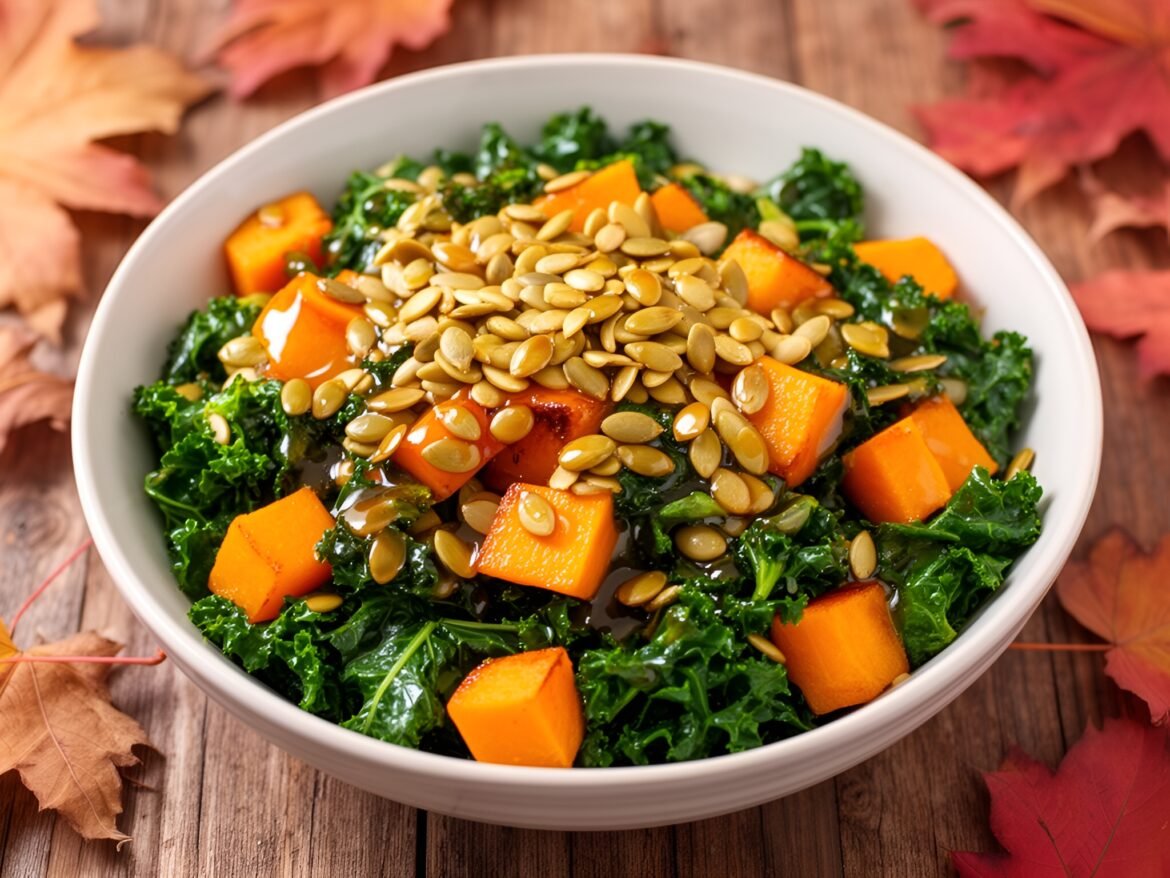
Warm Butternut Squash and Kale Salad with Toasted Pumpkin Seeds
Healthy & Low-CalorieSoups & SaladsVegetarian

Warm Butternut Squash and Kale Salad with Toasted Pumpkin Seeds

by Linda August 20, 2026
written by Linda

This warm butternut squash and kale salad is a wholesome dish that perfectly balances flavors and textures. The sweet roasted butternut squash pairs beautifully with the earthy kale, making it a nutritious yet satisfying option for lunch or dinner.

To elevate the dish, we add toasted pumpkin seeds, which provide a delightful crunch and a boost of healthy fats. The combination of these ingredients not only creates a feast for the eyes but also a nourishing meal packed with vitamins.

Warm Butternut Squash and Kale Salad with Toasted Pumpkin Seeds

Warm Butternut Squash and Kale Salad with Toasted Pumpkin Seeds

Serves: 4 Prep Time: 15 minutes Cooking Time: 25 minutes 25 minutes
Nutrition facts: 250 calories 14g fat
Rating: 5.0/5
( 1 voted )
Pin
Print

Ingredients

INGREDIENTS

  • 1 medium butternut squash, peeled and cubed
  • 4 cups kale, chopped
  • 1/2 cup pumpkin seeds
  • 2 tablespoons olive oil
  • 1 teaspoon salt
  • 1/2 teaspoon black pepper
  • 1 tablespoon maple syrup
  • 1 tablespoon apple cider vinegar
  • 1/2 teaspoon garlic powder
  • 1/2 teaspoon smoked paprika

Instructions

  1. Preheat the oven to 400°F (200°C).
  2. Toss the butternut squash cubes with 1 tablespoon of olive oil, salt, pepper, garlic powder, and smoked paprika on a baking sheet.
  3. Spread the squash in a single layer and roast for 25 minutes, or until tender and slightly caramelized, tossing halfway through.
  4. While the squash is roasting, heat a large skillet over medium heat and add the pumpkin seeds. Toast for 3-5 minutes until golden brown, stirring frequently.
  5. In the same skillet, add the chopped kale and remaining olive oil. Sauté for 5-7 minutes until the kale is wilted and tender.
  6. Once the butternut squash is done, add it to the skillet with the kale. Drizzle with maple syrup and apple cider vinegar, and toss to combine.
  7. Serve warm, garnished with toasted pumpkin seeds on top.

Notes

For an extra flavor boost, consider adding crumbled feta cheese or goat cheese before serving.

For the best results, ensure that you cut the butternut squash into even cubes to promote even cooking. If you’re looking to save time, you can roast the squash ahead of time and toss everything together just before serving.

Feel free to substitute the kale with spinach or arugula if you prefer a milder flavor. Leftovers can be stored in an airtight container in the refrigerator for up to three days; simply reheat in a skillet before serving.

August 20, 2026 0 comments
0 FacebookTwitterPinterestPocketEmail
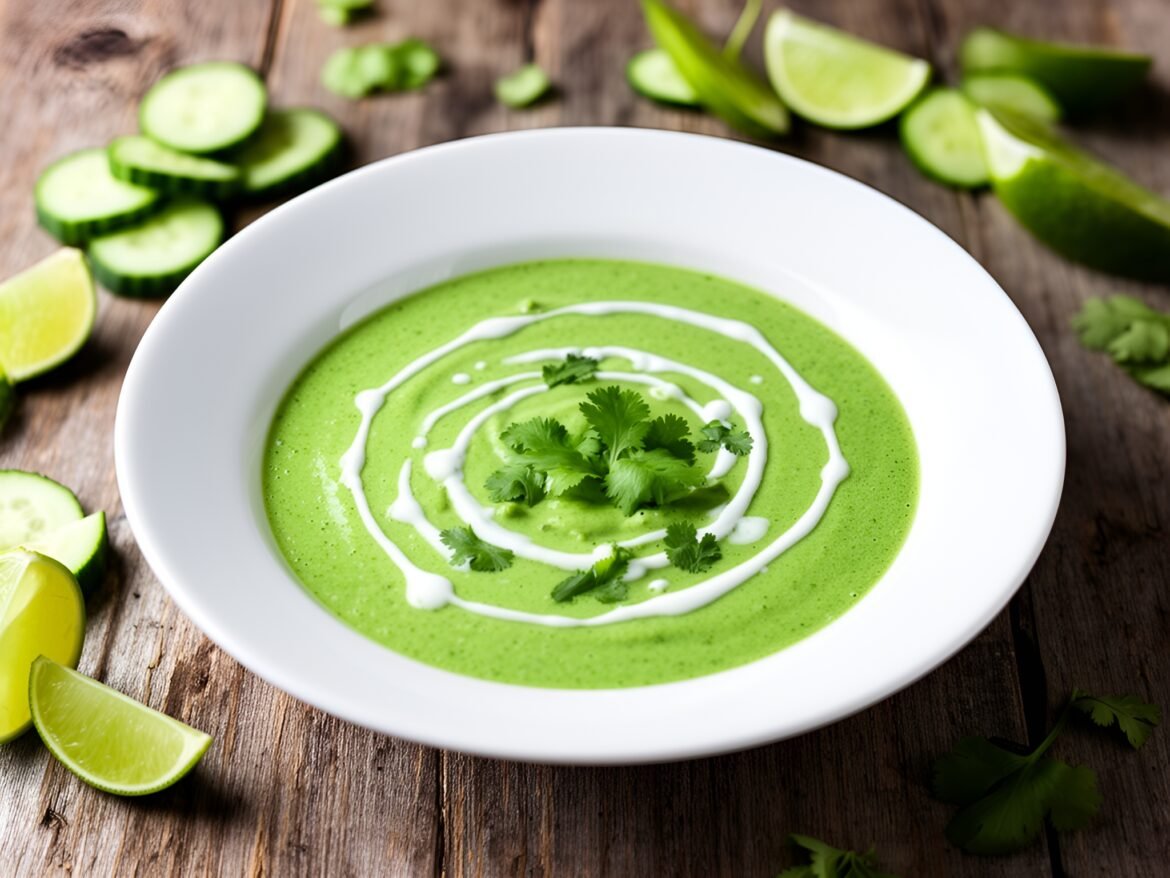
Refreshing Avocado-Cucumber Gazpacho with Tangy Cilantro-Lime Drizzle
Gluten-FreeHealthy & Low-CalorieSoups & SaladsVegan

Refreshing Avocado-Cucumber Gazpacho with Tangy Cilantro-Lime Drizzle

by Linda August 20, 2026
written by Linda

Beat the heat with this vibrant and creamy Chilled Avocado-Cucumber Gazpacho. Perfect for summer, this dish combines the refreshing flavors of cucumber and the rich creaminess of ripe avocados, creating a soup that’s both satisfying and light.

The addition of a tangy cilantro-lime drizzle elevates this gazpacho, providing a burst of citrusy freshness that complements the cool base. It’s easy to make and can be served as a starter or a light meal, making it a versatile choice for any occasion.

Refreshing Avocado-Cucumber Gazpacho with Tangy Cilantro-Lime Drizzle

Refreshing Avocado-Cucumber Gazpacho with Tangy Cilantro-Lime Drizzle

Serves: 4 Prep Time: 15 minutes Cooking Time: 0 minutes 0 minutes
Nutrition facts: 250 calories 15g fat
Rating: 5.0/5
( 1 voted )
Pin
Print

Ingredients

INGREDIENTS

  • 2 ripe avocados
  • 1 large cucumber, peeled and diced
  • 1 small red onion, diced
  • 1 clove garlic, minced
  • 2 cups vegetable broth, chilled
  • Juice of 2 limes
  • Salt and pepper to taste
  • 1/4 cup fresh cilantro, chopped
  • 1 tablespoon olive oil

FOR THE CILANTRO-LIME DRIZZLE

  • 1/4 cup Greek yogurt
  • Juice of 1 lime
  • 1 tablespoon fresh cilantro, chopped
  • Salt to taste

Instructions

  1. In a blender, combine avocados, cucumber, red onion, garlic, vegetable broth, lime juice, salt, and pepper.
  2. Blend until smooth and creamy, adjusting seasoning as needed.
  3. Transfer the gazpacho to a bowl and refrigerate for at least 1 hour to chill.
  4. For the cilantro-lime drizzle, whisk together Greek yogurt, lime juice, chopped cilantro, and salt in a small bowl.
  5. To serve, ladle the chilled gazpacho into bowls, drizzle with cilantro-lime sauce, and garnish with extra cilantro if desired.

Notes

Storage: Gazpacho can be stored in the refrigerator for up to 2 days. Stir well before serving again.

For the best flavor, chill the gazpacho for at least an hour before serving, allowing the flavors to meld beautifully. If you prefer a smoother texture, blend the ingredients longer, or strain the mixture for an ultra-refined finish.

Feel free to customize the toppings; diced tomatoes, croutons, or extra cilantro can add delightful textures. This gazpacho can be stored in the fridge for up to 2 days, making it a great option for meal prep!

August 20, 2026 0 comments
0 FacebookTwitterPinterestPocketEmail
Mediterranean Grilled Chicken Skewers with Sun-Dried Tomato Couscous
Kid-FriendlyMain DishesQuick & Easy (30-Min)

Mediterranean Grilled Chicken Skewers with Sun-Dried Tomato Couscous

by Linda August 20, 2026
written by Linda

Get ready to elevate your weeknight dinner with these Mediterranean Grilled Chicken Skewers! Marinated in a fragrant blend of olive oil, lemon juice, garlic, and aromatic herbs, these skewers are not only juicy but also packed with bold flavors.

Paired with a delicious sun-dried tomato couscous, this dish brings a taste of the Mediterranean to your table. The couscous is rich and savory, absorbing the essence of the sun-dried tomatoes, making it the perfect complement to the grilled chicken. Serve it at your next family gathering or barbecue for a dish that everyone will love!

Mediterranean Grilled Chicken Skewers with Sun-Dried Tomato Couscous

Mediterranean Grilled Chicken Skewers with Sun-Dried Tomato Couscous

Serves: 4 Prep Time: 20 minutes Cooking Time: 15 minutes 15 minutes
Nutrition facts: 550 calories 20g fat
Rating: 5.0/5
( 1 voted )
Pin
Print

Ingredients

INGREDIENTS

  • 1 lb chicken breast, cut into 1-inch cubes
  • 1/4 cup olive oil
  • 1 lemon, juiced
  • 4 cloves garlic, minced
  • 1 tsp dried oregano
  • 1 tsp dried thyme
  • Salt and pepper to taste
  • Skewers (soaked in water if wooden)
  • 1 cup couscous
  • 1/2 cup sun-dried tomatoes, chopped
  • 2 cups chicken broth
  • 1/4 cup fresh parsley, chopped
  • 1/4 cup feta cheese, crumbled (optional)

Instructions

  1. In a bowl, whisk together olive oil, lemon juice, garlic, oregano, thyme, salt, and pepper.
  2. Add chicken cubes to the marinade, ensuring they are well coated. Cover and refrigerate for at least 30 minutes.
  3. While the chicken marinates, prepare the couscous. In a pot, bring chicken broth to a boil and stir in couscous and sun-dried tomatoes. Remove from heat, cover, and let sit for 5 minutes.
  4. Fluff couscous with a fork and stir in parsley and feta cheese if using.
  5. Preheat the grill to medium-high heat. Thread marinated chicken onto skewers.
  6. Grill the chicken skewers for 6-8 minutes on each side or until fully cooked and juices run clear.
  7. Serve the grilled chicken skewers alongside the sun-dried tomato couscous for a refreshing meal.

Notes

Tip: Adjust the herbs in the marinade according to your preference; fresh herbs like basil or rosemary can also work well!

For the best flavor, marinate your chicken for at least 30 minutes to an hour before grilling. You can easily substitute the chicken with shrimp or beef if you prefer.

Leftover skewers can be stored in an airtight container in the fridge for up to 3 days. To reheat, place them on a grill or in the oven until heated through. The couscous can also be made ahead of time and served cold or reheated.

August 20, 2026 0 comments
0 FacebookTwitterPinterestPocketEmail
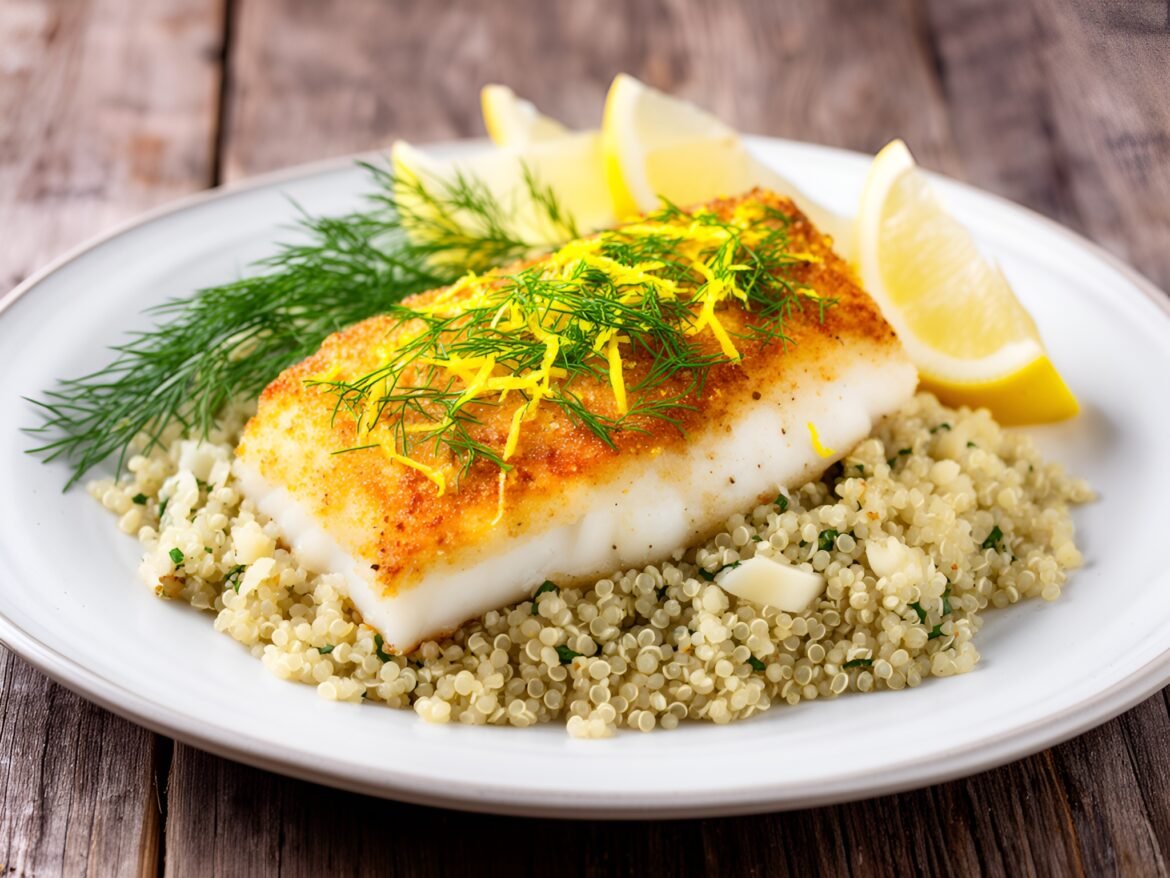
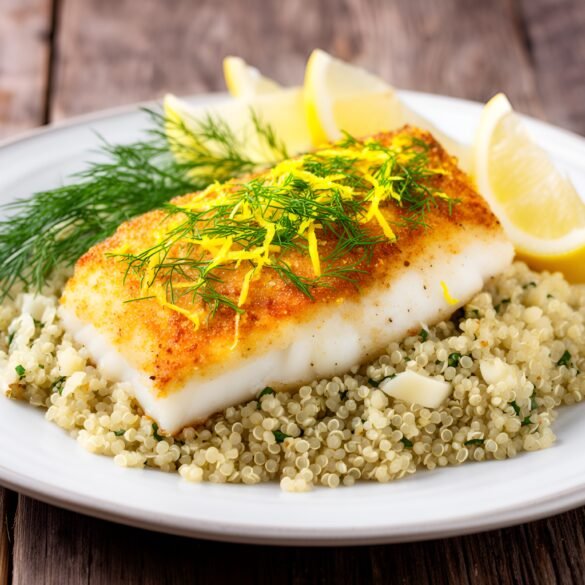
Crispy Lemon-Dill Baked Cod with Garlic Herb Quinoa
Healthy & Low-CalorieMain DishesQuick & Easy (30-Min)

Crispy Lemon-Dill Baked Cod with Garlic Herb Quinoa

by Linda August 20, 2026
written by Linda

Elevate your dinner experience with this Crispy Lemon-Dill Baked Cod, a dish that marries the zest of lemon with the freshness of dill. This baked cod is golden and crispy on the outside while remaining tender and flaky within, making it a delightful centerpiece for any meal.

Paired with Garlic Herb Quinoa, this meal is not just delicious but also packed with nutrients. The quinoa absorbs the flavors of garlic and herbs, creating a satisfying bed for the cod. This recipe is a quick and healthy option for busy weeknights or when entertaining guests.

Crispy Lemon-Dill Baked Cod with Garlic Herb Quinoa

Crispy Lemon-Dill Baked Cod with Garlic Herb Quinoa

Serves: 4 Prep Time: 15 minutes Cooking Time: 20 minutes 20 minutes
Nutrition facts: 350 calories 12g fat
Rating: 5.0/5
( 1 voted )
Pin
Print

Ingredients

INGREDIENTS

  • 4 cod fillets (6 oz each)
  • 1 lemon (zested and juiced)
  • 1/4 cup fresh dill (chopped)
  • 1/2 cup breadcrumbs
  • 1/4 cup grated Parmesan cheese
  • 2 tablespoons olive oil
  • Salt and pepper to taste
  • 1 cup quinoa
  • 2 cups vegetable broth
  • 3 cloves garlic (minced)
  • 1 teaspoon dried oregano
  • 1 teaspoon dried thyme

Instructions

  1. Preheat your oven to 400°F (200°C).
  2. In a bowl, combine breadcrumbs, Parmesan cheese, lemon zest, dill, olive oil, salt, and pepper to create the coating.
  3. Pat the cod fillets dry with paper towels and place them on a baking sheet lined with parchment paper.
  4. Spread the breadcrumb mixture evenly over each cod fillet, pressing gently to adhere.
  5. Bake in the preheated oven for 15-20 minutes or until the cod is cooked through and the crust is golden brown.
  6. Meanwhile, rinse the quinoa under cold water and drain well.
  7. In a medium saucepan, combine the quinoa, vegetable broth, minced garlic, oregano, and thyme. Bring to a boil, then reduce heat to low, cover, and simmer for 15 minutes or until the quinoa is fluffy and liquid is absorbed.
  8. Fluff the quinoa with a fork and season with salt and pepper to taste.
  9. Serve the crispy baked cod over a bed of garlic herb quinoa, garnished with additional dill and lemon wedges. Enjoy!

Notes

For a gluten-free option, substitute breadcrumbs with crushed gluten-free crackers.

For the crispiest cod, ensure your oven is fully preheated, and consider using a wire rack on top of the baking sheet to allow air circulation. If you’re looking for variations, try swapping out the dill for fresh parsley or tarragon for a different flavor profile.

Leftover cod can be stored in an airtight container in the refrigerator for up to 2 days. Reheat gently in the oven to maintain its crispy texture. The quinoa also makes a great lunch option; simply warm it up or enjoy it cold in a salad!

August 20, 2026 0 comments
0 FacebookTwitterPinterestPocketEmail
Savory Smoked Gouda and Herb Puff Pastry Twists
Appetizers & SnacksQuick & Easy (30-Min)Vegetarian

Savory Smoked Gouda and Herb Puff Pastry Twists

by Linda August 20, 2026
written by Linda

Indulge in the delightful crunch and rich flavor of these Savory Smoked Gouda and Herb Puff Pastry Twists. The combination of buttery, flaky pastry with the smoky depth of Gouda and the freshness of herbs creates an irresistible treat that’s perfect for entertaining or a cozy night in.

These twists are incredibly easy to make and can be ready in no time. They are not only visually stunning, but the aroma of baked herbs and cheese wafting through your kitchen is simply enchanting. Serve them warm with a dipping sauce of your choice for an elevated snacking experience.

Savory Smoked Gouda and Herb Puff Pastry Twists

Savory Smoked Gouda and Herb Puff Pastry Twists

Serves: 4-6 Prep Time: 15 minutes Cooking Time: 20 minutes 20 minutes
Nutrition facts: 250 calories 18g fat
Rating: 5.0/5
( 1 voted )
Pin
Print

Ingredients

INGREDIENTS

  • 1 sheet puff pastry, thawed
  • 1 cup smoked Gouda cheese, shredded
  • 1 tablespoon fresh chives, chopped
  • 1 tablespoon fresh parsley, chopped
  • 1 egg, beaten (for egg wash)
  • Salt and pepper to taste
  • Flour for dusting

Instructions

  1. Preheat the oven to 400°F (200°C) and line a baking sheet with parchment paper.
  2. On a lightly floured surface, roll out the puff pastry sheet to smooth out any creases.
  3. Cut the pastry into strips, about 1 inch wide.
  4. In a bowl, combine the shredded smoked Gouda cheese, chives, parsley, salt, and pepper.
  5. Place a small amount of the cheese mixture along one edge of each pastry strip.
  6. Fold the pastry over to encase the cheese mixture, pressing the edges to seal. Twist each strip gently to create a spiral shape.
  7. Brush each twist with the beaten egg to give them a golden color while baking.
  8. Arrange the twists on the prepared baking sheet, leaving space between each one.
  9. Bake in the preheated oven for 15-20 minutes, or until golden brown and puffed up.
  10. Remove from the oven and let cool slightly before serving.

Notes

Tip: For a touch of heat, add a pinch of red pepper flakes to the cheese mixture!

For variations, try different cheese like aged cheddar or fontina for a unique taste. You can also experiment with herbs such as thyme or rosemary for a different flavor profile.

Be cautious not to overfill the pastry with cheese, as it can ooze out while baking. Ensure the edges are well sealed for the best results. Store any leftovers in an airtight container in the refrigerator and reheat in the oven for a few minutes to regain their crispness.

August 20, 2026 0 comments
0 FacebookTwitterPinterestPocketEmail
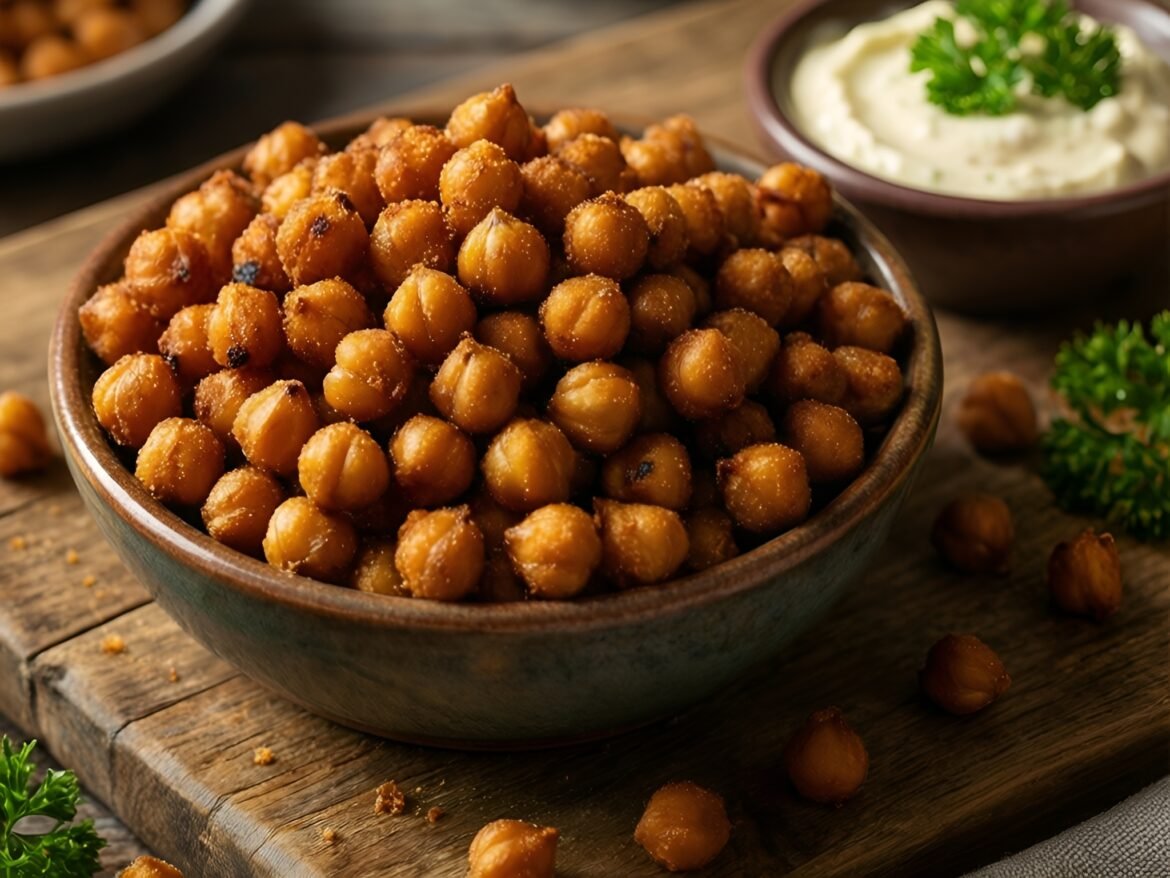
Crispy Spicy Chickpea Crunchers with Garlic Aioli
Appetizers & SnacksGluten-FreeQuick & Easy (30-Min)Vegan

Crispy Spicy Chickpea Crunchers with Garlic Aioli

by Linda August 20, 2026
written by Linda

If you’re looking for a crunchy, spicy snack that’s packed with flavor, these Crispy Spicy Chickpea Crunchers are just the ticket. Roasted to perfection, each chickpea is crispy on the outside and tender on the inside, delivering a delightful crunch with a kick of spice. Paired with a smooth and creamy garlic aioli, these bites are perfect for entertaining or as a healthy snack.

The secret to achieving the perfect crunch lies in roasting the chickpeas until they are golden brown. A combination of spices not only enhances the flavor but also adds an exciting heat. This dish is simple to prepare and makes for a great appetizer or snack option that everyone will love!

Crispy Spicy Chickpea Crunchers with Garlic Aioli

Crispy Spicy Chickpea Crunchers with Garlic Aioli

Serves: 4 Prep Time: 10 minutes Cooking Time: 30 minutes 30 minutes
Nutrition facts: 200 calories 12g fat
Rating: 5.0/5
( 1 voted )
Pin
Print

Ingredients

INGREDIENTS

  • 1 can (15 oz) chickpeas, drained and rinsed
  • 2 tablespoons olive oil
  • 1 teaspoon smoked paprika
  • 1/2 teaspoon cayenne pepper
  • 1/2 teaspoon garlic powder
  • 1/2 teaspoon onion powder
  • Salt and pepper to taste
  • For the Garlic Aioli:
  • 1/2 cup mayonnaise
  • 2 cloves garlic, minced
  • 1 tablespoon lemon juice
  • Salt to taste

Instructions

  1. Preheat the oven to 400°F (200°C).
  2. Pat the chickpeas dry with a paper towel to remove excess moisture.
  3. In a mixing bowl, combine the chickpeas, olive oil, smoked paprika, cayenne pepper, garlic powder, onion powder, salt, and pepper. Toss until chickpeas are evenly coated.
  4. Spread the chickpeas on a baking sheet in a single layer.
  5. Roast in the preheated oven for 25-30 minutes or until golden brown and crispy, shaking the pan halfway through for even cooking.
  6. Meanwhile, prepare the garlic aioli by mixing the mayonnaise, minced garlic, lemon juice, and salt in a small bowl until well combined.
  7. Once the chickpeas are crispy, remove them from the oven and let them cool slightly before serving with the garlic aioli. Enjoy!

Notes

Tip: For extra flavor, try adding fresh herbs like parsley or chives to the garlic aioli before serving.

For the crispiest chickpeas, make sure to dry them thoroughly before roasting. You can also experiment with different spices such as smoked paprika or cumin for a unique flavor profile.

Store leftover chickpeas in an airtight container at room temperature for up to 3 days. Keep in mind that they may lose some of their crunch over time, so enjoy them fresh!

If you’re looking for a vegan alternative to the garlic aioli, simply replace the mayonnaise with silken tofu blended with garlic and lemon juice for a creamy dip.

August 20, 2026 0 comments
0 FacebookTwitterPinterestPocketEmail
Crunchy Banana-Oatmeal Breakfast Muffins with Walnuts
Breakfast & BrunchHealthy & Low-CalorieQuick & Easy (30-Min)Vegetarian

Crunchy Banana-Oatmeal Breakfast Muffins with Walnuts

by Linda August 20, 2026
written by Linda

These Crunchy Banana-Oatmeal Breakfast Muffins are a delightful and nutritious start to your morning. Made with ripe bananas, wholesome oats, and a hint of cinnamon, each muffin is a perfect balance of flavor and texture.

The addition of walnuts provides a satisfying crunch while also boosting the nutritional profile. Whether you’re rushing out the door or enjoying a leisurely breakfast at home, these muffins are a delicious option that will keep you fueled throughout the day.

Crunchy Banana-Oatmeal Breakfast Muffins with Walnuts

Crunchy Banana-Oatmeal Breakfast Muffins with Walnuts

Serves: 12 Prep Time: 15 minutes Cooking Time: 25 minutes 25 minutes
Nutrition facts: 180 calories 8g fat
Rating: 5.0/5
( 1 voted )
Pin
Print

Ingredients

INGREDIENTS

  • 2 ripe bananas, mashed
  • 1 cup rolled oats
  • 1/2 cup whole wheat flour
  • 1/2 cup brown sugar
  • 1/4 cup vegetable oil
  • 1/2 cup milk (or plant-based milk)
  • 2 eggs
  • 1 teaspoon vanilla extract
  • 1 teaspoon baking powder
  • 1/2 teaspoon baking soda
  • 1/2 teaspoon ground cinnamon
  • 1/4 teaspoon salt
  • 1/2 cup chopped walnuts

Instructions

  1. Preheat your oven to 350°F (175°C) and line a muffin tin with paper liners or grease with non-stick spray.
  2. In a large bowl, combine the mashed bananas, rolled oats, whole wheat flour, brown sugar, vegetable oil, milk, eggs, and vanilla extract. Mix until well combined.
  3. In a separate bowl, whisk together the baking powder, baking soda, cinnamon, and salt.
  4. Gradually add the dry ingredients to the wet mixture, stirring until just combined. Be careful not to overmix.
  5. Gently fold in the chopped walnuts, reserving a few for topping if desired.
  6. Scoop the batter evenly into the prepared muffin tin, filling each cup about 3/4 full. Top with reserved walnuts if using.
  7. Bake in the preheated oven for 20-25 minutes, or until a toothpick inserted into the center comes out clean.
  8. Let the muffins cool in the pan for a few minutes before transferring them to a wire rack to cool completely.

Notes

Storage: Store muffins in an airtight container at room temperature for up to 3 days, or freeze for up to 3 months.

For the best flavor, use overripe bananas as they are sweeter and mash more easily. You can also substitute walnuts with pecans or almonds if you prefer. These muffins freeze well, so you can make a big batch and store them for quick breakfasts throughout the week.

To reheat, simply pop them in the microwave for 15-20 seconds or warm them in the oven for a few minutes at 350°F (175°C). Enjoy them plain or with a spread of almond butter for an extra treat!

August 20, 2026 0 comments
0 FacebookTwitterPinterestPocketEmail
Newer Posts
Older Posts

Recent Posts

  • Zesty Lemon-Lavender Ricotta Toasts

    November 5, 2026
  • Coconut Chai Oatmeal Paradise Bowls

    November 5, 2026
  • Refreshing Minty Pineapple Coconut Bliss

    November 4, 2026
  • Festive Spiced Apple Cider Sparkler

    November 4, 2026
  • Chilled Cucumber Melon Delight

    November 4, 2026

About Me

About Me

I'm Linda, a health professional, university graduate, and author sharing tested, easy-to-follow recipes made from simple, everyday ingredients. Based in Finland, I bring together my culinary training, love of travel, and home-cooked roots to help you cook confidently, on any budget.

Products

  • Spooky Creative Starry Sky Ceramic Mug Spooky Creative Starry Sky Ceramic Mug 10,00 €

Categories

  • Appetizers & Snacks (339)
  • Breakfast & Brunch (286)
  • Desserts & Baking (360)
  • Drinks & Beverages (279)
  • Gluten-Free (433)
  • Grilling & BBQ (12)
  • Healthy & Low-Calorie (385)
  • Holiday & Seasonal (37)
  • Kid-Friendly (495)
  • Main Dishes (370)
  • Quick & Easy (30-Min) (1,498)
  • Slow Cooker & Instant Pot (4)
  • Soups & Salads (223)
  • Vegan (370)
  • Vegetarian (1,207)

About Me

I'm Linda, a health professional and food writer sharing tested, easy-to-follow recipes made from simple ingredients.

Email: jspiceygiftstv@gmail.com

Useful Links

  • Home
  • About
  • Contact
  • Free Cookbooks
  • Terms and Conditions
  • Privacy Policy

Newsletter

Subscribe to to our Newsletter to stay updated with all our recipes.

Recent Posts

  • Zesty Lemon-Lavender Ricotta Toasts

    November 5, 2026
  • Coconut Chai Oatmeal Paradise Bowls

    November 5, 2026
  • Instagram
  • Pinterest
  • Youtube
  • Tiktok

@2026 - All Right Reserved. Designed and Developed by JSpiceyGifts

J Spicey Gifts
  • Home
  • Recipes
    • Breakfast & Brunch
    • Appetizers & Snacks
    • Main Dishes
    • Soups & Salads
    • Desserts & Baking
    • Drinks & Beverages
  • Categories
    • Vegetarian
    • Vegan
    • Gluten-Free
    • Quick & Easy (30-Min)
    • Slow Cooker & Instant Pot
    • Grilling & BBQ
    • Healthy & Low-Calorie
    • Holiday & Seasonal
    • Kid-Friendly
  • About
  • Contact

Shopping Cart

Close

No products in the cart.

Close