J Spicey Gifts
  • Home
  • Recipes
    • Breakfast & Brunch
    • Appetizers & Snacks
    • Main Dishes
    • Soups & Salads
    • Desserts & Baking
    • Drinks & Beverages
  • Categories
    • Vegetarian
    • Vegan
    • Gluten-Free
    • Quick & Easy (30-Min)
    • Slow Cooker & Instant Pot
    • Grilling & BBQ
    • Healthy & Low-Calorie
    • Holiday & Seasonal
    • Kid-Friendly
  • About
  • Contact
Top Posts
Zesty Lemon-Thyme Grilled Salmon with Colorful Roasted Veggie...
Fiery Harissa Cauliflower Steaks with Garlic Tahini Drizzle
Savory Creamy Tuscan Garlic Shrimp Pasta Bake
Flavorful Smoky Honey-Garlic Glazed Tofu Stir-Fry
Exquisite Moroccan-Spiced Chicken with Apricot Tagine
Crispy Herb-Infused Polenta Fries with Zesty Aioli
Smoky Chipotle Avocado Nacho Bites
Vibrant Sunrise Quinoa Power Bowls with Homemade Berry...
Decadent Cinnamon Swirl Banana Crumb Bake
Refreshing Lavender Citrus Sparkling Elixir for Summer Sips
J Spicey Gifts
  • Home
  • Recipes
    • Breakfast & Brunch
    • Appetizers & Snacks
    • Main Dishes
    • Soups & Salads
    • Desserts & Baking
    • Drinks & Beverages
  • Categories
    • Vegetarian
    • Vegan
    • Gluten-Free
    • Quick & Easy (30-Min)
    • Slow Cooker & Instant Pot
    • Grilling & BBQ
    • Healthy & Low-Calorie
    • Holiday & Seasonal
    • Kid-Friendly
  • About
  • Contact
J Spicey Gifts
J Spicey Gifts
  • Home
  • Recipes
    • Breakfast & Brunch
    • Appetizers & Snacks
    • Main Dishes
    • Soups & Salads
    • Desserts & Baking
    • Drinks & Beverages
  • Categories
    • Vegetarian
    • Vegan
    • Gluten-Free
    • Quick & Easy (30-Min)
    • Slow Cooker & Instant Pot
    • Grilling & BBQ
    • Healthy & Low-Calorie
    • Holiday & Seasonal
    • Kid-Friendly
  • About
  • Contact
Copyright 2021 - All Right Reserved
Zesty Chili Citrus Sparkler
Drinks & BeveragesHealthy & Low-CalorieQuick & Easy (30-Min)

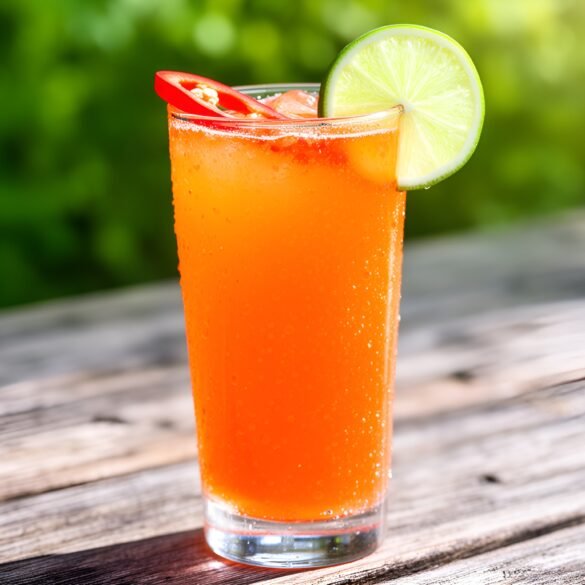
Zesty Chili Citrus Sparkler

by Linda July 31, 2026
written by Linda

Beat the heat with the Zesty Chili Citrus Sparkler, a refreshing drink that combines vibrant citrus flavors with a hint of spice. This effervescent beverage is perfect for summer gatherings or a cozy evening on the patio.

What sets this drink apart is the balance of tangy citrus, sparkling water, and a subtle kick from chili. It’s an excellent way to impress guests while providing a unique twist on traditional sparkling drinks.
Zesty Chili Citrus Sparkler

Zesty Chili Citrus Sparkler

Serves: 4 Prep Time: 10 minutes Cooking Time: 0 minutes 0 minutes
Nutrition facts: 90 calories 0g fat
Rating: 5.0/5
( 1 voted )
Pin
Print

Ingredients

INGREDIENTS

  • 1 cup fresh orange juice
  • 1/2 cup fresh lime juice
  • 1-2 teaspoons chili powder (adjust to taste)
  • 1 tablespoon agave syrup (optional)
  • 4 cups sparkling water
  • Ice cubes
  • Orange and lime slices for garnish
  • Fresh chili slices for garnish (optional)

Instructions

  1. Juice the oranges and limes into a measuring cup until you have the required amount of juice.
  2. In a large pitcher, combine the fresh citrus juices with chili powder and agave syrup, if using. Stir well to combine.
  3. Fill serving glasses with ice cubes and pour the citrus mixture over the ice, filling each glass halfway.
  4. Top off each glass with sparkling water, stirring gently to mix.
  5. Garnish with slices of orange, lime, and fresh chili if desired. Serve immediately.

Notes

Storage: Best enjoyed fresh, but the citrus mixture can be made a few hours in advance. Just add the sparkling water right before serving.

For an extra burst of flavor, consider adding fresh herbs like mint or basil as a garnish. You can also experiment with different citrus fruits such as blood oranges or grapefruits for a unique twist.

To make this drink even more refreshing, chill your serving glasses beforehand. If you prefer a sweeter drink, feel free to add a splash of simple syrup or agave nectar to taste.


July 31, 2026 0 comments
0 FacebookTwitterPinterestPocketEmail
Spiced Gingerbread Cocoa Crinkle Cookies
Desserts & BakingHoliday & SeasonalKid-FriendlyVegetarian

Spiced Gingerbread Cocoa Crinkle Cookies

by Linda July 30, 2026
written by Linda

These Spiced Gingerbread Cocoa Crinkle Cookies are the ultimate holiday delight, combining the warm flavors of gingerbread with rich cocoa for an irresistible treat. With their soft, chewy centers and crinkly powdered sugar tops, these cookies not only taste amazing but look festive too!

The secret to their unique flavor lies in the blend of spices—ginger, cinnamon, and nutmeg—perfectly complementing the cocoa. These cookies are ideal for sharing with family and friends during the holiday season, or for enjoying with a cozy cup of hot cocoa.

Spiced Gingerbread Cocoa Crinkle Cookies

Spiced Gingerbread Cocoa Crinkle Cookies

Serves: 24 Prep Time: 15 minutes Cooking Time: 10 minutes 10 minutes
Nutrition facts: 120 calories 5g fat
Rating: 5.0/5
( 1 voted )
Pin
Print

Ingredients

INGREDIENTS

  • 1 cup all-purpose flour
  • 1/2 cup unsweetened cocoa powder
  • 1 teaspoon baking powder
  • 1/2 teaspoon baking soda
  • 1/2 teaspoon salt
  • 1 tablespoon ground ginger
  • 1 teaspoon ground cinnamon
  • 1/2 teaspoon ground nutmeg
  • 1/4 cup unsalted butter, softened
  • 1/2 cup brown sugar, packed
  • 1/4 cup granulated sugar
  • 1 large egg
  • 1 teaspoon vanilla extract
  • 1/4 cup molasses
  • 1/2 cup powdered sugar for dusting

Instructions

  1. Preheat the oven to 350°F (175°C) and line a baking sheet with parchment paper.
  2. In a bowl, whisk together the flour, cocoa powder, baking powder, baking soda, salt, ginger, cinnamon, and nutmeg. Set aside.
  3. In a large mixing bowl, cream together the softened butter, brown sugar, and granulated sugar until light and fluffy.
  4. Beat in the egg, vanilla extract, and molasses until well combined.
  5. Gradually add the dry ingredients to the wet ingredients, mixing until just combined.
  6. Chill the dough in the refrigerator for 30 minutes to make it easier to handle.
  7. Scoop tablespoon-sized amounts of dough, roll into balls, and then roll each ball in powdered sugar to coat thoroughly.
  8. Place the dough balls onto the prepared baking sheet, spacing them a few inches apart.
  9. Bake for 8-10 minutes or until the edges are set but the centers are still soft. Let cool on the pan for a few minutes before transferring to a wire rack to cool completely.

Notes

Storage: Keep cookies in an airtight container at room temperature for up to a week. They also freeze nicely for up to 3 months.

For an even richer chocolate flavor, you can substitute half of the cocoa powder with melted dark chocolate. If you prefer a lighter version, consider reducing the sugar slightly. These cookies also freeze well; just store them in an airtight container and thaw them at room temperature before serving.

Common mistakes to avoid include overbaking—these cookies should be soft in the center when pulled from the oven. For variations, try adding white chocolate chips or chopped nuts for added texture.

July 30, 2026 0 comments
0 FacebookTwitterPinterestPocketEmail
Decadent Velvet-CrĆØme Raspberry Swirl Brownies
Desserts & BakingKid-FriendlyVegetarian

Decadent Velvet-CrĆØme Raspberry Swirl Brownies

by Linda July 30, 2026
written by Linda

These Velvet-CrĆØme Raspberry Swirl Brownies are a decadent treat that combines the rich, fudgy texture of classic brownies with a vibrant raspberry crĆØme swirl. Perfect for any occasion, these brownies are not just a dessert; they’re a statement piece that will impress your guests.

The key to achieving that luscious swirl lies in the simple raspberry purƩe, which contrasts beautifully with the deep chocolate flavor. With just a few ingredients, you can create a dessert that looks as good as it tastes!

Decadent Velvet-CrĆØme Raspberry Swirl Brownies

Decadent Velvet-CrĆØme Raspberry Swirl Brownies

Serves: 12 Prep Time: 20 minutes Cooking Time: 30 minutes 30 minutes
Nutrition facts: 240 calories 12g fat
Rating: 5.0/5
( 1 voted )
Pin
Print

Ingredients

INGREDIENTS

  • 1/2 cup unsalted butter
  • 1 cup granulated sugar
  • 2 large eggs
  • 1 teaspoon vanilla extract
  • 1/3 cup unsweetened cocoa powder
  • 1/2 cup all-purpose flour
  • 1/4 teaspoon salt
  • 1/4 teaspoon baking powder
  • 1 cup fresh raspberries
  • 2 tablespoons powdered sugar

Instructions

  1. Preheat your oven to 350°F (175°C) and grease a 9x9 inch baking pan.
  2. In a medium saucepan, melt the butter over low heat. Remove from heat and stir in the granulated sugar, eggs, and vanilla until well blended.
  3. Mix in the cocoa, flour, salt, and baking powder until just combined, being careful not to overmix.
  4. Pour the brownie batter into the prepared pan and spread it evenly using a spatula.
  5. In a small bowl, mash the raspberries with powdered sugar until you have a chunky purƩe. Drop spoonfuls of the raspberry mixture onto the brownie batter.
  6. Using a knife or skewer, gently swirl the raspberry purƩe into the brownie batter to create a marbled effect.
  7. Bake in the preheated oven for 25-30 minutes, or until the edges are set and a toothpick inserted in the center comes out with a few moist crumbs.
  8. Allow the brownies to cool in the pan before slicing into squares and serving.

Notes

Tip: To enhance the raspberry flavor, you can add a teaspoon of lemon juice to the purƩe.

For the best results, ensure your butter and eggs are at room temperature before starting. This helps create a smoother batter. If fresh raspberries aren’t available, frozen raspberries work just as well; just thaw and drain them before use.

Store any leftovers in an airtight container at room temperature for up to 3 days or in the fridge for up to a week. These brownies also freeze well; just wrap them tightly in plastic wrap and store in a freezer-safe bag.

July 30, 2026 0 comments
0 FacebookTwitterPinterestPocketEmail
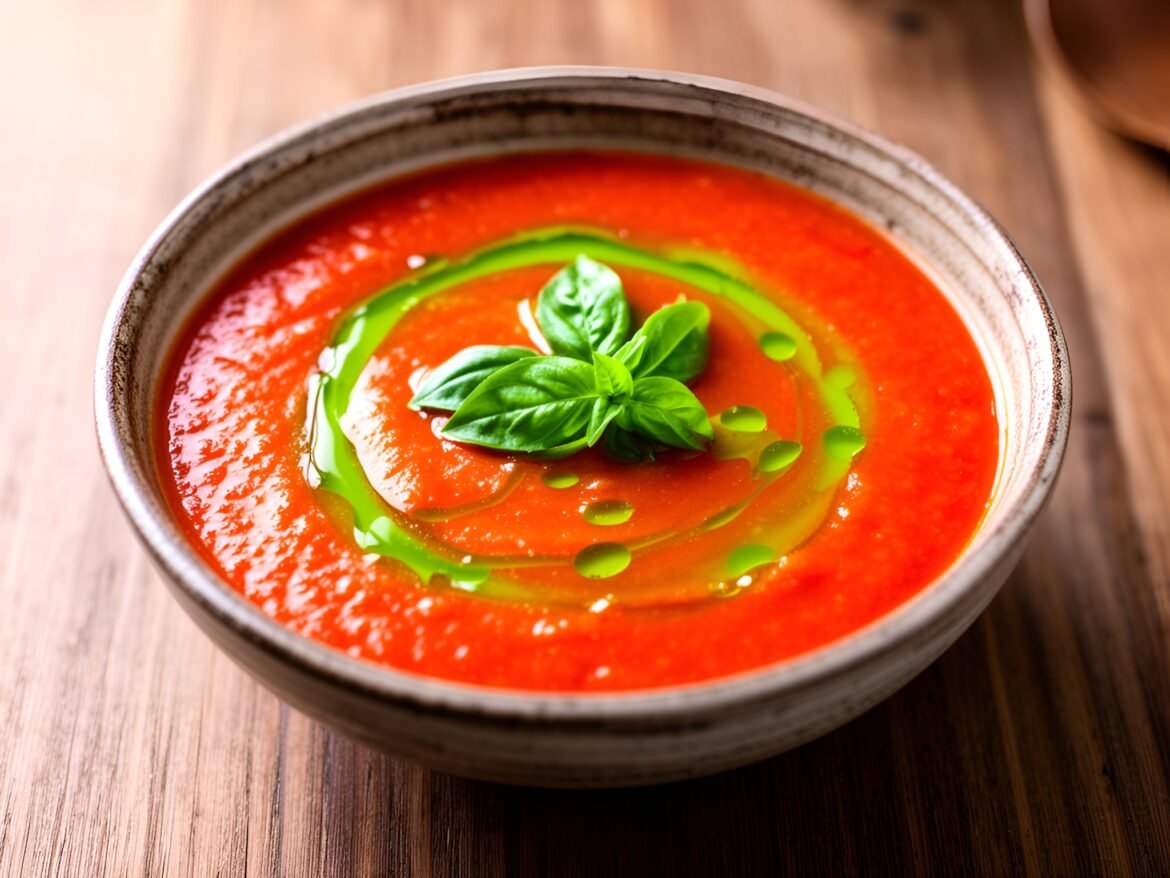
Smoky Roasted Bell Pepper & Tomato Soup with Basil Oil Drizzle
Gluten-FreeHealthy & Low-CalorieSoups & SaladsVegetarian

Smoky Roasted Bell Pepper & Tomato Soup with Basil Oil Drizzle

by Linda July 30, 2026
written by Linda

Indulge in a bowl of comfort with this Smoky Roasted Bell Pepper & Tomato Soup, a delightful blend of sweet roasted peppers and ripe tomatoes. The roasting process enhances the natural sweetness of the vegetables, while the smoky undertones add depth and richness.

This soup is not just about the flavors; it’s also beautifully finished with a drizzle of homemade basil oil, which lends a fresh, herby brightness that balances the richness perfectly. It’s an ideal dish for chilly evenings, and it pairs wonderfully with crusty bread.

Smoky Roasted Bell Pepper & Tomato Soup with Basil Oil Drizzle

Smoky Roasted Bell Pepper & Tomato Soup with Basil Oil Drizzle

Serves: 4 Prep Time: 15 minutes Cooking Time: 30 minutes 30 minutes
Nutrition facts: 190 calories 14g fat
Rating: 5.0/5
( 1 voted )
Pin
Print

Ingredients

INGREDIENTS

  • 4 large red bell peppers, halved and seeds removed
  • 6 ripe tomatoes, quartered
  • 1 medium onion, chopped
  • 4 cloves garlic, minced
  • 2 tablespoons olive oil
  • 1 teaspoon smoked paprika
  • Salt and pepper to taste
  • 2 cups vegetable broth
  • Fresh basil leaves for the oil
  • 1/2 cup olive oil (for the basil oil)

FOR THE BASIL OIL

  • 1/2 cup fresh basil leaves
  • 1/2 cup olive oil

Instructions

  1. Preheat the oven to 425°F (220°C).
  2. Place the halved bell peppers, quartered tomatoes, onion, and minced garlic on a baking sheet. Drizzle with 2 tablespoons of olive oil, smoked paprika, salt, and pepper. Toss to coat evenly.
  3. Roast in the preheated oven for 25-30 minutes, until the vegetables are tender and slightly charred.
  4. Transfer the roasted vegetables to a blender or food processor. Add the vegetable broth and blend until smooth. Adjust seasoning as needed.
  5. To make the basil oil, combine 1/2 cup of basil leaves and 1/2 cup of olive oil in a small saucepan. Heat over low heat for about 5 minutes to infuse the oil, then remove from heat and let cool. Strain the oil into a jar, discarding the solids.
  6. Ladle the soup into bowls and drizzle with the basil oil before serving.

Notes

Tip: For a vegan version, ensure the vegetable broth is plant-based. This soup freezes well; store in portions for quick meals later!

For an extra kick, consider adding a pinch of red pepper flakes to the soup as it simmers. If you want a creamier texture, blend in a splash of heavy cream or coconut milk after pureeing the soup.

Store any leftovers in an airtight container in the refrigerator for up to three days. Reheat gently on the stove, adding a splash of water if needed to reach the desired consistency. Enjoy this soup with a slice of toasted sourdough for the perfect meal!

July 30, 2026 0 comments
0 FacebookTwitterPinterestPocketEmail
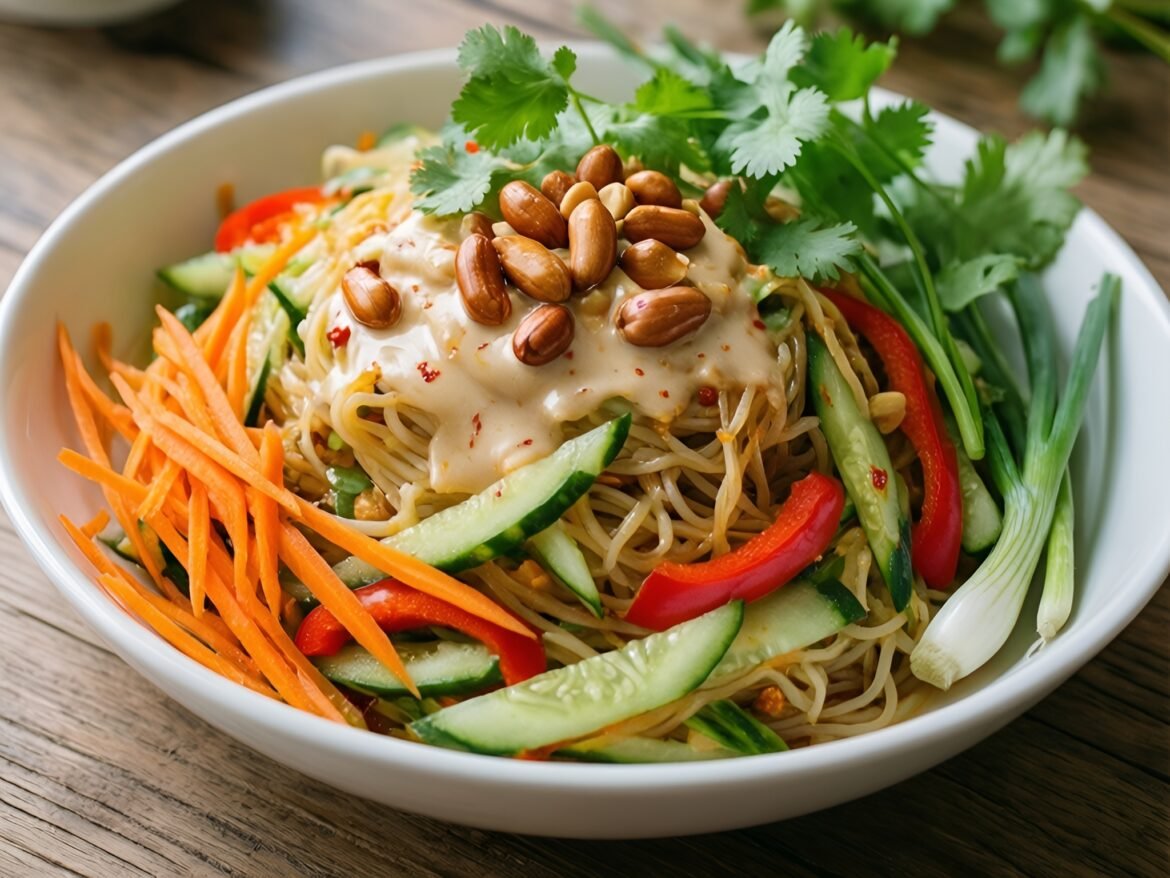
Tangy Spicy Thai Coconut Noodle Salad with Crunchy Peanuts
Gluten-FreeMain DishesQuick & Easy (30-Min)Vegan

Tangy Spicy Thai Coconut Noodle Salad with Crunchy Peanuts

by Linda July 30, 2026
written by Linda

Enjoy a burst of flavors with this Spicy Thai Coconut Noodle Salad that brings together the creaminess of coconut, vibrant vegetables, and the crunch of peanuts. This dish is not only quick to prepare but also a delightful balance of spicy, tangy, and sweet notes that will make your taste buds dance.

Using rice noodles as a base, this salad is tossed in a zesty coconut dressing, making it gluten-free and perfect for warm weather meals. The incorporation of fresh herbs and vegetables elevates each bite, delivering a refreshing experience that is both satisfying and wholesome.

Tangy Spicy Thai Coconut Noodle Salad with Crunchy Peanuts

Tangy Spicy Thai Coconut Noodle Salad with Crunchy Peanuts

Serves: 4 Prep Time: 15 minutes Cooking Time: 10 minutes 10 minutes
Nutrition facts: 320 calories 18g fat
Rating: 5.0/5
( 1 voted )
Pin
Print

Ingredients

INGREDIENTS

  • 8 oz rice noodles
  • 1 cup shredded carrots
  • 1 red bell pepper, thinly sliced
  • 1 cucumber, julienned
  • 1 cup fresh cilantro, chopped
  • 1/2 cup roasted peanuts, chopped
  • 1/4 cup green onions, sliced

FOR THE DRESSING

  • 1 can (13.5 oz) coconut milk
  • 2 tbsp lime juice
  • 2 tbsp soy sauce
  • 1 tbsp fish sauce
  • 1 tbsp brown sugar
  • 1-2 tbsp chili paste (to taste)

Instructions

  1. Cook the rice noodles according to package instructions, then drain and rinse under cold water to stop cooking.
  2. In a large bowl, combine the shredded carrots, sliced bell pepper, julienned cucumber, cilantro, and green onions.
  3. In a separate bowl, whisk together all the dressing ingredients until well combined and smooth.
  4. Add the cooled noodles to the vegetable mixture and pour the dressing over it. Toss until everything is well-coated.
  5. Top with chopped peanuts and give it another gentle toss before serving. Enjoy chilled or at room temperature.

Notes

Tip: For a vegan version, ensure that the fish sauce is omitted or replaced with soy sauce.

For the best flavor, allow the salad to marinate in the dressing for at least 30 minutes before serving. This will enhance the taste and bring out the freshness of the herbs.

If you prefer a milder version, reduce the amount of chili or use a sweet chili sauce. You can also substitute the peanuts with sesame seeds for a different crunch or add grilled chicken for extra protein.

Store leftovers in an airtight container in the fridge for up to 2 days. Give it a good toss before serving again to refresh the flavors.

July 30, 2026 0 comments
0 FacebookTwitterPinterestPocketEmail
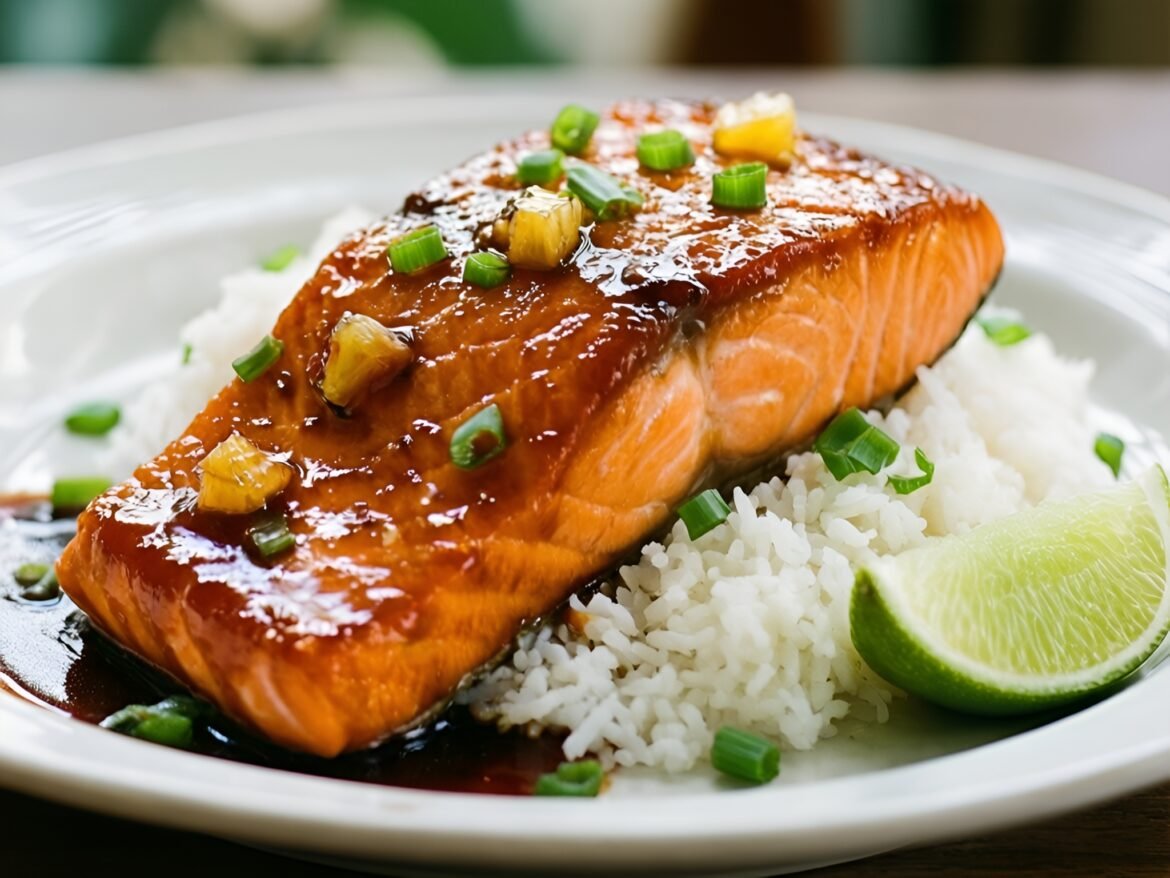
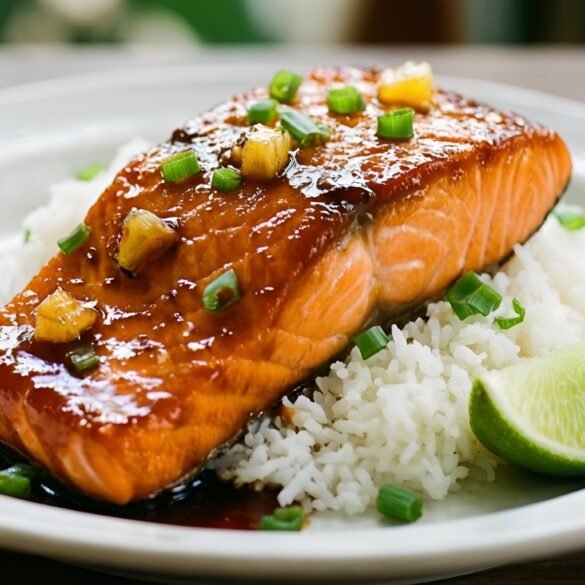
Sweet and Spicy Pineapple Teriyaki Salmon with Coconut Rice
Healthy & Low-CalorieKid-FriendlyMain DishesQuick & Easy (30-Min)

Sweet and Spicy Pineapple Teriyaki Salmon with Coconut Rice

by Linda July 30, 2026
written by Linda

This Sweet and Spicy Pineapple Teriyaki Salmon is a delightful fusion of flavors, combining the rich, tender salmon with a zesty pineapple teriyaki glaze that balances sweetness and spice. The addition of creamy coconut rice complements the dish perfectly, creating a tropical escape right at your dining table.

Perfect for a weeknight dinner or a special occasion, this dish is quick to prepare and packed with nutrients, making it not only delicious but also a healthy choice. The bright colors and enticing aromas will make it a hit with family and friends alike!

Sweet and Spicy Pineapple Teriyaki Salmon with Coconut Rice

Sweet and Spicy Pineapple Teriyaki Salmon with Coconut Rice

Serves: 4 Prep Time: 15 minutes Cooking Time: 20 minutes 20 minutes
Nutrition facts: 450 calories 16g fat
Rating: 5.0/5
( 1 voted )
Pin
Print

Ingredients

INGREDIENTS

  • 4 salmon fillets
  • 1 cup pineapple chunks (fresh or canned)
  • 1/4 cup soy sauce
  • 1/4 cup brown sugar
  • 2 tablespoons rice vinegar
  • 1 tablespoon sriracha (adjust to taste)
  • 1 tablespoon cornstarch
  • 1 cup coconut milk
  • 1 cup jasmine rice
  • 1 cup water
  • Salt and pepper to taste
  • Chopped green onions for garnish

Instructions

  1. In a bowl, mix the soy sauce, brown sugar, rice vinegar, and sriracha to create the teriyaki sauce. Reserve half for serving.
  2. Add cornstarch to the remaining sauce and mix until smooth.
  3. In a skillet over medium heat, add the pineapple chunks and pour in the teriyaki sauce. Cook for about 5 minutes until the sauce thickens and the pineapple caramelizes slightly.
  4. Season the salmon fillets with salt and pepper, then add them to the skillet, skin-side down. Spoon some sauce over the top and let cook for about 6-8 minutes, or until cooked through and flaky.
  5. While the salmon cooks, rinse the jasmine rice under cold water until the water runs clear. Bring 1 cup of water and 1 cup of coconut milk to a boil in a saucepan, add the rice, cover, and simmer for 15 minutes or until rice is tender and liquid is absorbed.
  6. Fluff the coconut rice with a fork and season with salt to taste.
  7. Serve the salmon over a bed of coconut rice, spoon extra teriyaki sauce over the top, and garnish with chopped green onions.

Notes

Tip: For an extra tropical touch, serve with lime wedges and a sprinkle of sesame seeds.

To ensure perfect salmon, look for fillets with even thickness for uniform cooking. If you’re short on time, you can use store-bought teriyaki sauce instead of making your own. For added texture, garnish with toasted coconut flakes or chopped scallions.

Store any leftovers in an airtight container in the fridge for up to 2 days. Reheat gently in the microwave or on the stovetop. Enjoy the salmon over a fresh salad the next day for a light lunch!

July 30, 2026 0 comments
0 FacebookTwitterPinterestPocketEmail
Kid-FriendlyMain DishesQuick & Easy (30-Min)

Savory Maple-Mustard Glazed Chicken Thighs with SautƩed Green Beans

by Linda July 30, 2026
written by Linda

These Savory Maple-Mustard Glazed Chicken Thighs are a delightful balance of sweet and tangy flavors that will elevate your dinner table. The chicken thighs are marinated in a luscious maple-mustard sauce, providing a rich texture and a mouthwatering glaze that caramelizes beautifully during cooking.

Paired with sautƩed green beans, this dish not only bursts with flavor but also presents a colorful plate. The crisp-tender green beans add a fresh crunch that complements the juicy chicken, making it a satisfying meal for any occasion.

Savory Maple-Mustard Glazed Chicken Thighs with SautƩed Green Beans

Serves: 4 Prep Time: 15 minutes Cooking Time: 30 minutes 30 minutes
Nutrition facts: 350 calories 20g fat
Rating: 5.0/5
( 1 voted )
Pin
Print

Ingredients

INGREDIENTS

  • 4 bone-in, skin-on chicken thighs
  • 1/4 cup maple syrup
  • 2 tablespoons Dijon mustard
  • 1 tablespoon apple cider vinegar
  • 1 teaspoon garlic powder
  • Salt and pepper, to taste
  • 2 cups fresh green beans, trimmed
  • 2 tablespoons olive oil
  • 1 clove garlic, minced
  • 1/4 teaspoon red pepper flakes (optional)

Instructions

  1. Preheat your oven to 400°F (200°C).
  2. In a small bowl, whisk together the maple syrup, Dijon mustard, apple cider vinegar, garlic powder, salt, and pepper until well combined.
  3. Place the chicken thighs in a baking dish and pour the maple-mustard glaze over them, ensuring they are well coated.
  4. Bake in the preheated oven for 25-30 minutes, or until the chicken is cooked through and the skin is crispy and caramelized.
  5. While the chicken is baking, heat olive oil in a skillet over medium heat. Add the minced garlic and sautƩ for about 30 seconds until fragrant.
  6. Add the trimmed green beans to the skillet and cook for 5-7 minutes, stirring occasionally, until they are bright green and tender-crisp. Season with salt, pepper, and red pepper flakes if using.
  7. Once the chicken is done, remove it from the oven and let it rest for a few minutes before serving with the sautƩed green beans on the side.

Notes

Tip: For a thicker glaze, simmer the maple-mustard sauce in a small saucepan over low heat until it reduces slightly before using it on the chicken.

For an extra kick, consider adding a pinch of red pepper flakes to the glaze. If you prefer a different cut, chicken breasts can be used instead, though adjust the cooking time as they may cook faster. To store leftovers, refrigerate in an airtight container for up to 3 days. Reheat gently in the oven or on the stovetop to maintain the chicken’s juiciness.

July 30, 2026 0 comments
0 FacebookTwitterPinterestPocketEmail
Kid-FriendlyMain DishesQuick & Easy (30-Min)

Chipotle-Lime Fish Tacos with Fresh Mango Slaw

by Linda July 30, 2026
written by Linda

These Chipotle-Lime Fish Tacos are the perfect combination of spicy and refreshing, making them a delightful option for taco night. The fish is marinated in a spicy chipotle-lime sauce that infuses each piece with a zesty kick, while the mango slaw adds a sweet and crunchy contrast.

This recipe is incredibly easy to prepare and can be on your table in under 30 minutes! The vibrant colors and fresh flavors make these tacos not just a meal, but a festive experience. Serve them with warm tortillas for the ultimate treat!

Chipotle-Lime Fish Tacos with Fresh Mango Slaw

Serves: 4 Prep Time: 15 minutes Cooking Time: 15 minutes 15 minutes
Nutrition facts: 320 calories 10g fat
Rating: 5.0/5
( 1 voted )
Pin
Print

Ingredients

INGREDIENTS

  • 1 lb white fish fillets (such as tilapia or cod)
  • 2 tablespoons chipotle sauce
  • Juice of 2 limes
  • 1 teaspoon ground cumin
  • Salt and pepper to taste
  • 8 small corn or flour tortillas
  • 1 cup shredded cabbage
  • 1 ripe mango, diced
  • 1/4 cup red onion, finely chopped
  • 1/4 cup fresh cilantro, chopped
  • 1 tablespoon honey
  • 1 tablespoon olive oil
  • 1 tablespoon lime juice

Instructions

  1. Preheat your grill or skillet over medium-high heat.
  2. In a bowl, combine the chipotle sauce, lime juice, ground cumin, salt, and pepper. Add the fish fillets and coat them evenly in the marinade. Let sit for 10 minutes.
  3. While the fish is marinating, prepare the mango slaw by mixing the shredded cabbage, diced mango, red onion, cilantro, honey, olive oil, and lime juice in a separate bowl. Season with salt to taste.
  4. Cook the marinated fish on the grill or skillet for about 3-4 minutes per side, or until cooked through and flaky.
  5. Warm the tortillas on the grill or in a dry skillet until pliable.
  6. Assemble the tacos by placing pieces of fish on the tortillas, topping them with the mango slaw, and adding extra cilantro if desired.

Notes

Tip: For added crunch, top your tacos with some sliced radishes or avocado slices.

For a milder version, reduce the amount of chipotle sauce in the marinade. You can also substitute the fish with shrimp or grilled chicken if you prefer. The mango slaw can be made ahead of time and stored in the fridge, allowing the flavors to meld beautifully.

These tacos are best enjoyed fresh, but you can store leftovers in an airtight container for up to 2 days. Reheat the fish gently in a skillet to avoid drying it out.

July 30, 2026 0 comments
0 FacebookTwitterPinterestPocketEmail
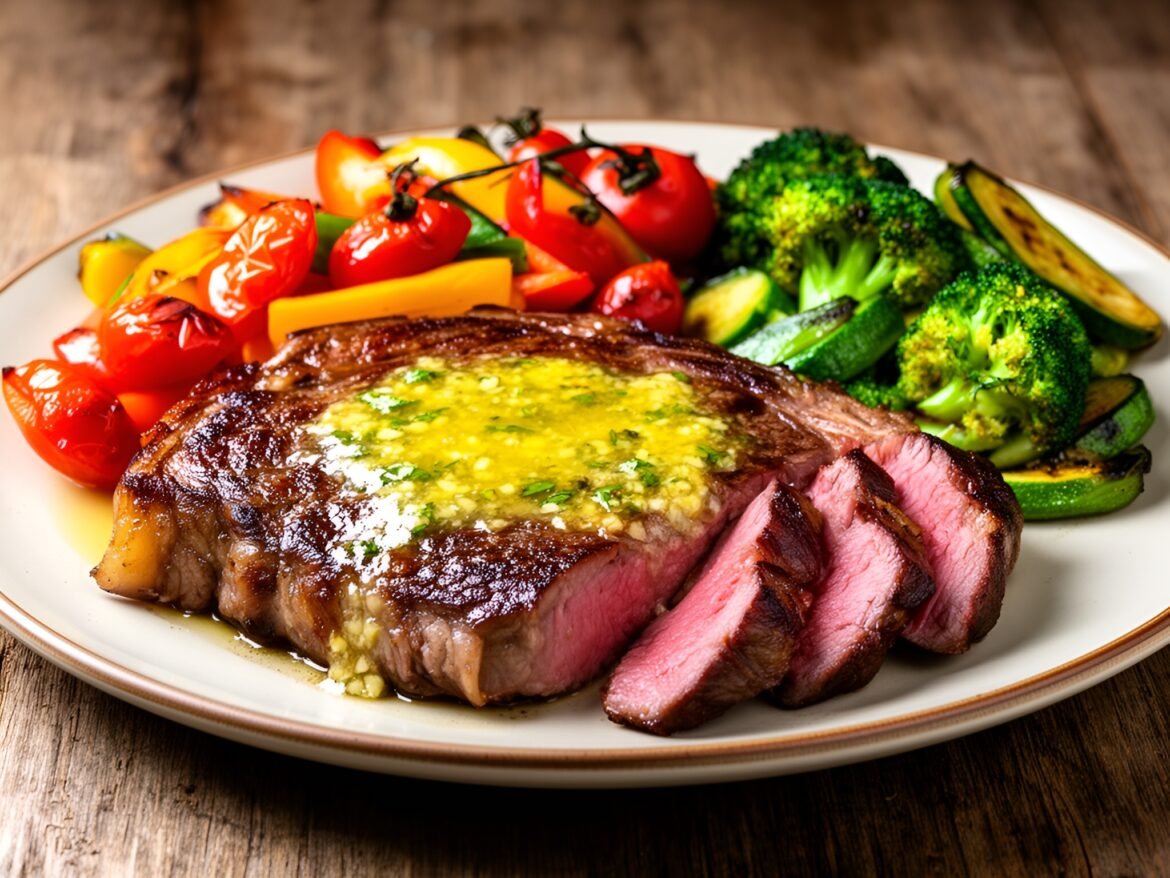
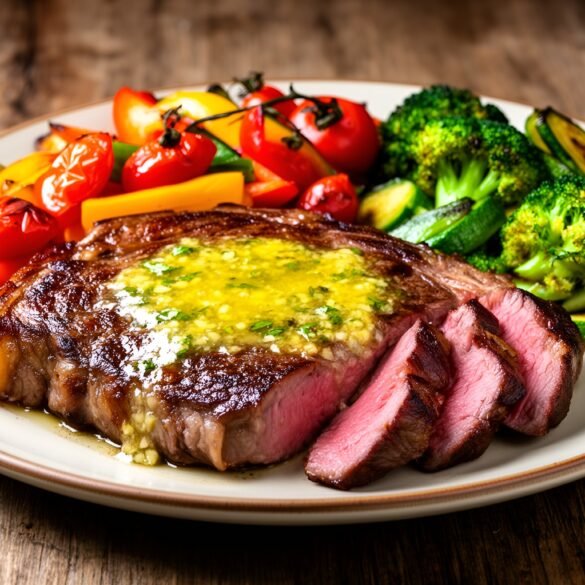
Herb-Infused Garlic Butter Steak with Roasted Rainbow Veggies
Healthy & Low-CalorieMain DishesQuick & Easy (30-Min)

Herb-Infused Garlic Butter Steak with Roasted Rainbow Veggies

by Linda July 30, 2026
written by Linda

This Herb-Infused Garlic Butter Steak with Roasted Rainbow Veggies is a perfect blend of juicy steak and colorful, nutritious vegetables. The garlic butter, enriched with fresh herbs, elevates the steak to a whole new level, making it incredibly tender and flavorful.

Roasting the rainbow veggies not only adds a beautiful presentation but also enhances their natural sweetness. This dish is not just delicious but also quick to prepare, making it an ideal choice for a weeknight dinner or a special occasion.

Herb-Infused Garlic Butter Steak with Roasted Rainbow Veggies

Herb-Infused Garlic Butter Steak with Roasted Rainbow Veggies

Serves: 2 Prep Time: 15 minutes Cooking Time: 25 minutes 25 minutes
Nutrition facts: 600 calories 40g fat
Rating: 5.0/5
( 1 voted )
Pin
Print

Ingredients

INGREDIENTS

  • 2 ribeye steaks
  • 4 tablespoons unsalted butter
  • 4 cloves garlic, minced
  • 1 tablespoon fresh rosemary, chopped
  • 1 tablespoon fresh thyme, chopped
  • Salt and pepper to taste
  • 1 cup cherry tomatoes, halved
  • 1 bell pepper, sliced
  • 1 zucchini, sliced
  • 1 cup broccoli florets
  • 2 tablespoons olive oil

Instructions

  1. Preheat your oven to 425°F (220°C).
  2. In a small bowl, mix the softened butter with minced garlic, rosemary, thyme, salt, and pepper until well combined.
  3. Season both sides of the ribeye steaks with salt and pepper. Heat a skillet over medium-high heat and add 2 tablespoons of the garlic herb butter.
  4. Sear the steaks for 4-5 minutes on each side for medium-rare, then remove from the skillet and let rest.
  5. While the steak is resting, toss the cherry tomatoes, bell pepper, zucchini, and broccoli in olive oil, salt, and pepper on a baking sheet.
  6. Roast the vegetables in the preheated oven for about 15-20 minutes, or until they are tender and slightly caramelized.
  7. Slice the rested steak and serve topped with the remaining garlic herb butter. Arrange the roasted rainbow veggies on the side.

Notes

For best results, allow the steaks to come to room temperature before cooking. This ensures even cooking throughout.

For an extra burst of flavor, consider marinating the steak in the garlic herb butter for a few hours before cooking. If you’re short on time, just a quick rub on the steak will still impart great flavor.

Feel free to swap out the vegetables based on what you have on hand or in season. Asparagus, bell peppers, or sweet potatoes would also work nicely. To store leftovers, keep the steak and veggies in separate airtight containers in the fridge for up to 3 days.

July 30, 2026 0 comments
0 FacebookTwitterPinterestPocketEmail
Tangy BBQ-Lime Chicken Skewers with Pineapple Salsa
Grilling & BBQKid-FriendlyMain Dishes

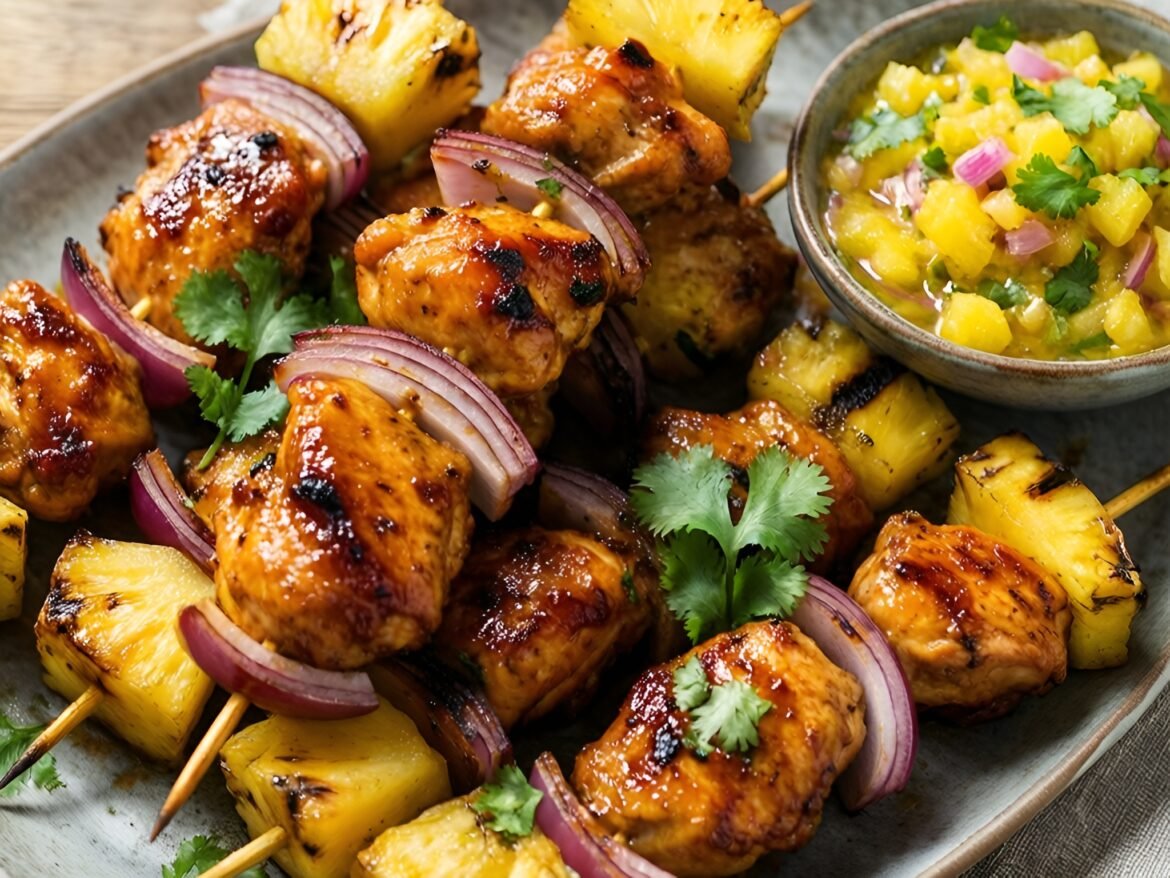
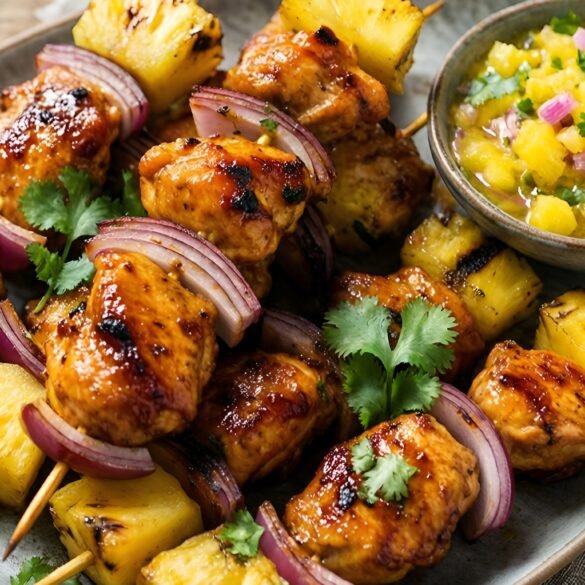
Tangy BBQ-Lime Chicken Skewers with Pineapple Salsa

by Linda July 30, 2026
written by Linda

Looking for a mouthwatering meal that sings with summer flavors? These Tangy BBQ-Lime Chicken Skewers are grilled to perfection and bursting with zest. The marinade, featuring a blend of BBQ sauce and fresh lime juice, tenderizes the chicken while adding a delightful tangy kick. Combined with juicy chunks of pineapple, these skewers are a perfect choice for backyard barbecues or quick weeknight dinners.

The accompanying Pineapple Salsa adds a refreshing touch, with sweet pineapple, crisp red onion, and a hint of cilantro. Together, they create a symphony of flavors that will impress family and friends alike. Get ready to fire up your grill and enjoy this tropical taste sensation!

Tangy BBQ-Lime Chicken Skewers with Pineapple Salsa

Tangy BBQ-Lime Chicken Skewers with Pineapple Salsa

Serves: 4 Prep Time: 20 minutes Cooking Time: 15 minutes 15 minutes
Nutrition facts: 350 calories 8g fat
Rating: 5.0/5
( 1 voted )
Pin
Print

Ingredients

INGREDIENTS

  • 1 lb chicken breast, cut into 1-inch cubes
  • 1/2 cup BBQ sauce
  • Juice of 2 limes
  • 1 pineapple, peeled, cored, and cut into chunks
  • 1 red onion, cut into wedges
  • 1/4 cup fresh cilantro, chopped
  • Salt and pepper, to taste
  • Skewers (wooden or metal)

FOR THE PINEAPPLE SALSA

  • 1 cup fresh pineapple, diced
  • 1/4 cup red onion, finely chopped
  • 1/4 cup cilantro, chopped
  • Juice of 1 lime
  • Salt, to taste

Instructions

  1. In a bowl, mix the BBQ sauce and lime juice. Add the chicken cubes, ensuring they are well-coated. Marinate for at least 30 minutes.
  2. Soak wooden skewers in water for 10-15 minutes to prevent burning, if using.
  3. Alternate threading the marinated chicken, pineapple chunks, and onion wedges onto the skewers.
  4. Preheat the grill to medium-high heat. Lightly oil the grill grates.
  5. Place the skewers on the grill and cook for about 10-15 minutes, turning occasionally, until the chicken is cooked through and has grill marks.
  6. While the chicken cooks, prepare the pineapple salsa by combining the diced pineapple, red onion, cilantro, lime juice, and salt in a bowl. Mix well.
  7. Remove the skewers from the grill and let rest for a few minutes before serving.
  8. Serve the skewers warm with the fresh pineapple salsa on the side.

Notes

Tip: For extra char, grill the skewers directly over the flames for the last 2 minutes of cooking.

For the best flavor, marinate the chicken for at least 30 minutes, but ideally, let it sit in the marinade for a few hours. If you don’t have BBQ sauce on hand, a homemade version with ketchup, vinegar, and spices works great too.

Feel free to substitute chicken thighs for a juicier option, or even use shrimp for a quick cooking alternative. The salsa can be customized by adding diced jalapeƱos for some heat or switching up the herbs with mint instead of cilantro.

Leftover skewers can be stored in the fridge for up to three days and reheated on the grill or in the oven. Serve them on a bed of rice or alongside a fresh salad for a complete meal.

July 30, 2026 0 comments
0 FacebookTwitterPinterestPocketEmail
Newer Posts
Older Posts

Recent Posts

  • Zesty Lemon-Thyme Grilled Salmon with Colorful Roasted Veggie Medley

    September 15, 2026
  • Fiery Harissa Cauliflower Steaks with Garlic Tahini Drizzle

    September 15, 2026
  • Savory Creamy Tuscan Garlic Shrimp Pasta Bake

    September 15, 2026
  • Flavorful Smoky Honey-Garlic Glazed Tofu Stir-Fry

    September 15, 2026
  • Exquisite Moroccan-Spiced Chicken with Apricot Tagine

    September 15, 2026

About Me

About Me

I'm Linda, a health professional, university graduate, and author sharing tested, easy-to-follow recipes made from simple, everyday ingredients. Based in Finland, I bring together my culinary training, love of travel, and home-cooked roots to help you cook confidently, on any budget.

Products

  • Spooky Creative Starry Sky Ceramic Mug Spooky Creative Starry Sky Ceramic Mug 10,00 €

Categories

  • Appetizers & Snacks (161)
  • Breakfast & Brunch (129)
  • Desserts & Baking (174)
  • Drinks & Beverages (136)
  • Gluten-Free (208)
  • Grilling & BBQ (11)
  • Healthy & Low-Calorie (197)
  • Holiday & Seasonal (20)
  • Kid-Friendly (243)
  • Main Dishes (195)
  • Quick & Easy (30-Min) (698)
  • Slow Cooker & Instant Pot (4)
  • Soups & Salads (111)
  • Vegan (167)
  • Vegetarian (574)

About Me

I'm Linda, a health professional and food writer sharing tested, easy-to-follow recipes made from simple ingredients.

Email: jspiceygiftstv@gmail.com

Useful Links

  • Home
  • About
  • Contact
  • Free Cookbooks
  • Terms and Conditions
  • Privacy Policy

Newsletter

Subscribe to to our Newsletter to stay updated with all our recipes.

Recent Posts

  • Zesty Lemon-Thyme Grilled Salmon with Colorful Roasted Veggie Medley

    September 15, 2026
  • Fiery Harissa Cauliflower Steaks with Garlic Tahini Drizzle

    September 15, 2026
  • Instagram
  • Pinterest
  • Youtube
  • Tiktok

@2026 - All Right Reserved. Designed and Developed by JSpiceyGifts

J Spicey Gifts
  • Home
  • Recipes
    • Breakfast & Brunch
    • Appetizers & Snacks
    • Main Dishes
    • Soups & Salads
    • Desserts & Baking
    • Drinks & Beverages
  • Categories
    • Vegetarian
    • Vegan
    • Gluten-Free
    • Quick & Easy (30-Min)
    • Slow Cooker & Instant Pot
    • Grilling & BBQ
    • Healthy & Low-Calorie
    • Holiday & Seasonal
    • Kid-Friendly
  • About
  • Contact

Shopping Cart

Close

No products in the cart.

Close