J Spicey Gifts
  • Home
  • Recipes
    • Breakfast & Brunch
    • Appetizers & Snacks
    • Main Dishes
    • Soups & Salads
    • Desserts & Baking
    • Drinks & Beverages
  • Categories
    • Vegetarian
    • Vegan
    • Gluten-Free
    • Quick & Easy (30-Min)
    • Slow Cooker & Instant Pot
    • Grilling & BBQ
    • Healthy & Low-Calorie
    • Holiday & Seasonal
    • Kid-Friendly
  • About
  • Contact
Top Posts
Savory Chive and Cheddar Breakfast Scones
Maple-Bourbon Pecan Overnight Oats
Luscious Coconut Avocado Smoothie Delight
Cool Spicy Mango Lime Refresher
Sparkling Hibiscus Berry Bliss
Tropical Passionfruit Mint Refresher
Citrus Chill Fusion Fizz
Decadent Salted Caramel Espresso Brownies with a Rich...
Brilliant Blackberry Lime Meringue Tart
Delicious Raspberry Almond Tartlets with Honey Drizzle
J Spicey Gifts
  • Home
  • Recipes
    • Breakfast & Brunch
    • Appetizers & Snacks
    • Main Dishes
    • Soups & Salads
    • Desserts & Baking
    • Drinks & Beverages
  • Categories
    • Vegetarian
    • Vegan
    • Gluten-Free
    • Quick & Easy (30-Min)
    • Slow Cooker & Instant Pot
    • Grilling & BBQ
    • Healthy & Low-Calorie
    • Holiday & Seasonal
    • Kid-Friendly
  • About
  • Contact
J Spicey Gifts
J Spicey Gifts
  • Home
  • Recipes
    • Breakfast & Brunch
    • Appetizers & Snacks
    • Main Dishes
    • Soups & Salads
    • Desserts & Baking
    • Drinks & Beverages
  • Categories
    • Vegetarian
    • Vegan
    • Gluten-Free
    • Quick & Easy (30-Min)
    • Slow Cooker & Instant Pot
    • Grilling & BBQ
    • Healthy & Low-Calorie
    • Holiday & Seasonal
    • Kid-Friendly
  • About
  • Contact
Copyright 2021 - All Right Reserved
Crispy Garlic-Parmesan Stuffed Mushroom Caps with Herbed Yogurt Dip
Appetizers & SnacksQuick & Easy (30-Min)Vegetarian

Crispy Garlic-Parmesan Stuffed Mushroom Caps with Herbed Yogurt Dip

by Linda August 18, 2026
written by Linda

These Crispy Garlic-Parmesan Stuffed Mushroom Caps are a delicious and impressive appetizer that will steal the show at any gathering. The earthy flavor of the mushrooms pairs perfectly with a savory filling of garlic, Parmesan, breadcrumbs, and herbs, creating a delightful combination.

Baked until golden and crispy, these stuffed mushrooms are not only easy to prepare but also satisfyingly rich. To elevate the dish, enjoy them with a creamy herbed yogurt dip that adds a refreshing contrast to the richness of the filling.

Crispy Garlic-Parmesan Stuffed Mushroom Caps with Herbed Yogurt Dip

Crispy Garlic-Parmesan Stuffed Mushroom Caps with Herbed Yogurt Dip

Serves: 4-6 Prep Time: 20 minutes Cooking Time: 25 minutes 25 minutes
Nutrition facts: 180 calories 10g fat
Rating: 5.0/5
( 1 voted )
Pin
Print

Ingredients

INGREDIENTS

  • 16 large white mushrooms
  • 1 cup breadcrumbs
  • 1/2 cup grated Parmesan cheese
  • 3 cloves garlic, minced
  • 2 tablespoons fresh parsley, chopped
  • 1 tablespoon olive oil
  • Salt and pepper to taste
  • For the Herbed Yogurt Dip:
  • 1 cup plain Greek yogurt
  • 1 tablespoon lemon juice
  • 1 tablespoon fresh dill, chopped
  • Salt and pepper to taste

Instructions

  1. Preheat the oven to 375°F (190°C).
  2. Remove the stems from the mushrooms and finely chop them.
  3. In a skillet, heat olive oil over medium heat. Add the chopped mushroom stems and minced garlic; sauté until soft and fragrant, about 3 minutes.
  4. In a bowl, combine sautéed stems and garlic with breadcrumbs, grated Parmesan, and parsley; mix well. Season with salt and pepper.
  5. Stuff each mushroom cap generously with the mixture, pressing down gently to ensure it holds together.
  6. Place the stuffed mushroom caps on a baking sheet lined with parchment paper.
  7. Bake in the preheated oven for 20-25 minutes, or until golden brown and crispy on top.
  8. Meanwhile, prepare the herbed yogurt dip by mixing Greek yogurt, lemon juice, dill, salt, and pepper in a bowl.
  9. Once the mushrooms are done, serve them warm with the herbed yogurt dip on the side.

Notes

Note: For a gluten-free option, substitute regular breadcrumbs with gluten-free breadcrumbs.

For the best flavor, use freshly grated Parmesan cheese. You can also switch up the herbs in the yogurt dip; try dill or parsley for a different twist. If you’re short on time, prepare the stuffed mushrooms ahead of time and bake them just before serving.

To store leftovers, keep the stuffed mushrooms in an airtight container in the refrigerator for up to 2 days. Reheat in the oven to retain their crispiness.


August 18, 2026 0 comments
0 FacebookTwitterPinterestPocketEmail
Crispy Creamy Avocado-Corn Fritters with Zesty Lime Dip
Appetizers & SnacksQuick & Easy (30-Min)Vegetarian

Crispy Creamy Avocado-Corn Fritters with Zesty Lime Dip

by Linda August 18, 2026
written by Linda

These crispy creamy avocado-corn fritters are not just a treat for the taste buds but also a feast for the eyes. Made with fresh ingredients, they perfectly blend creamy avocados with sweet corn, creating a delightful texture and flavor in every bite.

The addition of a zesty lime dip elevates these fritters, making them an irresistible appetizer or snack. Whether served at gatherings or enjoyed on a cozy evening, they promise to impress with their bright flavors and crispy exterior.

Crispy Creamy Avocado-Corn Fritters with Zesty Lime Dip

Crispy Creamy Avocado-Corn Fritters with Zesty Lime Dip

Serves: 4-6 Prep Time: 15 minutes Cooking Time: 20 minutes 20 minutes
Nutrition facts: 180 calories 9g fat
Rating: 5.0/5
( 1 voted )
Pin
Print

Ingredients

INGREDIENTS

  • 2 ripe avocados, mashed
  • 1 cup sweet corn kernels (fresh or frozen)
  • 1/2 cup all-purpose flour
  • 1/4 cup cornmeal
  • 1/4 cup chopped fresh cilantro
  • 1/4 cup green onions, sliced
  • 2 large eggs
  • 1 teaspoon baking powder
  • 1/2 teaspoon salt
  • 1/4 teaspoon black pepper
  • 1/4 teaspoon cumin
  • Oil for frying

FOR THE SPICY LIME DIP

  • 1/2 cup Greek yogurt
  • 1 tablespoon lime juice
  • 1 teaspoon lime zest
  • 1/2 teaspoon chili powder
  • Salt to taste

Instructions

  1. In a large bowl, combine mashed avocados, corn, flour, cornmeal, cilantro, green onions, eggs, baking powder, salt, pepper, and cumin. Mix until well combined.
  2. Heat oil in a skillet over medium heat. Once hot, drop spoonfuls of the fritter mixture into the skillet, flattening gently.
  3. Fry until golden brown and crispy, about 3-4 minutes per side. Remove and drain on paper towels.
  4. In a separate bowl, mix Greek yogurt, lime juice, lime zest, chili powder, and salt to make the dip.
  5. Serve the fritters warm with the spicy lime dip on the side. Enjoy!

Notes

Tip: For a vegan version, substitute eggs with flaxseed meal mixed with water.

For the best texture, ensure your fritters are nice and golden on the outside. If your batter is too thick, you can add a little water or extra lime juice to loosen it up. Experiment with spices; a pinch of cayenne can add a nice kick!

These fritters can be stored in the refrigerator for up to 3 days. Reheat them in the oven for a few minutes at 350°F to regain their crispiness. Enjoy them as an appetizer, snack, or even as a light main dish!

August 18, 2026 0 comments
0 FacebookTwitterPinterestPocketEmail
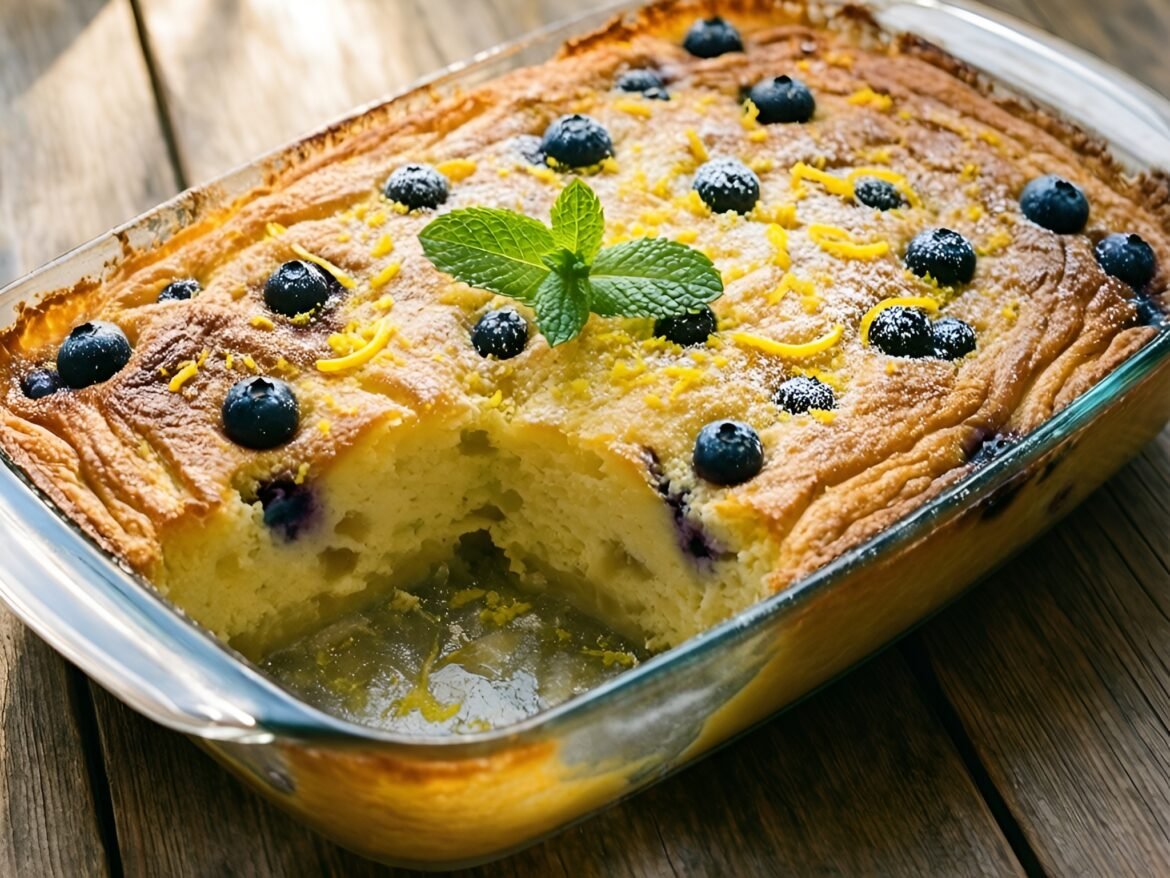
Zesty Lemon-Blueberry Overnight French Toast Casserole
Breakfast & BrunchKid-FriendlyQuick & Easy (30-Min)Vegetarian

Zesty Lemon-Blueberry Overnight French Toast Casserole

by Linda August 18, 2026
written by Linda

This Zesty Lemon-Blueberry Overnight French Toast Casserole combines the bright flavors of lemon and juicy blueberries for a delightful breakfast or brunch. The best part? It can be prepared the night before, allowing the bread to soak up all the delicious flavors while you sleep!

A rich vanilla custard infuses the bread with creaminess, while a sprinkle of fresh blueberries and a hint of lemon zest add a refreshing twist. This dish is not only visually appealing but also a crowd-pleaser that will elevate any meal with minimal effort.

Zesty Lemon-Blueberry Overnight French Toast Casserole

Zesty Lemon-Blueberry Overnight French Toast Casserole

Serves: 6-8 Prep Time: 15 minutes Cooking Time: 45 minutes 45 minutes
Nutrition facts: 320 calories 10g fat
Rating: 5.0/5
( 1 voted )
Pin
Print

Ingredients

INGREDIENTS

  • 8 slices of brioche or challah bread, cubed
  • 1 cup fresh blueberries
  • 1 cup milk
  • 4 large eggs
  • 1/2 cup granulated sugar
  • 1/4 cup fresh lemon juice
  • 1 tablespoon lemon zest
  • 1 teaspoon vanilla extract
  • 1/2 teaspoon cinnamon
  • 1/4 teaspoon salt
  • 1 tablespoon butter, for greasing

Instructions

  1. Grease a 9x13 inch baking dish with butter.
  2. In a large bowl, whisk together the milk, eggs, sugar, lemon juice, lemon zest, vanilla extract, cinnamon, and salt until well combined.
  3. Arrange half of the cubed bread in the prepared baking dish and sprinkle half of the blueberries over the top.
  4. Pour half of the custard mixture over the bread and blueberries, making sure to coat them evenly.
  5. Add the remaining bread cubes and top with the remaining blueberries.
  6. Pour the rest of the custard mixture over the top, ensuring all bread is soaked. Press down gently if needed.
  7. Cover the dish with plastic wrap and refrigerate overnight (or at least for 4 hours).
  8. Preheat the oven to 350°F (175°C).
  9. Remove the casserole from the refrigerator and let it sit at room temperature for 15 minutes before baking.
  10. Bake for 40-45 minutes or until the top is golden brown and the custard is set. Let cool for a few minutes before serving.

Notes

Tip: For an added crunch, consider sprinkling some chopped nuts on top before baking!

For the best texture, use day-old bread or a thicker loaf like brioche or challah. If you want to make this dish even healthier, consider swapping out half of the milk for Greek yogurt for added protein.

Once baked, you can top the casserole with a dusting of powdered sugar or a drizzle of maple syrup for extra sweetness. Leftovers can be stored in the refrigerator for up to 3 days and are delicious reheated in the microwave!

August 18, 2026 0 comments
0 FacebookTwitterPinterestPocketEmail
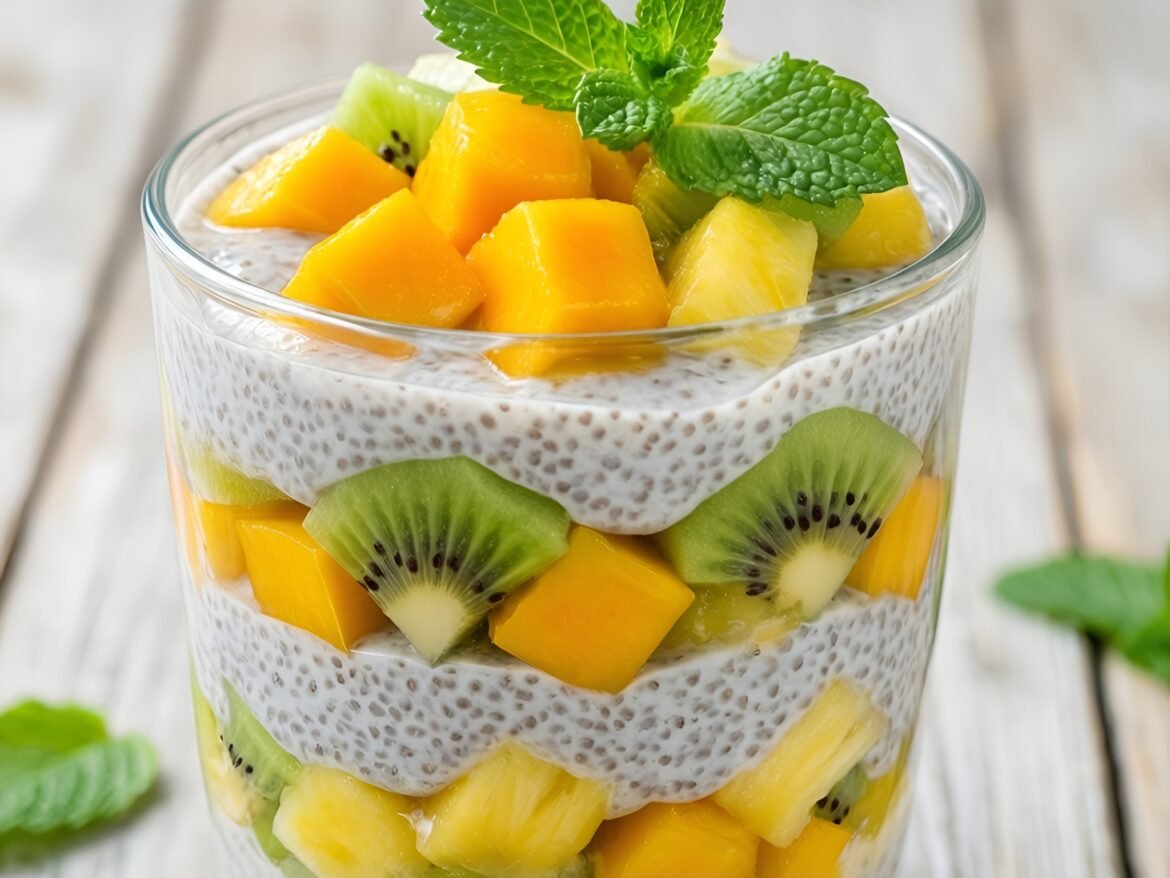
Tropical Bliss Coconut Chia Pudding Parfait with Fresh Fruits
Breakfast & BrunchQuick & Easy (30-Min)VeganVegetarian

Tropical Bliss Coconut Chia Pudding Parfait with Fresh Fruits

by Linda August 18, 2026
written by Linda

Start your day with a burst of sunshine in a glass! This Tropical Bliss Coconut Chia Pudding Parfait is not just a treat for the taste buds; it’s visually stunning and packed with nutrients. Chia seeds soaked in creamy coconut milk create a delightful, pudding-like texture that pairs beautifully with layers of fresh tropical fruit.

The combination of mango, kiwi, and pineapple not only adds a splash of color but also brings a natural sweetness that complements the earthy flavor of the chia. Perfect for breakfast or a healthy snack, this parfait is as enjoyable to make as it is to eat!

Tropical Bliss Coconut Chia Pudding Parfait with Fresh Fruits

Tropical Bliss Coconut Chia Pudding Parfait with Fresh Fruits

Serves: 2 Prep Time: 10 minutes Cooking Time: 0 minutes 0 minutes
Nutrition facts: 220 calories 10g fat
Rating: 5.0/5
( 1 voted )
Pin
Print

Ingredients

INGREDIENTS

  • 1 cup coconut milk
  • 1/4 cup chia seeds
  • 2 tablespoons maple syrup (or honey)
  • 1 ripe mango, diced
  • 1 ripe kiwi, sliced
  • 1/2 cup pineapple, diced
  • 1 teaspoon vanilla extract
  • Pinch of sea salt
  • Fresh mint leaves for garnish

Instructions

  1. In a mixing bowl, combine coconut milk, chia seeds, maple syrup, vanilla extract, and a pinch of sea salt. Stir well to combine.
  2. Cover and refrigerate the mixture for at least 2 hours or overnight until it thickens into a pudding-like consistency.
  3. Once thickened, stir the chia pudding again to break up any clumps.
  4. In serving glasses or bowls, layer the chia pudding with diced mango, sliced kiwi, and diced pineapple. Repeat the layers until the glasses are full.
  5. Top with a sprinkle of fresh mint leaves for garnish before serving.

Notes

Storage: The chia pudding can be made ahead and stored in the refrigerator for up to 5 days. Just keep the fruits separate until ready to serve to maintain their freshness.

For a smoother texture, blend the coconut milk with the chia seeds before letting them sit to thicken. If you don’t have coconut milk, almond milk works well too but may alter the flavor slightly.

Feel free to substitute the fruits based on what’s in season or your personal preferences. Berries, bananas, or papaya would also make great additions. This parfait can be prepared a day in advance and stored in the fridge for a quick grab-and-go meal!

August 18, 2026 0 comments
0 FacebookTwitterPinterestPocketEmail
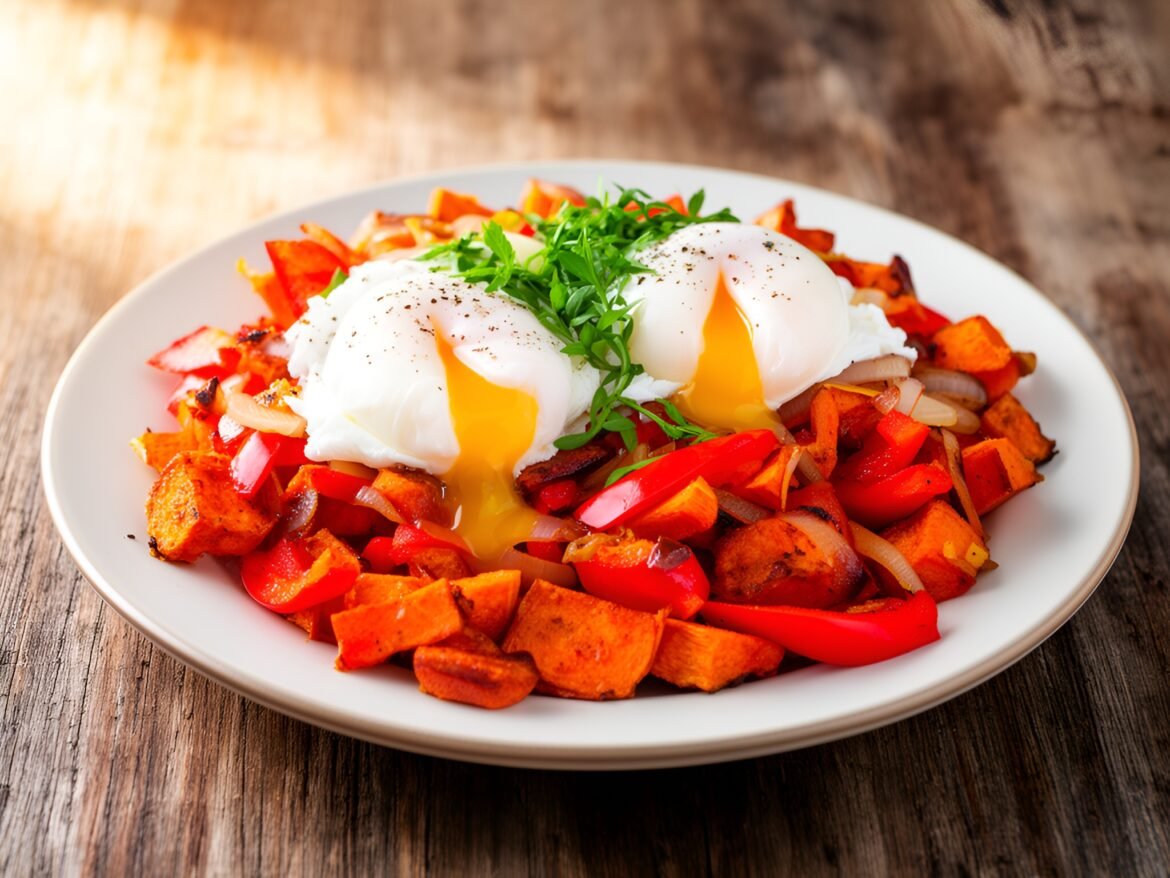
Hearty Savory Sweet Potato Breakfast Hash with Poached Eggs
Breakfast & BrunchKid-FriendlyQuick & Easy (30-Min)Vegetarian

Hearty Savory Sweet Potato Breakfast Hash with Poached Eggs

by Linda August 18, 2026
written by Linda

Kickstart your morning with this vibrant savory sweet potato breakfast hash. It’s a delightful blend of sweet potatoes, bell peppers, and onions, all sautéed to caramelized perfection. Topping this hash with poached eggs adds an extra layer of richness, making it a fulfilling breakfast that’s both nutritious and satisfying.

The combination of flavors and textures, from the sweetness of the potatoes to the creamy yolk of the poached egg, is simply irresistible. Serve it up hot with a sprinkle of fresh herbs for a colorful presentation that’s sure to impress.

Hearty Savory Sweet Potato Breakfast Hash with Poached Eggs

Hearty Savory Sweet Potato Breakfast Hash with Poached Eggs

Serves: 2-3 Prep Time: 15 minutes Cooking Time: 25 minutes 25 minutes
Nutrition facts: 350 calories 15g fat
Rating: 5.0/5
( 1 voted )
Pin
Print

Ingredients

INGREDIENTS

  • 2 medium sweet potatoes, peeled and diced
  • 1 red bell pepper, diced
  • 1 small onion, diced
  • 2 tablespoons olive oil
  • Salt and pepper to taste
  • 2-3 large eggs
  • Fresh herbs (like parsley or chives) for garnish

Instructions

  1. Heat olive oil in a large skillet over medium heat.
  2. Add diced sweet potatoes, season with salt and pepper, and cook for about 10 minutes, stirring occasionally, until they begin to soften.
  3. Stir in the diced onion and bell pepper, cooking for an additional 10-15 minutes until all vegetables are tender and slightly caramelized.
  4. In a separate pot, bring water to a gentle simmer and poach eggs to your desired doneness.
  5. Serve the sweet potato hash topped with poached eggs and garnish with fresh herbs.

Notes

Tip: For a spicy kick, add a pinch of cayenne pepper or some diced jalapeños to the hash.

For best results, choose sweet potatoes that are firm and free of blemishes. You can customize this hash by adding your favorite vegetables such as spinach or mushrooms, or even incorporating cooked sausage for added protein.

To reheat leftovers, simply sauté in a pan with a little olive oil until warmed through. The dish can be served as a hearty brunch or a quick weekday breakfast!

August 18, 2026 0 comments
0 FacebookTwitterPinterestPocketEmail
Exotic Passionfruit Basil Cooler: A Refreshing Tropical Twist
Drinks & BeveragesGluten-FreeQuick & Easy (30-Min)Vegan

Exotic Passionfruit Basil Cooler: A Refreshing Tropical Twist

by Linda August 17, 2026
written by Linda

Beat the heat with this Exotic Passionfruit Basil Cooler! This refreshing beverage combines the sweet, tangy flavor of fresh passionfruit with aromatic basil, creating a delightful drink that is perfect for summer gatherings or a relaxing afternoon.

The unique pairing of tropical fruit and herbal notes results in a sophisticated cooler that not only tantalizes the taste buds but also looks stunning. With its bright yellow hue and fragrant basil garnish, this drink is as visually appealing as it is delicious!

Exotic Passionfruit Basil Cooler: A Refreshing Tropical Twist

Exotic Passionfruit Basil Cooler: A Refreshing Tropical Twist

Serves: 2 Prep Time: 10 minutes Cooking Time: 0 minutes 0 minutes
Nutrition facts: 120 calories 0g fat
Rating: 5.0/5
( 1 voted )
Pin
Print

Ingredients

INGREDIENTS

  • 4 ripe passionfruits
  • 5-6 fresh basil leaves
  • 1-2 tablespoons honey or agave syrup
  • 1 cup soda water or sparkling water
  • Ice cubes
  • Basil sprigs for garnish

Instructions

  1. Cut the passionfruits in half and scoop the pulp into a mixing bowl.
  2. Add the honey or agave syrup to the passionfruit pulp and mix well until combined.
  3. In a glass, muddle the fresh basil leaves to release their aroma and flavor.
  4. Pour the passionfruit mixture over the muddled basil in the glass.
  5. Fill the glass with ice cubes and top off with soda water or sparkling water, stirring gently to combine.
  6. Garnish with additional basil sprigs and serve immediately. Enjoy your tropical cooler!

Notes

Tip: Adjust the sweetness by adding more or less honey/agave to suit your taste.

For a more pronounced basil flavor, muddle a few extra basil leaves before adding the passionfruit and soda. You can also experiment with different herbs like mint or even cilantro for a unique twist!

If you can’t find fresh passionfruit, consider using passionfruit juice as an alternative, but be sure to adjust the sweetness. This drink can be served over ice or blended for a slushy version on particularly hot days. Store any leftovers in the fridge for up to one day, but note that the freshness may diminish.

August 17, 2026 0 comments
0 FacebookTwitterPinterestPocketEmail
Cooling Hibiscus Mint Refresher for Hot Days
Drinks & BeveragesGluten-FreeQuick & Easy (30-Min)Vegan

Cooling Hibiscus Mint Refresher for Hot Days

by Linda August 17, 2026
written by Linda

Stay cool during the hot summer months with this Cooling Hibiscus Mint Refresher. This delightful drink combines the tart and floral notes of hibiscus with the refreshing taste of mint, creating a beverage that’s not only thirst-quenching but also visually stunning.

Making this refresher is a breeze and the result is a vibrant ruby-red drink that can be served over ice for a refreshing treat. It’s perfect for summer picnics, brunches, or as a special addition to your hydration routine!

Cooling Hibiscus Mint Refresher for Hot Days

Cooling Hibiscus Mint Refresher for Hot Days

Serves: 4 Prep Time: 5 minutes Cooking Time: 10 minutes 10 minutes
Nutrition facts: 60 calories 0g fat
Rating: 5.0/5
( 1 voted )
Pin
Print

Ingredients

INGREDIENTS

  • 4 cups water
  • 1 cup dried hibiscus flowers
  • 1/2 cup fresh mint leaves
  • 1/2 cup honey or agave syrup (to taste)
  • Ice cubes for serving
  • Mint sprigs for garnish (optional)

Instructions

  1. Boil 4 cups of water in a medium saucepan.
  2. Once boiling, remove from heat and add the dried hibiscus flowers and fresh mint leaves.
  3. Let the mixture steep for about 10 minutes, then strain it into a large pitcher, discarding the solids.
  4. Stir in honey or agave syrup while the liquid is still warm, adjusting to your desired sweetness.
  5. Allow the mixture to cool to room temperature, then refrigerate until chilled.
  6. Serve over ice and garnish with fresh mint sprigs if desired.

Notes

Storage: This refresher can be stored in the refrigerator for up to 3 days. Serve chilled for the best experience.

For an extra kick, try adding a splash of lime juice to enhance the flavor profile. You can also sweeten it to your liking with honey or agave syrup, depending on your preference!

If you want to make this drink a bit more festive, consider adding a splash of sparkling water right before serving for a fizzy twist. This refresher keeps well in the fridge for up to 3 days, but it’s best served fresh to enjoy the vibrant flavors.

August 17, 2026 0 comments
0 FacebookTwitterPinterestPocketEmail
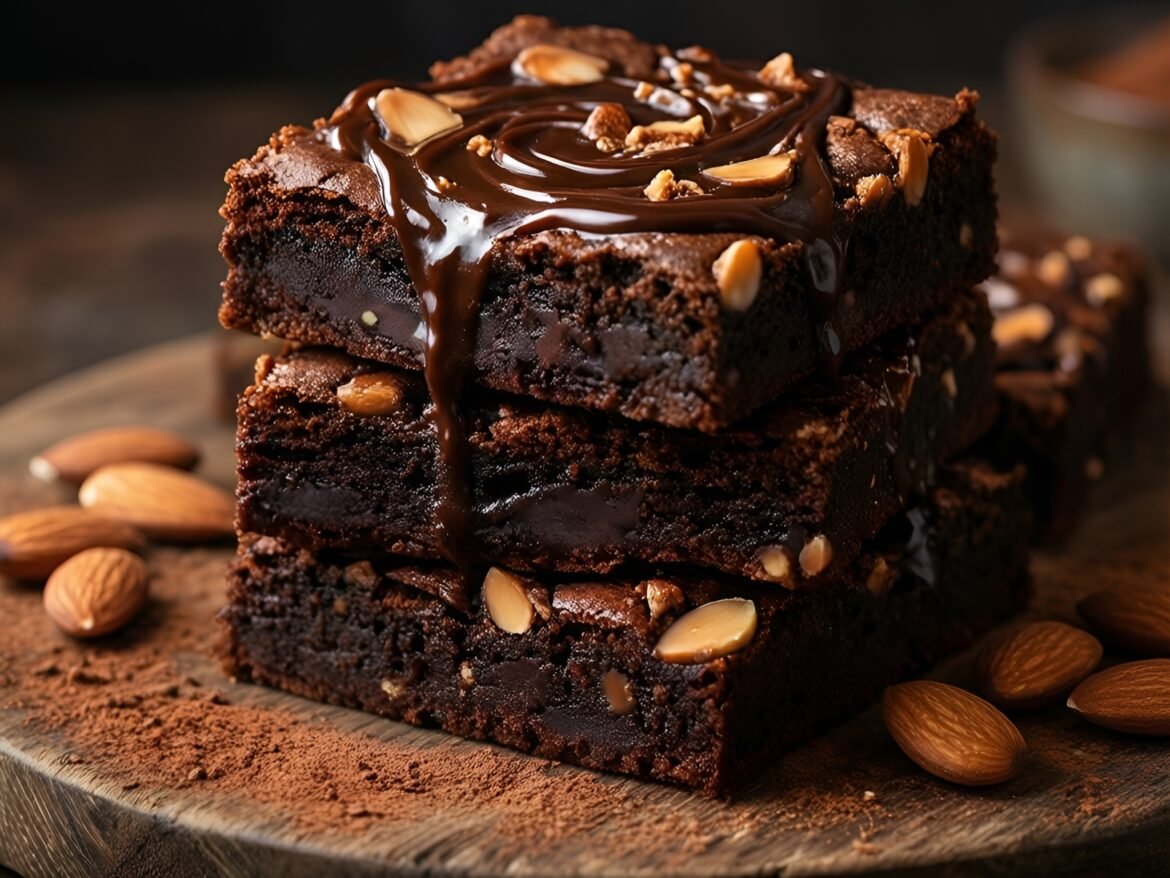
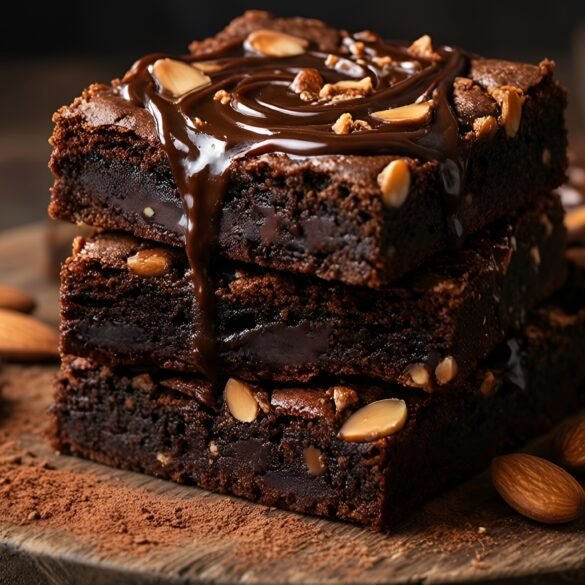
Indulgent Espresso Swirl Mocha Almond Fudge Brownies
Desserts & BakingQuick & Easy (30-Min)Vegetarian

Indulgent Espresso Swirl Mocha Almond Fudge Brownies

by Linda August 17, 2026
written by Linda

These Indulgent Espresso Swirl Mocha Almond Fudge Brownies are the ultimate dessert for chocolate lovers. The combination of rich cocoa, crunchy almonds, and a bold espresso swirl creates a luxurious treat that’s hard to resist.

Perfect for any occasion, these brownies are easy to make and offer a delightful balance of flavors. Whether you’re hosting a gathering or simply indulging yourself, this decadent dessert is sure to impress!

Indulgent Espresso Swirl Mocha Almond Fudge Brownies

Indulgent Espresso Swirl Mocha Almond Fudge Brownies

Serves: 12 Prep Time: 15 minutes Cooking Time: 30 minutes 30 minutes
Nutrition facts: 250 calories 14g fat
Rating: 5.0/5
( 1 voted )
Pin
Print

Ingredients

INGREDIENTS

  • 1 cup unsalted butter
  • 2 cups granulated sugar
  • 4 large eggs
  • 1 teaspoon vanilla extract
  • 1 cup all-purpose flour
  • 1 cup unsweetened cocoa powder
  • 1/2 teaspoon salt
  • 1 cup chopped almonds
  • 1/2 cup brewed espresso

Instructions

  1. Preheat your oven to 350°F (175°C) and grease a 9x13 inch baking pan.
  2. In a saucepan, melt the butter over low heat. Remove from heat and stir in the sugar until well combined.
  3. Add eggs one at a time, mixing well after each addition, then stir in the vanilla extract.
  4. In a separate bowl, whisk together the flour, cocoa powder, and salt. Gradually add the dry ingredients to the wet mixture until just combined.
  5. Fold in the chopped almonds and brewed espresso until evenly distributed.
  6. Pour the brownie batter into the prepared baking pan and spread evenly.
  7. For the espresso swirl, take a tablespoon of brewed espresso and drizzle it over the top of the brownie batter; use a knife to gently swirl it through the batter.
  8. Bake in the preheated oven for 25-30 minutes or until a toothpick inserted comes out with a few moist crumbs.
  9. Allow the brownies to cool in the pan before cutting into squares and serving.

Notes

Tip: For added richness, serve these brownies with a scoop of vanilla ice cream or a dollop of whipped cream.

For a gluten-free option, substitute regular flour with almond flour or a gluten-free blend. If you prefer less sweetness, reduce the sugar slightly, but keep the moist texture by balancing with the butter.

Store leftover brownies in an airtight container at room temperature for up to 3 days or in the refrigerator for up to a week. To reheat, simply pop them in the microwave for a few seconds until warm.

August 17, 2026 0 comments
0 FacebookTwitterPinterestPocketEmail
Delicate Lemon-Lavender Shortbread Sandwiches with Honey Cream
Desserts & BakingQuick & Easy (30-Min)Vegetarian

Delicate Lemon-Lavender Shortbread Sandwiches with Honey Cream

by Linda August 17, 2026
written by Linda

These Lemon-Lavender Shortbread Sandwiches are a delightful treat that combines the refreshing zest of lemon with the aromatic essence of lavender. The buttery shortbread is perfectly crumbly, creating a lovely contrast with the creamy honey filling. Ideal for afternoon tea, these sandwiches not only taste amazing but also look elegant on any dessert platter.

The key to achieving the best flavor is using culinary-grade lavender, which adds a subtle floral note that pairs beautifully with the bright lemon. These cookies are simple to make yet impressive enough for any special occasion.

Delicate Lemon-Lavender Shortbread Sandwiches with Honey Cream

Delicate Lemon-Lavender Shortbread Sandwiches with Honey Cream

Serves: 12 Prep Time: 30 minutes Cooking Time: 15 minutes 15 minutes
Nutrition facts: 150 calories 9g fat
Rating: 5.0/5
( 1 voted )
Pin
Print

Ingredients

INGREDIENTS

  • 1 cup unsalted butter, softened
  • 1/2 cup powdered sugar
  • 1 tablespoon lemon zest
  • 1 tablespoon culinary lavender
  • 2 cups all-purpose flour
  • 1/4 teaspoon salt
  • 1/2 cup honey
  • 1/2 cup heavy cream

Instructions

  1. Preheat your oven to 350°F (175°C).
  2. In a mixing bowl, cream together the softened butter and powdered sugar until light and fluffy.
  3. Add the lemon zest and culinary lavender to the mixture, then mix until well combined.
  4. Gradually add in the flour and salt, mixing until a dough forms.
  5. Roll the dough out on a floured surface to about 1/4 inch thick, then cut out shapes using a cookie cutter.
  6. Place the cookies on a baking sheet lined with parchment paper and bake for 12-15 minutes or until the edges are lightly golden.
  7. Allow the cookies to cool completely on a wire rack.
  8. In a separate bowl, whip the heavy cream until soft peaks form, then gently fold in the honey.
  9. Once the cookies are cool, spread a layer of honey cream on the bottom of half of the cookies, then sandwich them with the remaining cookies.
  10. Serve immediately or refrigerate until ready to enjoy.

Notes

Usage Tip: These cookies are best enjoyed within a week, but they can be frozen without the filling for up to a month.

For the best texture, ensure your butter is slightly softened before creaming it with the sugar. This helps create that melt-in-your-mouth quality. If you can’t find culinary lavender, you can substitute with finely grated lemon zest for a different twist. Store the sandwiches in an airtight container to maintain their freshness, and consider chilling them for 15 minutes before serving to enhance the flavors.

August 17, 2026 0 comments
0 FacebookTwitterPinterestPocketEmail
Silky Raspberry-Lime Cheesecake Bars with Coconut Crust
Desserts & BakingGluten-FreeQuick & Easy (30-Min)Vegetarian

Silky Raspberry-Lime Cheesecake Bars with Coconut Crust

by Linda August 17, 2026
written by Linda

These Silky Raspberry-Lime Cheesecake Bars with Coconut Crust are a delightful treat that combines the tartness of raspberries and limes with the rich creaminess of cheesecake. The coconut crust adds a tropical twist, making these bars perfect for summer parties or as a refreshing dessert.

What sets these cheesecake bars apart is their bright flavor profile and smooth texture, which pairs beautifully with the crisp coconut base. Ready in just a few easy steps, this recipe will quickly become a favorite for both casual gatherings and special occasions.

Silky Raspberry-Lime Cheesecake Bars with Coconut Crust

Silky Raspberry-Lime Cheesecake Bars with Coconut Crust

Serves: 12 Prep Time: 20 minutes Cooking Time: 30 minutes 30 minutes
Nutrition facts: 210 calories 12g fat
Rating: 5.0/5
( 1 voted )
Pin
Print

Ingredients

INGREDIENTS

  • 1 1/2 cups shredded unsweetened coconut
  • 1/2 cup graham cracker crumbs
  • 1/4 cup sugar
  • 1/2 cup unsalted butter, melted
  • 2 (8-ounce) packages cream cheese, softened
  • 1 cup sugar
  • 3 large eggs
  • 1/4 cup sour cream
  • 1/4 cup fresh lime juice
  • Zest of 1 lime
  • 1 1/2 cups fresh raspberries

Instructions

  1. Preheat your oven to 350°F (175°C) and grease a 9x9 inch baking dish.
  2. In a bowl, mix together the shredded coconut, graham cracker crumbs, 1/4 cup sugar, and melted butter until combined.
  3. Press the coconut mixture into the bottom of the greased baking dish to form the crust. Bake for 10 minutes, then set aside to cool.
  4. In a large mixing bowl, beat the softened cream cheese with 1 cup of sugar until smooth.
  5. Add in the eggs one at a time, beating well after each addition. Mix in the sour cream, lime juice, and lime zest until fully combined.
  6. Gently fold in the fresh raspberries, being careful not to break them apart too much.
  7. Pour the cheesecake filling over the cooled crust and spread evenly.
  8. Bake in the preheated oven for 25 minutes, or until the center is set and slightly jiggles.
  9. Remove from the oven and let it cool at room temperature before refrigerating for at least 4 hours or overnight before slicing into bars. Serve chilled.

Notes

For a decorative touch, top the cheesecake bars with additional fresh raspberries and a sprinkle of lime zest before serving.

For best results, make sure your cream cheese is at room temperature to achieve a smooth filling. If you prefer a less sweet dessert, reduce the sugar in the filling slightly. You can also substitute fresh raspberries with frozen ones, but drain excess moisture before mixing.

Store leftover bars in an airtight container in the refrigerator for up to a week. These bars can also be frozen; just wrap them tightly and they will last for up to 3 months. Thaw in the refrigerator before serving.

August 17, 2026 0 comments
0 FacebookTwitterPinterestPocketEmail
Newer Posts
Older Posts

Recent Posts

  • Savory Chive and Cheddar Breakfast Scones

    September 14, 2026
  • Maple-Bourbon Pecan Overnight Oats

    September 14, 2026
  • Luscious Coconut Avocado Smoothie Delight

    September 14, 2026
  • Cool Spicy Mango Lime Refresher

    September 14, 2026
  • Sparkling Hibiscus Berry Bliss

    September 14, 2026

About Me

About Me

I'm Linda, a health professional, university graduate, and author sharing tested, easy-to-follow recipes made from simple, everyday ingredients. Based in Finland, I bring together my culinary training, love of travel, and home-cooked roots to help you cook confidently, on any budget.

Products

  • Spooky Creative Starry Sky Ceramic Mug Spooky Creative Starry Sky Ceramic Mug 10,00 €

Categories

  • Appetizers & Snacks (157)
  • Breakfast & Brunch (128)
  • Desserts & Baking (168)
  • Drinks & Beverages (134)
  • Gluten-Free (203)
  • Grilling & BBQ (11)
  • Healthy & Low-Calorie (190)
  • Holiday & Seasonal (20)
  • Kid-Friendly (236)
  • Main Dishes (185)
  • Quick & Easy (30-Min) (679)
  • Slow Cooker & Instant Pot (4)
  • Soups & Salads (109)
  • Vegan (162)
  • Vegetarian (559)

About Me

I'm Linda, a health professional and food writer sharing tested, easy-to-follow recipes made from simple ingredients.

Email: jspiceygiftstv@gmail.com

Useful Links

  • Home
  • About
  • Contact
  • Free Cookbooks
  • Terms and Conditions
  • Privacy Policy

Newsletter

Subscribe to to our Newsletter to stay updated with all our recipes.

Recent Posts

  • Savory Chive and Cheddar Breakfast Scones

    September 14, 2026
  • Maple-Bourbon Pecan Overnight Oats

    September 14, 2026
  • Instagram
  • Pinterest
  • Youtube
  • Tiktok

@2026 - All Right Reserved. Designed and Developed by JSpiceyGifts

J Spicey Gifts
  • Home
  • Recipes
    • Breakfast & Brunch
    • Appetizers & Snacks
    • Main Dishes
    • Soups & Salads
    • Desserts & Baking
    • Drinks & Beverages
  • Categories
    • Vegetarian
    • Vegan
    • Gluten-Free
    • Quick & Easy (30-Min)
    • Slow Cooker & Instant Pot
    • Grilling & BBQ
    • Healthy & Low-Calorie
    • Holiday & Seasonal
    • Kid-Friendly
  • About
  • Contact

Shopping Cart

Close

No products in the cart.

Close