J Spicey Gifts
  • Home
  • Recipes
    • Breakfast & Brunch
    • Appetizers & Snacks
    • Main Dishes
    • Soups & Salads
    • Desserts & Baking
    • Drinks & Beverages
  • Categories
    • Vegetarian
    • Vegan
    • Gluten-Free
    • Quick & Easy (30-Min)
    • Slow Cooker & Instant Pot
    • Grilling & BBQ
    • Healthy & Low-Calorie
    • Holiday & Seasonal
    • Kid-Friendly
  • About
  • Contact
Top Posts
Vibrant Crunchy Rainbow Quinoa Salad with Zesty Cilantro-Lime...
Spicy Curried Butternut Squash Soup with Crunchy Pepitas
Sweet and Savory Teriyaki Salmon with Sesame-Infused Bok...
Robust Chorizo and Creamy White Bean Casserole
Lime-Infused Coconut Grilled Chicken with Fresh Pineapple Salsa
Smoky Paprika Quinoa-Stuffed Bell Peppers
Herb-Infused Lemon-Garlic Butter Shrimp Risotto
Creamy Spinach and Sun-Dried Tomato Queso Dip
Savory Herbed Goat Cheese-Stuffed Mini Bell Peppers
Tropical Sweet Chili Mango-Cucumber Sushi Rolls
J Spicey Gifts
  • Home
  • Recipes
    • Breakfast & Brunch
    • Appetizers & Snacks
    • Main Dishes
    • Soups & Salads
    • Desserts & Baking
    • Drinks & Beverages
  • Categories
    • Vegetarian
    • Vegan
    • Gluten-Free
    • Quick & Easy (30-Min)
    • Slow Cooker & Instant Pot
    • Grilling & BBQ
    • Healthy & Low-Calorie
    • Holiday & Seasonal
    • Kid-Friendly
  • About
  • Contact
J Spicey Gifts
J Spicey Gifts
  • Home
  • Recipes
    • Breakfast & Brunch
    • Appetizers & Snacks
    • Main Dishes
    • Soups & Salads
    • Desserts & Baking
    • Drinks & Beverages
  • Categories
    • Vegetarian
    • Vegan
    • Gluten-Free
    • Quick & Easy (30-Min)
    • Slow Cooker & Instant Pot
    • Grilling & BBQ
    • Healthy & Low-Calorie
    • Holiday & Seasonal
    • Kid-Friendly
  • About
  • Contact
Copyright 2021 - All Right Reserved
Comforting Turmeric Cauliflower Bisque with Almond & Chive Gremolata
Gluten-FreeQuick & Easy (30-Min)Soups & SaladsVegan

Comforting Turmeric Cauliflower Bisque with Almond & Chive Gremolata

by Linda July 20, 2026
written by Linda

This golden-hued bisque combines tender roasted cauliflower with warm turmeric and aromatic ginger for a truly comforting soup. Its smooth, creamy texture comes from a splash of coconut milk, making it dairy-free and vegan-friendly.

The real star is the toasted almond and chive gremolata, which adds a bright, crunchy finish and a pop of herbaceous flavor. It’s an easy way to elevate a simple soup into something special.

Perfect for a cozy weeknight dinner or a starter at a dinner party, this bisque comes together quickly with pantry-friendly ingredients and minimal fuss.

Comforting Turmeric Cauliflower Bisque with Almond & Chive Gremolata

Comforting Turmeric Cauliflower Bisque with Almond & Chive Gremolata

Serves: 4 Prep Time: 15 minutes Cooking Time: 25 minutes 25 minutes
Nutrition facts: 200 calories 12g fat
Rating: 5.0/5
( 1 voted )
Pin
Print

Ingredients

FOR THE BISQUE

  • 1 medium head cauliflower, cut into florets (about 5 cups)
  • 2 tablespoons olive oil, divided
  • 1 small yellow onion, chopped
  • 2 cloves garlic, minced
  • 1 tablespoon fresh ginger, grated
  • 1 teaspoon ground turmeric
  • 1/4 teaspoon ground cumin
  • 4 cups vegetable broth
  • 1 cup full-fat coconut milk
  • Salt and freshly ground black pepper, to taste
  • Juice of 1/2 lemon

FOR THE ALMOND & CHIVE GREMOLATA

  • 1/2 cup sliced almonds, toasted
  • 2 tablespoons fresh chives, finely chopped
  • 1 teaspoon lemon zest
  • Pinch of sea salt

Instructions

  1. Preheat the oven to 425°F (220°C). Toss cauliflower florets with 1 tablespoon olive oil, salt, and pepper. Spread on a baking sheet and roast until golden, about 20 minutes, flipping halfway.
  2. Meanwhile, heat remaining tablespoon of olive oil in a large pot over medium heat. Add onion and cook until translucent, about 5 minutes. Stir in garlic, ginger, turmeric, and cumin, and cook until fragrant, about 1 minute.
  3. Add roasted cauliflower to the pot, pour in vegetable broth, and bring to a simmer. Cook 5 minutes to meld flavors.
  4. Remove from heat. Use an immersion blender (or transfer in batches to a blender) to puree until completely smooth. Return to low heat, stir in coconut milk and lemon juice, and season with salt and pepper to taste.
  5. In a small bowl, combine toasted almonds, chives, lemon zest, and a pinch of salt. Mix well.
  6. Ladle the bisque into bowls and spoon a generous sprinkle of almond and chive gremolata over each serving. Serve immediately.

Notes

Tip: For an ultra-silky finish, strain the blended soup through a fine-mesh sieve before reheating.

  • Roasting the cauliflower: Don’t skip this step—roasting brings out a nutty sweetness and deeper color.
  • Spice balance: Adjust turmeric and ginger to taste. A pinch of cayenne can add a subtle heat if desired.
  • Substitutions: Swap coconut milk for cashew cream or regular cream if not dairy-free.
  • Storage: Refrigerate leftovers in an airtight container for up to 4 days. Reheat gently on the stove, adding a splash of broth if it thickens.
  • Make it heartier: Stir in cooked lentils or white beans for extra protein.
July 20, 2026 0 comments
0 FacebookTwitterPinterestPocketEmail
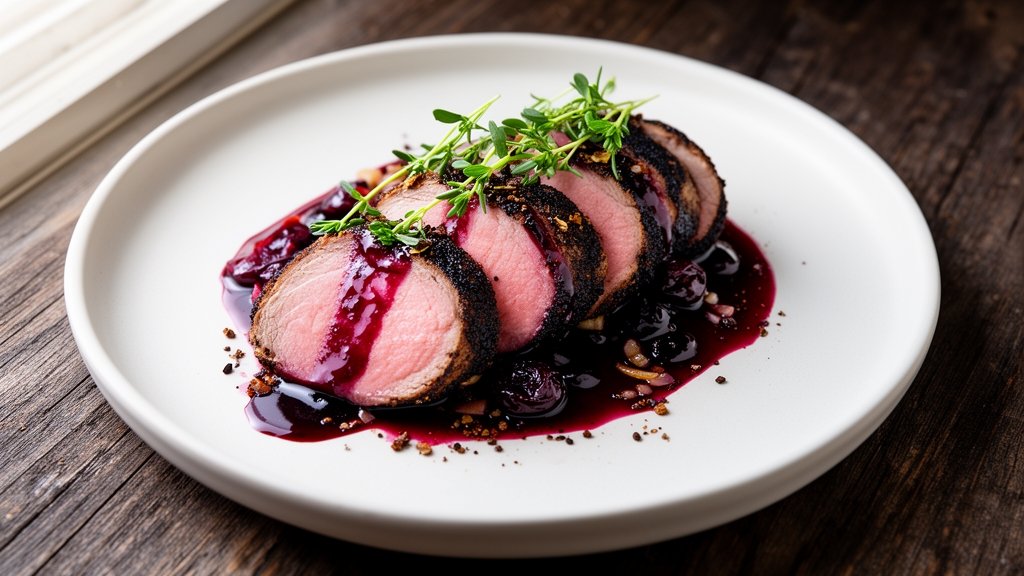
Smoky Coffee-Rubbed Pork Tenderloin with Cherry-Balsamic Gastrique
Gluten-FreeHealthy & Low-CalorieMain Dishes

Smoky Coffee-Rubbed Pork Tenderloin with Cherry-Balsamic Gastrique

by Linda July 20, 2026
written by Linda

This pork tenderloin gets a bold makeover with a smoky coffee-based rub that forms a crisp, flavorful crust while keeping the meat tender and juicy.

The finishing cherry-balsamic gastrique adds a glossy, sweet-tart glaze that elevates every bite with bright cherry notes and deep balsamic richness.

Ready in under an hour, this striking dish is perfect for weeknight dinners or special occasions when you want a simple yet impressive main course.

Smoky Coffee-Rubbed Pork Tenderloin with Cherry-Balsamic Gastrique

Smoky Coffee-Rubbed Pork Tenderloin with Cherry-Balsamic Gastrique

Serves: 4 Prep Time: 15 minutes Cooking Time: 25 minutes 25 minutes
Nutrition facts: 320 calories 9g fat
Rating: 5.0/5
( 1 voted )
Pin
Print

Ingredients

COFFEE RUB

  • 1 tablespoon finely ground coffee
  • 2 teaspoons smoked paprika
  • 1 teaspoon garlic powder
  • 1 teaspoon brown sugar
  • 1/2 teaspoon kosher salt
  • 1/4 teaspoon freshly ground black pepper
  • Pinch of cayenne pepper (optional)

PORK TENDERLOIN

  • 1.5–2 pounds pork tenderloin, trimmed
  • 2 tablespoons olive oil

CHERRY-BALSAMIC GASTRIQUE

  • 1 cup fresh or frozen pitted cherries
  • 1/4 cup balsamic vinegar
  • 2 tablespoons granulated sugar
  • 1 small shallot, finely chopped
  • Pinch of salt
  • 1 tablespoon unsalted butter (optional, for shine)

Instructions

  1. Preheat your oven to 400°F (200°C).
  2. Combine the coffee, smoked paprika, garlic powder, brown sugar, salt, black pepper, and cayenne (if using) in a small bowl, stirring until evenly blended.
  3. Pat the pork tenderloin dry with paper towels, brush all sides with olive oil, then press the coffee rub mixture firmly into the surface of the meat.
  4. Heat a large ovenproof skillet (preferably cast iron) over medium-high heat until hot and shimmering, then sear the pork on all sides until a dark crust forms, about 2 minutes per side.
  5. Transfer the skillet to the preheated oven and roast until the pork reaches an internal temperature of 145°F (63°C), about 12–15 minutes.
  6. While the pork roasts, prepare the gastrique: combine the cherries, balsamic vinegar, sugar, shallot, and a pinch of salt in a small saucepan over medium heat.
  7. Bring to a simmer, stirring occasionally, and cook until the mixture thickens to a syrupy consistency, about 8–10 minutes.
  8. Remove the gastrique from the heat and whisk in the butter until melted and glossy.
  9. When the pork is done, transfer it to a cutting board and let it rest for 5 minutes before slicing.
  10. Slice the pork into medallions, arrange on a serving platter, and spoon the cherry-balsamic gastrique over the top before serving.

Notes

Make ahead: The coffee rub can be mixed and stored in an airtight container for up to a week. Leftover pork keeps in the fridge for up to 2 days; reheat gently to retain juiciness.

Here are a few tips to ensure success and customize this dish:

  • Use a cast-iron skillet for an even sear and easy transfer to the oven.
  • If fresh cherries aren’t in season, frozen pitted cherries work just as well—no need to thaw.
  • For extra heat, add a pinch of cayenne or a dusting of chili powder to the coffee rub.
  • Leftovers make great sandwiches or salad toppings—thinly slice the pork and keep the gastrique in a jar.

Store any extra gastrique in the refrigerator for up to a week, and reheat gently before serving.

July 20, 2026 0 comments
0 FacebookTwitterPinterestPocketEmail
Crispy Panko-Crusted Brie Bites with Fig-Port Reduction
Appetizers & SnacksHoliday & SeasonalQuick & Easy (30-Min)Vegetarian

Crispy Panko-Crusted Brie Bites with Fig-Port Reduction

by Linda July 20, 2026
written by Linda

These Crispy Panko-Crusted Brie Bites combine a crunchy, golden exterior with a molten, creamy center. A simple three-step breading process yields perfectly crisp morsels every time.

The sweet-tangy fig-port reduction provides a rich counterpoint, brightened by a whisper of balsamic vinegar. It’s the ideal partner for warm, oozy cheese.

With under 30 minutes of hands-on time, these bite-sized treats are a fuss-free showstopper for last-minute parties, holiday gatherings, or cozy evenings at home.

Crispy Panko-Crusted Brie Bites with Fig-Port Reduction

Crispy Panko-Crusted Brie Bites with Fig-Port Reduction

Serves: 12 Prep Time: 15 minutes Cooking Time: 12 minutes 12 minutes
Nutrition facts: 85 calories 6g fat
Rating: 5.0/5
( 1 voted )
Pin
Print

Ingredients

BRIE BITES

  • 4 oz Brie cheese, rind removed, cut into twelve 1-inch cubes
  • 1/2 cup all-purpose flour
  • 2 large eggs
  • 1 tablespoon water
  • 1 cup panko breadcrumbs
  • 1 tablespoon finely chopped fresh thyme (optional)
  • 1/4 teaspoon salt
  • 1/4 teaspoon black pepper
  • Cooking spray or melted butter, for brushing

FIG-PORT REDUCTION

  • 1 cup fig preserves
  • 1/2 cup port wine
  • 1 teaspoon balsamic vinegar
  • Pinch of salt

Instructions

  1. Preheat the oven to 400°F and line a baking sheet with parchment paper; lightly coat with cooking spray or brush with melted butter.
  2. Arrange three shallow bowls: one with flour, one with beaten eggs and water, and one with panko mixed with thyme, salt, and pepper.
  3. Remove the rind from each Brie cube and dredge first in flour, then in the egg wash, and finally press into the panko mixture to coat completely; place on the prepared sheet.
  4. Lightly brush or spray the tops of the coated Brie bites with melted butter, then bake for 10–12 minutes until the crust is golden and cheese begins to melt.
  5. While the bites bake, combine fig preserves, port wine, balsamic vinegar, and a pinch of salt in a small saucepan over medium heat.
  6. Bring the mixture to a gentle boil, then reduce heat and simmer, stirring occasionally, until thickened and glossy, about 5–7 minutes.
  7. Transfer the fig-port reduction to a small serving bowl and let cool slightly; it will thicken further as it rests.
  8. Arrange the warm Brie bites on a platter around the reduction; garnish with extra thyme sprigs and serve immediately.

Notes

Note: You can prep the fig-port reduction up to 3 days ahead; reheat gently before serving for maximum flavor.

Tips and Variations

  • Extra crispness: For an even crunchier shell, double-dip the cheese cubes in egg and panko.
  • No port wine? Substitute a full cup of balsamic vinegar mixed with 2 tablespoons of honey for a bright, tangy glaze.
  • Herb twist: Swap fresh thyme for finely chopped rosemary or chives in the panko coating.
  • Make-ahead: Assemble and refrigerate the breaded brie bites up to 1 hour before baking; then bake just before guests arrive.
  • Storage: Store leftover reduction in an airtight jar in the fridge for up to 3 days; rewarm gently before serving.
July 20, 2026 0 comments
0 FacebookTwitterPinterestPocketEmail
Lavender-Infused Earl Grey Waffles with Blueberry Mascarpone Swirl
Breakfast & BrunchKid-FriendlyVegetarian

Lavender-Infused Earl Grey Waffles with Blueberry Mascarpone Swirl

by Linda July 20, 2026
written by Linda

These delicate waffles are infused with Earl Grey tea and a hint of lavender for a floral aroma that elevates your morning routine. Paired with a tangy blueberry mascarpone swirl, they strike the perfect balance of lightness and indulgence.

The secret is steeping tea leaves and lavender buds in warm buttermilk, imparting subtle citrusy bergamot notes and soft purple flecks throughout the batter. Crisp on the outside, tender within, they’re as beautiful as they are delicious.

Lavender-Infused Earl Grey Waffles with Blueberry Mascarpone Swirl

Lavender-Infused Earl Grey Waffles with Blueberry Mascarpone Swirl

Serves: 4 Prep Time: 15 minutes Cooking Time: 20 minutes 20 minutes
Nutrition facts: 480 calories 22g fat
Rating: 5.0/5
( 1 voted )
Pin
Print

Ingredients

FOR THE WAFFLES

  • 1½ cups all-purpose flour
  • 2 tablespoons granulated sugar
  • 1 tablespoon Earl Grey tea leaves
  • 1 teaspoon dried culinary lavender buds
  • 2 teaspoons baking powder
  • ½ teaspoon baking soda
  • Pinch of salt
  • 1¾ cups buttermilk
  • 2 large eggs
  • ¼ cup unsalted butter, melted
  • 1 teaspoon vanilla extract

FOR THE BLUEBERRY MASCARPONE SWIRL

  • 1 cup fresh or frozen blueberries
  • 2 tablespoons granulated sugar
  • 1 tablespoon lemon juice
  • 1 tablespoon water
  • ½ cup mascarpone cheese, room temperature
  • 2 tablespoons heavy cream
  • 1 tablespoon honey
  • ½ teaspoon vanilla extract

Instructions

  1. In a small saucepan or microwave-safe bowl, warm the buttermilk until just steaming. Stir in Earl Grey tea leaves and lavender buds, cover, and steep for 5 minutes. Strain and let cool slightly.
  2. In a large bowl whisk flour, sugar, baking powder, baking soda, and salt.
  3. In a separate bowl whisk eggs, melted butter, vanilla extract, and the cooled tea-infused buttermilk.
  4. Pour wet ingredients into dry ingredients and stir gently until just combined; do not overmix.
  5. Preheat and grease your waffle iron. Pour batter to fill the grid and cook until waffles are golden brown and crisp.
  6. Meanwhile, combine blueberries, sugar, lemon juice, and water in a small saucepan. Cook over medium heat, stirring, until berries break down and mixture thickens, about 5 minutes. Remove from heat and mash lightly.
  7. In a bowl, whisk mascarpone, heavy cream, honey, and vanilla extract until smooth and fluffy.
  8. To serve, spread each waffle with a layer of mascarpone cream then spoon blueberry compote over the top, swirling gently.
  9. Garnish with a few fresh blueberries and a small sprig of lavender, if desired, and serve immediately.

Notes

Tip: Leftover waffles freeze well in a single layer and can be reheated to crisp perfection.

For stronger lavender flavor, increase buds by ½ teaspoon, but strain the infusion well to avoid gritty bits in your batter.

Leftover waffles freeze well in a single layer. Reheat in a toaster or toaster oven until crisp.

Swap blueberries for raspberries or blackberries, or use Greek yogurt instead of mascarpone for a lighter swirl.

July 20, 2026 0 comments
0 FacebookTwitterPinterestPocketEmail
Sparkling Hibiscus Ginger Pomelo Spritz
Drinks & BeveragesGluten-FreeQuick & Easy (30-Min)Vegan

Sparkling Hibiscus Ginger Pomelo Spritz

by Linda July 20, 2026
written by Linda

Bright, floral hibiscus meets zesty ginger and juicy pomelo in this Sparkling Spritz. It’s a light, bubbly drink that’s both refreshing and sophisticated enough for entertaining.

The homemade hibiscus ginger syrup infuses every sip with rosy color and gentle heat, while fresh pomelo segments add bursts of citrus sweetness. Just stir, pour over ice, and top with sparkling water for a quick, elegant beverage.

Whether you’re lounging poolside or hosting friends, this spritz is an easy way to elevate any summer moment.

Sparkling Hibiscus Ginger Pomelo Spritz

Sparkling Hibiscus Ginger Pomelo Spritz

Serves: 4 Prep Time: 10 minutes Cooking Time: 10 minutes 10 minutes
Nutrition facts: 120 calories 0g fat
Rating: 5.0/5
( 1 voted )
Pin
Print

Ingredients

FOR THE HIBISCUS GINGER SYRUP

  • 1/2 cup dried hibiscus petals
  • 1/2 cup granulated sugar
  • 1/2 cup water
  • 1-inch piece fresh ginger, peeled and sliced
  • 1 tablespoon honey or agave (optional, for extra sweetness)

TO ASSEMBLE SPRITZ

  • 4 cups sparkling water or club soda, chilled
  • 1 cup fresh pomelo segments, peeled
  • Ice cubes
  • Fresh mint sprigs, for garnish
  • Thin pomelo or lime slices, for garnish

Instructions

  1. Combine sugar, water, hibiscus petals, and sliced ginger in a small saucepan over medium heat.
  2. Bring mixture to a gentle simmer, stirring until sugar dissolves. Simmer for 5 minutes to infuse flavors.
  3. Remove from heat and stir in honey or agave if using. Let syrup cool to room temperature, then strain into a clean jar. Discard solids.
  4. Fill four glasses with ice and divide pomelo segments among them.
  5. Add 2 tablespoons of hibiscus ginger syrup to each glass (adjust to taste).
  6. Top each glass with 1 cup sparkling water and gently stir to combine.
  7. Garnish with mint sprigs and thin citrus slices. Serve immediately and enjoy.
  8. Refrigerate any unused syrup for up to 1 week.

Notes

Storage: Store leftover syrup in a sealed jar in the fridge for up to a week. Pomelo segments will stay fresh in an airtight container for 1–2 days.

For a faster chill, refrigerate your syrup before mixing. Swap pomelo for grapefruit or blood orange segments if unavailable. If you prefer a sweeter spritz, add an extra tablespoon of honey or agave to the syrup.

Leftover syrup keeps for up to a week in a sealed jar refrigerated. Assemble just before serving to preserve fizz—store pre-peeled pomelo segments in an airtight container separately for up to two days.

July 20, 2026 0 comments
0 FacebookTwitterPinterestPocketEmail
Warm Spiced Chai Apple Cider Punch
Drinks & BeveragesHoliday & SeasonalQuick & Easy (30-Min)

Warm Spiced Chai Apple Cider Punch

by jorlijesempire July 20, 2026
written by jorlijesempire

Warm up your autumn evenings with this delightful Spiced Chai Apple Cider Punch. This drink combines the rich flavors of traditional chai spices with the sweetness of apple cider, creating a cozy beverage that warms you from the inside out.

Perfect for gatherings, this punch is not only easy to make in large batches but also offers a comforting aroma that fills your home. The blend of cinnamon, cardamom, and ginger gives it a distinctive flavor profile, while the apple cider adds a naturally sweet base. Garnish with fresh apple slices and a sprinkle of cinnamon for an inviting presentation!

Warm Spiced Chai Apple Cider Punch

Warm Spiced Chai Apple Cider Punch

Serves: 8 Prep Time: 10 minutes Cooking Time: 20 minutes 20 minutes
Nutrition facts: 120 calories 0g fat
Rating: 5.0/5
( 1 voted )
Pin
Print

Ingredients

INGREDIENTS

  • 8 cups apple cider
  • 4 chai tea bags
  • 2 cinnamon sticks
  • 1 teaspoon whole cloves
  • 1 teaspoon whole allspice
  • 1 teaspoon ground ginger
  • 1/2 teaspoon ground cardamom
  • 2 apples, thinly sliced
  • Honey or maple syrup to taste (optional)

Instructions

  1. In a large pot, combine the apple cider and chai tea bags.
  2. Add in the cinnamon sticks, cloves, allspice, ginger, and cardamom.
  3. Heat the mixture over medium heat until it is steaming, but do not boil.
  4. Remove the tea bags after 10 minutes to prevent bitterness.
  5. Stir in honey or maple syrup if additional sweetness is desired.
  6. Add the sliced apples to the pot and let them warm through for about 5 minutes.
  7. Remove from heat and serve hot in mugs or a punch bowl, garnished with additional apple slices and cinnamon sticks. Enjoy!

Notes

Tip: For a festive touch, consider adding a splash of orange juice or a few cranberries to the punch for added flavor and color.

For a caffeine-free version, switch to herbal chai tea. If you’re looking to spice things up, consider adding a splash of rum or bourbon for an adult twist.

Store any leftovers in the refrigerator for up to 3 days. Reheat gently on the stove when you’re ready to enjoy it again. This punch is also delicious when served chilled over ice during warmer months!

July 20, 2026 0 comments
0 FacebookTwitterPinterestPocketEmail
Refreshing Tropical Pineapple-Mint Fizz
Drinks & BeveragesKid-FriendlyQuick & Easy (30-Min)

Refreshing Tropical Pineapple-Mint Fizz

by jorlijesempire July 20, 2026
written by jorlijesempire

If you’re looking for a thirst-quenching drink to beat the heat, look no further than this Tropical Pineapple-Mint Fizz! Bursting with fresh pineapple juice and a hint of mint, this fizzy mocktail is bound to become your go-to summer sip. The combination of bright tropical flavors and sparkling water creates a refreshing drink that feels like a vacation in a glass.

Perfect for warm weather gatherings or simply a sunny afternoon on the patio, this drink is not only easy to make but also visually stunning. Add some fresh mint leaves and pineapple wedges for garnish, and you have a party-worthy beverage that everyone will love!

Refreshing Tropical Pineapple-Mint Fizz

Refreshing Tropical Pineapple-Mint Fizz

Serves: 4 Prep Time: 10 minutes Cooking Time: 0 minutes 0 minutes
Nutrition facts: 90 calories 0g fat
Rating: 5.0/5
( 1 voted )
Pin
Print

Ingredients

INGREDIENTS

  • 2 cups fresh pineapple juice
  • 1/2 cup fresh mint leaves
  • 2 tablespoons lime juice
  • 4 cups sparkling water
  • Ice cubes
  • Pineapple wedges and mint sprigs for garnish

Instructions

  1. In a pitcher, combine the fresh pineapple juice and lime juice.
  2. Muddle the mint leaves gently in the juice mixture to release their flavor.
  3. Add the sparkling water to the juice mixture and stir gently to combine.
  4. Fill glasses with ice cubes and pour the tropical concoction over the ice.
  5. Garnish with pineapple wedges and fresh mint sprigs before serving.

Notes

Tip: Make it a cocktail by adding rum or vodka for an adult version of this refreshing drink!

For a sweeter drink, feel free to add a splash of simple syrup or agave nectar to the mix. If you prefer a more pronounced mint flavor, muddle extra mint leaves with the pineapple juice before mixing. This drink can also be easily transformed into a cocktail by adding a splash of rum or vodka!

To keep your fizz bubbly, serve it immediately after mixing and avoid stirring too vigorously to preserve the carbonation. Leftovers can be stored in the fridge, but best enjoyed fresh.

July 20, 2026 0 comments
0 FacebookTwitterPinterestPocketEmail
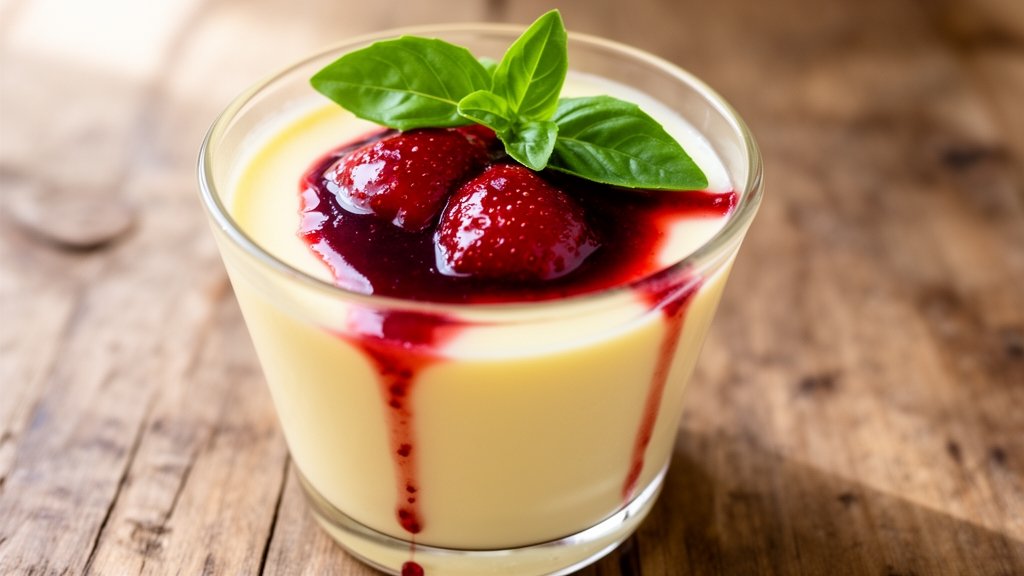
Citrusy Lemon-Basil Panna Cotta with Strawberry Balsamic Reduction
Desserts & BakingQuick & Easy (30-Min)Vegetarian

Citrusy Lemon-Basil Panna Cotta with Strawberry Balsamic Reduction

by jorlijesempire July 20, 2026
written by jorlijesempire

This Lemon-Basil Panna Cotta is a delightful twist on the classic Italian dessert, blending the zesty brightness of lemon with the aromatic freshness of basil. Its silky smooth texture makes it a perfect canvas for a rich, tangy strawberry balsamic reduction that elevates every bite.

Whether you’re hosting a dinner party or simply treating yourself, this panna cotta brings a touch of elegance to the table. The combination of flavors is both refreshing and indulgent, making it an ideal dessert for warm evenings or special occasions.

Citrusy Lemon-Basil Panna Cotta with Strawberry Balsamic Reduction

Citrusy Lemon-Basil Panna Cotta with Strawberry Balsamic Reduction

Serves: 4 Prep Time: 20 minutes Cooking Time: 10 minutes 10 minutes
Nutrition facts: 280 calories 16g fat
Rating: 5.0/5
( 1 voted )
Pin
Print

Ingredients

INGREDIENTS

  • 1 cup heavy cream
  • 1/2 cup whole milk
  • 1/2 cup granulated sugar
  • 1 tablespoon lemon zest
  • 1/4 cup fresh lemon juice
  • 1/2 teaspoon vanilla extract
  • 1 tablespoon powdered gelatin
  • 2 tablespoons water
  • 1/4 cup fresh basil leaves, finely chopped
  • 1 cup fresh strawberries, hulled and sliced
  • 1/4 cup balsamic vinegar
  • 2 tablespoons honey

Instructions

  1. In a small bowl, sprinkle gelatin over water and let it bloom for about 5 minutes.
  2. In a saucepan, combine heavy cream, whole milk, sugar, lemon zest, and lemon juice over medium heat. Stir until the sugar dissolves and the mixture is hot but not boiling.
  3. Remove from heat and stir in the bloomed gelatin until fully dissolved. Add vanilla extract and chopped basil, mixing well.
  4. Pour the mixture into serving glasses or molds and refrigerate for at least 4 hours, or until set.
  5. To make the strawberry balsamic glaze, combine sliced strawberries, balsamic vinegar, and honey in a saucepan. Cook over medium heat, stirring occasionally, for about 10 minutes, until the sauce thickens slightly.
  6. Once the panna cotta is set, remove from the refrigerator and top with the strawberry balsamic glaze before serving. Garnish with fresh basil leaves if desired.

Notes

Tip: Use fresh strawberries for the glaze for the best flavor. If you find the panna cotta too sweet, reduce the sugar in the cream mixture or in the glaze.

For a perfect panna cotta, ensure that the gelatin is fully dissolved to avoid graininess. You can substitute the basil with fresh mint for a different aromatic experience. The strawberry balsamic glaze can be made in advance and stored in the refrigerator for up to a week.

When serving, garnish with fresh basil leaves or additional strawberry slices for a beautiful presentation. This dessert pairs wonderfully with a glass of sparkling wine or a light dessert wine.

July 20, 2026 0 comments
0 FacebookTwitterPinterestPocketEmail
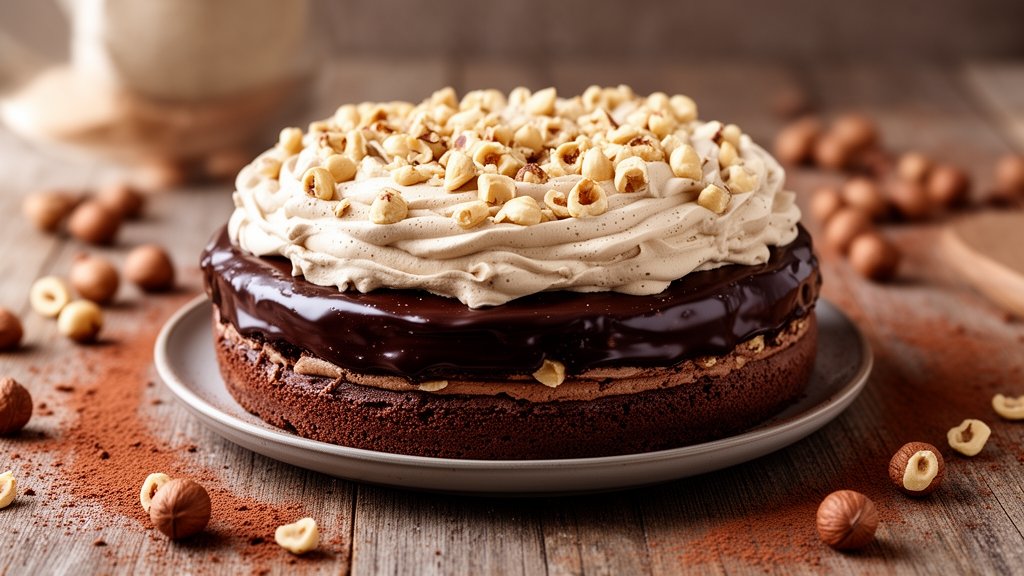
Decadent Chocolate Hazelnut Torte with Whipped Coffee Cream
Desserts & BakingGluten-FreeVegetarian

Decadent Chocolate Hazelnut Torte with Whipped Coffee Cream

by jorlijesempire July 20, 2026
written by jorlijesempire

This decadent Chocolate Hazelnut Torte is a rich, velvety dessert that’s perfect for chocolate lovers. The combination of chocolate and toasted hazelnuts creates a delightful flavor explosion, while the whipped coffee cream adds a luxurious touch that elevates this cake to a new level of indulgence.

What makes this torte truly special is its moist texture and the balance of sweetness, making it ideal for special occasions or simply as a treat for yourself. The layers of flavor are enhanced by the use of high-quality chocolate and freshly toasted hazelnuts, ensuring each bite is a heavenly experience.

Decadent Chocolate Hazelnut Torte with Whipped Coffee Cream

Decadent Chocolate Hazelnut Torte with Whipped Coffee Cream

Serves: 8 Prep Time: 30 minutes Cooking Time: 45 minutes 45 minutes
Nutrition facts: 350 calories 24g fat
Rating: 5.0/5
( 1 voted )
Pin
Print

Ingredients

INGREDIENTS

  • 1 cup hazelnuts, toasted and chopped
  • 1/2 cup unsweetened cocoa powder
  • 1/2 cup all-purpose flour
  • 1/2 teaspoon baking powder
  • 1/4 teaspoon salt
  • 1 cup granulated sugar
  • 1/2 cup unsalted butter, softened
  • 3 large eggs
  • 1 teaspoon vanilla extract
  • 4 ounces dark chocolate, chopped
  • 1 cup heavy cream
  • 2 tablespoons powdered sugar
  • 1 tablespoon instant coffee granules
  • 1 teaspoon hot water

Instructions

  1. Preheat the oven to 350°F (175°C). Grease and line a 9-inch round cake pan with parchment paper.
  2. In a medium bowl, whisk together the cocoa powder, flour, baking powder, and salt. Set aside.
  3. In a large mixing bowl, cream the softened butter and granulated sugar until light and fluffy. Add the eggs one at a time, mixing well after each addition, then stir in the vanilla extract.
  4. Melt the chopped dark chocolate in a heatproof bowl over simmering water or in the microwave. Allow it to cool slightly, then mix it into the butter mixture until fully combined.
  5. Gradually add the dry ingredients to the chocolate mixture, stirring until just combined. Fold in the chopped hazelnuts.
  6. Pour the batter into the prepared cake pan and smooth the top. Bake for 30-35 minutes, or until a toothpick inserted into the center comes out clean. Let cool in the pan for 10 minutes before transferring to a wire rack to cool completely.
  7. To make the whipped coffee cream, dissolve the instant coffee in hot water. In a mixing bowl, beat the heavy cream and powdered sugar until soft peaks form. Gradually fold in the coffee mixture until fully incorporated.
  8. Once the torte is completely cool, spread the whipped coffee cream on top and decorate with additional chopped hazelnuts, if desired. Serve and enjoy!

Notes

Tip: For an extra layer of flavor, try adding a splash of hazelnut liqueur to the batter or cream.

For best results, use high-quality dark chocolate with at least 70% cocoa content for a richer flavor. If you’re short on time, you can prepare the whipped coffee cream ahead of time and store it in the refrigerator until serving.

To make this dessert even more special, consider adding a sprinkle of sea salt on top for contrast or drizzling extra melted chocolate over the torte before serving. This torte keeps well in the fridge for up to three days; just be sure to cover it to maintain its moisture.

July 20, 2026 0 comments
0 FacebookTwitterPinterestPocketEmail
Rich and Creamy Tuscan Tomato Basil Soup with Garlic Parmesan Croutons
Quick & Easy (30-Min)Soups & SaladsVegetarian

Rich and Creamy Tuscan Tomato Basil Soup with Garlic Parmesan Croutons

by jorlijesempire July 20, 2026
written by jorlijesempire

This Tuscan Tomato Basil Soup is a delightful blend of ripe tomatoes, fresh basil, and rich cream, creating a comforting dish that warms the soul. The homemade garlic Parmesan croutons add a satisfying crunch and elevate the soup to a new level of deliciousness.

Perfect for a chilly evening or as a starter to impress guests, this recipe uses simple ingredients to create a dish that is both hearty and flavorful. Enjoy a taste of Tuscany right in your own kitchen!

Rich and Creamy Tuscan Tomato Basil Soup with Garlic Parmesan Croutons

Rich and Creamy Tuscan Tomato Basil Soup with Garlic Parmesan Croutons

Serves: 4-6 Prep Time: 15 minutes Cooking Time: 30 minutes 30 minutes
Nutrition facts: 320 calories 20g fat
Rating: 5.0/5
( 1 voted )
Pin
Print

Ingredients

INGREDIENTS

  • 2 tbsp olive oil
  • 1 medium onion, chopped
  • 3 cloves garlic, minced
  • 2 cans (14 oz each) diced tomatoes
  • 2 cups vegetable broth
  • 1 cup heavy cream
  • 1 cup fresh basil leaves, chopped
  • Salt and pepper to taste
  • 1 cup cubed bread (preferably ciabatta or sourdough)
  • 1/2 cup grated Parmesan cheese
  • 1 tsp garlic powder
  • 1 tsp dried Italian herbs

Instructions

  1. Heat olive oil in a large pot over medium heat. Add chopped onion and sauté until translucent, about 5 minutes.
  2. Stir in minced garlic and cook for an additional minute until fragrant.
  3. Add the diced tomatoes (with juice) and vegetable broth. Bring to a boil, then reduce the heat and simmer for 15 minutes.
  4. Stir in the heavy cream and fresh basil, then season with salt and pepper to taste. Use an immersion blender for a smooth consistency, if desired.
  5. Meanwhile, preheat the oven to 375°F (190°C). In a bowl, combine cubed bread, olive oil, garlic powder, Italian herbs, and half of the Parmesan cheese. Toss to coat evenly.
  6. Spread the bread cubes on a baking sheet and bake for 10-12 minutes or until golden brown and crispy.
  7. Serve the soup hot, garnished with the remaining Parmesan and topped with the garlic Parmesan croutons.

Notes

Tip: For an extra touch, drizzle balsamic glaze over the soup before serving.

For the best flavor, use fresh, in-season tomatoes if possible, or opt for high-quality canned tomatoes. If you prefer a smoother texture, blend the soup until creamy. You can store leftovers in an airtight container in the refrigerator for up to 3 days, or freeze for up to a month.

Feel free to customize the croutons by adding herbs like thyme or oregano for extra flavor, and use day-old bread for a better texture!

July 20, 2026 0 comments
0 FacebookTwitterPinterestPocketEmail
Newer Posts
Older Posts

Recent Posts

  • Vibrant Crunchy Rainbow Quinoa Salad with Zesty Cilantro-Lime Dressing

    November 6, 2026
  • Spicy Curried Butternut Squash Soup with Crunchy Pepitas

    November 6, 2026
  • Sweet and Savory Teriyaki Salmon with Sesame-Infused Bok Choy

    November 6, 2026
  • Robust Chorizo and Creamy White Bean Casserole

    November 6, 2026
  • Lime-Infused Coconut Grilled Chicken with Fresh Pineapple Salsa

    November 6, 2026

About Me

About Me

I'm Linda, a health professional, university graduate, and author sharing tested, easy-to-follow recipes made from simple, everyday ingredients. Based in Finland, I bring together my culinary training, love of travel, and home-cooked roots to help you cook confidently, on any budget.

Products

  • Spooky Creative Starry Sky Ceramic Mug Spooky Creative Starry Sky Ceramic Mug 10,00 €

Categories

  • Appetizers & Snacks (349)
  • Breakfast & Brunch (288)
  • Desserts & Baking (362)
  • Drinks & Beverages (284)
  • Gluten-Free (441)
  • Grilling & BBQ (12)
  • Healthy & Low-Calorie (392)
  • Holiday & Seasonal (37)
  • Kid-Friendly (507)
  • Main Dishes (380)
  • Quick & Easy (30-Min) (1,529)
  • Slow Cooker & Instant Pot (4)
  • Soups & Salads (227)
  • Vegan (376)
  • Vegetarian (1,224)

About Me

I'm Linda, a health professional and food writer sharing tested, easy-to-follow recipes made from simple ingredients.

Email: jspiceygiftstv@gmail.com

Useful Links

  • Home
  • About
  • Contact
  • Free Cookbooks
  • Terms and Conditions
  • Privacy Policy

Newsletter

Subscribe to to our Newsletter to stay updated with all our recipes.

Recent Posts

  • Vibrant Crunchy Rainbow Quinoa Salad with Zesty Cilantro-Lime Dressing

    November 6, 2026
  • Spicy Curried Butternut Squash Soup with Crunchy Pepitas

    November 6, 2026
  • Instagram
  • Pinterest
  • Youtube
  • Tiktok

@2026 - All Right Reserved. Designed and Developed by JSpiceyGifts

J Spicey Gifts
  • Home
  • Recipes
    • Breakfast & Brunch
    • Appetizers & Snacks
    • Main Dishes
    • Soups & Salads
    • Desserts & Baking
    • Drinks & Beverages
  • Categories
    • Vegetarian
    • Vegan
    • Gluten-Free
    • Quick & Easy (30-Min)
    • Slow Cooker & Instant Pot
    • Grilling & BBQ
    • Healthy & Low-Calorie
    • Holiday & Seasonal
    • Kid-Friendly
  • About
  • Contact

Shopping Cart

Close

No products in the cart.

Close