J Spicey Gifts
  • Home
  • Recipes
    • Breakfast & Brunch
    • Appetizers & Snacks
    • Main Dishes
    • Soups & Salads
    • Desserts & Baking
    • Drinks & Beverages
  • Categories
    • Vegetarian
    • Vegan
    • Gluten-Free
    • Quick & Easy (30-Min)
    • Slow Cooker & Instant Pot
    • Grilling & BBQ
    • Healthy & Low-Calorie
    • Holiday & Seasonal
    • Kid-Friendly
  • About
  • Contact
Top Posts
Savory Chive and Cheddar Breakfast Scones
Maple-Bourbon Pecan Overnight Oats
Luscious Coconut Avocado Smoothie Delight
Cool Spicy Mango Lime Refresher
Sparkling Hibiscus Berry Bliss
Tropical Passionfruit Mint Refresher
Citrus Chill Fusion Fizz
Decadent Salted Caramel Espresso Brownies with a Rich...
Brilliant Blackberry Lime Meringue Tart
Delicious Raspberry Almond Tartlets with Honey Drizzle
J Spicey Gifts
  • Home
  • Recipes
    • Breakfast & Brunch
    • Appetizers & Snacks
    • Main Dishes
    • Soups & Salads
    • Desserts & Baking
    • Drinks & Beverages
  • Categories
    • Vegetarian
    • Vegan
    • Gluten-Free
    • Quick & Easy (30-Min)
    • Slow Cooker & Instant Pot
    • Grilling & BBQ
    • Healthy & Low-Calorie
    • Holiday & Seasonal
    • Kid-Friendly
  • About
  • Contact
J Spicey Gifts
J Spicey Gifts
  • Home
  • Recipes
    • Breakfast & Brunch
    • Appetizers & Snacks
    • Main Dishes
    • Soups & Salads
    • Desserts & Baking
    • Drinks & Beverages
  • Categories
    • Vegetarian
    • Vegan
    • Gluten-Free
    • Quick & Easy (30-Min)
    • Slow Cooker & Instant Pot
    • Grilling & BBQ
    • Healthy & Low-Calorie
    • Holiday & Seasonal
    • Kid-Friendly
  • About
  • Contact
Copyright 2021 - All Right Reserved
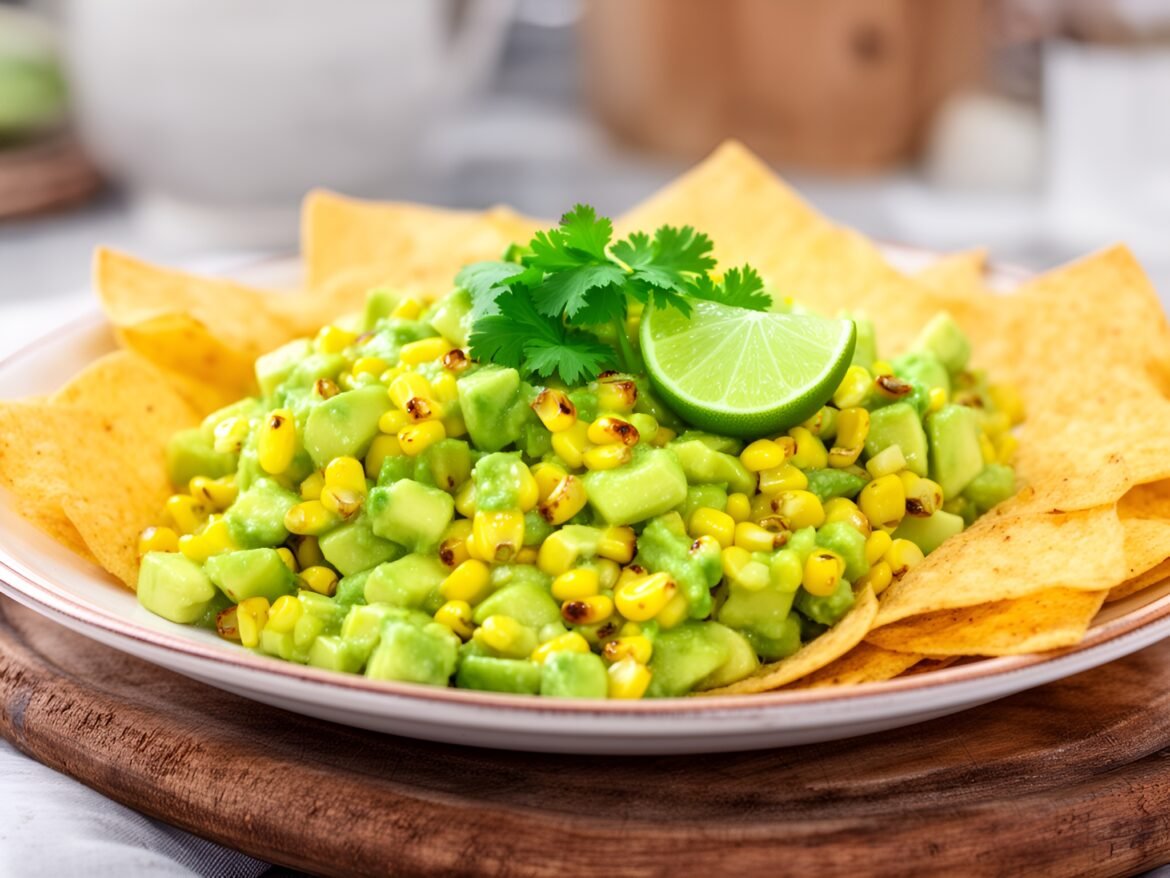
Zesty Fiery Roasted Corn and Avocado Salsa Bites
Appetizers & SnacksGluten-FreeQuick & Easy (30-Min)Vegetarian

Zesty Fiery Roasted Corn and Avocado Salsa Bites

by Linda August 17, 2026
written by Linda

Get ready to awaken your taste buds with these Zesty Fiery Roasted Corn and Avocado Salsa Bites! This vibrant appetizer combines the sweetness of roasted corn with the creaminess of fresh avocado, creating a delightful explosion of flavor.

What sets this dish apart is its fiery twist, featuring a hint of jalapeño and lime that elevates it to a whole new level. These bites are not just delicious; they are visually stunning and make for a perfect finger food at any gathering or party.
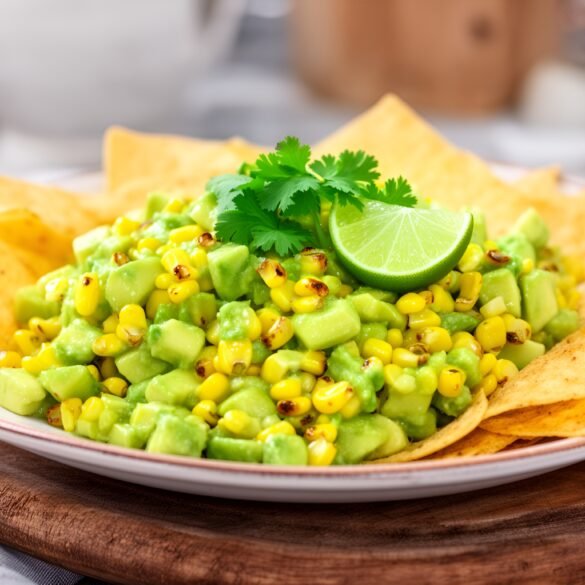
Zesty Fiery Roasted Corn and Avocado Salsa Bites

Zesty Fiery Roasted Corn and Avocado Salsa Bites

Serves: 4-6 Prep Time: 15 minutes Cooking Time: 10 minutes 10 minutes
Nutrition facts: 150 calories 9g fat
Rating: 5.0/5
( 1 voted )
Pin
Print

Ingredients

INGREDIENTS

  • 2 cups corn kernels (fresh, frozen, or canned)
  • 1 ripe avocado, diced
  • 1 jalapeño, minced
  • 1/4 cup red onion, finely chopped
  • 1/4 cup fresh cilantro, chopped
  • Juice of 1 lime
  • Salt and pepper to taste
  • Tortilla chips or small cups for serving

Instructions

  1. Preheat your oven to 400°F (200°C).
  2. Spread the corn kernels evenly on a baking sheet and roast in the oven for about 10 minutes, or until they start to caramelize and turn golden.
  3. In a mixing bowl, combine the roasted corn, diced avocado, minced jalapeño, chopped red onion, and chopped cilantro.
  4. Squeeze fresh lime juice over the mixture and season with salt and pepper to taste. Gently toss to combine without mashing the avocado.
  5. Serve the salsa in small cups or atop tortilla chips for easy snacking. Enjoy!

Notes

Tip: Adjust the amount of jalapeño to suit your spice preference, and feel free to add a dash of hot sauce for an extra kick!

For added texture, consider adding diced red onion or fresh cilantro to the salsa. If you prefer a milder flavor, you can substitute the jalapeño with a sweet bell pepper.

Leftover salsa can be stored in an airtight container in the refrigerator for up to two days. Serve with tortilla chips for a delightful snack!


August 17, 2026 0 comments
0 FacebookTwitterPinterestPocketEmail
Savory Spinach-Feta Flatbreads Topped with Poached Eggs
Breakfast & BrunchKid-FriendlyQuick & Easy (30-Min)Vegetarian

Savory Spinach-Feta Flatbreads Topped with Poached Eggs

by Linda August 17, 2026
written by Linda

These Savory Spinach-Feta Breakfast Flatbreads with Poached Eggs are the perfect way to kick-start your morning. With a crisp flatbread base, creamy feta cheese, and vibrant spinach, this dish is both nutritious and satisfying.

The poached eggs add a luxurious touch, creating a rich and creamy sauce when broken, making every bite a delightful experience. Not only are these flatbreads easy to prepare, but they also showcase the wonderful combination of flavors that will leave you energized for the day ahead.

Savory Spinach-Feta Flatbreads Topped with Poached Eggs

Savory Spinach-Feta Flatbreads Topped with Poached Eggs

Serves: 2 Prep Time: 10 minutes Cooking Time: 15 minutes 15 minutes
Nutrition facts: 320 calories 18g fat
Rating: 5.0/5
( 1 voted )
Pin
Print

Ingredients

INGREDIENTS

  • 2 flatbreads
  • 1 tablespoon olive oil
  • 2 cups fresh spinach
  • 1/2 cup crumbled feta cheese
  • 2 large eggs
  • Salt and pepper to taste
  • Fresh herbs for garnish (optional)

Instructions

  1. Preheat your oven to 400°F (200°C).
  2. Brush the flatbreads with olive oil on both sides and place them on a baking sheet.
  3. Bake the flatbreads in the oven for about 5 minutes until they begin to crisp.
  4. In a skillet over medium heat, sauté the fresh spinach until wilted, about 2-3 minutes. Season with salt and pepper.
  5. Spread the sautéed spinach evenly over the baked flatbreads, then sprinkle crumbled feta cheese on top.
  6. Return the flatbreads to the oven and bake for another 5-7 minutes until the cheese is slightly melted and the flatbreads are crispy.
  7. While the flatbreads are baking, poach the eggs in simmering water until the whites are set but the yolks are still runny, about 3-4 minutes.
  8. Remove the flatbreads from the oven and top each one with a poached egg. Garnish with fresh herbs if desired.
  9. Serve immediately, adding additional salt and pepper to taste.

Notes

Storage: These flatbreads are best enjoyed fresh but can be stored in the refrigerator for up to 2 days. Reheat in a toaster oven for best results.

For the perfect poached eggs, make sure to use fresh eggs to achieve the best shape and texture. Adding a splash of vinegar to the water can help the egg whites set better.

Don’t hesitate to customize the toppings according to your preference! You can add sliced avocado, fresh herbs, or even a drizzle of hot sauce for an extra kick.

These flatbreads can be prepared in advance; simply reheat them in the oven before serving. Enjoy them fresh from the oven for the best flavor and texture!

August 17, 2026 0 comments
0 FacebookTwitterPinterestPocketEmail
Fluffy Lemon-Blueberry Quinoa Pancakes with Honey Yogurt Drizzle
Breakfast & BrunchKid-FriendlyQuick & Easy (30-Min)Vegetarian

Fluffy Lemon-Blueberry Quinoa Pancakes with Honey Yogurt Drizzle

by Linda August 17, 2026
written by Linda

Start your day with a burst of flavor in these fluffy Lemon-Blueberry Quinoa Pancakes, a refreshing twist on a breakfast classic. Packed with protein from quinoa and loaded with juicy blueberries, these pancakes are both satisfying and nutritious.

The addition of bright lemon zest elevates the flavor profile, making each bite a delightful experience. Drizzled with a creamy honey yogurt sauce, these pancakes are perfect for a leisurely weekend brunch or a special occasion breakfast.

Fluffy Lemon-Blueberry Quinoa Pancakes with Honey Yogurt Drizzle

Fluffy Lemon-Blueberry Quinoa Pancakes with Honey Yogurt Drizzle

Serves: 4 Prep Time: 15 minutes Cooking Time: 20 minutes 20 minutes
Nutrition facts: 250 calories 8g fat
Rating: 5.0/5
( 1 voted )
Pin
Print

Ingredients

INGREDIENTS

  • 1 cup cooked quinoa
  • 1 cup all-purpose flour (or whole wheat flour)
  • 1 tablespoon baking powder
  • 1/2 teaspoon salt
  • 2 tablespoons sugar
  • 1 cup milk (dairy or non-dairy)
  • 2 large eggs
  • 1 tablespoon lemon zest
  • 1/2 cup fresh blueberries
  • 1 tablespoon vegetable oil (plus more for cooking)

FOR THE HONEY YOGURT DRIZZLE

  • 1/2 cup Greek yogurt (or non-dairy yogurt)
  • 2 tablespoons honey (or maple syrup for vegan option)
  • 1 tablespoon lemon juice

Instructions

  1. In a large bowl, combine cooked quinoa, flour, baking powder, salt, and sugar.
  2. In another bowl, whisk together milk, eggs, and lemon zest until well blended.
  3. Pour the wet ingredients into the dry ingredients and stir until just combined; fold in blueberries gently.
  4. Heat a skillet over medium heat and add a little vegetable oil.
  5. For each pancake, pour 1/4 cup of batter onto the skillet and cook until bubbles form on the surface, about 3-4 minutes. Flip and cook for another 2-3 minutes until golden brown.
  6. Repeat with the remaining batter, adding more oil to the skillet as needed.
  7. For the honey yogurt drizzle, mix together Greek yogurt, honey, and lemon juice in a small bowl until smooth.
  8. Serve pancakes warm, drizzled with honey yogurt and extra blueberries if desired.

Notes

Tip: These pancakes are best served fresh but can be stored in the refrigerator for up to 3 days or frozen for longer shelf life.

For best results, use fresh blueberries; if using frozen, do not thaw them to prevent the batter from turning blue. Feel free to substitute Greek yogurt with any non-dairy yogurt for a vegan option.

To store leftovers, place them in an airtight container in the fridge for up to three days. Reheat on a skillet or in the microwave before serving. You can also freeze the pancakes; simply layer them with parchment paper and store in a freezer bag. Reheat directly from frozen, adding a minute or two to cooking time.

August 17, 2026 0 comments
0 FacebookTwitterPinterestPocketEmail
Spicy Grapefruit Spritz with Chili Infusion
Drinks & BeveragesHealthy & Low-CalorieQuick & Easy (30-Min)

Spicy Grapefruit Spritz with Chili Infusion

by Linda August 16, 2026
written by Linda

Experience the perfect balance of sweet and spicy with this Chili-Infused Grapefruit Spritz. This invigorating drink combines the tartness of grapefruit with a hint of heat from chili, making it an ideal choice for warm summer evenings or lively gatherings.

The infusion process is simple yet effective, allowing the sweet, juicy notes of the grapefruit to shine through while the chili adds an unexpected twist. Serve it over ice and watch as your guests enjoy the refreshing bubbles of sparkling water mingled with the complex flavors!

Spicy Grapefruit Spritz with Chili Infusion

Spicy Grapefruit Spritz with Chili Infusion

Serves: 4 Prep Time: 10 minutes Cooking Time: 0 minutes 0 minutes
Nutrition facts: 120 calories 0g fat
Rating: 5.0/5
( 1 voted )
Pin
Print

Ingredients

INGREDIENTS

  • 2 ripe grapefruits
  • 2 tablespoons chili flakes
  • 1/2 cup sugar
  • 2 cups sparkling water
  • Ice cubes
  • Grapefruit slices and chili flakes for garnish

Instructions

  1. Juice the grapefruits and strain to remove any seeds or pulp.
  2. In a small saucepan, combine the grapefruit juice, sugar, and chili flakes, and heat over medium until the sugar dissolves. Remove from heat and let it steep for 10 minutes.
  3. Strain the mixture through a fine mesh sieve to remove the chili flakes, creating a grapefruit chili syrup.
  4. In a glass, combine 1/4 cup of the grapefruit chili syrup with ice cubes and add 1/2 cup of sparkling water. Stir gently to combine.
  5. Garnish with slices of grapefruit and a sprinkle of chili flakes on top before serving.

Notes

Make ahead: Prepare the grapefruit chili syrup in advance and refrigerate for quick assembly when guests arrive.

For a milder version, reduce the chili infusion time or use fewer chili flakes. If you want to enhance the flavor, try adding fresh mint leaves or a splash of elderflower cordial.

This spritz pairs beautifully with light appetizers like shrimp cocktails or spicy tacos. For storage, keep the infused syrup in a sealed container in the refrigerator for up to a week; just mix as needed!

August 16, 2026 0 comments
0 FacebookTwitterPinterestPocketEmail
Sparkling Rosemary Lemonade with a Twist
Drinks & BeveragesGluten-FreeQuick & Easy (30-Min)Vegan

Sparkling Rosemary Lemonade with a Twist

by Linda August 16, 2026
written by Linda

Nothing says summer quite like a refreshing glass of lemonade, and this sparkling rosemary-infused version takes it to a new level. The combination of zesty lemon and aromatic rosemary creates a delightful balance that’s both invigorating and unique.

The fizz adds a celebratory touch, making it perfect for picnics, barbecues, or simply enjoying on a sunny afternoon. With natural sweetness and a hint of herbal aroma, this drink will surely become your go-to refreshment this season.

Sparkling Rosemary Lemonade with a Twist

Sparkling Rosemary Lemonade with a Twist

Serves: 4 Prep Time: 10 minutes Cooking Time: 5 minutes 5 minutes
Nutrition facts: 120 calories 0g fat
Rating: 5.0/5
( 1 voted )
Pin
Print

Ingredients

INGREDIENTS

  • 1 cup fresh lemon juice
  • 1 cup sugar or honey (to taste)
  • 4 sprigs fresh rosemary
  • 4 cups sparkling water
  • Ice cubes
  • Lemon slices and rosemary sprigs for garnish

Instructions

  1. In a small saucepan, combine sugar (or honey) and 1 cup of water. Bring to a simmer, stirring until dissolved.
  2. Add rosemary sprigs to the syrup, remove from heat, and let steep for 10 minutes.
  3. Strain the syrup into a pitcher, discarding the rosemary.
  4. Add fresh lemon juice and mix well.
  5. Pour in the sparkling water and stir gently to combine.
  6. Serve over ice, garnished with lemon slices and additional rosemary sprigs. Enjoy!

Notes

Tip: For a fun twist, add a splash of gin or vodka for a refreshing cocktail version!

For a stronger rosemary flavor, consider steeping the rosemary longer in the simple syrup. If you prefer a sweeter drink, adjust the honey or sugar to taste. You can also experiment with other herbs like mint or basil for variation.

Store any leftover lemonade in the refrigerator for up to three days. To serve, simply add more sparkling water to re-fizz and refresh!

August 16, 2026 0 comments
0 FacebookTwitterPinterestPocketEmail
Decadent Chocolate Hazelnut Bliss Cookies with Sea Salt Flakes
Desserts & BakingKid-FriendlyQuick & Easy (30-Min)Vegetarian

Decadent Chocolate Hazelnut Bliss Cookies with Sea Salt Flakes

by Linda August 16, 2026
written by Linda

Chocolate Hazelnut Bliss Cookies are a true treat for the senses, combining the rich flavors of chocolate and hazelnut for an unforgettable bite. Each cookie is soft and chewy, bursting with chocolate chips and finely chopped hazelnuts, topped with a delicate sprinkle of sea salt to enhance the flavors.

Perfect for any occasion, these cookies are not only a delightful dessert but also a wonderful way to impress guests. The combination of textures—from the crunch of hazelnuts to the melting chocolate—makes these cookies a must-try. Enjoy them fresh out of the oven or as a sweet snack throughout the day!

Decadent Chocolate Hazelnut Bliss Cookies with Sea Salt Flakes

Decadent Chocolate Hazelnut Bliss Cookies with Sea Salt Flakes

Serves: 24 Prep Time: 15 minutes Cooking Time: 12 minutes 12 minutes
Nutrition facts: 150 calories 9g fat
Rating: 5.0/5
( 1 voted )
Pin
Print

Ingredients

INGREDIENTS

  • 1 cup unsalted butter, softened
  • 1 cup brown sugar
  • 1/2 cup granulated sugar
  • 2 large eggs
  • 1 teaspoon vanilla extract
  • 2 cups all-purpose flour
  • 1/2 cup cocoa powder
  • 1 teaspoon baking soda
  • 1/2 teaspoon salt
  • 1 cup chocolate chips (dark or semi-sweet)
  • 1 cup chopped hazelnuts
  • Sea salt flakes for topping

Instructions

  1. Preheat your oven to 350°F (175°C) and line a baking sheet with parchment paper.
  2. In a large mixing bowl, cream together the softened butter, brown sugar, and granulated sugar until light and fluffy.
  3. Add the eggs one at a time, mixing well after each addition. Stir in the vanilla extract.
  4. In a separate bowl, whisk together the flour, cocoa powder, baking soda, and salt.
  5. Gradually add the dry ingredients to the wet ingredients, mixing until just combined.
  6. Fold in the chocolate chips and chopped hazelnuts until evenly distributed.
  7. Scoop tablespoon-sized portions of dough and place them on the prepared baking sheet, leaving space between each cookie.
  8. Sprinkle a pinch of sea salt on top of each cookie before baking.
  9. Bake for 10-12 minutes, until the edges are set but the centers are still soft.
  10. Remove from the oven and let the cookies cool on the baking sheet for 5 minutes before transferring to a wire rack to cool completely.

Notes

Tip: For the best flavor, use high-quality chocolate and hazelnuts. If you prefer a sweeter cookie, adjust the sugar to taste.

To ensure your cookies are perfectly chewy, avoid overbaking them. They will firm up as they cool. If you want an extra nutty flavor, toast the hazelnuts lightly before chopping.

These cookies can be stored in an airtight container for up to a week. For a fun twist, try substituting the hazelnuts with almonds or pecans, or add a touch of instant espresso powder for a mocha flavor!

August 16, 2026 0 comments
0 FacebookTwitterPinterestPocketEmail
Cinnamon Swirl Apple Pie Bars with Caramel Drizzle
Desserts & BakingKid-FriendlyQuick & Easy (30-Min)Vegetarian

Cinnamon Swirl Apple Pie Bars with Caramel Drizzle

by Linda August 16, 2026
written by Linda

These Cinnamon Swirl Apple Pie Bars are a delicious twist on the traditional apple pie, combining tender, buttery bars with a warm cinnamon swirl and sweet apple filling. Perfect for fall gatherings or a cozy night in, they offer all the comforting flavors of apple pie in a convenient bar form.

The contrast of spices and caramel creates a decadent treat that’s sure to impress your family and friends. With a rich, buttery crust and a drizzle of homemade caramel, these bars are as beautiful as they are delicious.

Cinnamon Swirl Apple Pie Bars with Caramel Drizzle

Cinnamon Swirl Apple Pie Bars with Caramel Drizzle

Serves: 12 Prep Time: 30 minutes Cooking Time: 45 minutes 45 minutes
Nutrition facts: 320 calories 15g fat
Rating: 5.0/5
( 1 voted )
Pin
Print

Ingredients

INGREDIENTS

  • 2 cups all-purpose flour
  • 1 cup unsalted butter, softened
  • 1 cup granulated sugar
  • 1/2 cup brown sugar
  • 1 large egg
  • 1 teaspoon vanilla extract
  • 1 teaspoon baking powder
  • 1/2 teaspoon salt
  • 1 teaspoon ground cinnamon
  • 3 cups peeled and sliced apples (Granny Smith or Honeycrisp)
  • 1 tablespoon lemon juice
  • 1/4 cup caramel sauce (for drizzle)

Instructions

  1. Preheat the oven to 350°F (175°C) and grease a 9x13 inch baking pan.
  2. In a large mixing bowl, cream together the softened butter, granulated sugar, and brown sugar until light and fluffy.
  3. Add the egg and vanilla, mixing until well combined.
  4. In another bowl, whisk together the flour, baking powder, salt, and cinnamon. Gradually add the dry ingredients to the wet mixture, stirring until just combined.
  5. Press half of the dough into the bottom of the prepared baking pan to create a crust.
  6. In a separate bowl, toss the sliced apples with lemon juice and a sprinkle of cinnamon. Spread the apple mixture evenly over the crust.
  7. Drop spoonfuls of the remaining dough over the apples, creating a swirl pattern. Use a knife to gently swirl the dough for a marbled effect.
  8. Bake in the preheated oven for 30-35 minutes, or until golden brown and a toothpick inserted in the center comes out clean.
  9. Let cool in the pan for at least 10 minutes before cutting into bars. Drizzle with caramel sauce before serving.

Notes

Tip: For added texture, sprinkle some chopped nuts over the apple filling before topping with the dough.

For an extra burst of flavor, add a pinch of nutmeg to the apple filling. If you don’t have caramel sauce on hand, you can quickly make your own by melting sugar and butter together until it reaches a smooth, silky consistency.

Store any leftovers in an airtight container at room temperature for up to 3 days. These bars also freeze well; just ensure they are wrapped tightly to avoid freezer burn.

August 16, 2026 0 comments
0 FacebookTwitterPinterestPocketEmail
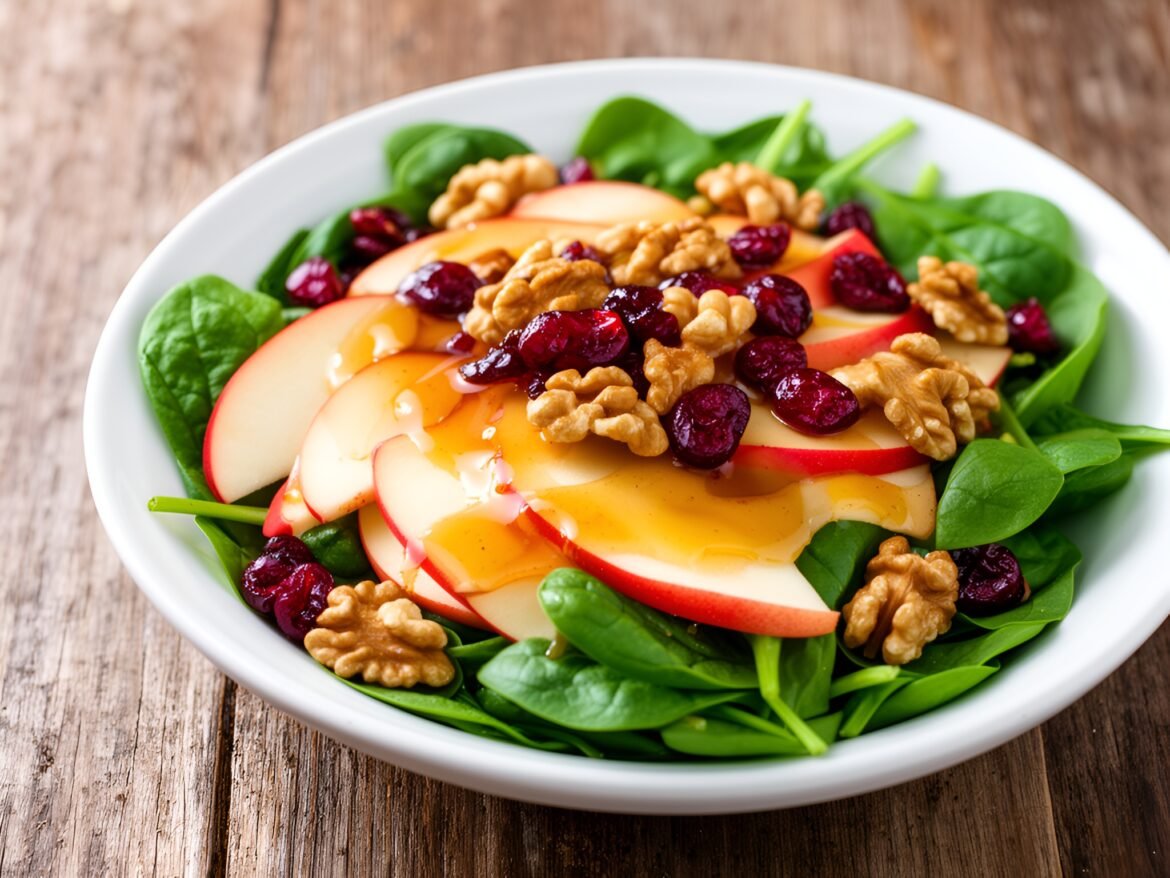
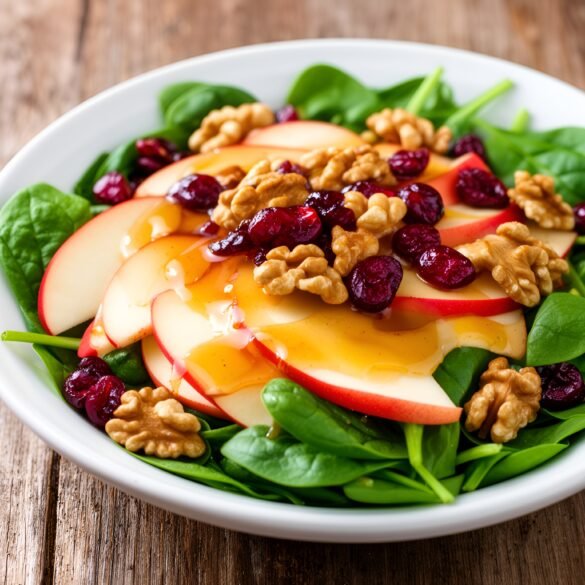
Autumn Apple-Cranberry Spinach Salad with Maple-Walnut Vinaigrette
Healthy & Low-CalorieSoups & SaladsVegetarian

Autumn Apple-Cranberry Spinach Salad with Maple-Walnut Vinaigrette

by Linda August 16, 2026
written by Linda

This Autumn Apple-Cranberry Spinach Salad is a delightful blend of flavors and textures, perfect for celebrating the harvest season. Fresh spinach provides a vibrant base, while crisp apples and tart cranberries add a seasonal sweetness. The crowning touch is the homemade maple-walnut vinaigrette, offering a rich, nutty flavor that complements the salad beautifully.

The combination of crunchy walnuts and chewy cranberries enhances the salad’s overall appeal, making it an excellent choice for gatherings or a simple weeknight dinner. This dish is not only delicious but also packed with nutrients, making it a wholesome addition to your meal lineup.

Autumn Apple-Cranberry Spinach Salad with Maple-Walnut Vinaigrette

Autumn Apple-Cranberry Spinach Salad with Maple-Walnut Vinaigrette

Serves: 4-6 Prep Time: 15 minutes Cooking Time: 5 minutes 5 minutes
Nutrition facts: 220 calories 15g fat
Rating: 5.0/5
( 1 voted )
Pin
Print

Ingredients

INGREDIENTS

  • 6 cups fresh spinach leaves
  • 1 large apple, thinly sliced (Fuji or Granny Smith)
  • 1/2 cup dried cranberries
  • 1/2 cup walnuts, chopped
  • 1/4 cup crumbled feta cheese (optional)

FOR THE MAPLE-WALNUT VINAIGRETTE

  • 1/4 cup olive oil
  • 2 tablespoons apple cider vinegar
  • 2 tablespoons maple syrup
  • 1/4 cup walnuts, finely chopped
  • Salt and pepper to taste

Instructions

  1. In a small skillet, toast the chopped walnuts over medium heat for 3-5 minutes until fragrant, stirring frequently. Remove from heat and let cool.
  2. In a medium bowl, whisk together olive oil, apple cider vinegar, maple syrup, and finely chopped walnuts. Season with salt and pepper to taste.
  3. In a large salad bowl, combine fresh spinach, sliced apple, dried cranberries, and toasted walnuts.
  4. Drizzle the maple-walnut vinaigrette over the salad just before serving and toss gently to combine.
  5. If desired, sprinkle crumbled feta cheese on top for an extra layer of flavor. Serve immediately.

Notes

Storage: This salad is best enjoyed fresh, but you can store leftovers (without dressing) in an airtight container in the fridge for up to 2 days. Dress just before serving for optimal freshness.

For added texture, try toasting the walnuts before adding them to the salad. This enhances their flavor and adds a delightful crunch. If you’re looking for a nut-free version, you can substitute sunflower seeds for walnuts.

The apple variety can be adapted based on your preference – sweet Fuji or tart Granny Smith apples both work well. To make this salad ahead of time, prepare the vinaigrette separately and keep it refrigerated. Just toss the salad ingredients together before serving for the freshest taste.

August 16, 2026 0 comments
0 FacebookTwitterPinterestPocketEmail
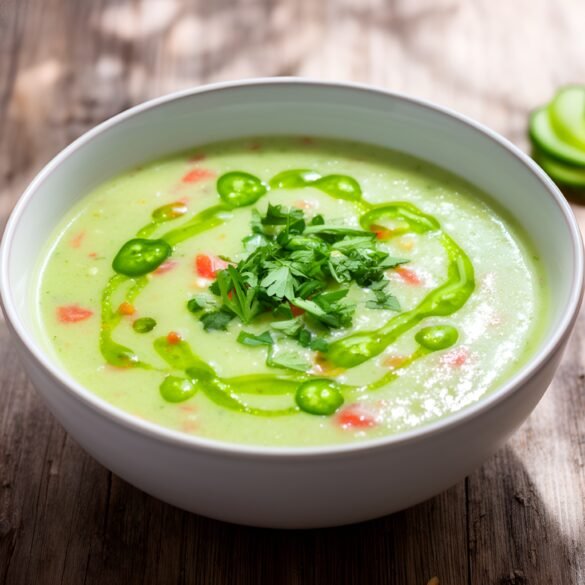
Coconut-Lemongrass Chilled Gazpacho with Spicy Jalapeño Drizzle
Gluten-FreeSoups & SaladsVeganVegetarian

Coconut-Lemongrass Chilled Gazpacho with Spicy Jalapeño Drizzle

by Linda August 16, 2026
written by Linda

Beat the heat with this refreshing Coconut-Lemongrass Chilled Gazpacho, a vibrant twist on the classic summer soup. The creamy coconut milk paired with the citrusy notes of lemongrass brings an exotic flair to your palate, making it perfect for hot days or outdoor gatherings.

This gazpacho is not only delicious but also easy to make. Just blend fresh, ripe vegetables and herbs, chill, and serve. The added spicy jalapeño drizzle provides an exciting contrast to the cool, creamy base, ensuring each spoonful is packed with flavor!

Coconut-Lemongrass Chilled Gazpacho with Spicy Jalapeño Drizzle

Coconut-Lemongrass Chilled Gazpacho with Spicy Jalapeño Drizzle

Serves: 4 Prep Time: 15 minutes Cooking Time: 0 minutes 0 minutes
Nutrition facts: 150 calories 7g fat
Rating: 5.0/5
( 1 voted )
Pin
Print

Ingredients

INGREDIENTS

  • 2 cups diced ripe tomatoes
  • 1 cup diced cucumber
  • 1/2 cup chopped red bell pepper
  • 1/2 cup coconut milk
  • 1 stalk lemongrass, finely chopped
  • 2 tablespoons lime juice
  • 1 tablespoon olive oil
  • Salt and pepper to taste
  • 1 jalapeño, seeded and chopped
  • 1 tablespoon honey or agave syrup (optional)

Instructions

  1. Combine the diced tomatoes, cucumber, red bell pepper, coconut milk, chopped lemongrass, lime juice, and olive oil in a blender.
  2. Season with salt and pepper, then blend until smooth and creamy. Adjust seasoning as needed.
  3. Chill the gazpacho in the refrigerator for at least 1 hour before serving.
  4. For the spicy jalapeño drizzle, blend the chopped jalapeño with a splash of water and honey (if using) until smooth.
  5. Drizzle the jalapeño mixture over the chilled gazpacho before serving and enjoy!

Notes

Tip: For added freshness, garnish with chopped cilantro or mint before serving.

For a milder version, remove the seeds from the jalapeños before blending. If you want to add more texture, consider topping the gazpacho with diced cucumber or bell peppers.

This gazpacho can be stored in the refrigerator for up to 3 days, making it a great make-ahead option for summer parties. Serve it in chilled bowls for an extra refreshing touch!

August 16, 2026 0 comments
0 FacebookTwitterPinterestPocketEmail
Sweet and Spicy Maple-Glazed Pork Tenderloin with Roasted Root Veggies
Main Dishes

Sweet and Spicy Maple-Glazed Pork Tenderloin with Roasted Root Veggies

by Linda August 16, 2026
written by Linda

This Spicy Maple-Glazed Pork Tenderloin is a delightful fusion of sweet and spicy flavors that will elevate your dinner game. The tender pork is marinated and roasted to perfection, bathed in a glossy maple glaze that caramelizes beautifully in the oven. Paired with a medley of roasted root vegetables, this dish not only brings a vibrant array of colors to your plate but also layers of flavor that complement the savory meat.

The secret lies in the balance of heat from red pepper flakes and the natural sweetness of maple syrup, which together create a glaze that clings perfectly to the tenderloin. Roasting the root vegetables alongside the pork allows them to soak up the flavors while achieving a crisp exterior and tender inside.

Sweet and Spicy Maple-Glazed Pork Tenderloin with Roasted Root Veggies

Sweet and Spicy Maple-Glazed Pork Tenderloin with Roasted Root Veggies

Serves: 4 Prep Time: 15 minutes Cooking Time: 45 minutes 45 minutes
Nutrition facts: 350 calories 12g fat
Rating: 5.0/5
( 1 voted )
Pin
Print

Ingredients

INGREDIENTS

  • 1.5 lbs pork tenderloin
  • 1/4 cup pure maple syrup
  • 2 tablespoons Dijon mustard
  • 1 tablespoon soy sauce
  • 1 teaspoon red pepper flakes
  • Salt and pepper to taste
  • 2 cups diced root vegetables (carrots, parsnips, and sweet potatoes)
  • 2 tablespoons olive oil
  • 1 tablespoon fresh thyme leaves

Instructions

  1. Preheat the oven to 400°F (200°C).
  2. In a small bowl, whisk together maple syrup, Dijon mustard, soy sauce, red pepper flakes, and a pinch of salt and pepper.
  3. Place the pork tenderloin in a baking dish and pour the marinade over it, ensuring it is well coated. Let it marinate for at least 30 minutes.
  4. While the pork is marinating, prepare the root vegetables. In a bowl, toss the diced vegetables with olive oil, thyme, and a bit of salt and pepper.
  5. Spread the root vegetables around the pork in the baking dish.
  6. Roast in the preheated oven for 25-30 minutes, or until the pork reaches an internal temperature of 145°F (63°C) and the vegetables are tender and caramelized.
  7. Remove from the oven and let the pork rest for 5-10 minutes before slicing. Serve with the roasted root vegetables.

Notes

Tip: For extra flavor, consider searing the pork in a hot skillet for a few minutes before roasting to develop a nice crust.

When preparing the pork, make sure to allow it to marinate for at least 30 minutes, or even overnight if you have time, for the best flavor. For a spicier kick, you can increase the amount of red pepper flakes or add a dash of hot sauce to the marinade.

Feel free to experiment with the root vegetables; carrots, parsnips, and sweet potatoes work wonderfully. Leftovers can be stored in an airtight container in the refrigerator for up to three days and can be reheated in the oven or microwave.

August 16, 2026 0 comments
0 FacebookTwitterPinterestPocketEmail
Newer Posts
Older Posts

Recent Posts

  • Savory Chive and Cheddar Breakfast Scones

    September 14, 2026
  • Maple-Bourbon Pecan Overnight Oats

    September 14, 2026
  • Luscious Coconut Avocado Smoothie Delight

    September 14, 2026
  • Cool Spicy Mango Lime Refresher

    September 14, 2026
  • Sparkling Hibiscus Berry Bliss

    September 14, 2026

About Me

About Me

I'm Linda, a health professional, university graduate, and author sharing tested, easy-to-follow recipes made from simple, everyday ingredients. Based in Finland, I bring together my culinary training, love of travel, and home-cooked roots to help you cook confidently, on any budget.

Products

  • Spooky Creative Starry Sky Ceramic Mug Spooky Creative Starry Sky Ceramic Mug 10,00 €

Categories

  • Appetizers & Snacks (157)
  • Breakfast & Brunch (128)
  • Desserts & Baking (168)
  • Drinks & Beverages (134)
  • Gluten-Free (203)
  • Grilling & BBQ (11)
  • Healthy & Low-Calorie (190)
  • Holiday & Seasonal (20)
  • Kid-Friendly (236)
  • Main Dishes (185)
  • Quick & Easy (30-Min) (679)
  • Slow Cooker & Instant Pot (4)
  • Soups & Salads (109)
  • Vegan (162)
  • Vegetarian (559)

About Me

I'm Linda, a health professional and food writer sharing tested, easy-to-follow recipes made from simple ingredients.

Email: jspiceygiftstv@gmail.com

Useful Links

  • Home
  • About
  • Contact
  • Free Cookbooks
  • Terms and Conditions
  • Privacy Policy

Newsletter

Subscribe to to our Newsletter to stay updated with all our recipes.

Recent Posts

  • Savory Chive and Cheddar Breakfast Scones

    September 14, 2026
  • Maple-Bourbon Pecan Overnight Oats

    September 14, 2026
  • Instagram
  • Pinterest
  • Youtube
  • Tiktok

@2026 - All Right Reserved. Designed and Developed by JSpiceyGifts

J Spicey Gifts
  • Home
  • Recipes
    • Breakfast & Brunch
    • Appetizers & Snacks
    • Main Dishes
    • Soups & Salads
    • Desserts & Baking
    • Drinks & Beverages
  • Categories
    • Vegetarian
    • Vegan
    • Gluten-Free
    • Quick & Easy (30-Min)
    • Slow Cooker & Instant Pot
    • Grilling & BBQ
    • Healthy & Low-Calorie
    • Holiday & Seasonal
    • Kid-Friendly
  • About
  • Contact

Shopping Cart

Close

No products in the cart.

Close