J Spicey Gifts
  • Home
  • Recipes
    • Breakfast & Brunch
    • Appetizers & Snacks
    • Main Dishes
    • Soups & Salads
    • Desserts & Baking
    • Drinks & Beverages
  • Categories
    • Vegetarian
    • Vegan
    • Gluten-Free
    • Quick & Easy (30-Min)
    • Slow Cooker & Instant Pot
    • Grilling & BBQ
    • Healthy & Low-Calorie
    • Holiday & Seasonal
    • Kid-Friendly
  • About
  • Contact
Top Posts
Savory Garlic Butter Turkey Meatballs on Creamy Herbed...
Moroccan-Spiced Quinoa-Stuffed Eggplant Boats
Zesty Cajun Jambalaya with Shrimp and Andouille Sausage
Herb-Crusted Pork Tenderloin with Sweet Fig Reduction Sauce
Sweet and Spicy Chipotle-Mango Glazed Salmon with Coconut...
Crispy Balsamic Glazed Brussels Sprout Bites
Stuffed Mini Peppers with Spinach and Feta Delight
Savory Chive and Cheddar Breakfast Scones
Maple-Bourbon Pecan Overnight Oats
Luscious Coconut Avocado Smoothie Delight
J Spicey Gifts
  • Home
  • Recipes
    • Breakfast & Brunch
    • Appetizers & Snacks
    • Main Dishes
    • Soups & Salads
    • Desserts & Baking
    • Drinks & Beverages
  • Categories
    • Vegetarian
    • Vegan
    • Gluten-Free
    • Quick & Easy (30-Min)
    • Slow Cooker & Instant Pot
    • Grilling & BBQ
    • Healthy & Low-Calorie
    • Holiday & Seasonal
    • Kid-Friendly
  • About
  • Contact
J Spicey Gifts
J Spicey Gifts
  • Home
  • Recipes
    • Breakfast & Brunch
    • Appetizers & Snacks
    • Main Dishes
    • Soups & Salads
    • Desserts & Baking
    • Drinks & Beverages
  • Categories
    • Vegetarian
    • Vegan
    • Gluten-Free
    • Quick & Easy (30-Min)
    • Slow Cooker & Instant Pot
    • Grilling & BBQ
    • Healthy & Low-Calorie
    • Holiday & Seasonal
    • Kid-Friendly
  • About
  • Contact
Copyright 2021 - All Right Reserved
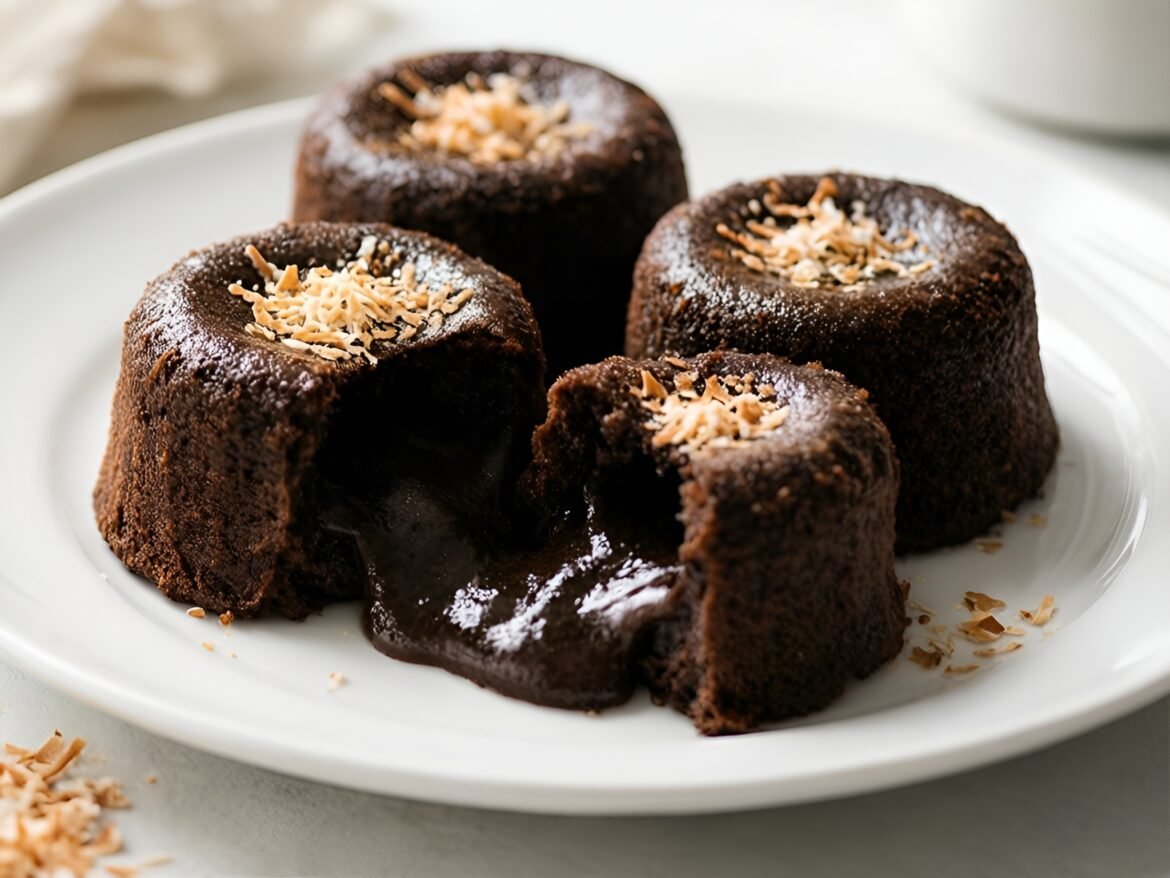
Rich Chocolate-Coconut Lava Cakes with Melting Centers
Desserts & BakingVegetarian

Rich Chocolate-Coconut Lava Cakes with Melting Centers

by Linda August 11, 2026
written by Linda

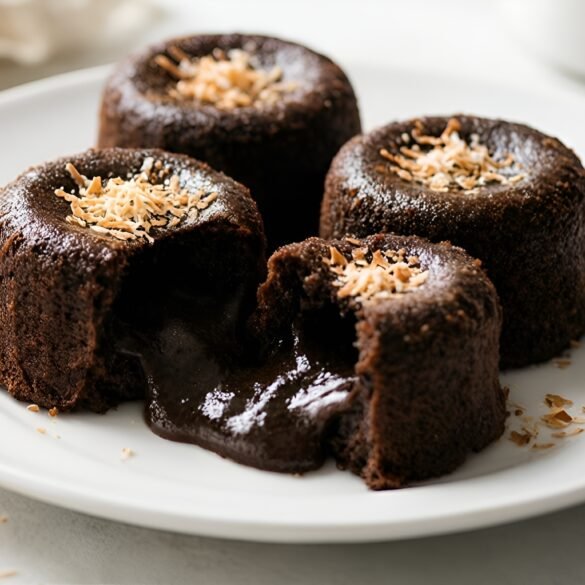
These rich chocolate-coconut lava cakes are the ultimate dessert for chocolate lovers. With a warm, melting center that spills out as you cut into them, they combine the richness of dark chocolate with the tropical flair of coconut.

Perfect for special occasions or a delightful treat any night of the week, these cakes are surprisingly easy to make. Serve them warm, perhaps with a scoop of vanilla ice cream, and prepare for a heavenly experience!
Rich Chocolate-Coconut Lava Cakes with Melting Centers

Rich Chocolate-Coconut Lava Cakes with Melting Centers

Serves: 4 Prep Time: 20 minutes Cooking Time: 12 minutes 12 minutes
Nutrition facts: 350 calories 22g fat
Rating: 5.0/5
( 1 voted )
Pin
Print

Ingredients

INGREDIENTS

  • 1/2 cup unsalted butter
  • 4 oz dark chocolate, chopped
  • 1/4 cup granulated sugar
  • 2 large eggs
  • 2 large egg yolks
  • 1/4 cup all-purpose flour
  • 1/4 cup sweetened shredded coconut
  • 1/2 tsp vanilla extract
  • 1/4 tsp salt
  • additional shredded coconut for garnish

Instructions

  1. Preheat your oven to 425°F (220°C) and grease four ramekins with butter and dust with flour.
  2. In a microwave-safe bowl, melt the butter and dark chocolate together in 30-second intervals, stirring until smooth.
  3. In a separate bowl, whisk together the sugar, eggs, and egg yolks until pale and fluffy.
  4. Add the melted chocolate mixture to the egg mixture, stirring gently to combine.
  5. Fold in the flour, shredded coconut, vanilla extract, and salt until just mixed.
  6. Divide the batter evenly among the prepared ramekins and place them on a baking sheet.
  7. Bake for 10-12 minutes or until the edges are firm but the center is soft.
  8. Remove from the oven and let the cakes cool for 1 minute before inverting them onto plates.
  9. Garnish with additional shredded coconut and serve immediately. Enjoy!

Notes

Storage: These lava cakes are best served fresh but can be refrigerated for up to 2 days. Reheat in the microwave for 10-15 seconds before serving.

For best results, ensure your ramekins are well greased to prevent sticking. If you want to make these ahead of time, you can prepare the batter and store it in the fridge for up to 24 hours. Just add a few extra minutes to the baking time if they go into the oven straight from the fridge.

Feel free to swap out the coconut for other ingredients, like crushed nuts or a different type of chocolate, to customize the flavor.


August 11, 2026 0 comments
0 FacebookTwitterPinterestPocketEmail
Lemon-Dusted Blueberry Cream Puffs
Desserts & BakingKid-FriendlyVegetarian

Lemon-Dusted Blueberry Cream Puffs

by Linda August 11, 2026
written by Linda

These Lemon-Dusted Blueberry Cream Puffs are a delightful treat that combines the lightness of choux pastry with a rich blueberry cream filling. Perfect for gatherings or a sweet afternoon indulgence, these pastries are sure to impress with their vibrant flavors and beautiful presentation.

The addition of lemon zest not only enhances the flavor but also adds a refreshing twist that perfectly complements the sweetness of the blueberries. Whether you’re a seasoned baker or trying your hand at cream puffs for the first time, this recipe will guide you step-by-step to create these airy delights.

Lemon-Dusted Blueberry Cream Puffs

Lemon-Dusted Blueberry Cream Puffs

Serves: 12 Prep Time: 30 minutes Cooking Time: 25 minutes 25 minutes
Nutrition facts: 150 calories 9g fat
Rating: 5.0/5
( 1 voted )
Pin
Print

Ingredients

INGREDIENTS

  • 1 cup water
  • 1/2 cup unsalted butter
  • 1 cup all-purpose flour
  • 4 large eggs
  • 1/4 teaspoon salt
  • 1 cup heavy cream
  • 1/2 cup powdered sugar
  • 1 cup blueberries (fresh or frozen)
  • 1 tablespoon lemon zest
  • 1 teaspoon vanilla extract
  • Extra powdered sugar for dusting

Instructions

  1. Preheat your oven to 400°F (200°C).
  2. In a medium saucepan, combine water, butter, and salt; bring to a boil.
  3. Remove from heat and stir in flour until a smooth dough forms.
  4. Add eggs one at a time, mixing well after each addition until smooth and glossy.
  5. Using a piping bag, pipe small mounds of dough onto a parchment-lined baking sheet.
  6. Bake for 20-25 minutes until golden and puffed. Let cool completely.
  7. In a bowl, whip the heavy cream with powdered sugar, vanilla extract, and lemon zest until stiff peaks form.
  8. Fold in the blueberries gently until well combined.
  9. Cut the tops off the cooled cream puffs and fill them with the blueberry cream mixture.
  10. Replace the tops and dust with extra powdered sugar before serving.

Notes

Tip: Ensure the cream puffs are completely cooled before filling to prevent the cream from melting or leaking out.

For the best results, make sure to bake the cream puffs until they are golden brown; underbaked puffs can deflate. If you’re short on time, you can prepare the blueberry cream filling a day in advance and store it in the refrigerator. Additionally, feel free to experiment with different fruit flavors by substituting blueberries with raspberries or strawberries!

Store leftover cream puffs in an airtight container in the refrigerator for up to two days. For the best texture, enjoy them within the first day of making.

August 11, 2026 0 comments
0 FacebookTwitterPinterestPocketEmail
Velvety Curried Butternut Squash and Apple Soup with Toasted Pecans
Healthy & Low-CalorieSoups & SaladsVeganVegetarian

Velvety Curried Butternut Squash and Apple Soup with Toasted Pecans

by Linda August 11, 2026
written by Linda

This curried butternut squash and apple soup is the perfect blend of sweet and savory flavors, making it an ideal dish for chilly days. The rich, velvety texture is achieved through pureeing roasted squash and apples, while the addition of curry powder brings warmth and depth to each spoonful.

Toasting the pecans adds a delightful crunch that complements the smooth soup beautifully. This comforting soup is not only delicious but also packed with nutrients, making it a wholesome choice for lunch or dinner.

Velvety Curried Butternut Squash and Apple Soup with Toasted Pecans

Velvety Curried Butternut Squash and Apple Soup with Toasted Pecans

Serves: 4 Prep Time: 15 minutes Cooking Time: 40 minutes 40 minutes
Nutrition facts: 250 calories 10g fat
Rating: 5.0/5
( 1 voted )
Pin
Print

Ingredients

INGREDIENTS

  • 1 medium butternut squash, peeled and diced
  • 2 apples, peeled and chopped (preferably Granny Smith)
  • 1 onion, chopped
  • 2 cloves garlic, minced
  • 1 tablespoon curry powder
  • 4 cups vegetable broth
  • 1 tablespoon olive oil
  • Salt and pepper to taste
  • 1/2 cup pecans, toasted
  • Fresh cilantro for garnish (optional)

Instructions

  1. Preheat your oven to 400°F (200°C).
  2. Toss the diced butternut squash and chopped apples with olive oil, salt, and pepper on a baking sheet. Roast for 25-30 minutes until tender and slightly caramelized.
  3. In a large pot, heat a tablespoon of olive oil over medium heat. Add the chopped onion and sauté until translucent, about 5 minutes.
  4. Add the minced garlic and curry powder to the pot, stirring for an additional minute until fragrant.
  5. Once the squash and apples are roasted, add them to the pot along with the vegetable broth. Bring to a boil, then reduce heat and simmer for 10 minutes.
  6. Use an immersion blender to puree the soup until smooth. Alternatively, transfer the soup in batches to a blender and blend until creamy.
  7. Taste and adjust seasoning with salt and pepper as needed. Serve hot, garnished with toasted pecans and fresh cilantro if desired.

Notes

For added richness, stir in a splash of coconut milk right before serving.

To make your soup even creamier, you can stir in a splash of coconut milk or cream before serving. If you prefer a little heat, consider adding a pinch of cayenne pepper to the curry mix.

For storage, keep the soup in an airtight container in the fridge for up to 4 days. Reheat gently on the stove, adding a little broth if the soup thickens too much. This soup also freezes well; just be sure to let it cool completely before transferring to freezer-safe containers.

August 11, 2026 0 comments
0 FacebookTwitterPinterestPocketEmail
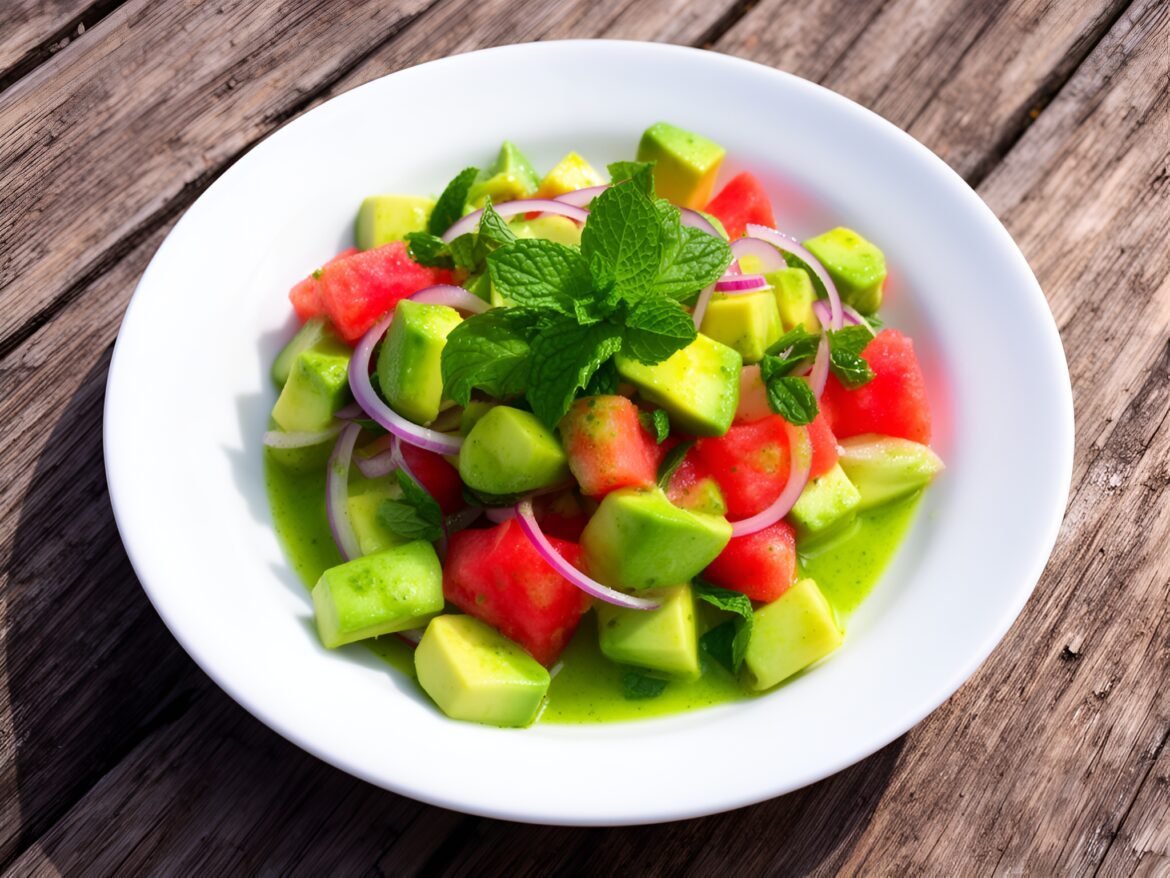
Creamy Avocado Watermelon Salad with Refreshing Mint Vinaigrette
Gluten-FreeQuick & Easy (30-Min)Soups & SaladsVegetarian

Creamy Avocado Watermelon Salad with Refreshing Mint Vinaigrette

by Linda August 11, 2026
written by Linda

Beat the heat this summer with a delightful Creamy Avocado Watermelon Salad topped with a refreshing mint vinaigrette. This dish balances the rich creaminess of avocado with the juicy sweetness of watermelon, making it a vibrant addition to any meal or picnic.

The mint vinaigrette adds a burst of freshness that enhances the flavors of both the avocado and watermelon. Perfect for warm days, this salad is not only visually stunning but also packed with nutrients.

Creamy Avocado Watermelon Salad with Refreshing Mint Vinaigrette

Creamy Avocado Watermelon Salad with Refreshing Mint Vinaigrette

Serves: 4 Prep Time: 15 minutes Cooking Time: 0 minutes 0 minutes
Nutrition facts: 180 calories 12g fat
Rating: 5.0/5
( 1 voted )
Pin
Print

Ingredients

INGREDIENTS

  • 2 cups watermelon, cubed
  • 1 avocado, diced
  • 1/4 cup red onion, thinly sliced
  • 1/4 cup fresh mint leaves, chopped
  • 1/4 cup olive oil
  • 2 tablespoons lemon juice
  • 1 tablespoon honey
  • Salt and pepper to taste

Instructions

  1. In a large bowl, combine cubed watermelon, diced avocado, and sliced red onion.
  2. In a separate bowl, whisk together olive oil, lemon juice, honey, salt, and pepper until well blended.
  3. Pour the vinaigrette over the salad and gently toss to combine, being careful not to mash the avocado.
  4. Sprinkle chopped mint leaves on top and serve immediately.

Notes

Note: For added flavor, let the salad sit for 10 minutes before serving to allow the flavors to meld.

For a twist, try adding crumbled feta or goat cheese for a salty contrast that pairs wonderfully with the sweet watermelon. You can also substitute lime juice for lemon juice in the vinaigrette for a different citrus note.

Storage tip: If you’re prepping ahead, consider keeping the vinaigrette separate until serving to maintain the freshness of the ingredients.

August 11, 2026 0 comments
0 FacebookTwitterPinterestPocketEmail
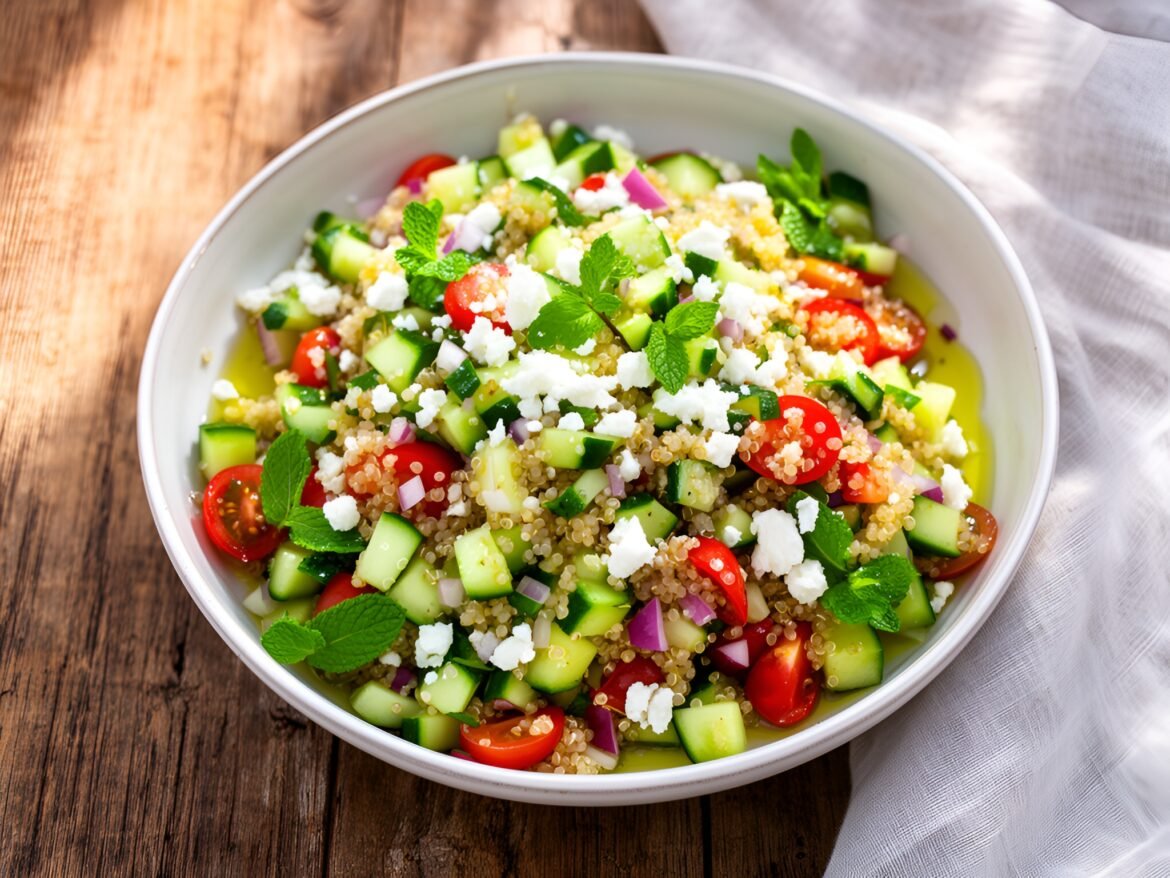
Refreshing Cucumber-Mint Quinoa Salad with Feta Crumbles
Gluten-FreeQuick & Easy (30-Min)Soups & SaladsVegetarian

Refreshing Cucumber-Mint Quinoa Salad with Feta Crumbles

by Linda August 11, 2026
written by Linda

Bright, refreshing, and packed with flavor, this Cucumber-Mint Quinoa Salad with Feta Crumbles is the ideal dish for summer gatherings or a quick lunch. The crunchy cucumber and vibrant mint create a delightful combination, while the nutty quinoa adds a satisfying texture.

The addition of tangy feta crumbles elevates this salad, giving it a creamy element that balances beautifully with the crisp vegetables. It’s not just tasty; it’s also a nutritious powerhouse, making it a perfect choice for health-conscious eaters.

Refreshing Cucumber-Mint Quinoa Salad with Feta Crumbles

Refreshing Cucumber-Mint Quinoa Salad with Feta Crumbles

Serves: 4 Prep Time: 15 minutes Cooking Time: 15 minutes 15 minutes
Nutrition facts: 220 calories 10g fat
Rating: 5.0/5
( 1 voted )
Pin
Print

Ingredients

INGREDIENTS

  • 1 cup quinoa
  • 2 cups water
  • 1 medium cucumber, diced
  • 1/2 cup cherry tomatoes, halved
  • 1/4 cup red onion, finely chopped
  • 1/4 cup fresh mint leaves, chopped
  • 1/2 cup feta cheese, crumbled
  • 2 tablespoons olive oil
  • 1 tablespoon lemon juice
  • Salt and pepper to taste

Instructions

  1. Rinse the quinoa under cold water to remove any bitterness.
  2. In a medium pot, combine the quinoa and water. Bring to a boil, then reduce heat to low, cover, and simmer for about 15 minutes or until the water is absorbed.
  3. Fluff the quinoa with a fork and let it cool slightly.
  4. In a large bowl, combine the diced cucumber, cherry tomatoes, red onion, and mint leaves.
  5. Add the cooked quinoa to the vegetable mixture, followed by the crumbled feta.
  6. In a small bowl, whisk together the olive oil, lemon juice, salt, and pepper. Pour over the salad and toss gently to combine.
  7. Serve immediately or chill in the refrigerator for 30 minutes to enhance the flavors.

Notes

Tip: This salad is best served fresh but can be stored in the refrigerator for up to 3 days. The flavors will intensify as it sits, but the cucumbers may lose some crunch.

For the freshest flavor, use organic cucumbers and mint. If you’re short on time, cooked quinoa can be found at many grocery stores. To enhance the salad, consider adding other vegetables like bell peppers or cherry tomatoes. This salad can be stored in the fridge for up to three days, making it great for meal prep.

For a vegan version, simply omit the feta or replace it with a vegan cheese alternative.

August 11, 2026 0 comments
0 FacebookTwitterPinterestPocketEmail
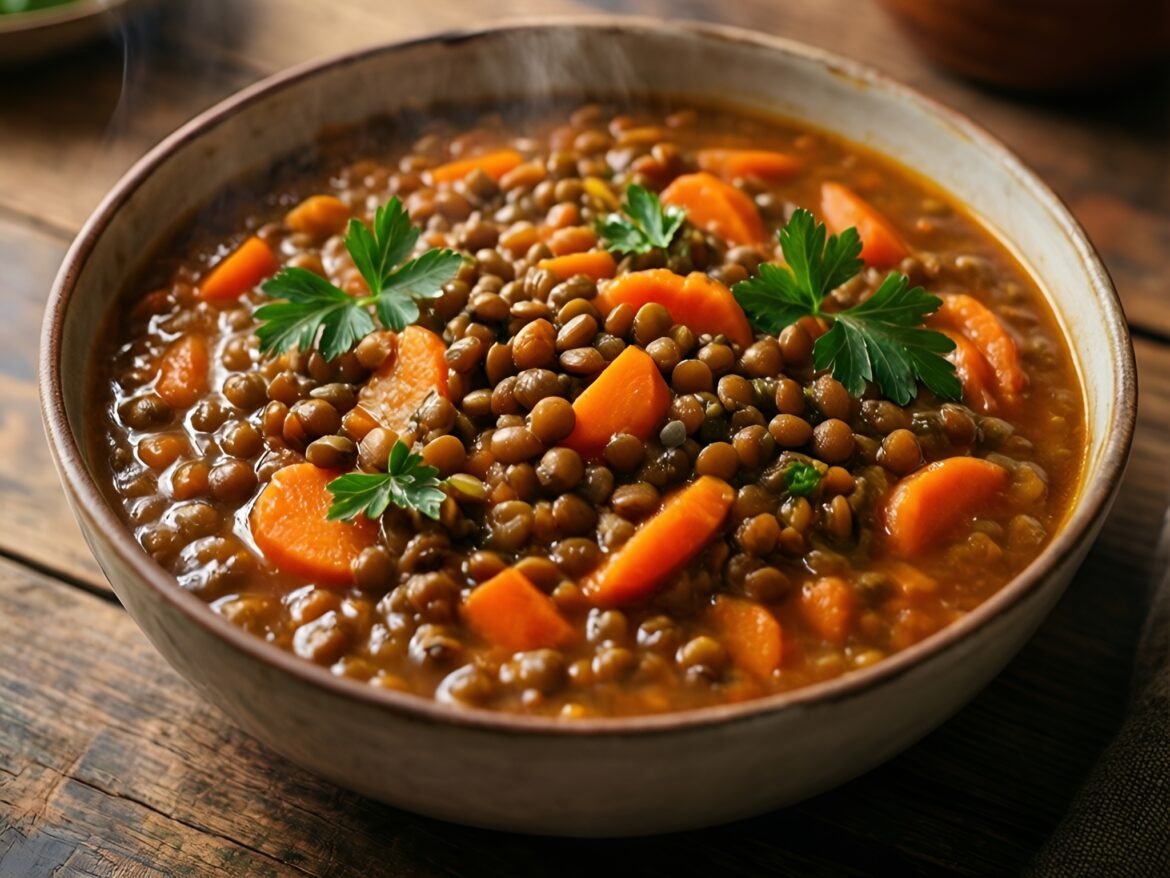
Wholesome Lentil and Carrot Stew for Cozy Evenings
Healthy & Low-CalorieMain DishesVegetarian

Wholesome Lentil and Carrot Stew for Cozy Evenings

by Linda August 11, 2026
written by Linda

Embrace the warmth of a hearty lentil and carrot stew that’s not only delicious but also brimming with nutrition. This cozy dish combines the earthy flavors of lentils with the natural sweetness of carrots, creating a comforting meal ideal for any time of year.

What sets this stew apart is its rich blend of spices and the addition of fresh herbs that elevate every bite. Whether served on its own or with a crusty piece of bread, this stew is sure to satisfy and nourish.

Wholesome Lentil and Carrot Stew for Cozy Evenings

Wholesome Lentil and Carrot Stew for Cozy Evenings

Serves: 4-6 Prep Time: 15 minutes Cooking Time: 45 minutes 45 minutes
Nutrition facts: 250 calories 8g fat
Rating: 5.0/5
( 1 voted )
Pin
Print

Ingredients

INGREDIENTS

  • 1 cup green or brown lentils, rinsed
  • 2 tablespoons olive oil
  • 1 medium onion, diced
  • 3 cloves garlic, minced
  • 3 carrots, sliced
  • 1 celery stalk, diced
  • 1 can (14 oz) diced tomatoes, with juice
  • 4 cups vegetable broth
  • 1 teaspoon ground cumin
  • 1 teaspoon smoked paprika
  • 1/2 teaspoon turmeric
  • Salt and pepper to taste
  • 2 cups fresh spinach (optional)
  • Fresh parsley, for garnish

Instructions

  1. Heat olive oil in a large pot over medium heat.
  2. Add diced onion and sauté until translucent, about 5 minutes.
  3. Stir in minced garlic, carrots, and celery; cook for another 5 minutes.
  4. Add lentils, diced tomatoes, vegetable broth, and all spices to the pot; bring to a boil.
  5. Reduce heat to low and let the stew simmer for about 30 minutes, or until lentils are tender.
  6. If using, stir in fresh spinach and cook for another 5 minutes until wilted.
  7. Season with salt and pepper to taste before serving.
  8. Garnish with chopped parsley and enjoy warm!

Notes

Storage: This stew can be stored in an airtight container in the refrigerator for up to 4 days, or frozen for longer preservation.

For a thicker stew, simply let it simmer longer until it reaches your desired consistency. If you’re looking to add more protein, consider incorporating some diced chicken or sausage. This stew also freezes well, making it a great meal prep option for busy weeks ahead.

Feel free to experiment with other vegetables like spinach or sweet potatoes for added variety. And remember, this stew tastes even better the next day as the flavors meld together!

August 11, 2026 0 comments
0 FacebookTwitterPinterestPocketEmail
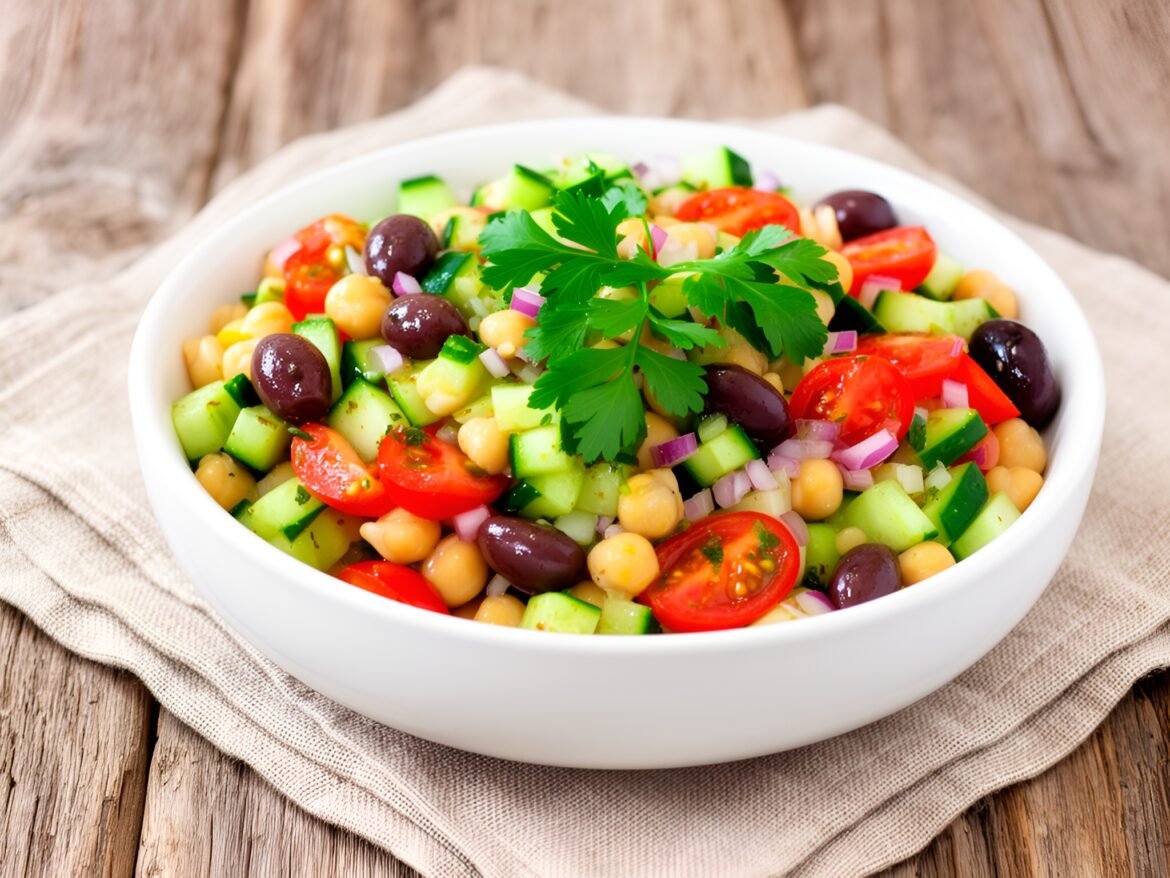
Vibrant Crisp Mediterranean Chickpea Salad with Zesty Lemon-Olive Dressing
Gluten-FreeQuick & Easy (30-Min)Soups & SaladsVegetarian

Vibrant Crisp Mediterranean Chickpea Salad with Zesty Lemon-Olive Dressing

by Linda August 11, 2026
written by Linda

Experience the refreshing taste of the Mediterranean with this Crisp Mediterranean Chickpea Salad. Packed with vibrant vegetables, protein-rich chickpeas, and a zesty lemon-olive dressing, this salad is not only nutritious but also incredibly delicious.

The combination of crunchy cucumbers, juicy tomatoes, and tangy red onion, all tossed with fresh herbs, makes each bite a delightful experience. Ideal for meal prep or as a side dish, it’s a versatile addition to any table.

Vibrant Crisp Mediterranean Chickpea Salad with Zesty Lemon-Olive Dressing

Vibrant Crisp Mediterranean Chickpea Salad with Zesty Lemon-Olive Dressing

Serves: 4 Prep Time: 15 minutes Cooking Time: 0 minutes 0 minutes
Nutrition facts: 250 calories 12g fat
Rating: 5.0/5
( 1 voted )
Pin
Print

Ingredients

INGREDIENTS

  • 1 can (15 oz) chickpeas, drained and rinsed
  • 1 cup cherry tomatoes, halved
  • 1 cucumber, diced
  • 1/2 red onion, finely chopped
  • 1/4 cup fresh parsley, chopped
  • 1/4 cup kalamata olives, pitted and sliced
  • Juice of 1 lemon
  • 1/4 cup extra virgin olive oil
  • Salt and pepper to taste
  • 1/2 teaspoon dried oregano

Instructions

  1. In a large mixing bowl, combine the chickpeas, cherry tomatoes, cucumber, red onion, parsley, and kalamata olives.
  2. In a separate bowl, whisk together the lemon juice, olive oil, salt, pepper, and dried oregano until well combined.
  3. Pour the dressing over the salad and toss gently to combine all ingredients evenly.
  4. Taste and adjust seasoning as needed, then serve immediately or chill for 30 minutes to enhance the flavors.

Notes

Tip: For a heartier salad, add grilled chicken or quinoa for extra protein.

For added texture, consider incorporating some feta cheese or crumbled avocado on top. If you prefer a spicier kick, add some diced jalapeños or a sprinkle of red pepper flakes.

Storage is simple; keep the salad in an airtight container in the fridge for up to 3 days. However, for best results, dress the salad just before serving to maintain the crispness of the veggies.

August 11, 2026 0 comments
0 FacebookTwitterPinterestPocketEmail
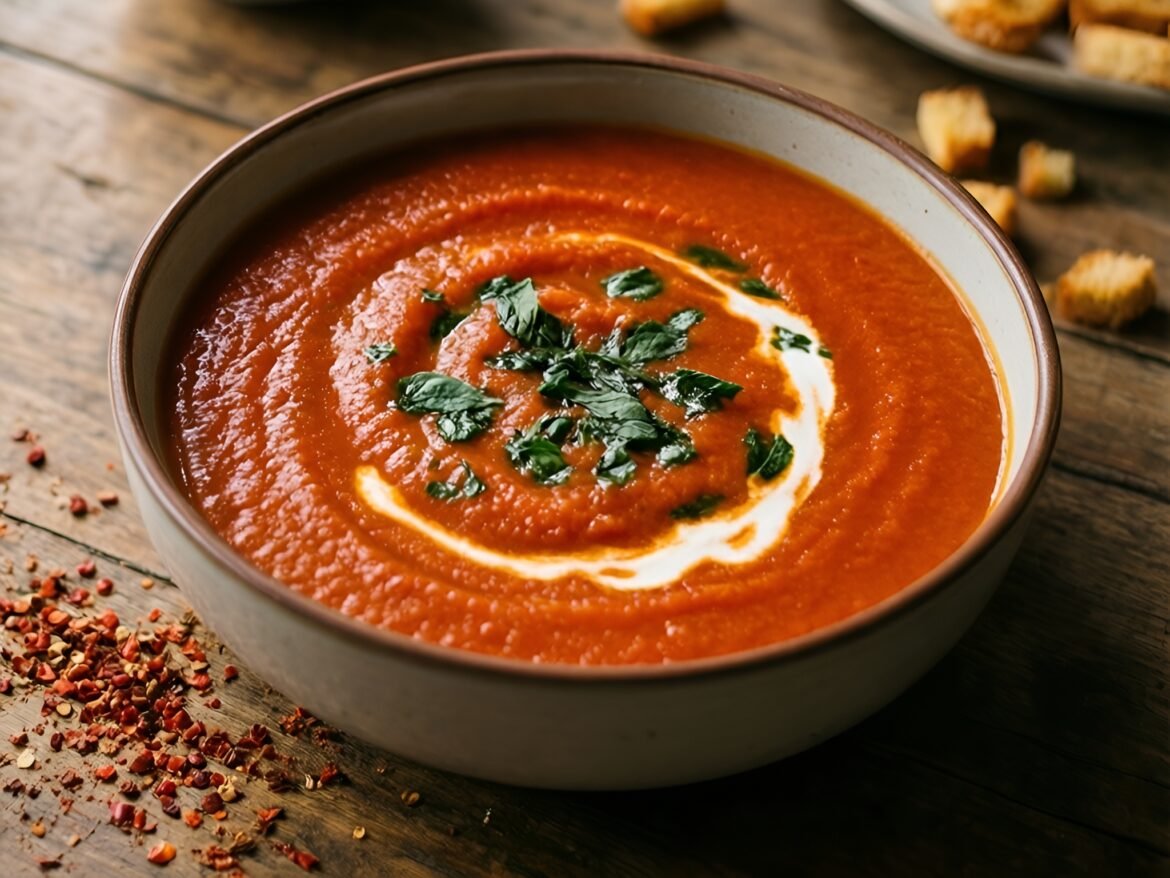
Spicy Roasted Tomato Basil Bisque with a Kick
Quick & Easy (30-Min)Soups & SaladsVegetarian

Spicy Roasted Tomato Basil Bisque with a Kick

by Linda August 11, 2026
written by Linda

Indulge in a bowl of comfort with this Spicy Roasted Tomato Basil Bisque. This soup is not only luscious and creamy but also packs a delightful punch of heat from roasted tomatoes and spices. Perfect for cozy evenings or as a starter for dinner parties, it’s sure to impress.

The secret to this bisque’s depth of flavor lies in roasting the tomatoes to caramelize their natural sweetness, which pairs beautifully with fresh basil. Add a splash of cream for that velvety texture, and you have a soup that’s both elegant and hearty.

Spicy Roasted Tomato Basil Bisque with a Kick

Spicy Roasted Tomato Basil Bisque with a Kick

Serves: 4 Prep Time: 15 minutes Cooking Time: 45 minutes 45 minutes
Nutrition facts: 320 calories 24g fat
Rating: 5.0/5
( 1 voted )
Pin
Print

Ingredients

INGREDIENTS

  • 2 lbs ripe tomatoes, halved
  • 1 onion, chopped
  • 4 cloves garlic, minced
  • 2 tbsp olive oil
  • 1 tsp red pepper flakes (adjust to taste)
  • Salt and black pepper to taste
  • 4 cups vegetable broth
  • 1 cup heavy cream
  • 1/2 cup fresh basil leaves, chopped
  • 1 tsp sugar (optional)

Instructions

  1. Preheat the oven to 400°F (200°C).
  2. Place the halved tomatoes, chopped onion, and minced garlic on a baking sheet. Drizzle with olive oil, and sprinkle with red pepper flakes, salt, and pepper.
  3. Roast in the oven for 25-30 minutes, until the tomatoes are caramelized and tender.
  4. Transfer the roasted vegetables to a large pot, and add the vegetable broth. Bring to a boil over medium-high heat.
  5. Reduce the heat and simmer for 10 minutes to allow the flavors to meld.
  6. Use an immersion blender to purée the soup until smooth. Stir in the heavy cream and fresh basil, adjusting the seasoning with more salt and pepper as needed.
  7. If the soup is too acidic, add sugar to balance the flavors.
  8. Serve hot, garnished with additional basil or croutons.

Notes

Storage: This bisque can be stored in an airtight container in the refrigerator for up to 4 days, or frozen for up to 3 months.

For a milder version, skip the additional chili flakes or use just a pinch. If you’re looking to brighten the flavor even more, a squeeze of lemon juice just before serving can do wonders. This bisque also freezes well; simply store it in airtight containers for up to three months. To serve, consider topping with croutons or a sprinkle of freshly grated Parmesan cheese for added texture and flavor.

August 11, 2026 0 comments
0 FacebookTwitterPinterestPocketEmail
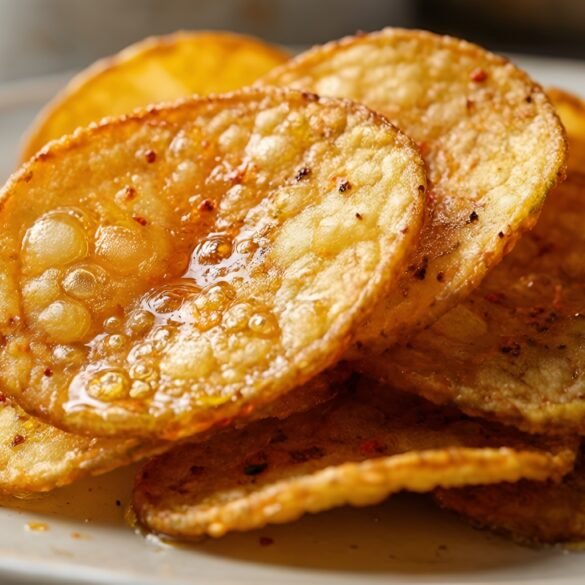
Crispy Crunchy Potato Wafers with Spicy Seasoning
Appetizers & SnacksKid-FriendlyVegetarian

Crispy Crunchy Potato Wafers with Spicy Seasoning

by Linda August 11, 2026
written by Linda

These crispy crunchy potato wafers are the perfect snack for any occasion! Light, airy, and full of flavor, they are sure to impress your guests or satisfy your late-night cravings.

Made with simple ingredients, these wafers achieve their delightful crunch by frying thinly sliced potatoes until golden brown. For an extra kick, we add a spicy seasoning blend that elevates the flavor, making them irresistibly addictive.

Crispy Crunchy Potato Wafers with Spicy Seasoning

Crispy Crunchy Potato Wafers with Spicy Seasoning

Serves: 4 Prep Time: 15 minutes Cooking Time: 20 minutes 20 minutes
Nutrition facts: 150 calories 8g fat
Rating: 5.0/5
( 1 voted )
Pin
Print

Ingredients

INGREDIENTS

  • 2 large russet potatoes
  • Vegetable oil for frying
  • 1 tsp salt
  • 1/2 tsp paprika
  • 1/4 tsp cayenne pepper
  • 1/4 tsp garlic powder
  • 1/4 tsp onion powder

Instructions

  1. Thinly slice the potatoes using a mandoline or sharp knife.
  2. Soak the potato slices in cold water for at least 30 minutes to remove excess starch.
  3. Drain and pat the potato slices dry with a clean kitchen towel.
  4. In a large pot, heat the vegetable oil over medium-high heat until it reaches 350°F (175°C).
  5. Carefully add a few potato slices to the hot oil, being careful not to overcrowd the pot.
  6. Fry the potato slices until they are golden brown and crispy, about 3-4 minutes.
  7. Use a slotted spoon to transfer the wafers to a paper towel-lined plate to drain excess oil.
  8. In a small bowl, mix together the salt, paprika, cayenne pepper, garlic powder, and onion powder.
  9. While the wafers are still warm, sprinkle the seasoning mix over them and toss gently to coat.

Notes

For lighter wafers, consider baking them at 400°F (200°C) for about 20-25 minutes, flipping halfway through.

For the perfect texture, ensure your potato slices are uniform in thickness—about 1/8 inch works best. You can use a mandoline for even slices.

Feel free to experiment with the seasonings! Try adding garlic powder, paprika, or even cheese powder for different flavor profiles. Store any leftovers in an airtight container to maintain their crispiness.

August 11, 2026 0 comments
0 FacebookTwitterPinterestPocketEmail
Zesty Lemon-Dijon Herb-Crusted Pork Chops with Vibrant Roasted Veggie Medley
Healthy & Low-CalorieMain DishesQuick & Easy (30-Min)

Zesty Lemon-Dijon Herb-Crusted Pork Chops with Vibrant Roasted Veggie Medley

by Linda August 11, 2026
written by Linda

These Lemon-Dijon Herb-Crusted Pork Chops are a flavorful twist on a classic dish. The bright citrus and tangy mustard create a delightful crust that locks in the juices, ensuring each bite is tender and succulent. Paired with a vibrant roasted veggie medley, this meal is not only delicious but visually appealing, making it a perfect choice for family dinners or entertaining guests.

Using fresh herbs and zesty lemon elevates the flavors, while the roasted vegetables bring a comforting earthiness to the plate. This dish is simple enough for a weeknight yet impressive enough for a special occasion, making it a versatile addition to your recipe repertoire.

Zesty Lemon-Dijon Herb-Crusted Pork Chops with Vibrant Roasted Veggie Medley

Zesty Lemon-Dijon Herb-Crusted Pork Chops with Vibrant Roasted Veggie Medley

Serves: 4 Prep Time: 15 minutes Cooking Time: 30 minutes 30 minutes
Nutrition facts: 380 calories 15g fat
Rating: 5.0/5
( 1 voted )
Pin
Print

Ingredients

INGREDIENTS

  • 4 bone-in pork chops
  • 2 tablespoons Dijon mustard
  • 2 tablespoons lemon juice
  • 1 tablespoon lemon zest
  • 2 tablespoons fresh parsley, chopped
  • 1 tablespoon fresh thyme, chopped
  • 1 teaspoon garlic powder
  • Salt and pepper to taste
  • 3 cups mixed vegetables (bell peppers, zucchini, and carrots)
  • 2 tablespoons olive oil
  • 1 teaspoon Italian seasoning

Instructions

  1. Preheat your oven to 400°F (200°C).
  2. In a small bowl, mix together Dijon mustard, lemon juice, lemon zest, parsley, thyme, garlic powder, salt, and pepper to create the herb mixture.
  3. Brush the herb mixture generously over both sides of the pork chops and set aside.
  4. On a baking sheet, toss the mixed vegetables with olive oil, Italian seasoning, salt, and pepper until well coated.
  5. Place the seasoned vegetables on one side of the baking sheet and the pork chops on the other side.
  6. Roast in the preheated oven for 25-30 minutes, or until the pork chops are cooked through (145°F internal temperature) and the vegetables are tender and slightly caramelized.
  7. Remove from the oven and let rest for 5 minutes before serving. Enjoy this dish warm!

Notes

Tip: For added flavor, consider adding a sprinkle of grated Parmesan cheese over the roasted vegetables before serving for an extra layer of taste.

For optimal flavor, allow the pork chops to marinate in the lemon-Dijon mixture for at least 30 minutes before cooking. This enhances the herb crust’s taste.

If you prefer, you can substitute the pork chops with chicken breasts or thighs. Adjust the cooking time accordingly to ensure they are cooked through.

Leftovers can be stored in an airtight container in the refrigerator for up to 3 days. Reheat gently in the oven or microwave to maintain tenderness.

August 11, 2026 0 comments
0 FacebookTwitterPinterestPocketEmail
Newer Posts
Older Posts

Recent Posts

  • Savory Garlic Butter Turkey Meatballs on Creamy Herbed Polenta

    September 14, 2026
  • Moroccan-Spiced Quinoa-Stuffed Eggplant Boats

    September 14, 2026
  • Zesty Cajun Jambalaya with Shrimp and Andouille Sausage

    September 14, 2026
  • Herb-Crusted Pork Tenderloin with Sweet Fig Reduction Sauce

    September 14, 2026
  • Sweet and Spicy Chipotle-Mango Glazed Salmon with Coconut Rice

    September 14, 2026

About Me

About Me

I'm Linda, a health professional, university graduate, and author sharing tested, easy-to-follow recipes made from simple, everyday ingredients. Based in Finland, I bring together my culinary training, love of travel, and home-cooked roots to help you cook confidently, on any budget.

Products

  • Spooky Creative Starry Sky Ceramic Mug Spooky Creative Starry Sky Ceramic Mug 10,00 €

Categories

  • Appetizers & Snacks (159)
  • Breakfast & Brunch (128)
  • Desserts & Baking (168)
  • Drinks & Beverages (134)
  • Gluten-Free (204)
  • Grilling & BBQ (11)
  • Healthy & Low-Calorie (192)
  • Holiday & Seasonal (20)
  • Kid-Friendly (239)
  • Main Dishes (190)
  • Quick & Easy (30-Min) (684)
  • Slow Cooker & Instant Pot (4)
  • Soups & Salads (109)
  • Vegan (162)
  • Vegetarian (562)

About Me

I'm Linda, a health professional and food writer sharing tested, easy-to-follow recipes made from simple ingredients.

Email: jspiceygiftstv@gmail.com

Useful Links

  • Home
  • About
  • Contact
  • Free Cookbooks
  • Terms and Conditions
  • Privacy Policy

Newsletter

Subscribe to to our Newsletter to stay updated with all our recipes.

Recent Posts

  • Savory Garlic Butter Turkey Meatballs on Creamy Herbed Polenta

    September 14, 2026
  • Moroccan-Spiced Quinoa-Stuffed Eggplant Boats

    September 14, 2026
  • Instagram
  • Pinterest
  • Youtube
  • Tiktok

@2026 - All Right Reserved. Designed and Developed by JSpiceyGifts

J Spicey Gifts
  • Home
  • Recipes
    • Breakfast & Brunch
    • Appetizers & Snacks
    • Main Dishes
    • Soups & Salads
    • Desserts & Baking
    • Drinks & Beverages
  • Categories
    • Vegetarian
    • Vegan
    • Gluten-Free
    • Quick & Easy (30-Min)
    • Slow Cooker & Instant Pot
    • Grilling & BBQ
    • Healthy & Low-Calorie
    • Holiday & Seasonal
    • Kid-Friendly
  • About
  • Contact

Shopping Cart

Close

No products in the cart.

Close