J Spicey Gifts
  • Home
  • Recipes
    • Breakfast & Brunch
    • Appetizers & Snacks
    • Main Dishes
    • Soups & Salads
    • Desserts & Baking
    • Drinks & Beverages
  • Categories
    • Vegetarian
    • Vegan
    • Gluten-Free
    • Quick & Easy (30-Min)
    • Slow Cooker & Instant Pot
    • Grilling & BBQ
    • Healthy & Low-Calorie
    • Holiday & Seasonal
    • Kid-Friendly
  • About
  • Contact
Top Posts
Delightfully Decadent Toasted Almond Joy Cheesecake Bites
Raspberry Lemonade Tart with Meringue Clouds
Choco-Coconut Whirlwind Cookies
Elegant Saffron-Infused Vanilla Chiffon Cake
Caramelized Banana Pecan Bliss Bars
Fresh Strawberry Spinach Salad with Creamy Poppyseed Dressing
Silky Curried Carrot and Coconut Soup with Fresh...
Savory Garlic Butter Turkey Meatballs on Creamy Herbed...
Moroccan-Spiced Quinoa-Stuffed Eggplant Boats
Zesty Cajun Jambalaya with Shrimp and Andouille Sausage
J Spicey Gifts
  • Home
  • Recipes
    • Breakfast & Brunch
    • Appetizers & Snacks
    • Main Dishes
    • Soups & Salads
    • Desserts & Baking
    • Drinks & Beverages
  • Categories
    • Vegetarian
    • Vegan
    • Gluten-Free
    • Quick & Easy (30-Min)
    • Slow Cooker & Instant Pot
    • Grilling & BBQ
    • Healthy & Low-Calorie
    • Holiday & Seasonal
    • Kid-Friendly
  • About
  • Contact
J Spicey Gifts
J Spicey Gifts
  • Home
  • Recipes
    • Breakfast & Brunch
    • Appetizers & Snacks
    • Main Dishes
    • Soups & Salads
    • Desserts & Baking
    • Drinks & Beverages
  • Categories
    • Vegetarian
    • Vegan
    • Gluten-Free
    • Quick & Easy (30-Min)
    • Slow Cooker & Instant Pot
    • Grilling & BBQ
    • Healthy & Low-Calorie
    • Holiday & Seasonal
    • Kid-Friendly
  • About
  • Contact
Copyright 2021 - All Right Reserved
Creamy Garlic-Buttermilk Quinoa Chicken Bake
Healthy & Low-CalorieKid-FriendlyMain DishesQuick & Easy (30-Min)

Creamy Garlic-Buttermilk Quinoa Chicken Bake

by Linda August 8, 2026
written by Linda

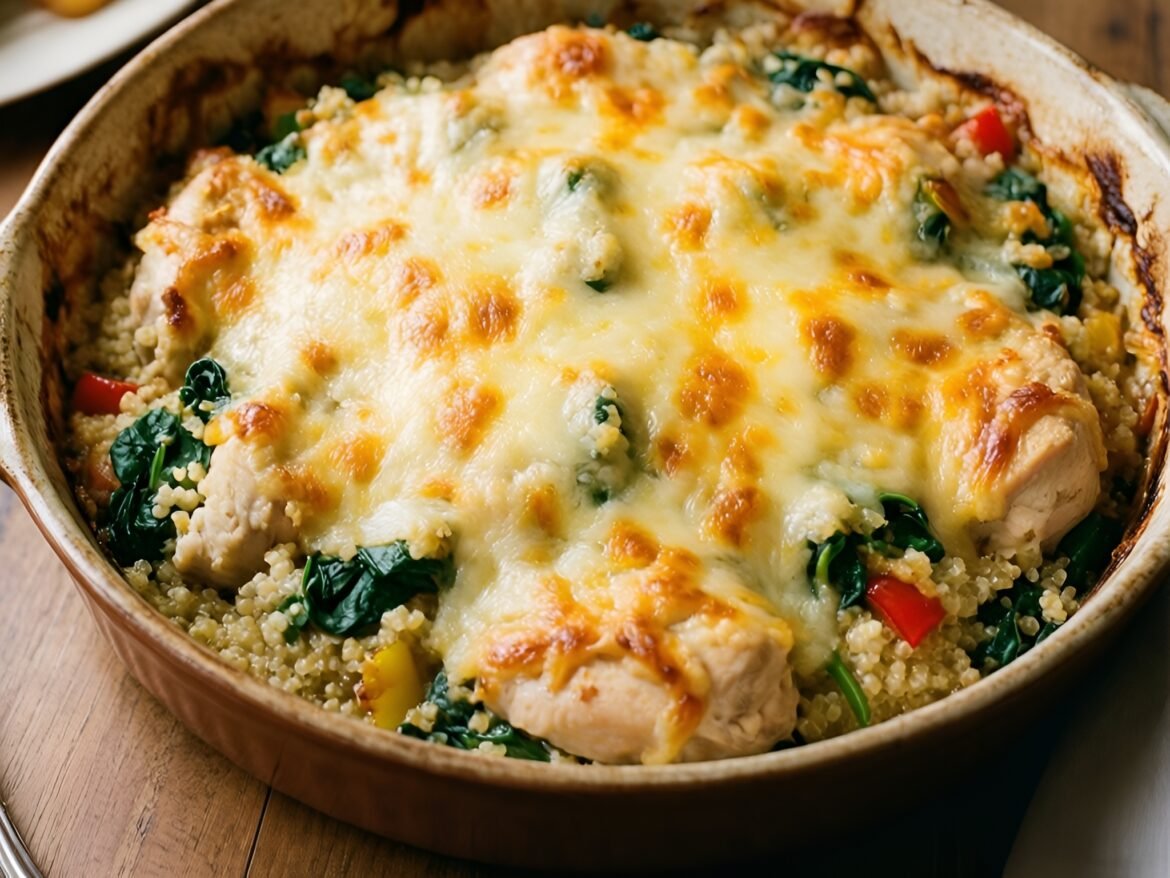
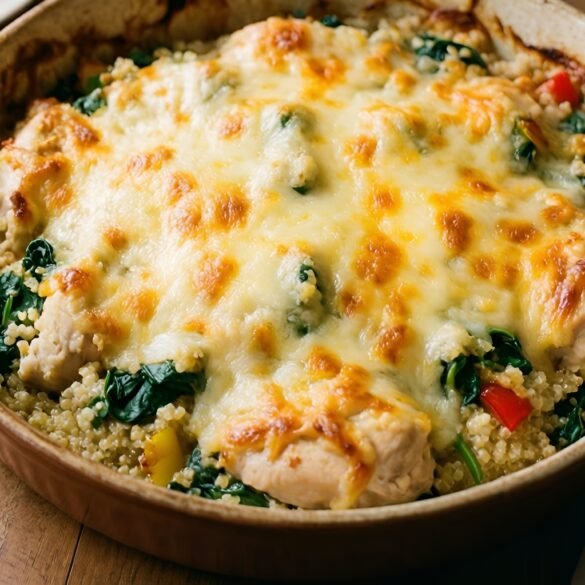
This creamy garlic-buttermilk quinoa chicken bake is a fantastic blend of flavors and textures, making it the perfect weeknight dinner. The tender chicken is marinated in a rich garlic-buttermilk sauce, infusing it with a delightful tang and creaminess. Quinoa, known for its nutritional benefits, adds a nutty flavor and fluffy texture that complements the dish beautifully.

This one-dish meal not only simplifies cleanup but is also customizable to suit your taste. Add in your favorite vegetables or spices for a personal touch. Perfect for family dinners, it’s sure to become a staple in your home!
Creamy Garlic-Buttermilk Quinoa Chicken Bake

Creamy Garlic-Buttermilk Quinoa Chicken Bake

Serves: 4-6 Prep Time: 15 minutes Cooking Time: 45 minutes 45 minutes
Nutrition facts: 450 calories 15g fat
Rating: 5.0/5
( 1 voted )
Pin
Print

Ingredients

INGREDIENTS

  • 1 lb boneless, skinless chicken breasts
  • 1 cup quinoa, rinsed
  • 2 cups buttermilk
  • 4 cloves garlic, minced
  • 1 teaspoon onion powder
  • 1 teaspoon paprika
  • Salt and pepper to taste
  • 1 cup shredded cheese (cheddar or mozzarella)
  • 1 cup chopped vegetables (like spinach, bell peppers, or broccoli)

Instructions

  1. Preheat the oven to 375°F (190°C).
  2. In a large bowl, whisk together the buttermilk, minced garlic, onion powder, paprika, salt, and pepper.
  3. Add the chicken breasts to the buttermilk mixture, ensuring they are fully submerged. Marinate for at least 30 minutes.
  4. In a separate pot, cook the quinoa according to package instructions and set aside.
  5. In a large baking dish, combine the cooked quinoa, marinated chicken (along with the marinade), and chopped vegetables. Mix well to combine.
  6. Top the mixture with shredded cheese, spreading it evenly over the surface.
  7. Bake in the preheated oven for 30-35 minutes, or until the chicken is cooked through and the cheese is bubbly and golden.
  8. Remove from the oven, let it cool for a few minutes, then serve warm.

Notes

Tip: Marinating the chicken overnight will enhance the flavors even more!

For an extra crunch, consider topping the bake with breadcrumbs or crushed nuts before baking. If you’re short on time, you can use pre-cooked chicken or rotisserie chicken to save on prep time. Feel free to substitute the quinoa with brown rice or couscous for a different base.

Store leftovers in an airtight container in the fridge for up to 3 days. Reheat in the oven or microwave until heated through. This dish is also great for meal prep; just divide into individual servings for a quick lunch option!

August 8, 2026 0 comments
0 FacebookTwitterPinterestPocketEmail
Savory Herbed Goat Cheese and Roasted Red Pepper Crostini
Appetizers & SnacksQuick & Easy (30-Min)Vegetarian

Savory Herbed Goat Cheese and Roasted Red Pepper Crostini

by Linda August 7, 2026
written by Linda

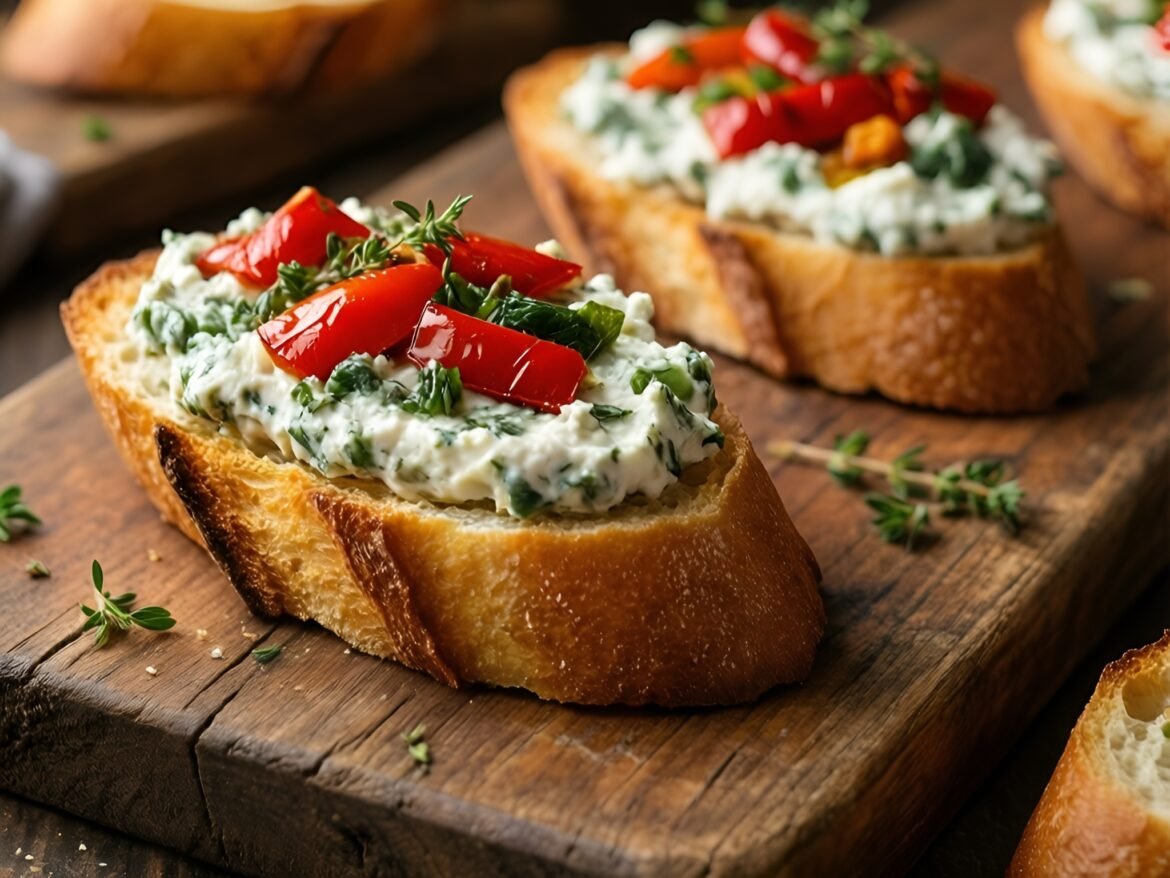
These Herbed Goat Cheese and Roasted Red Pepper Crostini are an irresistible appetizer that brings together creamy cheese, sweet roasted peppers, and crunchy bread in every bite. The combination of flavors and textures creates a delightful experience that is sure to impress your guests.

Using fresh herbs like basil and thyme, this recipe elevates the tangy goat cheese, making it a sophisticated yet simple choice for parties or casual gatherings. Pair them with a glass of wine for a perfect appetizer or snack!

Savory Herbed Goat Cheese and Roasted Red Pepper Crostini

Savory Herbed Goat Cheese and Roasted Red Pepper Crostini

Serves: 12 Prep Time: 15 minutes Cooking Time: 20 minutes 20 minutes
Nutrition facts: 120 calories 8g fat
Rating: 5.0/5
( 1 voted )
Pin
Print

Ingredients

INGREDIENTS

  • 1 French baguette, sliced
  • 8 oz goat cheese, softened
  • 1/4 cup cream cheese, softened
  • 1/4 cup roasted red peppers, chopped
  • 1 tbsp fresh basil, chopped
  • 1 tbsp fresh thyme, chopped
  • 2 tbsp olive oil
  • Salt and pepper to taste

Instructions

  1. Preheat your oven to 400°F (200°C).
  2. Arrange sliced baguette on a baking sheet and brush with olive oil.
  3. Toast in the preheated oven for about 8-10 minutes, or until golden and crispy.
  4. In a bowl, combine softened goat cheese, cream cheese, roasted red peppers, basil, thyme, salt, and pepper.
  5. Spread the herbed goat cheese mixture generously over each toasted crostini.
  6. Return the topped crostini to the oven for 5 minutes to warm through.
  7. Serve warm, garnished with extra herbs if desired.

Notes

The crostini can be made in advance; just store the prepared bread separately from the cheese mixture until ready to serve.

For a fun variation, try switching up the herbs or adding some chopped olives for a briny kick. If you can find them, use flavored goat cheese for an extra layer of taste. Leftover crostini can be stored in an airtight container for up to 2 days, but it’s best to assemble them just before serving for maximum crispiness.

August 7, 2026 0 comments
0 FacebookTwitterPinterestPocketEmail
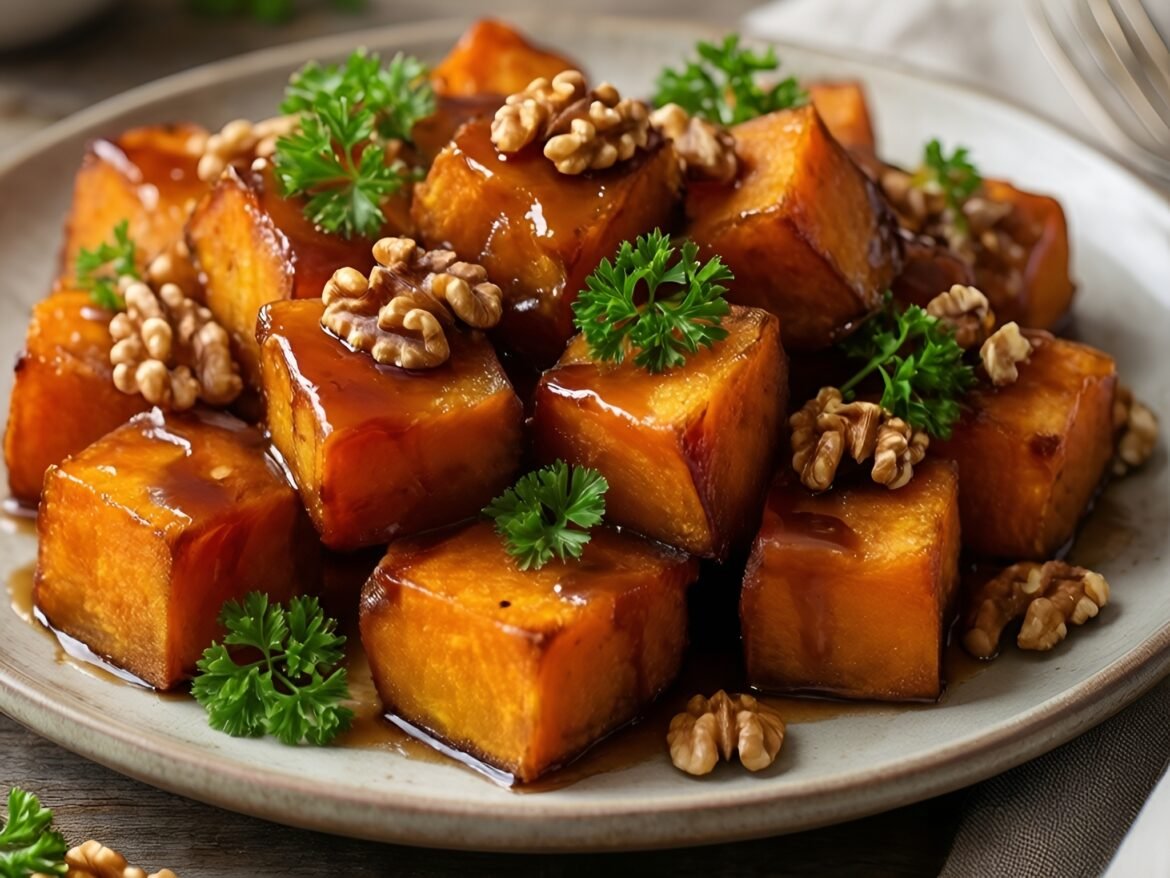
Tangy Maple-Walnut Sweet Potato Bites
Appetizers & SnacksGluten-FreeQuick & Easy (30-Min)Vegetarian

Tangy Maple-Walnut Sweet Potato Bites

by Linda August 7, 2026
written by Linda

These Tangy Maple-Walnut Sweet Potato Bites are a delightful combination of flavors and textures that everyone will love. The natural sweetness of roasted sweet potatoes pairs perfectly with the crunchy walnuts and a tangy maple glaze, creating a bite-sized treat that is as nutritious as it is delicious.

Perfect for parties, appetizers, or even a unique side dish, these bites are easy to prepare and sure to impress your guests. The addition of tangy flavors elevates the dish, making it a standout on any table.

Tangy Maple-Walnut Sweet Potato Bites

Tangy Maple-Walnut Sweet Potato Bites

Serves: 4-6 Prep Time: 15 minutes Cooking Time: 25 minutes 25 minutes
Nutrition facts: 180 calories 9g fat
Rating: 5.0/5
( 1 voted )
Pin
Print

Ingredients

INGREDIENTS

  • 2 medium sweet potatoes, peeled and cut into bite-sized cubes
  • 1/2 cup walnuts, roughly chopped
  • 1/4 cup maple syrup
  • 1 tablespoon apple cider vinegar
  • 1/2 teaspoon salt
  • 1/4 teaspoon black pepper
  • 1/2 teaspoon garlic powder
  • 1/2 teaspoon smoked paprika

Instructions

  1. Preheat the oven to 400°F (200°C) and line a baking sheet with parchment paper.
  2. In a large bowl, combine the sweet potato cubes, olive oil, salt, black pepper, garlic powder, and smoked paprika. Toss to coat evenly.
  3. Spread the sweet potatoes in a single layer on the prepared baking sheet and roast for 15 minutes.
  4. While the sweet potatoes are roasting, mix together the maple syrup, apple cider vinegar, and chopped walnuts in a small bowl.
  5. After 15 minutes, remove the sweet potatoes from the oven and pour the maple-walnut mixture over them. Toss gently to combine.
  6. Return the baking sheet to the oven and roast for an additional 10 minutes, or until the sweet potatoes are tender and the walnuts are golden brown.
  7. Let cool slightly before serving. Enjoy warm!

Notes

Tip: For an extra crunch, broil the bites for 2-3 minutes after baking, keeping a close eye to prevent burning.

For an extra touch, try adding a sprinkle of cinnamon or nutmeg to the sweet potatoes before roasting. If you have nut allergies, feel free to substitute the walnuts with toasted pumpkin seeds for a similar crunch.

These bites are best served warm but can be stored in an airtight container in the refrigerator for up to three days. Reheat them in the oven for a few minutes to regain their crispy texture.

August 7, 2026 0 comments
0 FacebookTwitterPinterestPocketEmail
Appetizers & SnacksKid-FriendlyQuick & Easy (30-Min)Vegetarian

Crispy Parmesan-Basil Artichoke Hearts

by Linda August 7, 2026
written by Linda

Crispy Parmesan-Basil Artichoke Hearts are a delightful blend of textures and flavors that will make your taste buds dance. These golden, crunch-topped artichoke hearts are coated in a savory blend of Parmesan cheese, fresh basil, and breadcrumbs, creating a snack that’s both satisfying and elegant.

Perfect as an appetizer or a finger food for your next gathering, these bites offer a unique twist on classic flavors. The crispiness from the oven-baking method makes them a healthier alternative to frying, while still delivering all the satisfying crunch you’d expect from a gourmet treat.

Crispy Parmesan-Basil Artichoke Hearts

Serves: 4 Prep Time: 15 minutes Cooking Time: 20 minutes 20 minutes
Nutrition facts: 180 calories 8g fat
Rating: 5.0/5
( 1 voted )
Pin
Print

Ingredients

INGREDIENTS

  • 1 can (14 oz) artichoke hearts, drained and halved
  • 1 cup breadcrumbs
  • 1/2 cup grated Parmesan cheese
  • 1/4 cup fresh basil, chopped
  • 1 teaspoon garlic powder
  • 1/2 teaspoon black pepper
  • 1/2 teaspoon salt
  • 2 large eggs, beaten
  • Olive oil spray

Instructions

  1. Preheat the oven to 400°F (200°C) and line a baking sheet with parchment paper.
  2. In a bowl, combine the breadcrumbs, grated Parmesan cheese, chopped basil, garlic powder, black pepper, and salt.
  3. In another bowl, beat the eggs until smooth.
  4. Dip each artichoke half into the beaten eggs, then coat it thoroughly in the breadcrumb mixture, pressing gently to adhere.
  5. Place the coated artichoke hearts on the prepared baking sheet, ensuring they are spaced evenly.
  6. Lightly spray the tops with olive oil to enhance crisping during baking.
  7. Bake in the preheated oven for 15-20 minutes, or until golden brown and crispy, turning halfway through the cooking time.
  8. Remove from the oven and let cool slightly before serving. Enjoy hot!

Notes

Tip: For added freshness, serve with a side of homemade lemon aioli or your favorite dipping sauce!

For an extra burst of flavor, consider adding minced garlic or a sprinkle of crushed red pepper flakes to the breadcrumb mixture. If you’re looking for a gluten-free option, substitute regular breadcrumbs with almond flour or gluten-free breadcrumbs.

These artichoke hearts are best enjoyed fresh but can be stored in an airtight container in the fridge for up to two days. Reheat them in the oven to restore their crispiness before serving.

August 7, 2026 0 comments
0 FacebookTwitterPinterestPocketEmail
Deliciously Flaky Spinach-Feta Puff Pastry Bites
Appetizers & SnacksQuick & Easy (30-Min)Vegetarian

Deliciously Flaky Spinach-Feta Puff Pastry Bites

by Linda August 7, 2026
written by Linda

These Savory Spinach-Feta Stuffed Puff Pastry Bites are the ultimate blend of flaky texture and rich flavor. With a buttery, golden-brown exterior and a savory filling of fresh spinach and tangy feta cheese, they make for a delightful treat at any gathering or satisfying snack.

Perfect for entertaining, these bite-sized pastries are easy to prepare and can be served warm or at room temperature. The combination of spinach and feta not only offers a delicious taste but also provides a nutritious boost. Whether you’re hosting a party or just looking for a quick appetizer, these puff pastry bites are sure to impress.

Deliciously Flaky Spinach-Feta Puff Pastry Bites

Deliciously Flaky Spinach-Feta Puff Pastry Bites

Serves: 12 Prep Time: 20 minutes Cooking Time: 25 minutes 25 minutes
Nutrition facts: 150 calories 9g fat
Rating: 5.0/5
( 1 voted )
Pin
Print

Ingredients

INGREDIENTS

  • 1 sheet frozen puff pastry, thawed
  • 2 cups fresh spinach, chopped
  • 1 cup feta cheese, crumbled
  • 1/4 cup cream cheese, softened
  • 1 clove garlic, minced
  • 1 egg, beaten (for egg wash)
  • Salt and pepper to taste
  • Sesame seeds for garnish (optional)

Instructions

  1. Preheat the oven to 400°F (200°C).
  2. Roll out the thawed puff pastry on a lightly floured surface and cut it into 3-inch squares.
  3. In a mixing bowl, combine the chopped spinach, feta cheese, cream cheese, minced garlic, salt, and pepper. Mix until well combined.
  4. Place a tablespoon of the spinach-feta mixture in the center of each pastry square.
  5. Fold the corners of the pastry over the filling to form a pocket and pinch the edges to seal.
  6. Brush the tops of the pastry bites with the beaten egg and sprinkle with sesame seeds if desired.
  7. Arrange the filled pastry bites on a baking sheet lined with parchment paper and bake for 20-25 minutes or until golden brown.
  8. Remove from the oven and let cool slightly before serving.

Notes

Tip: For added flavor, you can sauté the spinach briefly in olive oil before mixing it with the cheeses.

For an extra burst of flavor, consider adding chopped sun-dried tomatoes or a sprinkle of red pepper flakes to the filling. If you’re looking for a vegetarian option, you can substitute the feta with ricotta or goat cheese.

Make sure to chill your puff pastry before baking for the best texture. After baking, these bites can be stored in an airtight container for up to 3 days, and they can also be frozen for up to a month. Simply reheat in the oven to crisp them up before serving.

August 7, 2026 0 comments
0 FacebookTwitterPinterestPocketEmail
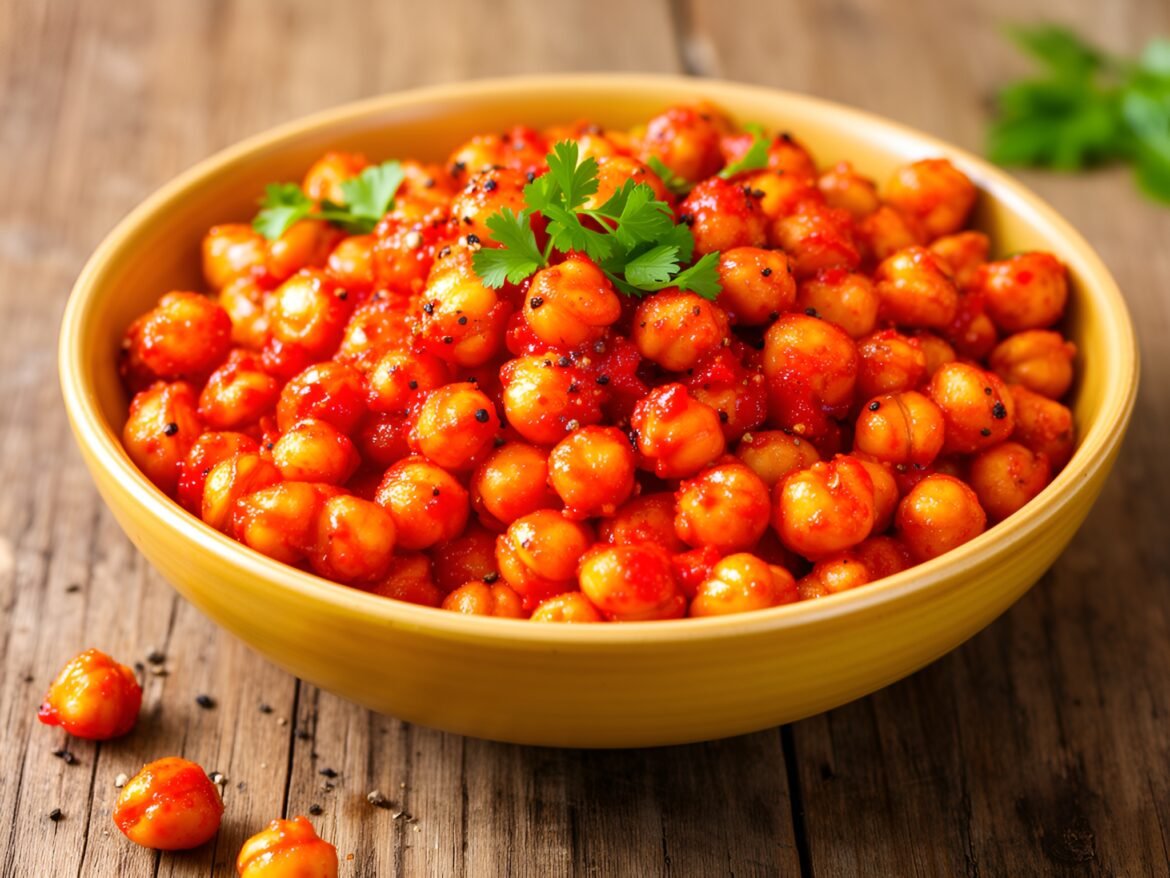
Spicy-Sweet Sriracha Honey Roasted Chickpeas
Appetizers & SnacksQuick & Easy (30-Min)VeganVegetarian

Spicy-Sweet Sriracha Honey Roasted Chickpeas

by Linda August 7, 2026
written by Linda

These Fiery Sriracha-Honey Roasted Chickpeas are the ultimate snack for those who love a kick of flavor. The combination of spicy Sriracha and sweet honey coats each chickpea beautifully, creating a crunchy treat that’s addictively delicious.

Roasting the chickpeas not only enhances their texture but also intensifies the flavors, making them a perfect companion for movie nights, road trips, or just a healthy snack option. With a few simple ingredients and straightforward steps, you can whip up this delightful recipe in no time!

Spicy-Sweet Sriracha Honey Roasted Chickpeas

Spicy-Sweet Sriracha Honey Roasted Chickpeas

Serves: 4 Prep Time: 10 minutes Cooking Time: 30 minutes 30 minutes
Nutrition facts: 150 calories 6g fat
Rating: 5.0/5
( 1 voted )
Pin
Print

Ingredients

INGREDIENTS

  • 1 can (15 oz) chickpeas, drained and rinsed
  • 2 tablespoons olive oil
  • 2 tablespoons honey
  • 1 tablespoon Sriracha sauce
  • 1/2 teaspoon salt
  • 1/2 teaspoon black pepper
  • 1/2 teaspoon garlic powder

Instructions

  1. Preheat your oven to 400°F (200°C).
  2. Spread the rinsed chickpeas on a clean kitchen towel and pat dry thoroughly.
  3. In a mixing bowl, combine the olive oil, honey, Sriracha, salt, pepper, and garlic powder.
  4. Add the dried chickpeas to the bowl and stir until they are evenly coated with the mixture.
  5. Arrange the chickpeas on a baking sheet in a single layer.
  6. Roast in the preheated oven for 25-30 minutes, stirring halfway through, until golden brown and crispy.
  7. Remove from the oven and let cool slightly before serving. Enjoy!

Notes

Tip: For an extra crunch, roast the chickpeas a bit longer, but keep an eye on them to prevent burning.

To ensure your chickpeas are extra crispy, make sure they are thoroughly dried before roasting. If you want to adjust the heat level, feel free to decrease the Sriracha or substitute it with a milder sauce.

For added flavor, consider mixing in some garlic powder or smoked paprika with the chickpeas. Store leftover chickpeas in an airtight container at room temperature for up to a week, but they are best enjoyed fresh out of the oven!

August 7, 2026 0 comments
0 FacebookTwitterPinterestPocketEmail
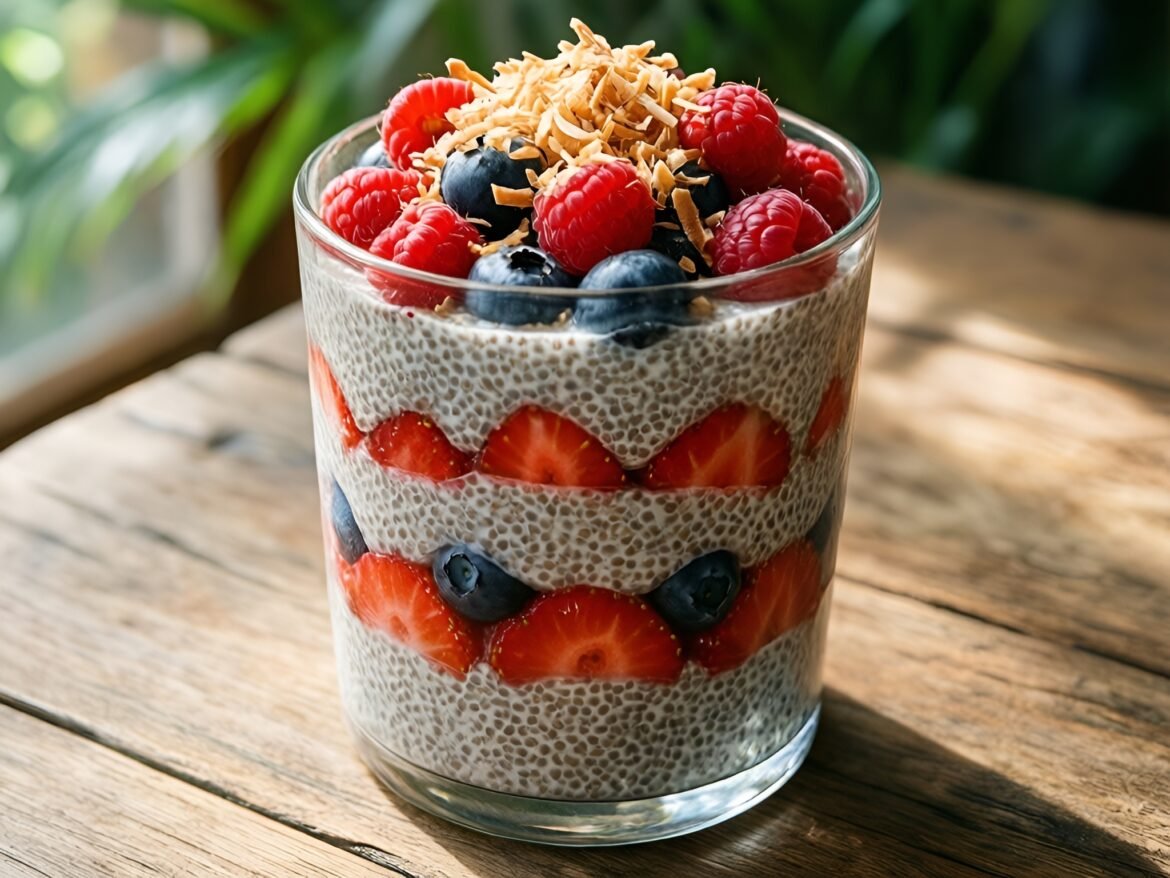
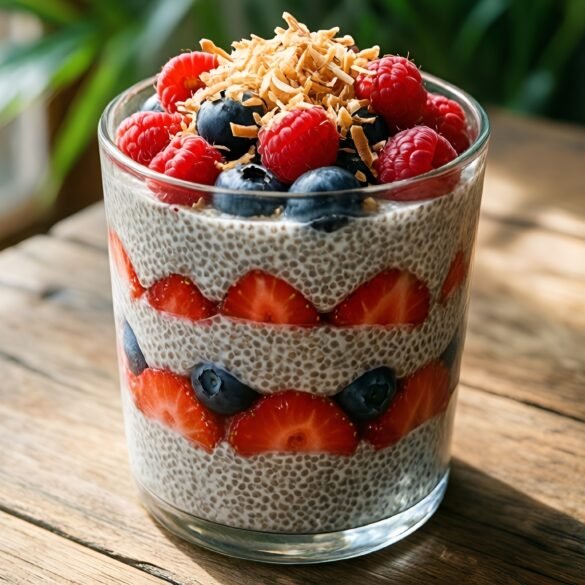
Tropical Coconut Chia-Pudding Parfait with Berry Medley
Breakfast & BrunchHealthy & Low-CalorieVeganVegetarian

Tropical Coconut Chia-Pudding Parfait with Berry Medley

by Linda August 7, 2026
written by Linda

This Tropical Coconut Chia-Pudding Parfait is a delicious way to start your day or enjoy as a snack. Creamy coconut chia pudding forms the base, providing a delightful texture and a hint of tropical flavor. Layered with a vibrant berry medley, this parfait is not only visually appealing but also packed with nutrients, making it a guilt-free indulgence.

Chia seeds are known for their impressive health benefits, including high fiber content and omega-3 fatty acids, which makes this dish both wholesome and satisfying. Plus, the combination of coconut and fresh berries creates a refreshing taste that embodies the essence of summer!

Tropical Coconut Chia-Pudding Parfait with Berry Medley

Tropical Coconut Chia-Pudding Parfait with Berry Medley

Serves: 2 Prep Time: 15 minutes Cooking Time: 0 minutes 0 minutes
Nutrition facts: 320 calories 18g fat
Rating: 5.0/5
( 1 voted )
Pin
Print

Ingredients

INGREDIENTS

  • 1/2 cup chia seeds
  • 2 cups coconut milk (canned or carton)
  • 2 tablespoons maple syrup (or honey)
  • 1 teaspoon vanilla extract
  • 1 cup mixed berries (strawberries, blueberries, raspberries)
  • 2 tablespoons shredded coconut (toasted, optional)

Instructions

  1. In a mixing bowl, combine chia seeds, coconut milk, maple syrup, and vanilla extract. Stir well to combine.
  2. Let the mixture sit for about 10 minutes, then stir again to prevent clumping.
  3. Cover and refrigerate for at least 4 hours or overnight until the chia pudding thickens.
  4. Once set, spoon the chia pudding into serving glasses or bowls, layering it with mixed berries as you go.
  5. Top the parfaits with additional berries and sprinkle shredded coconut before serving.

Notes

Tip: Feel free to switch up the fruits based on seasonality. You can use frozen berries if fresh ones aren’t available.

For the chia pudding, make sure to allow it sufficient time to set in the refrigerator—ideally overnight. This ensures the seeds swell up properly, creating a thick and creamy texture. If you’re looking for a sweeter pudding, feel free to add a dash of honey or maple syrup to taste.

You can easily customize your berry medley; try using strawberries, blueberries, raspberries, or even tropical fruits like mangoes or kiwis for variety. This parfait can be made ahead of time and stored in the fridge for up to three days, making it a convenient option for busy mornings!

August 7, 2026 0 comments
0 FacebookTwitterPinterestPocketEmail
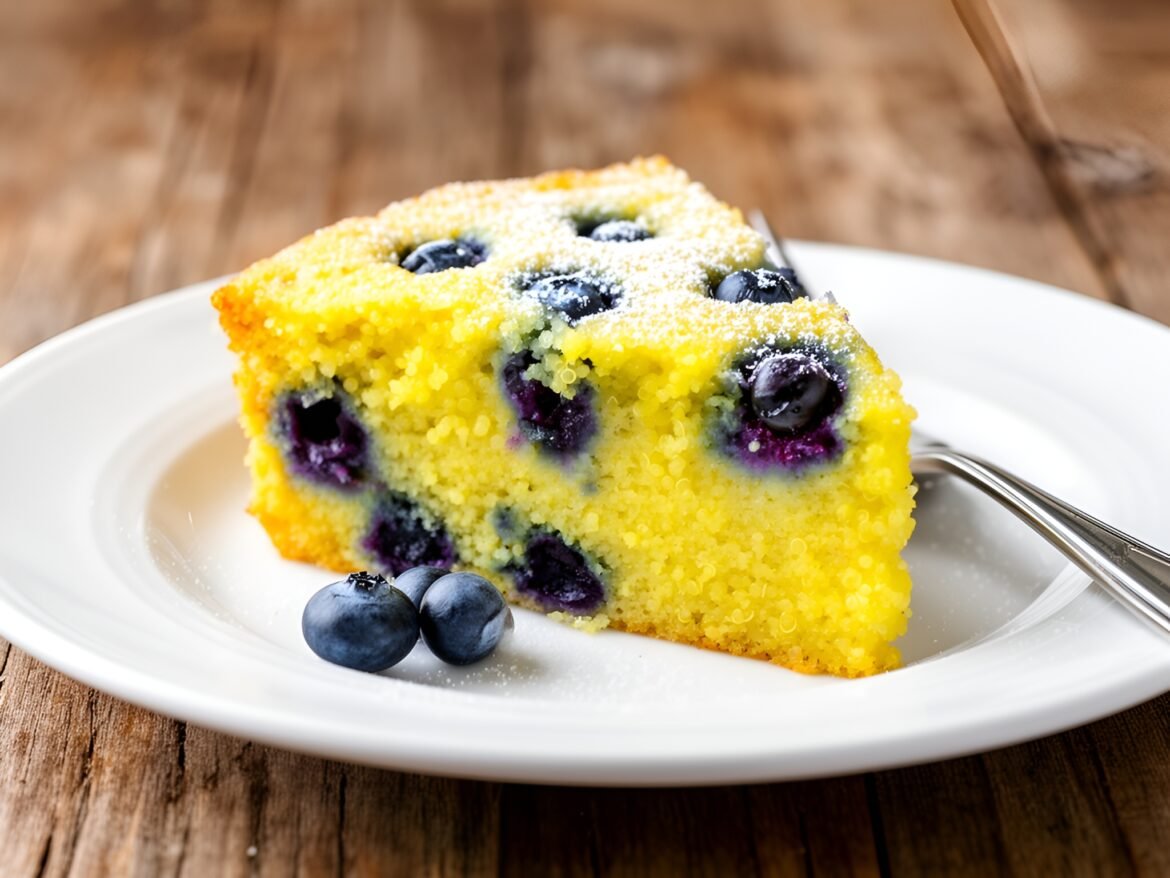
Zesty Lemon-Blueberry Quinoa Breakfast Cake
Breakfast & BrunchHealthy & Low-CalorieQuick & Easy (30-Min)Vegetarian

Zesty Lemon-Blueberry Quinoa Breakfast Cake

by Linda August 7, 2026
written by Linda

This Zesty Lemon-Blueberry Quinoa Breakfast Cake is a delicious way to kickstart your morning. It’s packed with protein and fiber from quinoa, and the burst of fresh blueberries coupled with zesty lemon make it a refreshing treat. Perfectly moist and lightly sweetened, it’s a delightful alternative to traditional breakfast options.

Not only is this breakfast cake simple to make, but it also offers a great way to use leftover quinoa. The combination of tangy lemon and juicy blueberries creates a harmonious flavor that will brighten your day. Whether enjoyed warm or at room temperature, it’s sure to become a morning favorite.

Zesty Lemon-Blueberry Quinoa Breakfast Cake

Zesty Lemon-Blueberry Quinoa Breakfast Cake

Serves: 8 Prep Time: 15 minutes Cooking Time: 30 minutes 30 minutes
Nutrition facts: 180 calories 7g fat
Rating: 5.0/5
( 1 voted )
Pin
Print

Ingredients

INGREDIENTS

  • 1 cup cooked quinoa
  • 1 cup fresh blueberries
  • 1/2 cup almond flour
  • 1/2 cup whole wheat flour
  • 1/4 cup honey or maple syrup
  • 1/4 cup unsweetened applesauce
  • 1/3 cup coconut oil, melted
  • 2 large eggs
  • 1/2 cup milk (dairy or non-dairy)
  • Zest of 1 lemon
  • Juice of 1 lemon
  • 1 teaspoon baking powder
  • 1/2 teaspoon baking soda
  • 1/4 teaspoon salt
  • 1 teaspoon vanilla extract

Instructions

  1. Preheat your oven to 350°F (175°C) and grease a 9-inch round cake pan.
  2. In a large bowl, combine the cooked quinoa, almond flour, whole wheat flour, baking powder, baking soda, and salt.
  3. In a separate bowl, whisk together the honey (or maple syrup), applesauce, melted coconut oil, eggs, milk, lemon juice, lemon zest, and vanilla extract until well combined.
  4. Pour the wet ingredients into the dry ingredients and mix until just combined. Gently fold in the blueberries.
  5. Transfer the batter to the prepared cake pan and spread it evenly.
  6. Bake in the preheated oven for 30-35 minutes, or until a toothpick inserted in the center comes out clean.
  7. Let the cake cool in the pan for 10 minutes, then transfer it to a wire rack to cool completely before serving.

Notes

Tip: This cake is best enjoyed fresh but can be stored in an airtight container in the fridge for up to 3 days.

For added texture, consider mixing in some chopped nuts or seeds. You can substitute the blueberries with raspberries or strawberries for a different flavor profile. If you want a touch of sweetness, add a drizzle of honey or maple syrup on top once cooled.

Store any leftovers in an airtight container in the refrigerator for up to three days. Reheat slices in the microwave for a quick breakfast or snack!

August 7, 2026 0 comments
0 FacebookTwitterPinterestPocketEmail
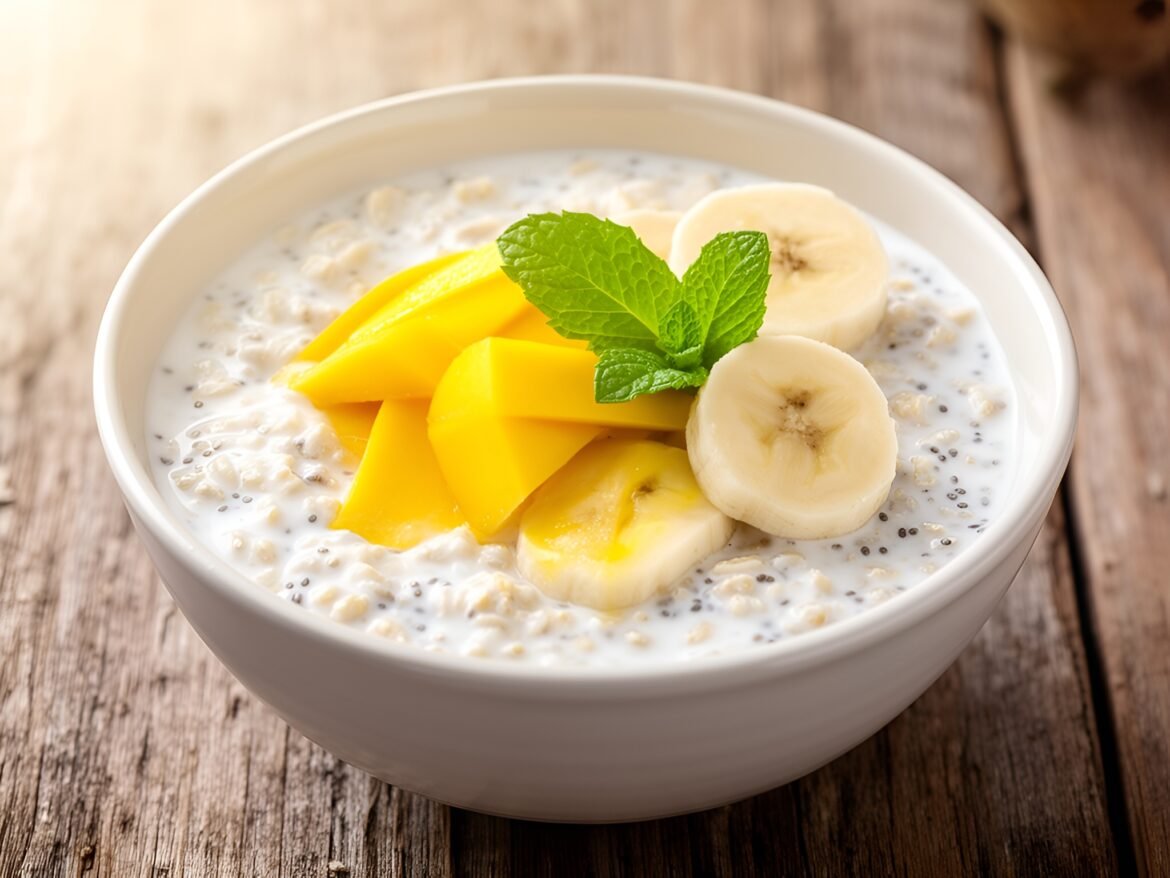
Creamy Tropical Mango-Banana Overnight Oats
Breakfast & BrunchQuick & Easy (30-Min)Vegetarian

Creamy Tropical Mango-Banana Overnight Oats

by Linda August 7, 2026
written by Linda

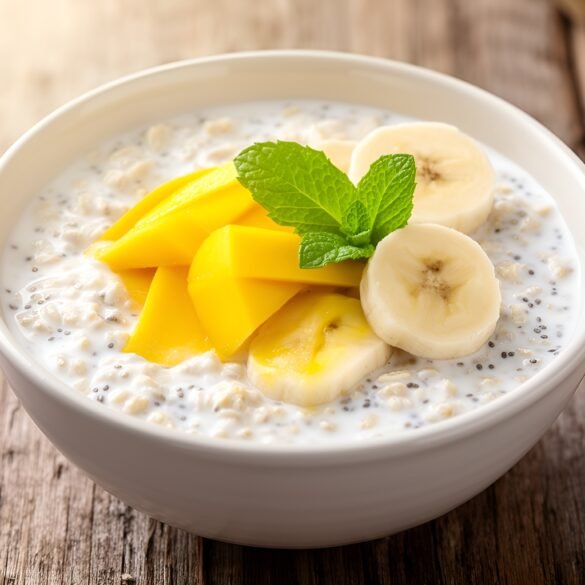
These creamy tropical mango-banana overnight oats are the perfect way to kickstart your morning. Bursting with flavor and nutrition, they combine the sweetness of ripe bananas and juicy mangoes with the heartiness of rolled oats.

The best part? They require minimal prep time and can be made the night before, making your breakfast routine easier and more delicious. The addition of coconut milk adds a tropical twist, while chia seeds provide a delightful texture and health benefits.

Creamy Tropical Mango-Banana Overnight Oats

Creamy Tropical Mango-Banana Overnight Oats

Serves: 2 Prep Time: 10 minutes Cooking Time: 0 minutes 0 minutes
Nutrition facts: 320 calories 10g fat
Rating: 5.0/5
( 1 voted )
Pin
Print

Ingredients

INGREDIENTS

  • 1 cup rolled oats
  • 1 ripe banana, sliced
  • 1 cup mango, diced
  • 1 cup coconut milk (or almond milk)
  • 2 tablespoons chia seeds
  • 1 tablespoon honey or maple syrup (optional)
  • 1/4 teaspoon vanilla extract
  • Pinch of salt
  • Fresh mint leaves for garnish (optional)

Instructions

  1. In a mixing bowl, combine rolled oats, chia seeds, and salt.
  2. In another bowl, mix coconut milk, honey (if using), and vanilla extract.
  3. Pour the coconut milk mixture over the dry ingredients and stir well.
  4. Fold in the sliced banana and diced mango, reserving a few pieces for topping.
  5. Divide the mixture into two jars or containers and refrigerate overnight (or at least 4 hours).
  6. Before serving, stir the oats and top with remaining banana and mango, adding fresh mint if desired.

Notes

Storage: These overnight oats can be stored in the fridge for up to 3 days. Enjoy them cold or warm them slightly in the microwave before serving.

For a thicker consistency, use less liquid or add more oats. If you prefer a smoother texture, blend the oats and milk together before adding the fruits. Feel free to switch up the fruits based on what’s in season or your personal preference; pineapples or berries make great alternatives!

To store leftovers, keep them in an airtight container in the refrigerator for up to 3 days. These oats are also great for meal prep; make several jars at once for busy mornings.

August 7, 2026 0 comments
0 FacebookTwitterPinterestPocketEmail
Zesty Cinnamon-Orange French Toast Roll-Ups
Breakfast & BrunchKid-FriendlyQuick & Easy (30-Min)

Zesty Cinnamon-Orange French Toast Roll-Ups

by Linda August 7, 2026
written by Linda

Indulge in a delightful twist on classic French toast with these Cinnamon-Orange Zest Roll-Ups. They’re not only easy to make but also a fun way to enjoy breakfast, appealing to both kids and adults alike.

Using soft bread rolled around a creamy orange-infused filling, each piece is then dipped in a cinnamon egg mixture and cooked to golden perfection. The zesty orange adds a refreshing touch, making these roll-ups a unique addition to your brunch repertoire.

Zesty Cinnamon-Orange French Toast Roll-Ups

Zesty Cinnamon-Orange French Toast Roll-Ups

Serves: 4 Prep Time: 15 minutes Cooking Time: 10 minutes 10 minutes
Nutrition facts: 300 calories 15g fat
Rating: 5.0/5
( 1 voted )
Pin
Print

Ingredients

INGREDIENTS

  • 6 slices of soft white or whole wheat bread
  • 4 oz cream cheese, softened
  • 2 tbsp powdered sugar
  • Zest of 1 orange
  • 1/2 tsp vanilla extract
  • 2 large eggs
  • 1/2 cup milk
  • 1 tsp ground cinnamon
  • Butter for cooking

Instructions

  1. Trim the crusts off each slice of bread and flatten them with a rolling pin.
  2. In a bowl, mix the softened cream cheese, powdered sugar, orange zest, and vanilla extract until smooth.
  3. Spread about 1 tablespoon of the cream cheese mixture onto each slice of flattened bread, then roll them up tightly.
  4. In a separate bowl, whisk together eggs, milk, and ground cinnamon until well combined.
  5. Heat a skillet over medium heat and add butter to coat the pan.
  6. Dip each roll-up in the egg mixture, allowing excess to drip off, then place seam-side down in the heated skillet.
  7. Cook for 2-3 minutes on each side or until golden brown and crispy.
  8. Remove from skillet, slice in half if desired, and serve warm, dusted with additional powdered sugar or drizzled with syrup.

Notes

Tip: For a fun twist, add chocolate chips to the cream cheese filling or serve with a side of fresh fruit.

For an extra touch of sweetness, drizzle some maple syrup or honey on top before serving. You can also substitute the cream cheese with ricotta for a lighter filling.

Make sure to use stale bread if possible, as it holds the filling better than fresh bread. Leftover roll-ups can be stored in an airtight container in the fridge for up to two days; simply reheat them in a toaster oven for a crispy finish.

August 7, 2026 0 comments
0 FacebookTwitterPinterestPocketEmail
Newer Posts
Older Posts

Recent Posts

  • Delightfully Decadent Toasted Almond Joy Cheesecake Bites

    September 15, 2026
  • Raspberry Lemonade Tart with Meringue Clouds

    September 15, 2026
  • Choco-Coconut Whirlwind Cookies

    September 15, 2026
  • Elegant Saffron-Infused Vanilla Chiffon Cake

    September 15, 2026
  • Caramelized Banana Pecan Bliss Bars

    September 15, 2026

About Me

About Me

I'm Linda, a health professional, university graduate, and author sharing tested, easy-to-follow recipes made from simple, everyday ingredients. Based in Finland, I bring together my culinary training, love of travel, and home-cooked roots to help you cook confidently, on any budget.

Products

  • Spooky Creative Starry Sky Ceramic Mug Spooky Creative Starry Sky Ceramic Mug 10,00 €

Categories

  • Appetizers & Snacks (159)
  • Breakfast & Brunch (128)
  • Desserts & Baking (173)
  • Drinks & Beverages (134)
  • Gluten-Free (204)
  • Grilling & BBQ (11)
  • Healthy & Low-Calorie (193)
  • Holiday & Seasonal (20)
  • Kid-Friendly (241)
  • Main Dishes (190)
  • Quick & Easy (30-Min) (689)
  • Slow Cooker & Instant Pot (4)
  • Soups & Salads (111)
  • Vegan (163)
  • Vegetarian (569)

About Me

I'm Linda, a health professional and food writer sharing tested, easy-to-follow recipes made from simple ingredients.

Email: jspiceygiftstv@gmail.com

Useful Links

  • Home
  • About
  • Contact
  • Free Cookbooks
  • Terms and Conditions
  • Privacy Policy

Newsletter

Subscribe to to our Newsletter to stay updated with all our recipes.

Recent Posts

  • Delightfully Decadent Toasted Almond Joy Cheesecake Bites

    September 15, 2026
  • Raspberry Lemonade Tart with Meringue Clouds

    September 15, 2026
  • Instagram
  • Pinterest
  • Youtube
  • Tiktok

@2026 - All Right Reserved. Designed and Developed by JSpiceyGifts

J Spicey Gifts
  • Home
  • Recipes
    • Breakfast & Brunch
    • Appetizers & Snacks
    • Main Dishes
    • Soups & Salads
    • Desserts & Baking
    • Drinks & Beverages
  • Categories
    • Vegetarian
    • Vegan
    • Gluten-Free
    • Quick & Easy (30-Min)
    • Slow Cooker & Instant Pot
    • Grilling & BBQ
    • Healthy & Low-Calorie
    • Holiday & Seasonal
    • Kid-Friendly
  • About
  • Contact

Shopping Cart

Close

No products in the cart.

Close