J Spicey Gifts
  • Home
  • Recipes
    • Breakfast & Brunch
    • Appetizers & Snacks
    • Main Dishes
    • Soups & Salads
    • Desserts & Baking
    • Drinks & Beverages
  • Categories
    • Vegetarian
    • Vegan
    • Gluten-Free
    • Quick & Easy (30-Min)
    • Slow Cooker & Instant Pot
    • Grilling & BBQ
    • Healthy & Low-Calorie
    • Holiday & Seasonal
    • Kid-Friendly
  • About
  • Contact
Top Posts
Delightfully Decadent Toasted Almond Joy Cheesecake Bites
Raspberry Lemonade Tart with Meringue Clouds
Choco-Coconut Whirlwind Cookies
Elegant Saffron-Infused Vanilla Chiffon Cake
Caramelized Banana Pecan Bliss Bars
Fresh Strawberry Spinach Salad with Creamy Poppyseed Dressing
Silky Curried Carrot and Coconut Soup with Fresh...
Savory Garlic Butter Turkey Meatballs on Creamy Herbed...
Moroccan-Spiced Quinoa-Stuffed Eggplant Boats
Zesty Cajun Jambalaya with Shrimp and Andouille Sausage
J Spicey Gifts
  • Home
  • Recipes
    • Breakfast & Brunch
    • Appetizers & Snacks
    • Main Dishes
    • Soups & Salads
    • Desserts & Baking
    • Drinks & Beverages
  • Categories
    • Vegetarian
    • Vegan
    • Gluten-Free
    • Quick & Easy (30-Min)
    • Slow Cooker & Instant Pot
    • Grilling & BBQ
    • Healthy & Low-Calorie
    • Holiday & Seasonal
    • Kid-Friendly
  • About
  • Contact
J Spicey Gifts
J Spicey Gifts
  • Home
  • Recipes
    • Breakfast & Brunch
    • Appetizers & Snacks
    • Main Dishes
    • Soups & Salads
    • Desserts & Baking
    • Drinks & Beverages
  • Categories
    • Vegetarian
    • Vegan
    • Gluten-Free
    • Quick & Easy (30-Min)
    • Slow Cooker & Instant Pot
    • Grilling & BBQ
    • Healthy & Low-Calorie
    • Holiday & Seasonal
    • Kid-Friendly
  • About
  • Contact
Copyright 2021 - All Right Reserved
Crispy Baked Parmesan-Ranch Cauliflower Popcorn
Appetizers & SnacksGluten-FreeQuick & Easy (30-Min)Vegetarian

Crispy Baked Parmesan-Ranch Cauliflower Popcorn

by Linda August 6, 2026
written by Linda

Using cauliflower as a base, these baked parmesan-ranch cauliflower popcorn bites offer a crunchy, flavorful alternative to traditional popcorn. Coated in a savory ranch seasoning and a generous sprinkle of parmesan, they deliver a satisfying crunch with every bite. Plus, they’re a fantastic way to sneak in some veggies while enjoying a delicious snack.

The key to achieving that perfect crispy texture is in the roasting. By baking at a high temperature, you’ll create a delightful crispiness that pairs beautifully with the zing of ranch flavor and the richness of parmesan. They make for a great appetizer, game-day snack, or even a fun side dish for dinner!

Crispy Baked Parmesan-Ranch Cauliflower Popcorn

Crispy Baked Parmesan-Ranch Cauliflower Popcorn

Serves: 4-6 Prep Time: 15 minutes Cooking Time: 25 minutes 25 minutes
Nutrition facts: 150 calories 10g fat
Rating: 5.0/5
( 1 voted )
Pin
Print

Ingredients

INGREDIENTS

  • 1 large head of cauliflower, cut into bite-sized florets
  • 1/2 cup grated Parmesan cheese
  • 1 packet (about 1 oz) ranch seasoning mix
  • 2 tablespoons olive oil
  • Salt and pepper to taste
  • Chopped fresh parsley for garnish (optional)

Instructions

  1. Preheat your oven to 425°F (220°C).
  2. In a large mixing bowl, combine the cauliflower florets with olive oil, ranch seasoning, salt, and pepper. Toss until well coated.
  3. Spread the cauliflower evenly on a baking sheet lined with parchment paper.
  4. Sprinkle the grated Parmesan cheese evenly over the cauliflower florets.
  5. Bake in the preheated oven for 20-25 minutes, or until the cauliflower is golden brown and crispy, stirring halfway through for even cooking.
  6. Remove from the oven and let cool slightly before serving. Garnish with chopped parsley if desired. Enjoy!

Notes

Tip: For extra flavor, try adding a squeeze of lemon juice before serving!

For the best results, ensure that your cauliflower florets are evenly sized to promote uniform cooking. If you’re feeling adventurous, try adding different seasoning blends or even a sprinkle of smoked paprika for extra depth of flavor. These bites can be served warm or at room temperature, making them perfect for gatherings.

Leftovers can be stored in an airtight container in the fridge for up to three days. Reheat them in the oven for a few minutes to regain their crispiness before serving. You can also experiment with dipping sauces like ranch dressing, garlic aioli, or even a spicy sriracha mayo for an extra kick!

August 6, 2026 0 comments
0 FacebookTwitterPinterestPocketEmail
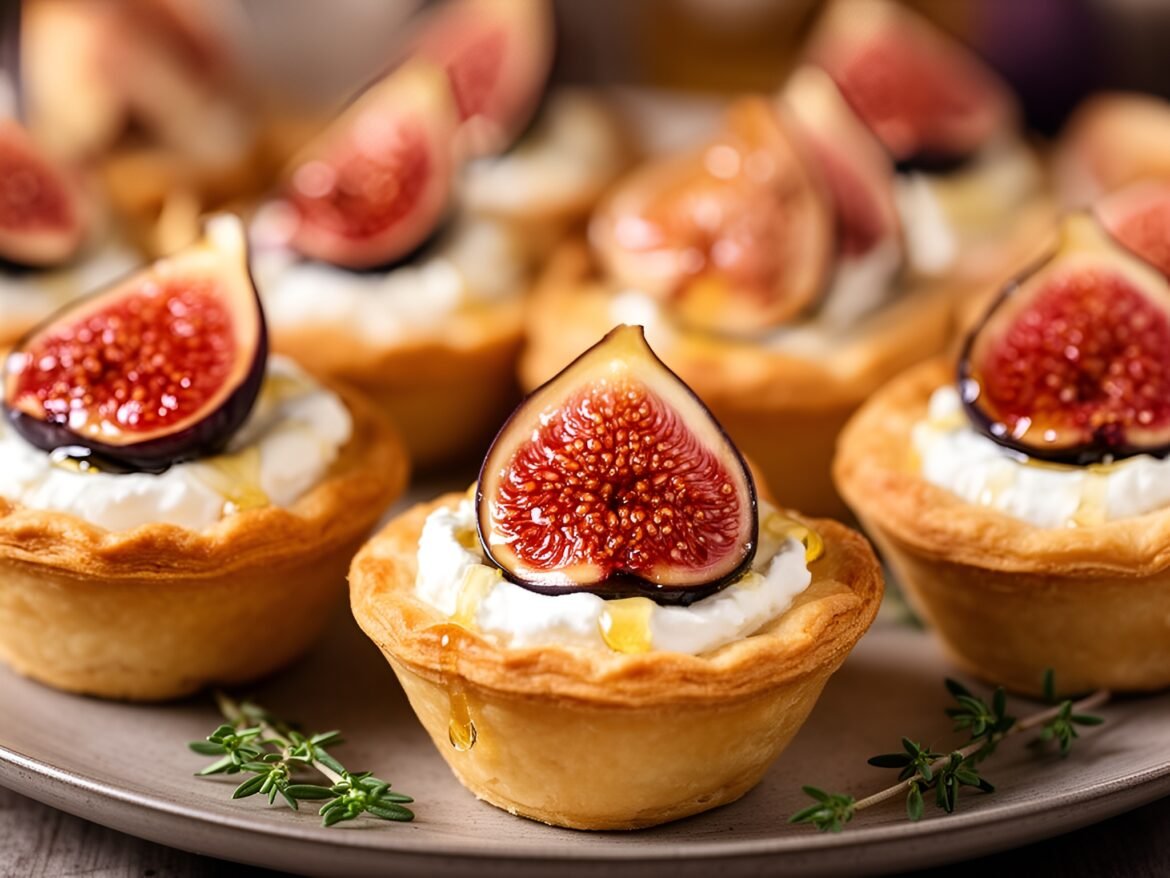
Decadent Goat Cheese and Fig Tartlets with Honey Drizzle
Appetizers & SnacksQuick & Easy (30-Min)Vegetarian

Decadent Goat Cheese and Fig Tartlets with Honey Drizzle

by Linda August 6, 2026
written by Linda

These Decadent Goat Cheese and Fig Tartlets are a perfect blend of sweet and savory, making them an irresistible appetizer for your next gathering. The creamy goat cheese pairs beautifully with the luscious figs, while a hint of honey pulls it all together for a delightful bite.

Using pre-made pastry shells simplifies the preparation, allowing you to focus on the rich flavors of the filling. These tartlets not only taste amazing but also present beautifully, making them a show-stopping addition to any platter.

Decadent Goat Cheese and Fig Tartlets with Honey Drizzle

Decadent Goat Cheese and Fig Tartlets with Honey Drizzle

Serves: 12 Prep Time: 20 minutes Cooking Time: 15 minutes 15 minutes
Nutrition facts: 150 calories 10g fat
Rating: 5.0/5
( 1 voted )
Pin
Print

Ingredients

INGREDIENTS

  • 1 package of pre-made pastry shells
  • 8 oz goat cheese, softened
  • 1/4 cup heavy cream
  • 1/4 cup honey, plus extra for drizzling
  • 1 cup fresh figs, sliced
  • 1 tsp fresh thyme, chopped (optional)
  • Salt and pepper to taste

Instructions

  1. Preheat the oven to 375°F (190°C).
  2. Arrange the pre-made pastry shells on a baking sheet.
  3. In a mixing bowl, combine the softened goat cheese, heavy cream, honey, thyme (if using), salt, and pepper; mix until smooth.
  4. Spoon the goat cheese mixture into each pastry shell, filling them generously.
  5. Top each tartlet with a few slices of fresh fig.
  6. Bake in the preheated oven for about 15 minutes, or until the pastry is golden and the filling is slightly puffed.
  7. Remove from the oven and let cool for a few minutes.
  8. Drizzle additional honey over the warm tartlets before serving.

Notes

Storage: These tartlets are best enjoyed fresh but can be stored in an airtight container in the refrigerator for up to 2 days. Reheat in the oven at 350°F (175°C) for about 5 minutes for the best results.

Tips for Perfect Tartlets

To avoid soggy bottoms, ensure your pastry shells are pre-baked until golden before adding the filling. If you’re out of fresh figs, dried figs can make a great substitute, just chop them finely and let them soak in warm water for a few minutes to soften.

For added flavor, experiment with a sprinkle of fresh herbs like thyme or rosemary in the filling. These tartlets can be made a few hours in advance; just store them in the refrigerator until ready to serve. Reheat briefly in the oven for the best texture.

August 6, 2026 0 comments
0 FacebookTwitterPinterestPocketEmail
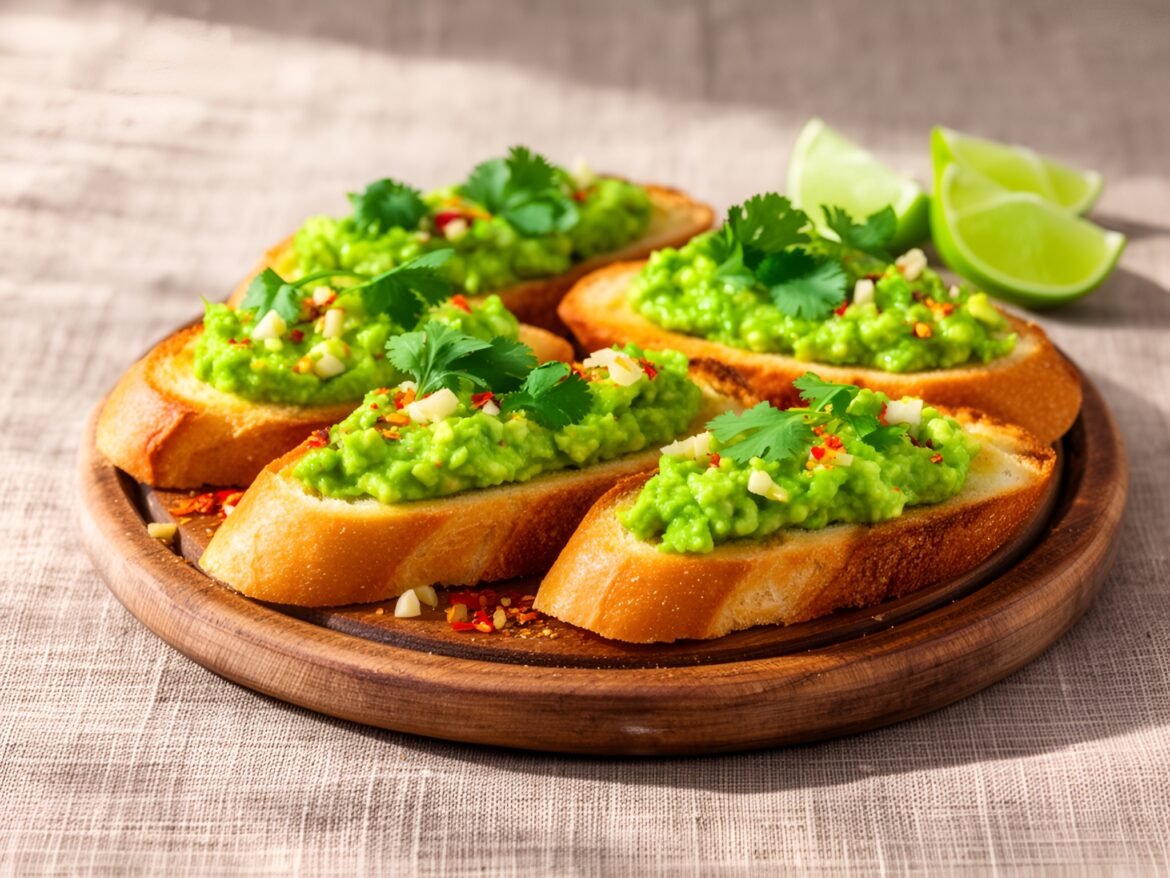
Zesty Spicy Garlic-Lime Avocado Crostini
Appetizers & SnacksGluten-FreeQuick & Easy (30-Min)Vegetarian

Zesty Spicy Garlic-Lime Avocado Crostini

by Linda August 6, 2026
written by Linda

Introducing Zesty Spicy Garlic-Lime Avocado Crostini, a delightful twist on the classic appetizer that combines creamy avocado with a punch of heat and tang. Perfect for gatherings or as a light snack, these crostini are easy to prepare and sure to impress your guests.

The key to this dish is ripe avocados blended with garlic and lime, offering a creamy base that contrasts beautifully with the crisp crostini. The addition of chili flakes adds just the right amount of heat, making each bite memorable and delicious.

Zesty Spicy Garlic-Lime Avocado Crostini

Zesty Spicy Garlic-Lime Avocado Crostini

Serves: 6-8 Prep Time: 15 minutes Cooking Time: 10 minutes 10 minutes
Nutrition facts: 150 calories 9g fat
Rating: 5.0/5
( 1 voted )
Pin
Print

Ingredients

INGREDIENTS

  • 1 baguette, sliced into 1/2-inch rounds
  • 2 ripe avocados
  • 2 cloves garlic, minced
  • Juice of 1 lime
  • 1/2 teaspoon chili flakes (adjust to taste)
  • Salt to taste
  • Olive oil for drizzling
  • Fresh cilantro for garnish (optional)

Instructions

  1. Preheat the oven to 400°F (200°C).
  2. Arrange the sliced baguette on a baking sheet and drizzle with olive oil.
  3. Toast the baguette slices in the oven for about 5-7 minutes, or until golden and crispy.
  4. While the bread is toasting, mash the avocados in a bowl, then mix in minced garlic, lime juice, chili flakes, and salt to taste.
  5. Once the crostini are ready, spread the avocado mixture generously over each slice.
  6. Garnish with fresh cilantro if desired, and serve immediately.

Notes

For extra flavor, consider adding a sprinkle of smoked paprika or a drizzle of balsamic glaze before serving.

For the best flavor, use fresh lime juice instead of bottled. You can also adjust the heat level by varying the amount of chili flakes used or substituting with fresh diced jalapeños for a different kick.

Feel free to customize your toppings with roasted tomatoes, feta cheese, or even a sprinkle of fresh herbs like cilantro or parsley for added freshness. These crostini are best enjoyed fresh but can be stored in an airtight container for up to one day.

August 6, 2026 0 comments
0 FacebookTwitterPinterestPocketEmail
Crispy Stuffed Arancini with Herb Pesto
Appetizers & SnacksQuick & Easy (30-Min)Vegetarian

Crispy Stuffed Arancini with Herb Pesto

by Linda August 6, 2026
written by Linda

Crispy Stuffed Arancini are a deliciously indulgent treat that are perfect for any occasion. These golden, deep-fried rice balls are filled with creamy cheese and herbs, providing a delightful contrast of textures and flavors.

What sets these arancini apart is the accompanying herb pesto, which adds a fresh and vibrant note that elevates each bite. The combination of crispy exterior and gooey cheese interior makes these a must-try for any appetizer lover!

Crispy Stuffed Arancini with Herb Pesto

Crispy Stuffed Arancini with Herb Pesto

Serves: 4 Prep Time: 30 minutes Cooking Time: 30 minutes 30 minutes
Nutrition facts: 300 calories 18g fat
Rating: 5.0/5
( 1 voted )
Pin
Print

Ingredients

INGREDIENTS

  • 2 cups cooked risotto
  • 1/2 cup grated Parmesan cheese
  • 1/2 cup mozzarella cheese, cubed
  • 1/4 cup all-purpose flour
  • 2 large eggs
  • 1 cup breadcrumbs
  • Vegetable oil, for frying
  • Salt and pepper, to taste
  • For the Herb Pesto:
  • 2 cups fresh basil leaves
  • 1/2 cup pine nuts
  • 1/2 cup olive oil
  • 1/4 cup grated Parmesan cheese
  • 1 clove garlic
  • Salt to taste

Instructions

  1. Prepare the herb pesto by blending basil, pine nuts, olive oil, Parmesan cheese, garlic, and salt in a food processor until smooth; set aside.
  2. In a mixing bowl, combine the cooked risotto, grated Parmesan, salt, and pepper. Mix well.
  3. Take a small amount of risotto mixture in your hand, flatten it, and place a cube of mozzarella in the center. Mold the risotto around the cheese to form a ball about 1 inch in diameter.
  4. Dredge each arancini in flour, then dip in beaten eggs, and finally coat with breadcrumbs, ensuring they are fully covered.
  5. Heat vegetable oil in a deep frying pan over medium heat. Fry the arancini in batches until golden brown and crispy, about 3-5 minutes per side.
  6. Remove arancini from the oil and drain on paper towels. Serve warm with herb pesto on the side.

Notes

Note: For a gluten-free option, use gluten-free breadcrumbs and flour.

For the best results, use leftover risotto that has been chilled in the fridge, as it will hold its shape better when forming the balls. If you want to make these arancini a bit healthier, consider baking them instead of frying for a lighter version.

Feel free to experiment with the filling; adding cooked mushrooms or sun-dried tomatoes can create a delightful variation. Store any leftovers in an airtight container in the fridge for up to 2 days, and reheat in the oven for crispy results.

August 6, 2026 0 comments
0 FacebookTwitterPinterestPocketEmail
Cranberry-Jalapeño Cheese Bites with Sweet Heat
Appetizers & SnacksKid-FriendlyVegetarian

Cranberry-Jalapeño Cheese Bites with Sweet Heat

by Linda August 6, 2026
written by Linda

These Cranberry-Jalapeño Cheese Bites take your appetizer game to the next level with their perfect blend of sweet, spicy, and savory flavors. The creamy cheese, tangy cranberry, and just the right kick from the jalapeños create a harmonious balance that is sure to please any palate.

Perfect for holiday gatherings or casual get-togethers, these bites are easy to prepare and can be made ahead of time. Serve them warm for a melty cheese experience or at room temperature for a delightful snack. Each bite is a burst of flavor that will have everyone coming back for more!

Cranberry-Jalapeño Cheese Bites with Sweet Heat

Cranberry-Jalapeño Cheese Bites with Sweet Heat

Serves: 12 Prep Time: 15 minutes Cooking Time: 10 minutes 10 minutes
Nutrition facts: 120 calories 9g fat
Rating: 5.0/5
( 1 voted )
Pin
Print

Ingredients

INGREDIENTS

  • 8 oz cream cheese, softened
  • 1 cup shredded sharp cheddar cheese
  • 1/2 cup cranberry sauce
  • 1-2 jalapeños, finely chopped (adjust for spice level)
  • 1/4 cup green onions, sliced thin
  • 1/2 teaspoon garlic powder
  • 1/2 teaspoon salt
  • 1/4 teaspoon black pepper
  • 1 package of mini phyllo pastry cups (15 count)

Instructions

  1. Preheat your oven to 350°F (175°C).
  2. In a mixing bowl, combine the softened cream cheese, shredded cheddar cheese, cranberry sauce, chopped jalapeños, green onions, garlic powder, salt, and black pepper. Mix well until all ingredients are thoroughly combined.
  3. Place the mini phyllo pastry cups on a baking sheet.
  4. Spoon the cheese mixture evenly into each phyllo cup, filling them almost to the top.
  5. Bake in the preheated oven for about 10 minutes, or until the cheese is melted and the tops are slightly golden.
  6. Remove from the oven and let cool for a few minutes before serving. Enjoy warm!

Notes

Tip: For added flair, garnish each bite with a small sprig of cilantro or a slice of jalapeño before serving.

For a milder option, remove the seeds from the jalapeños before mixing them into the cheese. You can also substitute the cranberry sauce with a cranberry jalapeño relish for extra texture and flavor.

Store any leftovers in an airtight container in the refrigerator for up to 3 days. Reheat them in the oven for a few minutes before serving to restore that delicious cheesy goodness.

August 6, 2026 0 comments
0 FacebookTwitterPinterestPocketEmail
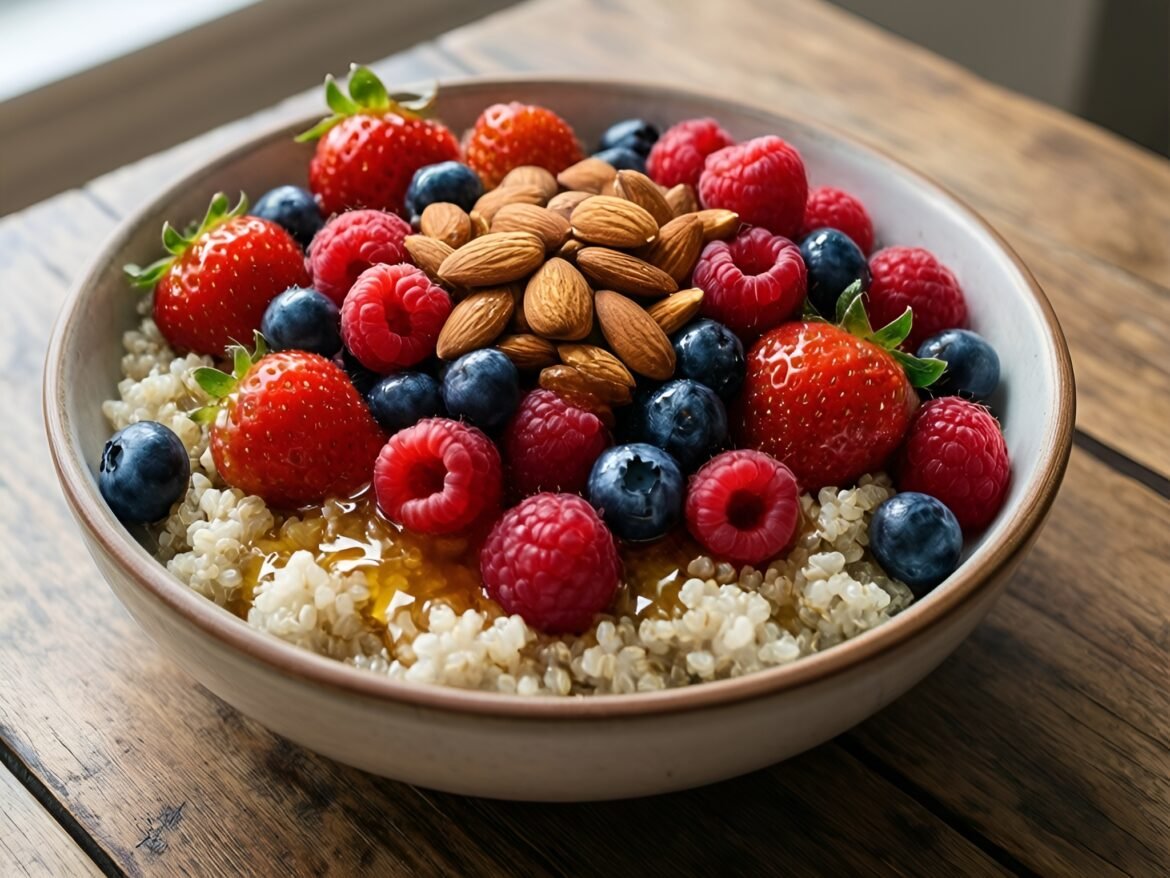
Berry-Burst Quinoa Breakfast Bowl
Breakfast & BrunchHealthy & Low-CalorieQuick & Easy (30-Min)Vegetarian

Berry-Burst Quinoa Breakfast Bowl

by Linda August 6, 2026
written by Linda

Fuel your mornings with a satisfying and nutritious Berry-Burst Quinoa Breakfast Bowl. This delightful dish combines fluffy quinoa with an array of fresh, colorful berries, offering a burst of flavor and essential nutrients in every bite.

The balance of protein from quinoa and vitamins from the berries makes this bowl not only delicious but also a powerhouse for your health. Top it off with a drizzle of honey or a sprinkle of nuts for added texture and sweetness, making it a perfect way to kickstart your day!

Berry-Burst Quinoa Breakfast Bowl

Berry-Burst Quinoa Breakfast Bowl

Serves: 2 Prep Time: 10 minutes Cooking Time: 15 minutes 15 minutes
Nutrition facts: 350 calories 15g fat
Rating: 5.0/5
( 1 voted )
Pin
Print

Ingredients

INGREDIENTS

  • 1 cup cooked quinoa
  • 1 cup mixed fresh berries (strawberries, blueberries, raspberries)
  • 1 tablespoon honey or maple syrup (optional)
  • 1/4 cup chopped nuts (almonds, walnuts, or pecans)
  • 1 tablespoon chia seeds (optional)
  • 1/2 teaspoon vanilla extract
  • 1/2 cup almond milk or yogurt

Instructions

  1. Rinse and cook the quinoa according to package instructions; let it cool slightly.
  2. In a bowl, mix the cooked quinoa with vanilla extract, adjusting sweetness with honey or maple syrup if desired.
  3. Add the mixed fresh berries to the quinoa, gently folding them in to combine without breaking them.
  4. Top the quinoa and berry mixture with chopped nuts and chia seeds if using.
  5. Serve immediately with a splash of almond milk or a dollop of yogurt, if preferred.

Notes

Note: This breakfast bowl is best enjoyed fresh but can be made in advance; just store the components separately to maintain texture.

For added creaminess, consider a dollop of Greek yogurt on top or a splash of almond milk. If you don’t have quinoa on hand, try using oats for a similar texture. To make this dish even more filling, mix in some chia seeds or nut butter.

Store any leftovers in the fridge for up to two days, and simply reheat the quinoa before serving again. You can also customize the berries based on seasonality or your preferences; strawberries, blueberries, and raspberries all work wonderfully!

August 6, 2026 0 comments
0 FacebookTwitterPinterestPocketEmail
Fluffy Blueberry-Lavender Pancakes Stack
Breakfast & BrunchKid-FriendlyVegetarian

Fluffy Blueberry-Lavender Pancakes Stack

by Linda August 6, 2026
written by Linda

Indulge in the light, airy bliss of Fluffy Blueberry-Lavender Pancakes Stack—your new brunch favorite! These pancakes are not just fluffy; they are also bursting with juicy blueberries and a hint of lavender, adding a unique floral note that elevates them to gourmet status.

Perfectly paired with a drizzle of maple syrup and a dollop of whipped cream, this recipe brings a refreshing twist to your classic pancake morning. The lavender adds an unexpected depth, making each bite a delightful surprise. Gather your loved ones and serve these pancakes for a special occasion or a leisurely weekend breakfast!

Fluffy Blueberry-Lavender Pancakes Stack

Fluffy Blueberry-Lavender Pancakes Stack

Serves: 4 Prep Time: 10 minutes Cooking Time: 15 minutes 15 minutes
Nutrition facts: 320 calories 10g fat
Rating: 5.0/5
( 1 voted )
Pin
Print

Ingredients

INGREDIENTS

  • 1 cup all-purpose flour
  • 2 tablespoons sugar
  • 1 tablespoon baking powder
  • 1/2 teaspoon baking soda
  • 1/4 teaspoon salt
  • 1 cup buttermilk
  • 1 large egg
  • 2 tablespoons unsalted butter, melted
  • 1/2 teaspoon dried culinary lavender
  • 1 cup fresh blueberries
  • Maple syrup, for serving
  • Whipped cream, for serving

Instructions

  1. In a mixing bowl, combine flour, sugar, baking powder, baking soda, and salt.
  2. In another bowl, whisk together buttermilk, egg, and melted butter until smooth.
  3. Combine the wet and dry ingredients until just mixed; be careful not to overmix.
  4. Gently fold in the dried lavender and fresh blueberries.
  5. Heat a non-stick skillet over medium heat and lightly grease it with butter or oil.
  6. Pour 1/4 cup of batter onto the skillet for each pancake, cooking until bubbles form on the surface, about 2-3 minutes.
  7. Flip the pancakes and cook for an additional 2-3 minutes until golden brown.
  8. Repeat with remaining batter, keeping pancakes warm in a preheated oven if necessary.
  9. Stack pancakes on plates, serving warm with maple syrup and whipped cream. Sprinkle with extra blueberries if desired.

Notes

Storage: These pancakes can be stored in an airtight container in the refrigerator for up to 3 days. Reheat in a toaster or skillet before serving.

For the best flavor, use fresh blueberries; if you opt for frozen, ensure they are well-drained to avoid excess moisture in the batter. Be cautious with lavender; a little goes a long way, so start with less and adjust to taste. If you’re looking to make these pancakes dairy-free, substitute regular milk with almond or oat milk, and use a plant-based yogurt for the topping.

These pancakes can be prepared in advance and reheated in the toaster for a quick breakfast during busy days. Add a sprinkle of powdered sugar on top before serving for an extra touch of sweetness!

August 6, 2026 0 comments
0 FacebookTwitterPinterestPocketEmail
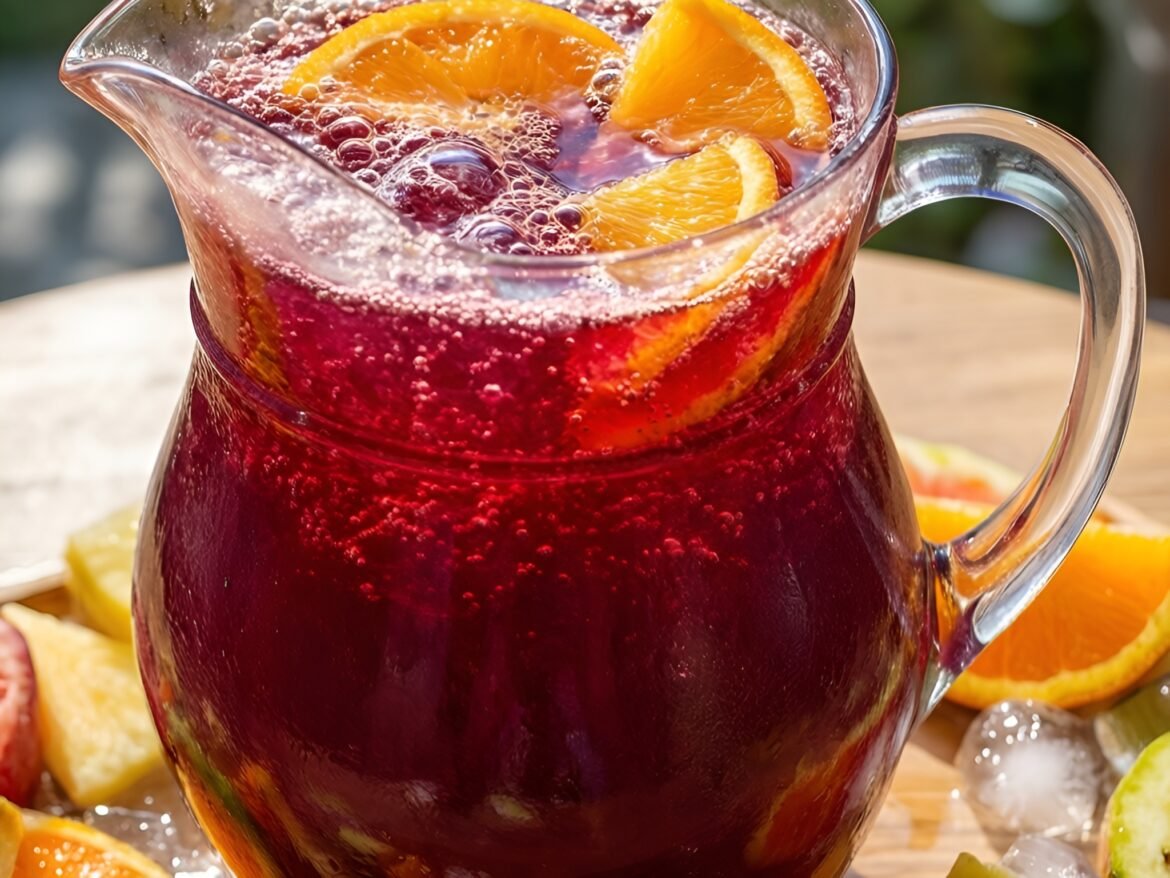
Tropical Hibiscus Sparkle Punch
Drinks & BeveragesGluten-FreeQuick & Easy (30-Min)Vegan

Tropical Hibiscus Sparkle Punch

by Linda August 6, 2026
written by Linda

Brighten up your gatherings with this Tropical Hibiscus Sparkle Punch. This refreshing beverage combines the vibrant flavors of hibiscus tea with the sweetness of tropical fruit juices, creating a stunning drink that captivates the senses.

Perfect for summer parties or a relaxing afternoon, this punch sparkles with effervescence, making it a delightful addition to any occasion. With its bold red hue and tropical aroma, your guests will be enchanted from the first sip!

Tropical Hibiscus Sparkle Punch

Tropical Hibiscus Sparkle Punch

Serves: 6-8 Prep Time: 15 minutes Cooking Time: 0 minutes 0 minutes
Nutrition facts: 80 calories 0g fat
Rating: 5.0/5
( 1 voted )
Pin
Print

Ingredients

INGREDIENTS

  • 4 cups brewed hibiscus tea
  • 1 cup pineapple juice
  • 1 cup orange juice
  • 2 cups sparkling water
  • 1/4 cup honey or agave syrup (adjust to taste)
  • Ice cubes
  • Fresh fruit slices (for garnish)

Instructions

  1. Brew hibiscus tea and let it cool completely.
  2. In a large pitcher, combine the cooled hibiscus tea, pineapple juice, orange juice, and honey or agave syrup.
  3. Stir well to ensure the honey is fully dissolved.
  4. Just before serving, add the sparkling water and gently stir to combine.
  5. Fill glasses with ice and pour the punch over the ice.
  6. Garnish with fresh fruit slices and serve immediately.

Notes

Note: Adjust the sweetness by varying the amount of honey or agave syrup to suit your taste.

For an extra twist, consider adding fresh mint leaves or slices of fresh fruit like oranges and pineapples to the punch for added flavor and visual appeal. If you’re looking to make this punch a bit more adult-friendly, a splash of rum or vodka can elevate it to a festive cocktail.

Store any leftover punch in the fridge, but be cautious: the longer it sits, the less fizzy it will become. Serve over ice for the best experience, and enjoy this delightful drink chilled!

August 6, 2026 0 comments
0 FacebookTwitterPinterestPocketEmail
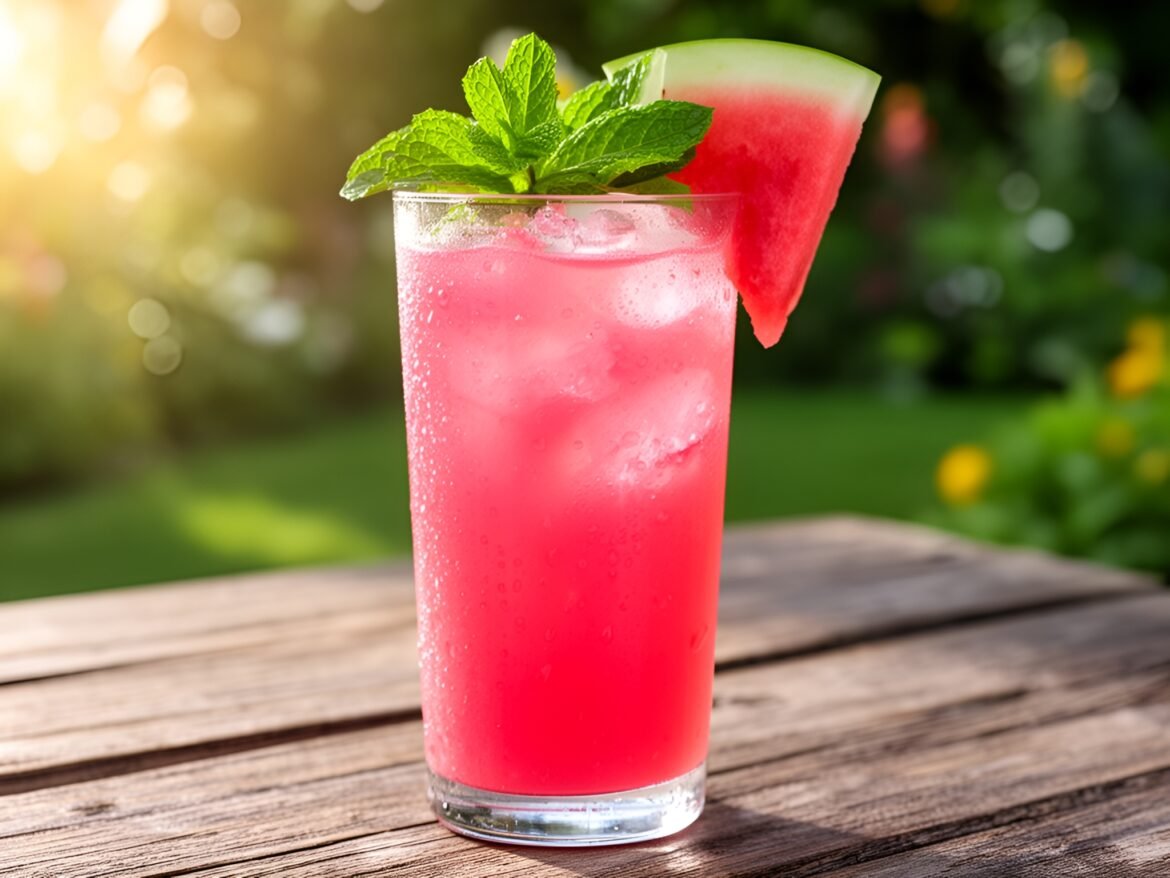
Refreshing Minty Watermelon Splash Cooler
Drinks & BeveragesGluten-FreeQuick & Easy (30-Min)Vegan

Refreshing Minty Watermelon Splash Cooler

by Linda August 6, 2026
written by Linda

Beat the heat with this vibrant Minty Watermelon Splash Cooler! This delightful drink combines fresh watermelon, zesty lime, and invigorating mint to create a refreshing beverage perfect for hot summer days.

Not only is this cooler incredibly easy to make, but it’s also a visually stunning drink, showcasing the beautiful pink hue of watermelon with a hint of green from the mint. Serve it at your next barbecue, picnic, or casual gathering, and watch it disappear!

Refreshing Minty Watermelon Splash Cooler

Refreshing Minty Watermelon Splash Cooler

Serves: 4 Prep Time: 10 minutes Cooking Time: 0 minutes 0 minutes
Nutrition facts: 50 calories 0g fat
Rating: 5.0/5
( 1 voted )
Pin
Print

Ingredients

INGREDIENTS

  • 4 cups watermelon, cubed and seeded
  • 1/4 cup fresh mint leaves, packed
  • Juice of 2 limes
  • 1-2 tablespoons honey or agave syrup (optional)
  • Sparkling water or soda, to taste
  • Ice cubes, for serving

Instructions

  1. In a blender, combine the watermelon cubes, mint leaves, lime juice, and honey or agave syrup if using.
  2. Blend until smooth, then strain the mixture through a fine mesh sieve into a pitcher to remove any pulp.
  3. Fill glasses with ice cubes and pour the watermelon mixture over the ice, filling each glass about halfway.
  4. Top each glass with sparkling water or soda to taste, stirring gently to combine.
  5. Garnish with extra mint leaves and a slice of watermelon, then serve immediately.

Notes

Note: This cooler is best enjoyed fresh, but you can store leftover watermelon juice in the refrigerator for up to 2 days.

For the best flavor, use ripe, sweet watermelon. You can also blend in other fruits like strawberries or cucumber for a unique twist! If you prefer a sweeter drink, add a touch of honey or agave syrup to taste.

This cooler is best served immediately while the mint is fresh, but you can prepare the watermelon juice ahead of time and mix in the mint just before serving. Try garnishing each glass with a watermelon wedge and a sprig of mint for an extra touch!

August 6, 2026 0 comments
0 FacebookTwitterPinterestPocketEmail
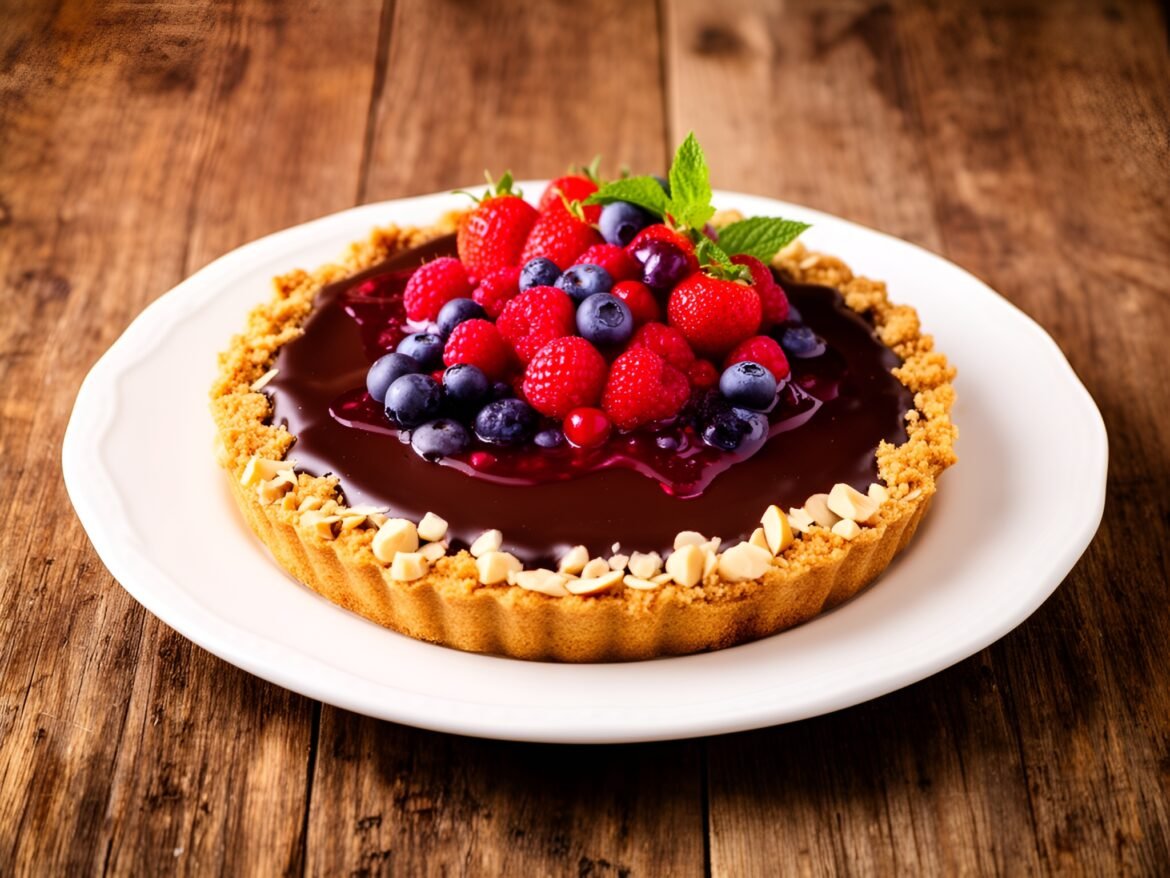
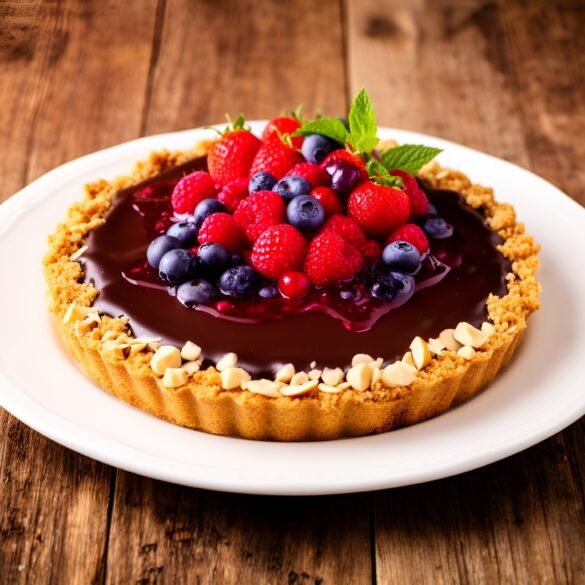
Chocolate-Hazelnut Crumble Tart with Berry Compote
Desserts & BakingHoliday & SeasonalVegetarian

Chocolate-Hazelnut Crumble Tart with Berry Compote

by Linda August 6, 2026
written by Linda

Experience the ultimate dessert treat with this Chocolate-Hazelnut Crumble Tart, a combination of rich chocolate and crunchy hazelnut flavors, topped with a luscious berry compote. The tart’s base is a buttery, crumbly crust that pairs beautifully with the silky chocolate filling.

This dessert is not only visually stunning but also incredibly satisfying, making it perfect for special occasions or a cozy night in. The berry compote adds a delightful tartness that balances the sweetness of the chocolate, creating a harmonious flavor profile that will impress your guests.

Chocolate-Hazelnut Crumble Tart with Berry Compote

Chocolate-Hazelnut Crumble Tart with Berry Compote

Serves: 8 Prep Time: 30 minutes Cooking Time: 45 minutes 45 minutes
Nutrition facts: 350 calories 20g fat
Rating: 5.0/5
( 1 voted )
Pin
Print

Ingredients

INGREDIENTS

  • 1 1/2 cups all-purpose flour
  • 1/2 cup powdered sugar
  • 1/2 cup unsalted butter, cold and cubed
  • 1/2 cup hazelnuts, finely ground
  • 1/4 teaspoon salt
  • 1 large egg yolk
  • 1/2 cup dark chocolate chips
  • 1/2 cup heavy cream
  • 1/2 cup hazelnut spread
  • 2 cups mixed berries (strawberries, blueberries, raspberries)
  • 1/4 cup granulated sugar
  • 1 tablespoon lemon juice

Instructions

  1. Preheat the oven to 350°F (175°C).
  2. In a mixing bowl, combine the flour, powdered sugar, ground hazelnuts, and salt. Add the cold butter and mix until crumbly.
  3. Stir in the egg yolk until the dough comes together. Press the mixture into a tart pan evenly and up the sides.
  4. Prick the crust with a fork and chill for 15 minutes. Bake for 15-20 minutes or until lightly golden. Let it cool.
  5. In a saucepan, heat the heavy cream until just simmering. Pour it over the chocolate chips in a bowl and let sit for 2 minutes, then stir until smooth.
  6. Add the hazelnut spread to the chocolate mixture and stir until fully combined. Pour the filling into the cooled tart crust.
  7. Refrigerate the tart for at least 2 hours to set.
  8. While the tart is chilling, make the berry compote: combine mixed berries, sugar, and lemon juice in a saucepan.
  9. Cook over medium heat until the berries break down and the mixture thickens, about 10 minutes. Remove from heat and let cool.
  10. Once the tart is set, top with the berry compote before serving. Enjoy!

Notes

Tip: For an extra crunch, sprinkle some chopped hazelnuts on top of the compote before serving.

To achieve the best texture for your tart crust, make sure to chill it before baking to prevent shrinkage. If hazelnuts aren’t available, you can substitute them with almonds or walnuts for a similar crunchy effect.

Store leftover tart in the refrigerator, covered, for up to 3 days. Reheat slightly in the oven for a warm treat, or enjoy it chilled. Feel free to experiment with different berries in the compote, such as raspberries or blueberries, for varied flavors!

August 6, 2026 0 comments
0 FacebookTwitterPinterestPocketEmail
Newer Posts
Older Posts

Recent Posts

  • Delightfully Decadent Toasted Almond Joy Cheesecake Bites

    September 15, 2026
  • Raspberry Lemonade Tart with Meringue Clouds

    September 15, 2026
  • Choco-Coconut Whirlwind Cookies

    September 15, 2026
  • Elegant Saffron-Infused Vanilla Chiffon Cake

    September 15, 2026
  • Caramelized Banana Pecan Bliss Bars

    September 15, 2026

About Me

About Me

I'm Linda, a health professional, university graduate, and author sharing tested, easy-to-follow recipes made from simple, everyday ingredients. Based in Finland, I bring together my culinary training, love of travel, and home-cooked roots to help you cook confidently, on any budget.

Products

  • Spooky Creative Starry Sky Ceramic Mug Spooky Creative Starry Sky Ceramic Mug 10,00 €

Categories

  • Appetizers & Snacks (159)
  • Breakfast & Brunch (128)
  • Desserts & Baking (173)
  • Drinks & Beverages (134)
  • Gluten-Free (204)
  • Grilling & BBQ (11)
  • Healthy & Low-Calorie (193)
  • Holiday & Seasonal (20)
  • Kid-Friendly (241)
  • Main Dishes (190)
  • Quick & Easy (30-Min) (689)
  • Slow Cooker & Instant Pot (4)
  • Soups & Salads (111)
  • Vegan (163)
  • Vegetarian (569)

About Me

I'm Linda, a health professional and food writer sharing tested, easy-to-follow recipes made from simple ingredients.

Email: jspiceygiftstv@gmail.com

Useful Links

  • Home
  • About
  • Contact
  • Free Cookbooks
  • Terms and Conditions
  • Privacy Policy

Newsletter

Subscribe to to our Newsletter to stay updated with all our recipes.

Recent Posts

  • Delightfully Decadent Toasted Almond Joy Cheesecake Bites

    September 15, 2026
  • Raspberry Lemonade Tart with Meringue Clouds

    September 15, 2026
  • Instagram
  • Pinterest
  • Youtube
  • Tiktok

@2026 - All Right Reserved. Designed and Developed by JSpiceyGifts

J Spicey Gifts
  • Home
  • Recipes
    • Breakfast & Brunch
    • Appetizers & Snacks
    • Main Dishes
    • Soups & Salads
    • Desserts & Baking
    • Drinks & Beverages
  • Categories
    • Vegetarian
    • Vegan
    • Gluten-Free
    • Quick & Easy (30-Min)
    • Slow Cooker & Instant Pot
    • Grilling & BBQ
    • Healthy & Low-Calorie
    • Holiday & Seasonal
    • Kid-Friendly
  • About
  • Contact

Shopping Cart

Close

No products in the cart.

Close