J Spicey Gifts
  • Home
  • Recipes
    • Breakfast & Brunch
    • Appetizers & Snacks
    • Main Dishes
    • Soups & Salads
    • Desserts & Baking
    • Drinks & Beverages
  • Categories
    • Vegetarian
    • Vegan
    • Gluten-Free
    • Quick & Easy (30-Min)
    • Slow Cooker & Instant Pot
    • Grilling & BBQ
    • Healthy & Low-Calorie
    • Holiday & Seasonal
    • Kid-Friendly
  • About
  • Contact
Top Posts
Chai-Spiced Vanilla Frappe with Creamy Whipped Topping
Citrus Sunset Sparkler with a Twist
Mocha Swirl Cupcake Cones with Chocolate Drizzle
Lavender-Infused Honey Cream Puffs with a Velvety Finish
Luxuriously Creamy Wild Mushroom and Spinach Soup with...
Lemon-Basil Chickpea and Avocado Salad with a Zesty...
Zesty Lemon-Thyme Grilled Salmon with Colorful Roasted Veggie...
Fiery Harissa Cauliflower Steaks with Garlic Tahini Drizzle
Savory Creamy Tuscan Garlic Shrimp Pasta Bake
Flavorful Smoky Honey-Garlic Glazed Tofu Stir-Fry
J Spicey Gifts
  • Home
  • Recipes
    • Breakfast & Brunch
    • Appetizers & Snacks
    • Main Dishes
    • Soups & Salads
    • Desserts & Baking
    • Drinks & Beverages
  • Categories
    • Vegetarian
    • Vegan
    • Gluten-Free
    • Quick & Easy (30-Min)
    • Slow Cooker & Instant Pot
    • Grilling & BBQ
    • Healthy & Low-Calorie
    • Holiday & Seasonal
    • Kid-Friendly
  • About
  • Contact
J Spicey Gifts
J Spicey Gifts
  • Home
  • Recipes
    • Breakfast & Brunch
    • Appetizers & Snacks
    • Main Dishes
    • Soups & Salads
    • Desserts & Baking
    • Drinks & Beverages
  • Categories
    • Vegetarian
    • Vegan
    • Gluten-Free
    • Quick & Easy (30-Min)
    • Slow Cooker & Instant Pot
    • Grilling & BBQ
    • Healthy & Low-Calorie
    • Holiday & Seasonal
    • Kid-Friendly
  • About
  • Contact
Copyright 2021 - All Right Reserved
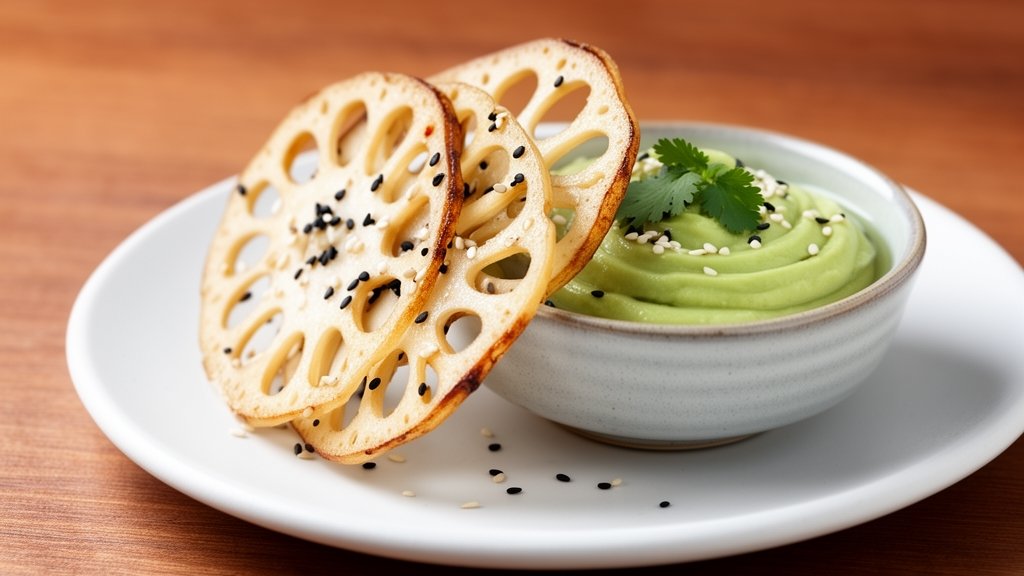
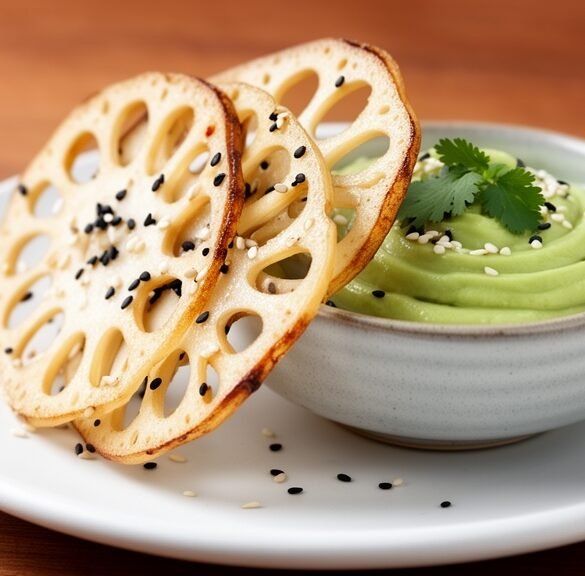
Crunchy Lotus Root Chips with Avocado-Cilantro Mousse & Toasted Sesame
Appetizers & SnacksGluten-FreeQuick & Easy (30-Min)Vegan

Crunchy Lotus Root Chips with Avocado-Cilantro Mousse & Toasted Sesame

by Linda July 21, 2026
written by Linda

These lotus root chips are impossibly crisp with a delicate golden lace pattern, making them as beautiful as they are delicious. Paired with a whipped avocado-cilantro mousse, they offer a creamy, tangy contrast that’s guaranteed to impress guests or elevate your afternoon snack.

The key is thinly slicing the lotus root and maintaining the oil temperature for crisp perfection without excess grease. Meanwhile, the mousse comes together in minutes with ripe avocado, fresh cilantro, lime juice, and a hint of garlic.

This recipe is naturally vegan, gluten-free, and Quick & Easy — ready in under 30 minutes!
Crunchy Lotus Root Chips with Avocado-Cilantro Mousse & Toasted Sesame

Crunchy Lotus Root Chips with Avocado-Cilantro Mousse & Toasted Sesame

Serves: 4 Prep Time: 15 minutes Cooking Time: 15 minutes 15 minutes
Nutrition facts: 260 calories 18g fat
Rating: 5.0/5
( 1 voted )
Pin
Print

Ingredients

FOR THE CHIPS

  • 1 pound lotus root (about 2 medium), peeled and thinly sliced
  • 2 cups neutral oil (canola or grapeseed)
  • Kosher salt, to taste
  • 1 tablespoon toasted sesame seeds

FOR THE MOUSSE

  • 2 ripe avocados, peeled and pitted
  • 1 cup fresh cilantro leaves, packed
  • 1 small garlic clove
  • 2 tablespoons fresh lime juice
  • Salt and pepper, to taste
  • 2–3 tablespoons water, as needed for consistency

Instructions

  1. Peel and thinly slice the lotus root to about 1/8-inch thickness using a mandoline. Rinse slices under cold water, then pat completely dry with paper towels.
  2. Heat oil in a heavy-bottomed pot or wok over medium-high heat until it reaches 350°F. Test by frying one slice: it should bubble and crisp in about 20 seconds.
  3. Fry lotus root slices in batches for 1½–2 minutes, until pale golden and lacy. Transfer with a slotted spoon to a paper towel-lined tray. Immediately season with salt and sprinkle with toasted sesame seeds.
  4. Meanwhile, combine avocados, cilantro, garlic, lime juice, salt, and pepper in a food processor. Pulse until smooth, adding water 1 tablespoon at a time until the mousse reaches a silky consistency.
  5. Spoon the avocado-cilantro mousse into a serving bowl. Arrange the lotus root chips around or stacked over the top. Garnish with extra cilantro sprigs and a final dusting of sesame seeds before serving.

Notes

Note: To keep chips crisp, serve immediately or store in an airtight container at room temperature for up to 1 day. Keep mousse chilled separately.

Tips & Variations

  • Dry slices thoroughly: Moisture leads to soggy chips, so pat lotus root slices completely dry before frying.
  • Oil temperature: Use a thermometer to keep oil between 340°F–360°F for the crispiest results.
  • Substitute seeds: Try white sesame or a mix of flax and chia for extra crunch.
  • Storage: Store chips in an airtight container at room temperature for up to 1 day. Keep the mousse chilled separately and serve within 24 hours.
  • Flavor twist: Add a pinch of cayenne to the mousse for a spicy kick, or stir in a splash of soy sauce for umami depth.

July 21, 2026 0 comments
0 FacebookTwitterPinterestPocketEmail
Lemon-Thyme Panko Peppadew Poppers with Whipped Goat Cheese
Appetizers & SnacksQuick & Easy (30-Min)Vegetarian

Lemon-Thyme Panko Peppadew Poppers with Whipped Goat Cheese

by Linda July 21, 2026
written by Linda

Elevate any gathering with these vibrant Peppadew poppers brimming with tangy whipped goat cheese and finished with a golden lemon-thyme panko crust. The sweet-piquant peppers offer a playful kick that pairs beautifully with creamy cheese and bright citrus.

With a silky filling whipped in moments and a crunchy herb-studded coating, these poppers are as easy to assemble as they are delicious. Perfect for parties, weeknight bites, or a quick appetizer that feels anything but basic.

Lemon-Thyme Panko Peppadew Poppers with Whipped Goat Cheese

Lemon-Thyme Panko Peppadew Poppers with Whipped Goat Cheese

Serves: 24 poppers Prep Time: 20 minutes Cooking Time: 15 minutes 15 minutes
Nutrition facts: 50 calories 4g fat
Rating: 5.0/5
( 1 voted )
Pin
Print

Ingredients

WHIPPED GOAT CHEESE

  • 4 oz goat cheese, softened
  • 2 tbsp heavy cream
  • Zest of 1 lemon
  • 1 tbsp fresh lemon juice
  • Salt and pepper to taste

PANKO COATING & POPPERS

  • 24 Peppadew peppers, drained and patted dry
  • 1 cup panko breadcrumbs
  • 1 tbsp chopped fresh thyme
  • 1 tsp lemon zest
  • 2 tbsp melted butter
  • Olive oil spray

Instructions

  1. Preheat oven to 400°F and line a baking sheet with parchment paper.
  2. In a bowl, whip goat cheese with heavy cream, lemon zest, and lemon juice until smooth. Season with salt and pepper.
  3. Transfer the cheese mixture to a piping bag or a zip-top bag with the corner snipped off. Pipe or spoon into each Peppadew pepper until just filled.
  4. In another bowl, combine panko, chopped thyme, lemon zest, melted butter, a pinch of salt, and pepper.
  5. Roll each stuffed pepper in the panko mixture, pressing gently to adhere.
  6. Arrange coated poppers on the prepared baking sheet and lightly spray with olive oil.
  7. Bake for 12–15 minutes, until the panko is golden and crisp.
  8. Let rest 2 minutes before transferring to a serving platter.

Notes

Note: For a spicy variation, add a pinch of cayenne to the whipped cheese or use hot mini peppers. Best served fresh but can be refreshed in the oven before serving.

To make ahead, prepare the whipped goat cheese up to 2 days in advance and keep it chilled in an airtight container. Assemble and coat the poppers just before baking to ensure maximum crispness.

If Peppadew peppers are unavailable, substitute mini sweet peppers or mild jalapeños for a touch more heat. For extra depth, stir a tablespoon of grated Parmesan into the panko mixture.

Store leftover poppers in an airtight container in the fridge for up to 1 day. Reheat at 375°F for 5 minutes to restore their crunch.

July 21, 2026 0 comments
0 FacebookTwitterPinterestPocketEmail
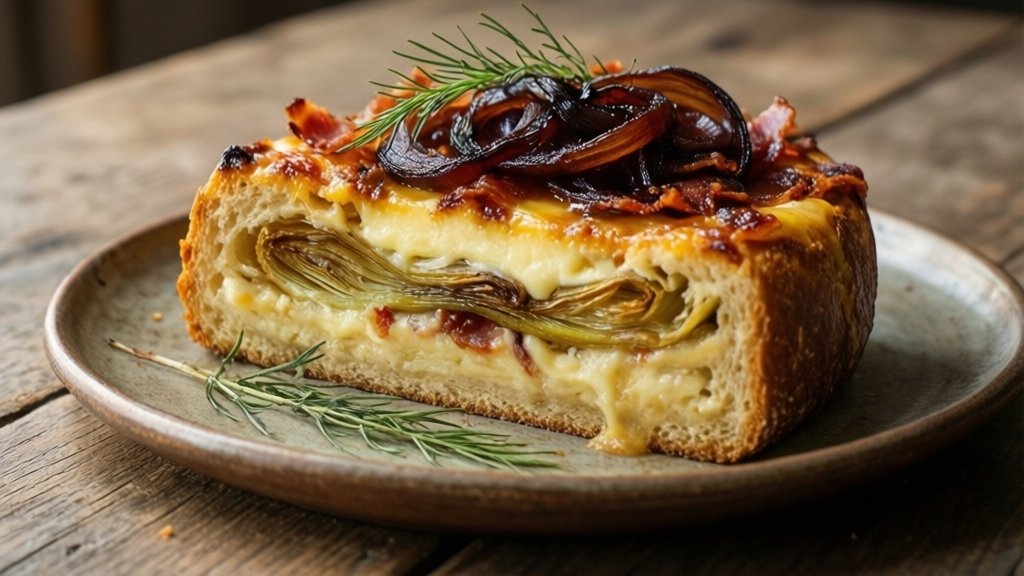
Cheesy Roasted Fennel & Pancetta Strata with Caramelized Onions
Breakfast & BrunchHoliday & Seasonal

Cheesy Roasted Fennel & Pancetta Strata with Caramelized Onions

by Linda July 21, 2026
written by Linda

This strata transforms humble day-old bread into a custardy, savory bake studded with tender roasted fennel, crisp pancetta and ribbons of sweet caramelized onion.

Rich Gruyère melts into every nook, yielding a golden crust that gives way to a pillowy interior. Prep the components ahead to assemble just before guests arrive—or let it rest overnight for deeper flavor.

Whether you’re entertaining or craving a cozy weekend brunch, this strata hits all the right notes of texture, aroma and indulgence.

Cheesy Roasted Fennel & Pancetta Strata with Caramelized Onions

Cheesy Roasted Fennel & Pancetta Strata with Caramelized Onions

Serves: 6-8 Prep Time: 25 minutes Cooking Time: 50 minutes 50 minutes
Nutrition facts: 380 calories 22g fat
Rating: 5.0/5
( 1 voted )
Pin
Print

Ingredients

FOR THE CARAMELIZED ONIONS

  • 2 tablespoons olive oil
  • 2 large yellow onions, thinly sliced
  • 1/4 teaspoon salt
  • 1 teaspoon sugar (optional)

FOR THE STRATA

  • Butter, for greasing the baking dish
  • 1 medium fennel bulb, trimmed and thinly sliced
  • 1 tablespoon olive oil
  • Salt and pepper
  • 4 ounces pancetta, diced
  • 8 cups cubed day-old bread (baguette or sourdough)
  • 2 cups shredded Gruyère cheese, divided
  • 6 large eggs
  • 2 cups whole milk
  • 1 teaspoon fresh thyme leaves

Instructions

  1. Preheat the oven to 400°F and grease a 9×13-inch baking dish with butter.
  2. On a rimmed baking sheet, toss fennel slices with 1 tablespoon olive oil, salt and pepper. Roast until tender and golden, 20–25 minutes, then set aside.
  3. Meanwhile, in a large skillet over medium heat, cook pancetta until crisp, about 5 minutes. Transfer to paper towels to drain.
  4. Add 2 tablespoons olive oil to the skillet. Stir in onions and salt, then cook over medium-low heat until soft and deep golden, 15–20 minutes, stirring occasionally. Sprinkle sugar in the last few minutes if desired.
  5. In a large bowl, whisk together eggs, milk, thyme, a pinch of salt and pepper.
  6. Add bread cubes, roasted fennel, pancetta and 1½ cups Gruyère to the egg mixture. Gently toss to coat.
  7. Spread half the bread mixture into the prepared dish. Top with caramelized onions, then the remaining bread mixture. Sprinkle with the remaining ½ cup Gruyère.
  8. Cover loosely with foil and refrigerate at least 30 minutes or up to overnight.
  9. Reduce oven temperature to 350°F. Bake covered for 30 minutes, then remove foil and bake until the top is puffed and golden, about 15 minutes more.
  10. Let the strata rest 10 minutes before slicing and serving.

Notes

Storage: Cover leftover strata and refrigerate for up to 2 days. Reheat slices in a 350°F oven for about 10 minutes until warmed through.

Make-ahead shortcut: Assemble the strata up to a day in advance, refrigerate covered and bake the next morning for stress-free brunch service.

Ingredient swaps: Substitute Swiss or fontina for Gruyère, or use prosciutto in place of pancetta. For a vegetarian version omit the meat and add sautéed mushrooms.

Serving ideas: Pair with a crisp green salad and a glass of sparkling wine. Leftover slices can be reheated in a toaster oven to maintain a crisp top.

July 21, 2026 0 comments
0 FacebookTwitterPinterestPocketEmail
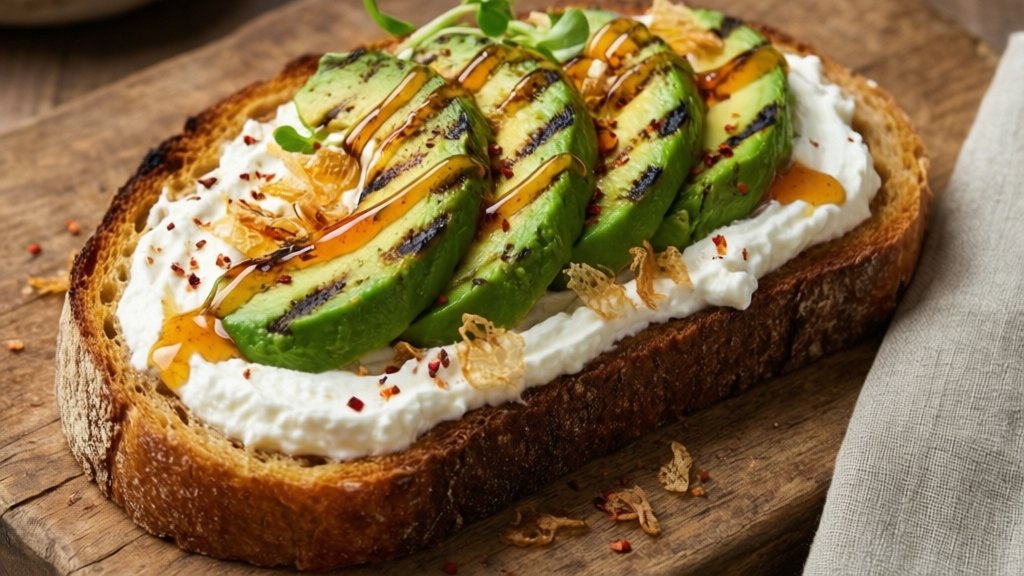
Charred Avocado & Whipped Feta Toast with Chili-Honey Drizzle & Crispy Shallots
Breakfast & BrunchQuick & Easy (30-Min)Vegetarian

Charred Avocado & Whipped Feta Toast with Chili-Honey Drizzle & Crispy Shallots

by Linda July 21, 2026
written by Linda

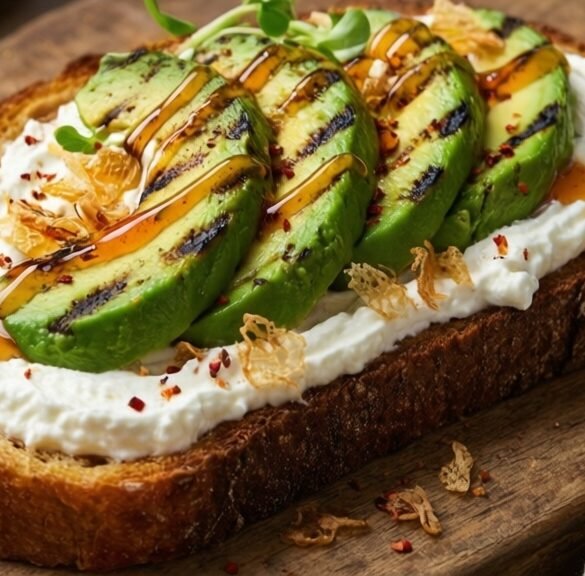
Charred avocado lends a smoky depth to silky whipped feta spread over crisp sourdough slices. A sweet-spicy chili-honey drizzle and golden, crunchy shallots elevate this simple toast into a gourmet treat.

Ready in under 30 minutes, this vibrant recipe balances creamy, tangy, and crunchy elements for an unforgettable brunch or snack.

Charred Avocado & Whipped Feta Toast with Chili-Honey Drizzle & Crispy Shallots

Charred Avocado & Whipped Feta Toast with Chili-Honey Drizzle & Crispy Shallots

Serves: 4 Prep Time: 15 minutes Cooking Time: 10 minutes 10 minutes
Nutrition facts: 350 calories 24g fat
Rating: 5.0/5
( 1 voted )
Pin
Print

Ingredients

FOR THE TOAST

  • 4 slices sourdough bread
  • 2 tablespoons olive oil

FOR THE WHIPPED FETA

  • 6 ounces feta cheese, crumbled
  • 2 tablespoons Greek yogurt
  • 1 tablespoon lemon juice
  • 1 tablespoon olive oil
  • Freshly ground black pepper, to taste

FOR THE CHILI-HONEY DRIZZLE

  • 3 tablespoons honey
  • 1 teaspoon red pepper flakes
  • 1 tablespoon lime juice

FOR THE CRISPY SHALLOTS

  • 2 large shallots, thinly sliced
  • 1/2 cup vegetable oil
  • Salt, to taste

Instructions

  1. In a food processor, combine feta cheese, Greek yogurt, lemon juice, olive oil, and black pepper; blend until smooth and set aside.
  2. Heat vegetable oil in a small skillet over medium heat. Add sliced shallots and fry until golden brown and crisp, about 3–4 minutes. Use a slotted spoon to transfer to a paper towel-lined plate and season with salt.
  3. In a small bowl, whisk together honey, red pepper flakes, and lime juice until combined; set aside.
  4. Brush sourdough slices with olive oil on both sides. Toast in a hot skillet or under the broiler until golden and crisp, about 2–3 minutes per side.
  5. Slice avocado halves; brush flesh with oil and char on a hot grill pan or skillet for 1–2 minutes per side until grill marks appear.
  6. Spread whipped feta evenly over each toast, then arrange charred avocado slices on top.
  7. Drizzle chili-honey mixture over the avocado toasts.
  8. Finish by sprinkling crispy shallots on top, garnish with microgreens or fresh herbs, and serve immediately.

Notes

Tip: For extra heat, drizzle a few drops of hot sauce over the finished toast. Leftover whipped feta can be stored in an airtight container for up to 3 days.

Tips & Variations

  • Char the avocado on a preheated grill pan or under the broiler for extra smokiness.
  • Substitute Greek yogurt for extra tang or swap feta with cream cheese for a milder profile.
  • Add fresh herbs like chopped cilantro, dill, or mint for brightness.

Storage & Reheating

Keep the whipped feta and chili-honey drizzle in separate airtight containers in the fridge for up to 3 days. Fry the shallots just before serving to maintain crispness, and assemble the toast right before eating to preserve textures.

July 21, 2026 0 comments
0 FacebookTwitterPinterestPocketEmail
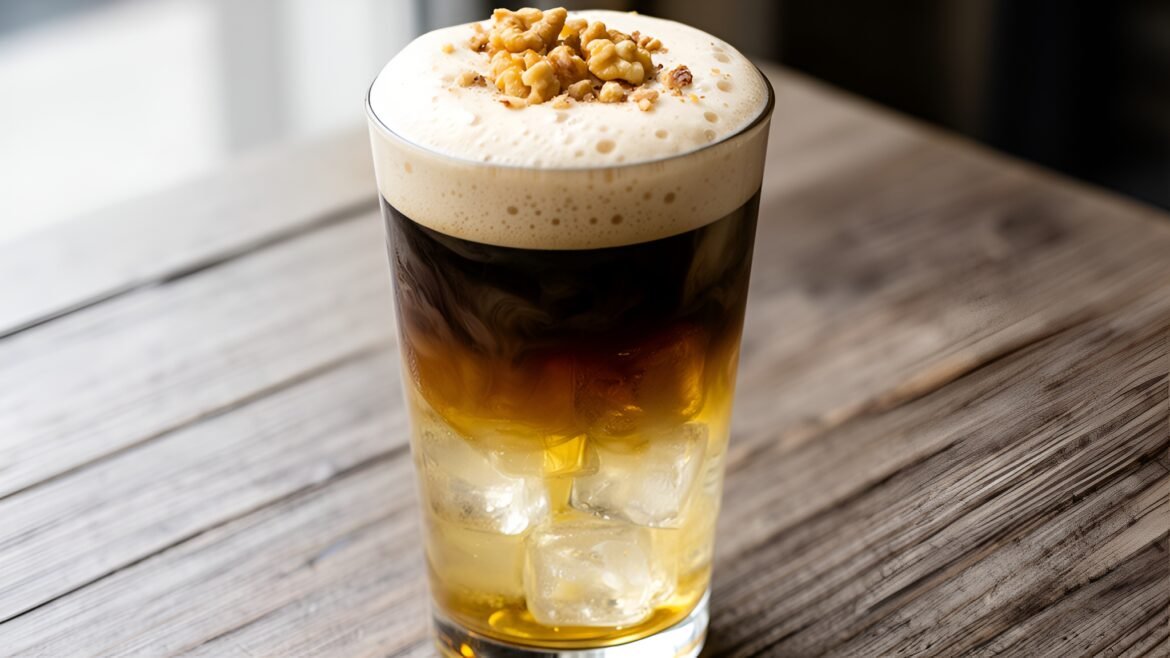
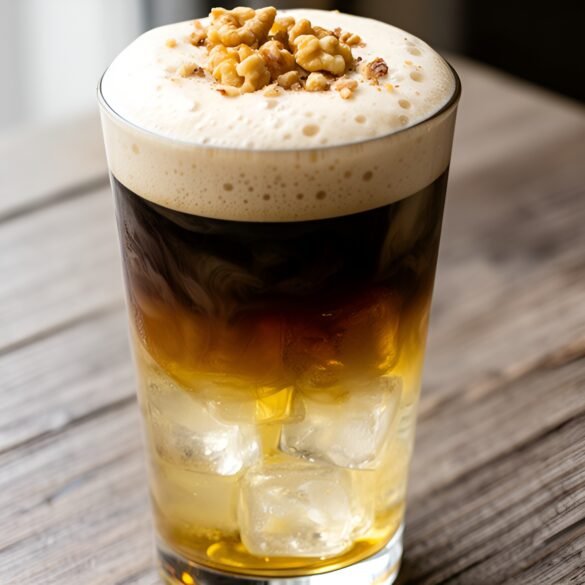
Smoky Maple Espresso Tonic with Toasted Walnut Foam
Drinks & BeveragesQuick & Easy (30-Min)

Smoky Maple Espresso Tonic with Toasted Walnut Foam

by Linda July 21, 2026
written by Linda

Discover a creative twist on your afternoon pick-me-up with this Smoky Maple Espresso Tonic. The bright bubbles of tonic water dance with the bold bite of freshly pulled espresso, balanced by a hint of smoky maple syrup.

Toasted walnut foam crowns each glass, adding a rich, nutty creaminess that transforms a simple coffee drink into an elevated café-style experience at home.

This recipe comes together in under 15 minutes and requires just a blender, a frother or immersion wand, and your favorite espresso maker.

Smoky Maple Espresso Tonic with Toasted Walnut Foam

Smoky Maple Espresso Tonic with Toasted Walnut Foam

Serves: 1 Prep Time: 10 minutes Cooking Time: 5 minutes 5 minutes
Nutrition facts: 200 calories 6g fat
Rating: 5.0/5
( 1 voted )
Pin
Print

Ingredients

FOR THE DRINK

  • 2 shots (60ml) freshly pulled espresso
  • 4–6 oz tonic water
  • 1 tbsp pure maple syrup
  • Ice cubes

FOR THE TOASTED WALNUT FOAM

  • 2 tbsp toasted walnuts
  • 3 tbsp milk (dairy or plant-based)
  • 1 tsp pure maple syrup
  • ¼ tsp soy lecithin powder (optional for stability)

Instructions

  1. Preheat oven to 350°F (175°C). Spread walnuts on a small baking sheet and toast for 5–7 minutes until fragrant; let cool.
  2. Combine toasted walnuts, milk, maple syrup, and soy lecithin in a blender and blend on high for 30 seconds until frothy. Strain through a fine mesh sieve into a chilled bowl and refrigerate foam while you prepare the drink.
  3. Brew two shots of espresso and let them cool slightly.
  4. Drizzle maple syrup around the inside of a tall glass, then fill with ice cubes.
  5. Pour tonic water into the glass, then slowly layer the espresso over the back of a spoon to create a layered effect.
  6. Give the walnut foam a quick froth with an immersion blender or milk frother and spoon it generously over the top of the drink.
  7. Garnish with a few crushed toasted walnuts or a light dusting of smoked sea salt and serve immediately.

Notes

Note: For best results, use fresh, high-quality espresso beans and chilled tonic water. Foam can be gently beaten again if it begins to collapse.

Tips & Variations

  • Vegan swap: Replace dairy milk with oat or almond milk and omit soy lecithin if desired.
  • Smoke boost: Stir a pinch of smoked sea salt or smoked paprika into the maple syrup for extra depth.
  • Cold brew option: Substitute cold brew concentrate for espresso if you prefer a gentler extraction.
  • Storage: Prepare the walnut foam up to 1 day ahead and keep it chilled; re-froth briefly before serving.
  • Garnish ideas: Top with finely grated orange zest or a few whole toasted walnut halves for extra flair.
July 21, 2026 0 comments
0 FacebookTwitterPinterestPocketEmail
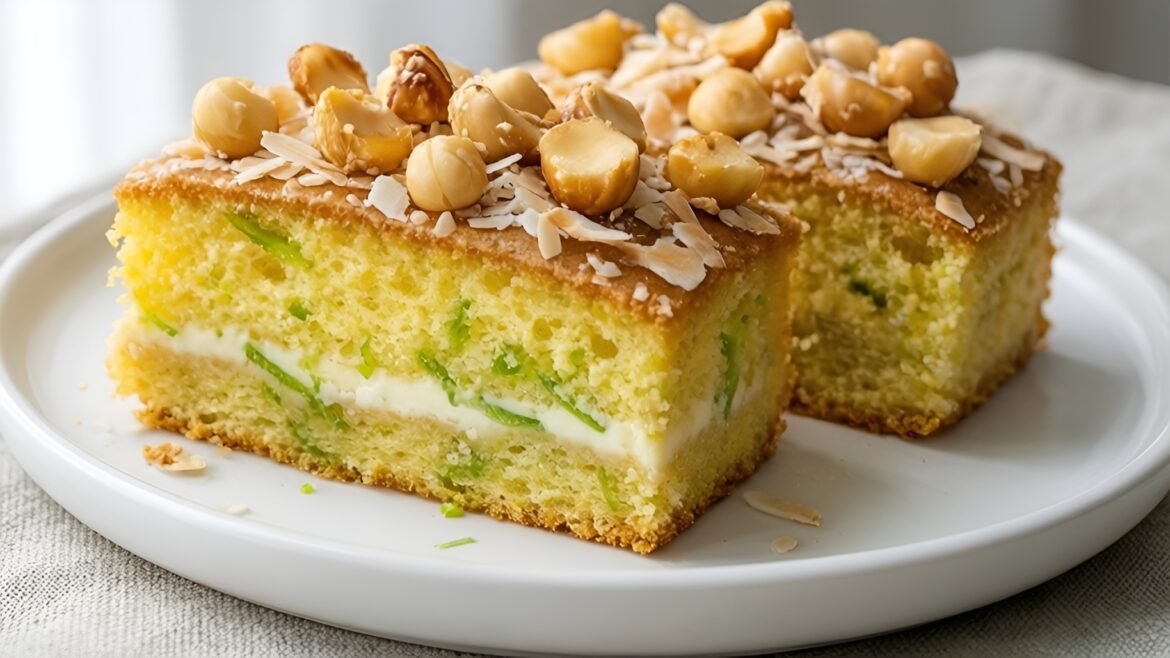
Light and Luscious Coconut Lime Chiffon Cake with Toasted Macadamia Crunch
Desserts & BakingKid-FriendlyVegetarian

Light and Luscious Coconut Lime Chiffon Cake with Toasted Macadamia Crunch

by Linda July 21, 2026
written by Linda

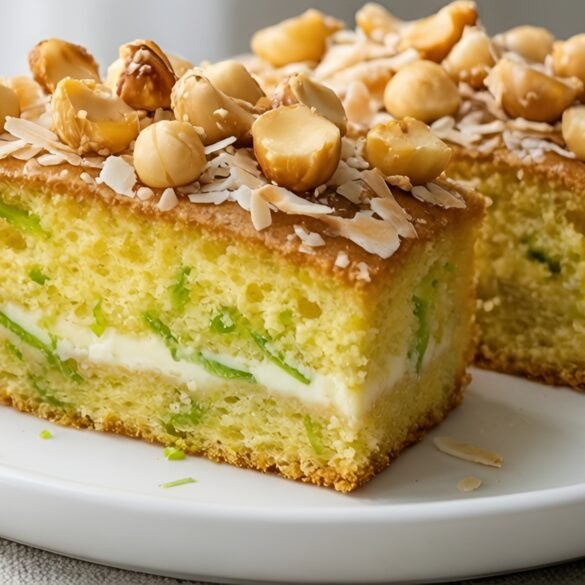
This coconut lime chiffon cake is a springy, cloud-like delight infused with fragrant lime zest and rich coconut milk. Its tender crumb and subtle tang make it the perfect light dessert for warm evenings.

Topped with a toasted macadamia crunch, every bite offers a contrast of airy cake and buttery, nutty crisp. Serve slices on their own or with a dollop of whipped cream for an extra touch of indulgence.

Light and Luscious Coconut Lime Chiffon Cake with Toasted Macadamia Crunch

Light and Luscious Coconut Lime Chiffon Cake with Toasted Macadamia Crunch

Serves: 10 Prep Time: 30 minutes Cooking Time: 50 minutes 50 minutes
Nutrition facts: 320 calories 18g fat
Rating: 5.0/5
( 1 voted )
Pin
Print

Ingredients

CAKE

  • 1 cup (120g) cake flour
  • 3/4 cup (150g) granulated sugar, divided
  • 4 large egg yolks
  • 1/2 cup (120ml) coconut milk
  • 1/4 cup (60ml) vegetable oil
  • 2 tablespoons fresh lime juice
  • 2 teaspoons lime zest
  • 4 large egg whites
  • 1/4 teaspoon cream of tartar
  • Pinch of salt

TOASTED MACADAMIA CRUNCH

  • 1 cup (140g) macadamia nuts, coarsely chopped
  • 2 tablespoons shredded coconut
  • 1 tablespoon unsalted butter
  • 1 tablespoon brown sugar
  • Pinch of salt

Instructions

  1. Preheat oven to 325°F (160°C). Do not grease a 9-inch (23cm) chiffon tube pan.
  2. In a large bowl, whisk together cake flour, 1/2 cup sugar, and a pinch of salt.
  3. In a separate bowl, whisk egg yolks, coconut milk, vegetable oil, lime juice, and lime zest until smooth.
  4. Pour the wet ingredients into the dry ingredients and stir until just combined.
  5. In a clean mixing bowl, beat egg whites and cream of tartar on medium speed until foamy.
  6. Gradually add the remaining 1/4 cup sugar to the egg whites, increasing to high speed, and beat until stiff peaks form.
  7. Gently fold one-third of the whipped egg whites into the batter to lighten it, then fold in the remaining whites until no streaks remain.
  8. Pour the batter into the ungreased tube pan, smoothing the top with a spatula.
  9. Bake for 45–50 minutes, or until the cake springs back when lightly touched and a skewer comes out clean.
  10. Immediately invert the pan onto a bottle or heatproof funnel and let the cake cool completely upside down to maintain height.
  11. Meanwhile, in a small skillet over medium heat, melt butter. Add macadamias, shredded coconut, brown sugar, and a pinch of salt, stirring constantly until golden and fragrant, about 3–4 minutes. Transfer to parchment to cool.
  12. Once the cake is completely cool, run a thin knife around the edges and gently remove. Slice and sprinkle with the toasted macadamia crunch before serving.

Notes

Storage: Store cake in an airtight container at room temperature for up to 2 days. Keep macadamia crunch separate to preserve crispness.

For the fluffiest chiffon, ensure your egg whites are whipped until stiff peaks form and gently fold them into the batter to preserve airiness. If you don’t have macadamias, cashews or almonds make a tasty substitute.

To keep the crunch crisp, toast the nuts just until golden and store them separately in an airtight container. Leftover cake can be stored at room temperature, covered, for up to 2 days.

Variations: add a teaspoon of vanilla extract or garnish with lime slices to brighten the presentation.

July 21, 2026 0 comments
0 FacebookTwitterPinterestPocketEmail
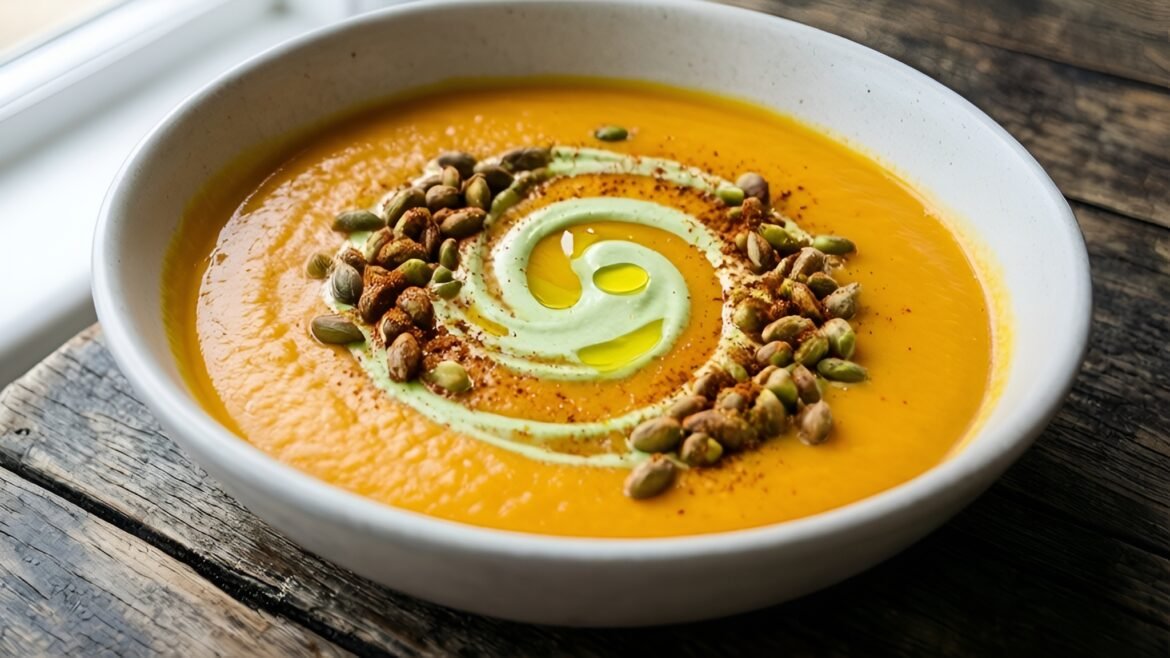
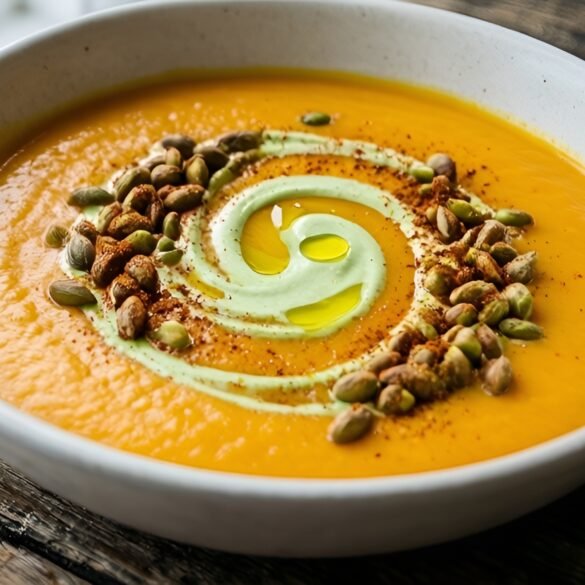
Roasted Chipotle Pumpkin & Sweet Potato Soup with Lime Crema & Pepita Crunch
Healthy & Low-CalorieSoups & SaladsVegetarian

Roasted Chipotle Pumpkin & Sweet Potato Soup with Lime Crema & Pepita Crunch

by Linda July 21, 2026
written by Linda

This warming soup showcases roasted pumpkin and sweet potato blended into a velvety base, spiked with smoky chipotle for depth of flavor. Roasting the vegetables brings out their natural sweetness and adds a hint of caramelization.

The soup is finished with a tangy lime crema and a crunchy pepita topping that adds texture and a pop of color. It’s a comforting yet vibrant dish perfect for chilly evenings or holiday gatherings.

Roasted Chipotle Pumpkin & Sweet Potato Soup with Lime Crema & Pepita Crunch

Roasted Chipotle Pumpkin & Sweet Potato Soup with Lime Crema & Pepita Crunch

Serves: 6 Prep Time: 15 minutes Cooking Time: 60 minutes 60 minutes
Nutrition facts: 210 calories 12g fat
Rating: 5.0/5
( 1 voted )
Pin
Print

Ingredients

SOUP

  • 2 tablespoons olive oil, divided
  • 1 medium onion, chopped
  • 3 garlic cloves, minced
  • 1 teaspoon ground cumin
  • 1/2 teaspoon smoked paprika
  • 2 dried chipotle peppers in adobo, seeded and minced
  • 4 cups pumpkin, peeled and cubed (about 2 lbs)
  • 2 cups sweet potato, peeled and cubed (1 medium)
  • 4 cups vegetable broth
  • 1 cup water
  • Salt and freshly ground black pepper to taste

TOPPINGS

  • 1/2 cup sour cream or Greek yogurt
  • Zest and juice of 1 lime
  • Kosher salt, to taste
  • 1/2 cup raw pepitas
  • 1 tablespoon olive oil
  • 1/2 teaspoon chili powder
  • Pinch of salt

Instructions

  1. Preheat the oven to 400°F (200°C). Toss the cubed pumpkin and sweet potato with 1 tablespoon of olive oil, a pinch of salt, and pepper, then spread evenly on a baking sheet and roast for 25–30 minutes until tender and lightly caramelized.
  2. Meanwhile, heat the remaining 1 tablespoon of olive oil in a large pot over medium heat. Add the chopped onion and cook until translucent, about 5 minutes.
  3. Stir in the minced garlic, ground cumin, and smoked paprika, cooking for 1 minute until fragrant.
  4. Add the minced chipotle peppers and sauté for another minute to release their smoky flavor.
  5. Transfer the roasted pumpkin and sweet potato to the pot, then pour in the vegetable broth and water. Bring to a boil, reduce heat, and simmer for 10–15 minutes.
  6. Use an immersion blender to puree the soup until smooth (or carefully blend in batches in a countertop blender). Return the soup to the pot and keep warm over low heat. Season with salt and pepper to taste.
  7. While the soup simmers, whisk together the sour cream, lime zest, lime juice, and a pinch of salt in a small bowl. Refrigerate until ready to serve.
  8. In a small skillet over medium heat, warm the olive oil and toast the pepitas with chili powder and salt, stirring frequently, until golden and fragrant, about 3–4 minutes. Remove from heat.
  9. Ladle the hot soup into bowls, drizzle with lime crema, and garnish with the chili-spiced pepita crunch. Serve immediately.

Notes

Make ahead: Soup and pepita crunch can be prepared up to 2 days in advance and stored separately in the fridge. Reheat gently and assemble just before serving.

Tips and Variations

  • Make it milder: Reduce chipotle peppers or use chipotle powder for a gentler heat.
  • Dairy-free crema: Substitute coconut yogurt for sour cream and omit lime zest if desired.
  • Chunky texture: Reserve half the roasted vegetables and stir them in after pureeing.
  • Storage: Store soup and toppings separately in airtight containers for up to 3 days. Reheat gently on the stovetop and assemble before serving.
July 21, 2026 0 comments
0 FacebookTwitterPinterestPocketEmail
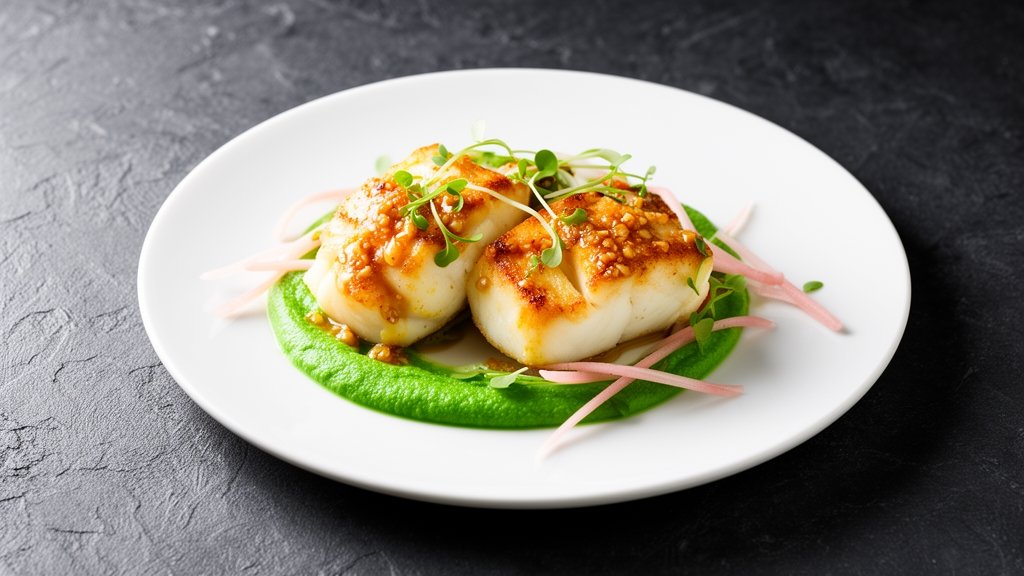
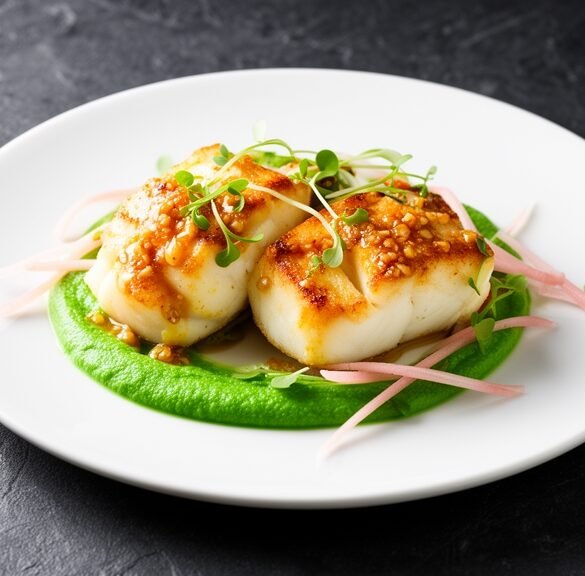
Miso Brown Butter Halibut with Vibrant Wasabi Pea Purée & Quick-Pickled Daikon
Healthy & Low-CalorieMain DishesQuick & Easy (30-Min)

Miso Brown Butter Halibut with Vibrant Wasabi Pea Purée & Quick-Pickled Daikon

by Linda July 20, 2026
written by Linda

This elegant dish features halibut fillets brushed with a rich miso brown butter glaze, seared until flaky and tender. A bright wasabi pea purée adds a silky, slightly spicy note that complements the savory fish.

Quick-pickled daikon ribbons bring a tangy crunch, balancing the buttery richness and adding color and texture. This recipe is perfect for a special weeknight dinner or entertaining guests.

With straightforward prep and pantry-friendly ingredients, you’ll have a restaurant-quality plate in under 40 minutes. Let’s dive into this harmonious blend of umami, spice, and acidity.

Miso Brown Butter Halibut with Vibrant Wasabi Pea Purée & Quick-Pickled Daikon

Miso Brown Butter Halibut with Vibrant Wasabi Pea Purée & Quick-Pickled Daikon

Serves: 4 Prep Time: 20 minutes Cooking Time: 15 minutes 15 minutes
Nutrition facts: 480 calories 25g fat
Rating: 5.0/5
( 1 voted )
Pin
Print

Ingredients

FOR THE HALIBUT

  • 4 (6-ounce) halibut fillets, skin removed
  • 2 tablespoons white miso paste
  • 4 tablespoons unsalted butter
  • 1 tablespoon neutral oil (canola or grapeseed)
  • Freshly ground black pepper

FOR THE WASABI PEA PURéE

  • 1 1/2 cups frozen peas, thawed
  • 2 tablespoons sour cream or Greek yogurt
  • 1 teaspoon wasabi powder or wasabi paste (adjust to taste)
  • 1 tablespoon lemon juice
  • Salt to taste

FOR THE QUICK-PICKLED DAIKON

  • 1 cup daikon radish, peeled and julienned
  • 1/4 cup rice vinegar
  • 1 tablespoon sugar
  • 1/2 teaspoon salt
  • 1/4 cup water

Instructions

  1. Whisk rice vinegar, sugar, salt, and water in a bowl until the sugar dissolves. Add julienned daikon, toss to coat, and refrigerate while preparing the rest of the dish.
  2. Combine thawed peas, sour cream, wasabi, lemon juice, and salt in a blender. Blend until smooth, adding a tablespoon of water if needed to reach a silky consistency. Transfer to a serving bowl.
  3. Pat halibut fillets dry and season both sides with freshly ground black pepper.
  4. Heat oil in a large skillet over medium-high heat. Add butter and swirl until melted and foaming. Continue cooking, swirling pan, until butter turns golden brown and smells nutty, about 2 to 3 minutes.
  5. Stir miso paste into the brown butter until fully incorporated and glossy.
  6. Push the miso brown butter to one side of the skillet and place the halibut fillets in the pan. Spoon the butter over the top of the fish.
  7. Cook the halibut for 3 to 4 minutes on each side, or until the flesh is opaque and flakes easily. Baste occasionally with the miso butter.
  8. Transfer the cooked halibut to plates. Drizzle any remaining miso brown butter from the skillet over the fish.
  9. To serve, spread a ribbon of the wasabi pea purée on each plate, top with a halibut fillet, and garnish with pickled daikon ribbons and pea shoots or microgreens.

Notes

Storage: Keep components separately refrigerated for up to 3 days. Gently reheat the purée and miso butter sauce over low heat to avoid separation.

Tips and Variations

  • Don’t overcook halibut: remove from heat once the center turns opaque and flakes easily.
  • For extra heat, stir a pinch of fresh wasabi powder into the pea purée before blending.
  • Substitute daikon with thinly sliced fennel or cucumber for a different crunch.
  • Leftover purée and pickles keep separately in airtight containers in the fridge for up to 3 days.
July 20, 2026 0 comments
0 FacebookTwitterPinterestPocketEmail
Mini Sweet Corn Arepa Cups with Smoked Gouda & Pickled Jalapeño
Appetizers & SnacksQuick & Easy (30-Min)Vegetarian

Mini Sweet Corn Arepa Cups with Smoked Gouda & Pickled Jalapeño

by Linda July 20, 2026
written by Linda

These mini arepa cups take classic Venezuelan corn cakes, sweetening the dough with fresh kernels and a hint of sugar before pressing it into bite-sized molds. Each cup bakes to a golden crisp, creating the perfect vessel for melted smoked gouda.

A quick-pickle of jalapeño rings brings bright acidity and a gentle kick that cuts through the richness. The dough comes together in minutes, and a simple bake and bake-again with cheese means you’ll have a crowd-pleasing snack ready in under 40 minutes.

Whether you’re hosting a party or craving an easy weeknight treat, these colorful cups are as fun to make as they are to eat.

Mini Sweet Corn Arepa Cups with Smoked Gouda & Pickled Jalapeño

Mini Sweet Corn Arepa Cups with Smoked Gouda & Pickled Jalapeño

Serves: 12 Prep Time: 20 minutes Cooking Time: 20 minutes 20 minutes
Nutrition facts: 180 calories 10g fat
Rating: 5.0/5
( 1 voted )
Pin
Print

Ingredients

FOR THE AREPA CUPS

  • 1½ cups masarepa (pre-cooked corn flour)
  • 1 cup milk
  • ½ cup water
  • 2 tbsp sugar
  • 1 tsp salt
  • 2 tbsp unsalted butter, melted
  • 1 cup fresh or frozen corn kernels

FOR THE QUICK PICKLED JALAPEñOS

  • ½ cup sliced jalapeños (seeds optional)
  • ½ cup white vinegar
  • ½ cup water
  • 1 tbsp sugar
  • 1 tsp salt

FOR ASSEMBLY

  • 1½ cups shredded smoked gouda
  • 2 tbsp chopped fresh cilantro
  • Lime wedges, for serving

Instructions

  1. Preheat the oven to 375°F (190°C). In a small saucepan, combine vinegar, water, sugar, and salt and bring to a simmer. Remove from heat and pour over jalapeño slices in a heatproof bowl; let cool while you prepare the arepas.
  2. In a medium bowl, whisk together masarepa, sugar, and salt. Stir in milk, water, and melted butter until a soft dough forms. Fold in the corn kernels, cover, and let rest for 5 minutes.
  3. Lightly grease a 12-cup mini muffin pan. Pinch off a tablespoon of dough and roll into a ball. Press each ball into the bottom of a muffin cup, pushing up the sides to form a little cup.
  4. Bake for 18–20 minutes, or until the edges are golden and firm to the touch. Remove from the oven and let cool in the pan for 5 minutes, then invert to release the cups.
  5. Divide the shredded smoked gouda evenly among the cups. Return to the oven and bake for 2–3 minutes, or until the cheese is melted and bubbly.
  6. Top each arepa cup with a few pickled jalapeño slices and a sprinkle of chopped cilantro. Serve warm with lime wedges on the side.

Notes

Tip: If you don’t have a mini muffin pan, you can shape the dough into small discs on a baking sheet and use your fingers or a small glass to form shallow cups.

Tips and Variations

  • Seeded jalapeños: Remove seeds for milder pickles, or leave them in for more heat.
  • Cheese swap: Try pepper jack or queso fresco for a different flavor twist.
  • Make it vegan: Use plant-based butter, milk, and a vegan cheddar alternative.

Storage: Keep arepa cups and pickles in separate airtight containers in the fridge for up to 3 days. Reheat cups in a 350°F oven for 5–7 minutes to restore crispness.

July 20, 2026 0 comments
0 FacebookTwitterPinterestPocketEmail
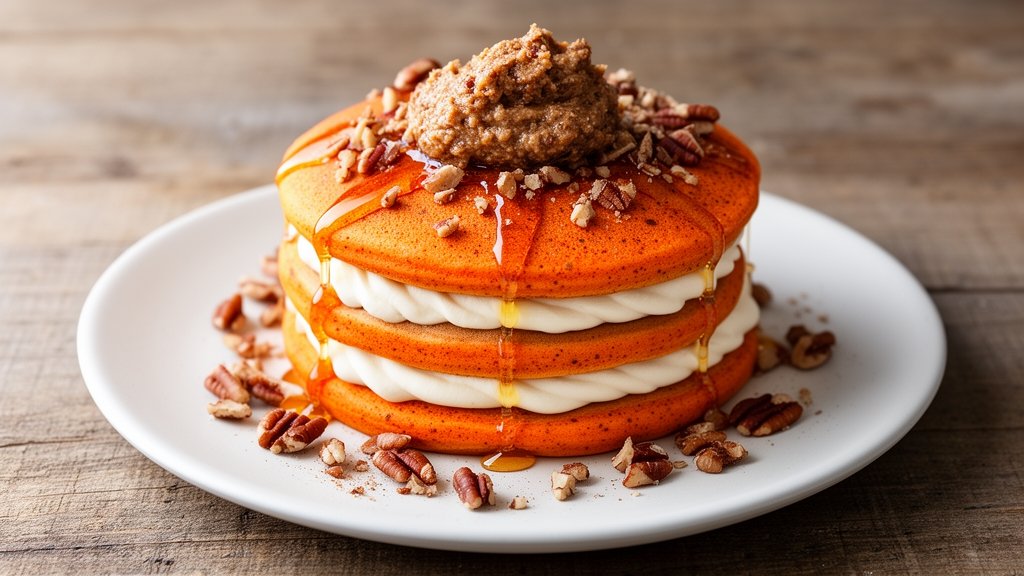
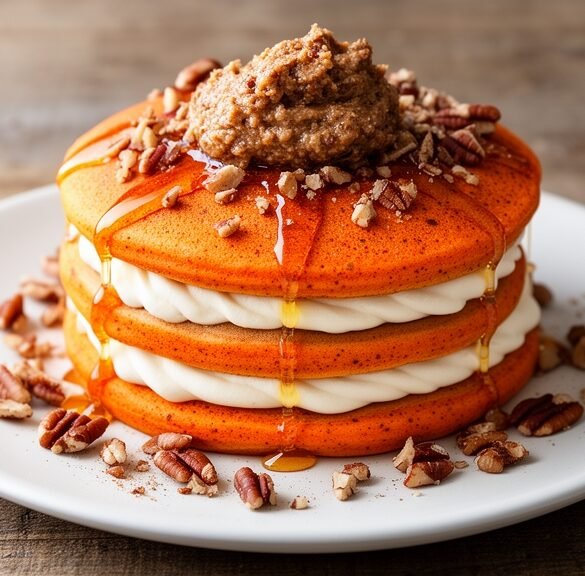
Sweet Potato Pancake Stack with Maple Mascarpone & Spiced Pecan Butter
Breakfast & BrunchQuick & Easy (30-Min)Vegetarian

Sweet Potato Pancake Stack with Maple Mascarpone & Spiced Pecan Butter

by Linda July 20, 2026
written by Linda

Enjoy a vibrant twist on classic pancakes with our Sweet Potato Pancake Stack layered with creamy maple mascarpone and topped with warm spiced pecan butter. The mashed sweet potato adds moisture and a hint of autumnal sweetness.

This recipe comes together in under 30 minutes, blending simple pantry ingredients into tender, cinnamon-kissed pancakes. The maple-sweetened mascarpone lends a luxurious tang, while the nutty pecan butter brings a cozy, spiced crunch.

Perfect for weekend brunch or a special breakfast treat, these stacks are irresistibly festive and comforting.

Sweet Potato Pancake Stack with Maple Mascarpone & Spiced Pecan Butter

Sweet Potato Pancake Stack with Maple Mascarpone & Spiced Pecan Butter

Serves: 4 Prep Time: 15 minutes Cooking Time: 20 minutes 20 minutes
Nutrition facts: 520 calories 28g fat
Rating: 5.0/5
( 1 voted )
Pin
Print

Ingredients

FOR THE PANCAKES

  • 1 cup mashed cooked sweet potato (about 1 medium sweet potato)
  • 1 cup all-purpose flour
  • 1 teaspoon baking powder
  • 1/2 teaspoon baking soda
  • 1/2 teaspoon ground cinnamon
  • 1/4 teaspoon ground nutmeg
  • 1/4 teaspoon salt
  • 1 large egg
  • 1/2 cup milk (dairy or non-dairy)
  • 2 tablespoons melted butter, plus more for cooking
  • 2 tablespoons brown sugar or maple syrup
  • 1 teaspoon vanilla extract

MAPLE MASCARPONE

  • 8 ounces mascarpone cheese, softened
  • 2 tablespoons pure maple syrup
  • 1 teaspoon vanilla extract
  • Pinch of salt

SPICED PECAN BUTTER

  • 1 cup toasted pecans
  • 2 tablespoons melted butter
  • 1 tablespoon pure maple syrup
  • 1/4 teaspoon ground cinnamon
  • Pinch of salt

Instructions

  1. Pierce the sweet potato with a fork and microwave on high for 6–8 minutes until tender. Let cool slightly, then scoop out the flesh and mash until smooth.
  2. In a medium bowl whisk together flour, baking powder, baking soda, cinnamon, nutmeg, and salt.
  3. In a separate bowl whisk the egg with milk, melted butter, brown sugar, vanilla, and mashed sweet potato until smooth.
  4. Pour the wet ingredients into the dry and stir until just combined; do not overmix.
  5. Heat a griddle or nonstick skillet over medium heat and brush lightly with melted butter.
  6. Pour 1/4 cup batter per pancake onto the hot griddle. Cook 2–3 minutes until bubbles form at the edges, then flip and cook 1–2 minutes until golden brown.
  7. Meanwhile, in a bowl beat mascarpone with maple syrup, vanilla, and salt until creamy; cover and chill.
  8. Place toasted pecans, melted butter, maple syrup, cinnamon, and salt in a food processor and pulse until a chunky nut butter forms.
  9. To assemble, stack pancakes with a dollop of maple mascarpone between each layer. Spoon spiced pecan butter on top and drizzle with extra maple syrup.
  10. Garnish with chopped pecans and serve immediately.

Notes

Make-ahead: Pancake batter can be stored covered in the fridge for up to 24 hours; keep mascarpone and pecan butter chilled separately. Reheat pancakes in a toaster oven for best texture.

Tips and Variations

  • Sweet Potato Prep: Microwave or roast the potato in advance to save time and ensure even texture.
  • Consistency: If batter is too thick, add a splash more milk; too thin, stir in a tablespoon of flour.
  • Substitutions: Swap pecans for walnuts or almonds in the spiced butter, or use Greek yogurt instead of mascarpone for tangier topping.
  • Storage: Refrigerate leftovers in separate airtight containers; reheat pancakes in a toaster oven for crisp edges.
July 20, 2026 0 comments
0 FacebookTwitterPinterestPocketEmail
Newer Posts
Older Posts

Recent Posts

  • Chai-Spiced Vanilla Frappe with Creamy Whipped Topping

    September 16, 2026
  • Citrus Sunset Sparkler with a Twist

    September 16, 2026
  • Mocha Swirl Cupcake Cones with Chocolate Drizzle

    September 16, 2026
  • Lavender-Infused Honey Cream Puffs with a Velvety Finish

    September 16, 2026
  • Luxuriously Creamy Wild Mushroom and Spinach Soup with Truffle Oil

    September 15, 2026

About Me

About Me

I'm Linda, a health professional, university graduate, and author sharing tested, easy-to-follow recipes made from simple, everyday ingredients. Based in Finland, I bring together my culinary training, love of travel, and home-cooked roots to help you cook confidently, on any budget.

Products

  • Spooky Creative Starry Sky Ceramic Mug Spooky Creative Starry Sky Ceramic Mug 10,00 €

Categories

  • Appetizers & Snacks (161)
  • Breakfast & Brunch (129)
  • Desserts & Baking (176)
  • Drinks & Beverages (138)
  • Gluten-Free (210)
  • Grilling & BBQ (11)
  • Healthy & Low-Calorie (197)
  • Holiday & Seasonal (20)
  • Kid-Friendly (244)
  • Main Dishes (195)
  • Quick & Easy (30-Min) (702)
  • Slow Cooker & Instant Pot (4)
  • Soups & Salads (113)
  • Vegan (169)
  • Vegetarian (579)

About Me

I'm Linda, a health professional and food writer sharing tested, easy-to-follow recipes made from simple ingredients.

Email: jspiceygiftstv@gmail.com

Useful Links

  • Home
  • About
  • Contact
  • Free Cookbooks
  • Terms and Conditions
  • Privacy Policy

Newsletter

Subscribe to to our Newsletter to stay updated with all our recipes.

Recent Posts

  • Chai-Spiced Vanilla Frappe with Creamy Whipped Topping

    September 16, 2026
  • Citrus Sunset Sparkler with a Twist

    September 16, 2026
  • Instagram
  • Pinterest
  • Youtube
  • Tiktok

@2026 - All Right Reserved. Designed and Developed by JSpiceyGifts

J Spicey Gifts
  • Home
  • Recipes
    • Breakfast & Brunch
    • Appetizers & Snacks
    • Main Dishes
    • Soups & Salads
    • Desserts & Baking
    • Drinks & Beverages
  • Categories
    • Vegetarian
    • Vegan
    • Gluten-Free
    • Quick & Easy (30-Min)
    • Slow Cooker & Instant Pot
    • Grilling & BBQ
    • Healthy & Low-Calorie
    • Holiday & Seasonal
    • Kid-Friendly
  • About
  • Contact

Shopping Cart

Close

No products in the cart.

Close