J Spicey Gifts
  • Home
  • Recipes
    • Breakfast & Brunch
    • Appetizers & Snacks
    • Main Dishes
    • Soups & Salads
    • Desserts & Baking
    • Drinks & Beverages
  • Categories
    • Vegetarian
    • Vegan
    • Gluten-Free
    • Quick & Easy (30-Min)
    • Slow Cooker & Instant Pot
    • Grilling & BBQ
    • Healthy & Low-Calorie
    • Holiday & Seasonal
    • Kid-Friendly
  • About
  • Contact
Top Posts
Vibrant Roasted Beet, Feta, and Citrus Salad with...
Creamy Tomato-Basil Bisque with a Twist
Autumn Harvest Butternut Squash and Apple Salad with...
Hearty Lentil and Spinach Rustic Summer Soup
Chilled Avocado-Cucumber Frappe with Lime Zest
Mediterranean Lamb Skewers with Herbed Tzatziki Sauce
Sizzling Chipotle-Lime Chicken and Avocado Enchilada Bake
Zesty Mini Taco Cups with Spicy Salsa Verde
Tangy Avocado-Cilantro Hummus with Pita Crisps
Savory Honey-Mustard Pretzel Bites with Creamy Dip
J Spicey Gifts
  • Home
  • Recipes
    • Breakfast & Brunch
    • Appetizers & Snacks
    • Main Dishes
    • Soups & Salads
    • Desserts & Baking
    • Drinks & Beverages
  • Categories
    • Vegetarian
    • Vegan
    • Gluten-Free
    • Quick & Easy (30-Min)
    • Slow Cooker & Instant Pot
    • Grilling & BBQ
    • Healthy & Low-Calorie
    • Holiday & Seasonal
    • Kid-Friendly
  • About
  • Contact
J Spicey Gifts
J Spicey Gifts
  • Home
  • Recipes
    • Breakfast & Brunch
    • Appetizers & Snacks
    • Main Dishes
    • Soups & Salads
    • Desserts & Baking
    • Drinks & Beverages
  • Categories
    • Vegetarian
    • Vegan
    • Gluten-Free
    • Quick & Easy (30-Min)
    • Slow Cooker & Instant Pot
    • Grilling & BBQ
    • Healthy & Low-Calorie
    • Holiday & Seasonal
    • Kid-Friendly
  • About
  • Contact
Copyright 2021 - All Right Reserved
Chai-Spiced Biscotti with a Chocolate Dip
Desserts & BakingQuick & Easy (30-Min)Vegetarian

Chai-Spiced Biscotti with a Chocolate Dip

by Linda September 4, 2026
written by Linda

These Chai-Spiced Biscotti are a delightful treat, marrying the warm flavors of traditional chai spices with the crunch of classic biscotti. Perfect for dunking in coffee or tea, these twice-baked cookies offer a satisfying crunch paired with a luscious chocolate dip.

The addition of spices like cinnamon, cardamom, and ginger not only enhances the flavor but also brings an aromatic experience to your baking. Topping them with a silky chocolate glaze makes these biscotti irresistible, whether for an afternoon snack or a festive gathering.

Chai-Spiced Biscotti with a Chocolate Dip

Chai-Spiced Biscotti with a Chocolate Dip

Serves: 12 Prep Time: 20 minutes Cooking Time: 40 minutes 40 minutes
Nutrition facts: 150 calories 6g fat
Rating: 5.0/5
( 1 voted )
Pin
Print

Ingredients

INGREDIENTS

  • 2 cups all-purpose flour
  • 1 cup granulated sugar
  • 1 tsp baking powder
  • 1/2 tsp salt
  • 1 tsp ground cinnamon
  • 1/2 tsp ground ginger
  • 1/2 tsp ground cardamom
  • 1/4 tsp ground cloves
  • 2 large eggs
  • 1 tsp vanilla extract
  • 1 cup semi-sweet chocolate chips
  • 1 tbsp coconut oil

Instructions

  1. Preheat the oven to 350°F (175°C) and line a baking sheet with parchment paper.
  2. In a large bowl, whisk together the flour, sugar, baking powder, salt, and spices until well combined.
  3. In a separate bowl, beat the eggs and vanilla extract until frothy. Gradually add the egg mixture to the dry ingredients and stir until a dough forms.
  4. Shape the dough into a log, about 12 inches long and 3 inches wide, and place it on the prepared baking sheet.
  5. Bake for 25-30 minutes, or until golden and firm. Let cool on the baking sheet for 10 minutes.
  6. Transfer the log to a cutting board and slice it diagonally into 1/2-inch thick slices.
  7. Arrange the slices cut-side down on the baking sheet and bake for an additional 10-15 minutes, or until crisp and golden.
  8. In a microwave-safe bowl, melt the chocolate chips and coconut oil together in 30-second intervals, stirring until smooth.
  9. Dip the cooled biscotti into the chocolate, allowing the excess to drip off, and place them on parchment paper to set.

Notes

Note: Biscotti can be stored in an airtight container for up to two weeks.

For a twist, try adding chopped nuts or dried fruit to the dough. Almonds or cranberries complement the chai spices beautifully. Be careful not to overbake the biscotti; they should be dry but not too hard. Store in an airtight container at room temperature, and they will stay fresh for up to two weeks. To re-crisp, warm them in the oven for a few minutes before serving!


September 4, 2026 0 comments
0 FacebookTwitterPinterestPocketEmail
Decadent Caramel-Pecan Praline Cheesecake Bars
Desserts & BakingQuick & Easy (30-Min)Vegetarian

Decadent Caramel-Pecan Praline Cheesecake Bars

by Linda September 4, 2026
written by Linda

These Caramel-Pecan Praline Cheesecake Bars are the ultimate dessert indulgence, combining creamy cheesecake with a crunchy pecan topping and a luscious caramel drizzle. The rich flavors and textures make them a perfect treat for any occasion, whether it’s a family gathering or a holiday celebration.

What sets these bars apart is the contrast between the smooth, velvety cheesecake and the crispy, nutty praline topping. The addition of caramel gives them an extra touch of sweetness, ensuring that every bite is a delightful experience.

Decadent Caramel-Pecan Praline Cheesecake Bars

Decadent Caramel-Pecan Praline Cheesecake Bars

Serves: 12 Prep Time: 25 minutes Cooking Time: 40 minutes 40 minutes
Nutrition facts: 350 calories 20g fat
Rating: 5.0/5
( 1 voted )
Pin
Print

Ingredients

INGREDIENTS

  • 1 1/2 cups graham cracker crumbs
  • 1/2 cup unsalted butter, melted
  • 2 cups cream cheese, softened
  • 3/4 cup granulated sugar
  • 1 teaspoon vanilla extract
  • 2 large eggs
  • 1 cup chopped pecans
  • 1 cup caramel sauce

Instructions

  1. Preheat the oven to 325°F (160°C). Grease a 9x9-inch baking pan and line with parchment paper, leaving some overhang for easy removal.
  2. In a medium bowl, mix graham cracker crumbs and melted butter until combined. Press evenly into the bottom of the prepared pan to form the crust.
  3. In a large mixing bowl, beat the cream cheese until smooth and creamy. Add the sugar and vanilla, and mix until combined.
  4. Add the eggs one at a time, mixing well after each addition. Pour the cheesecake mixture over the graham cracker crust and spread evenly.
  5. Sprinkle the chopped pecans over the cheesecake mixture, pressing lightly to embed them.
  6. Bake in the preheated oven for 30-35 minutes, or until the edges are set and the center is slightly jiggly. Turn off the oven and let the bars cool in the oven for 10 minutes.
  7. Remove from the oven and let cool completely at room temperature, then refrigerate for at least 2 hours.
  8. Once chilled, cut into squares and drizzle with caramel sauce before serving.

Notes

Tip: For a festive touch, sprinkle a pinch of sea salt on top of the caramel drizzle before serving.

For optimal results, ensure your cream cheese is at room temperature before mixing to avoid lumps. You can use store-bought caramel sauce for convenience, but homemade will elevate the flavor. If pecans are unavailable, walnuts or almonds can be substituted without compromising the taste.

Store leftovers in an airtight container in the refrigerator for up to 3 days. These bars can also be frozen for up to a month; simply thaw in the fridge before serving. They are best enjoyed chilled!

September 4, 2026 0 comments
0 FacebookTwitterPinterestPocketEmail
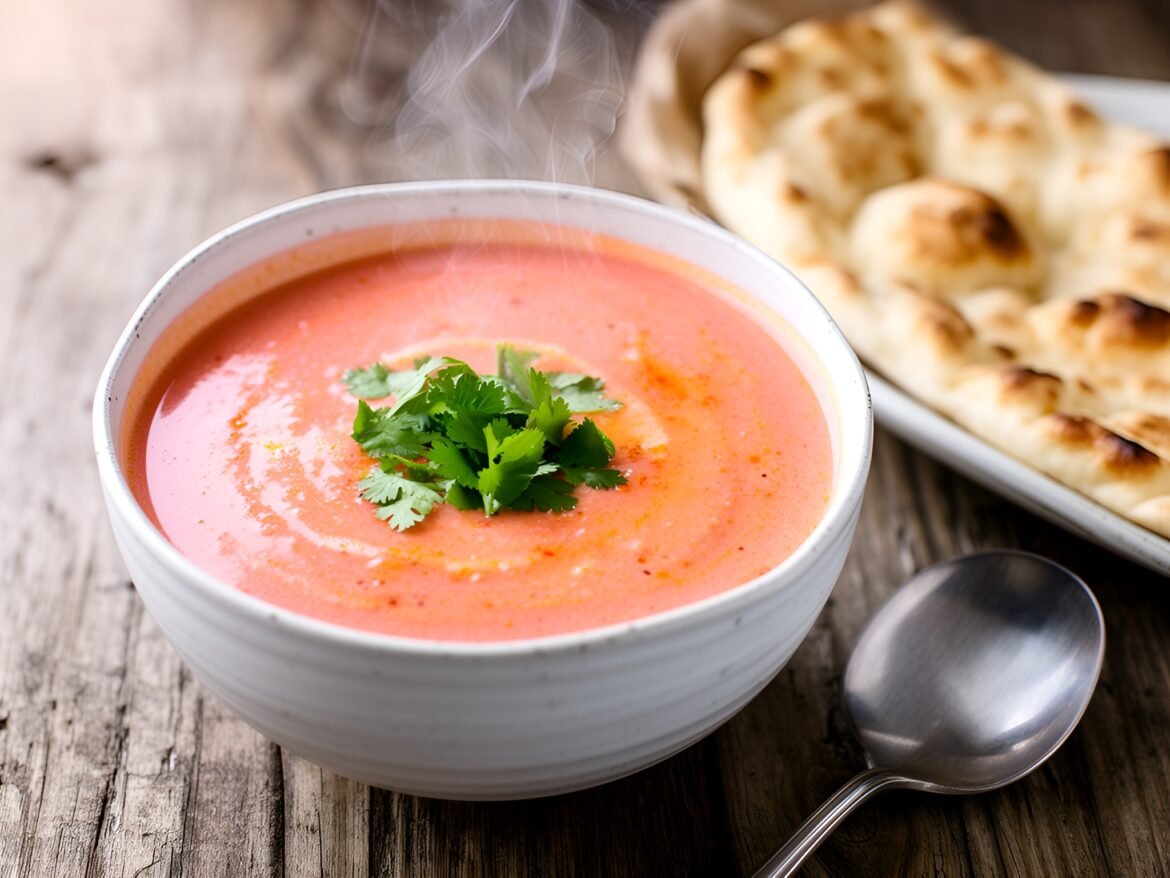
Fiery Coconut-Tomato Chickpea Soup with Fresh Cilantro
Gluten-FreeQuick & Easy (30-Min)Soups & SaladsVegan

Fiery Coconut-Tomato Chickpea Soup with Fresh Cilantro

by Linda September 4, 2026
written by Linda

Indulge in the vibrant flavors of this Fiery Coconut-Tomato Chickpea Soup, where warmth meets spice in a creamy embrace. The combination of coconut milk and fresh tomatoes creates a luscious base, while chickpeas add heartiness and protein, making this soup perfect for any meal.

What sets this soup apart is its bold heat from spices, balanced by the freshness of cilantro. Whether you’re looking for a quick weeknight dinner or a nourishing lunch, this soup is sure to become a favorite in your kitchen.

Fiery Coconut-Tomato Chickpea Soup with Fresh Cilantro

Fiery Coconut-Tomato Chickpea Soup with Fresh Cilantro

Serves: 4-6 Prep Time: 15 minutes Cooking Time: 30 minutes 30 minutes
Nutrition facts: 350 calories 15g fat
Rating: 5.0/5
( 1 voted )
Pin
Print

Ingredients

INGREDIENTS

  • 2 tablespoons olive oil
  • 1 medium onion, chopped
  • 3 cloves garlic, minced
  • 1 teaspoon ground cumin
  • 1 teaspoon ground coriander
  • 1/2 teaspoon red chili flakes
  • 1 can (14 oz) diced tomatoes
  • 1 can (14 oz) coconut milk
  • 2 cans (15 oz each) chickpeas, drained and rinsed
  • 2 cups vegetable broth
  • Salt to taste
  • Fresh cilantro, chopped (for garnish)

Instructions

  1. Heat olive oil in a large pot over medium heat.
  2. Add chopped onion and sauté until translucent, about 5 minutes.
  3. Stir in minced garlic, cumin, coriander, and red chili flakes; cook for another minute until fragrant.
  4. Add diced tomatoes, coconut milk, chickpeas, and vegetable broth; stir to combine.
  5. Bring the mixture to a simmer, then reduce heat and let it cook for 20 minutes to meld flavors.
  6. Season with salt to taste, then use an immersion blender to partially blend for a creamy texture, leaving some chunks for heartiness.
  7. Serve hot, garnished with fresh cilantro. Enjoy!

Notes

Store leftovers in an airtight container in the refrigerator for up to 3 days. Reheat gently on the stove before serving.

For added depth, consider roasting the tomatoes before adding them to the soup. This enhances their sweetness and flavor.

Feel free to adjust the level of spice to your liking—adding more chili flakes or fresh chilies will amp up the heat, while yogurt or sour cream can mellow it out on serving. Leftovers can be stored in the refrigerator for up to three days, and this soup actually tastes even better the next day as the flavors meld.

September 4, 2026 0 comments
0 FacebookTwitterPinterestPocketEmail
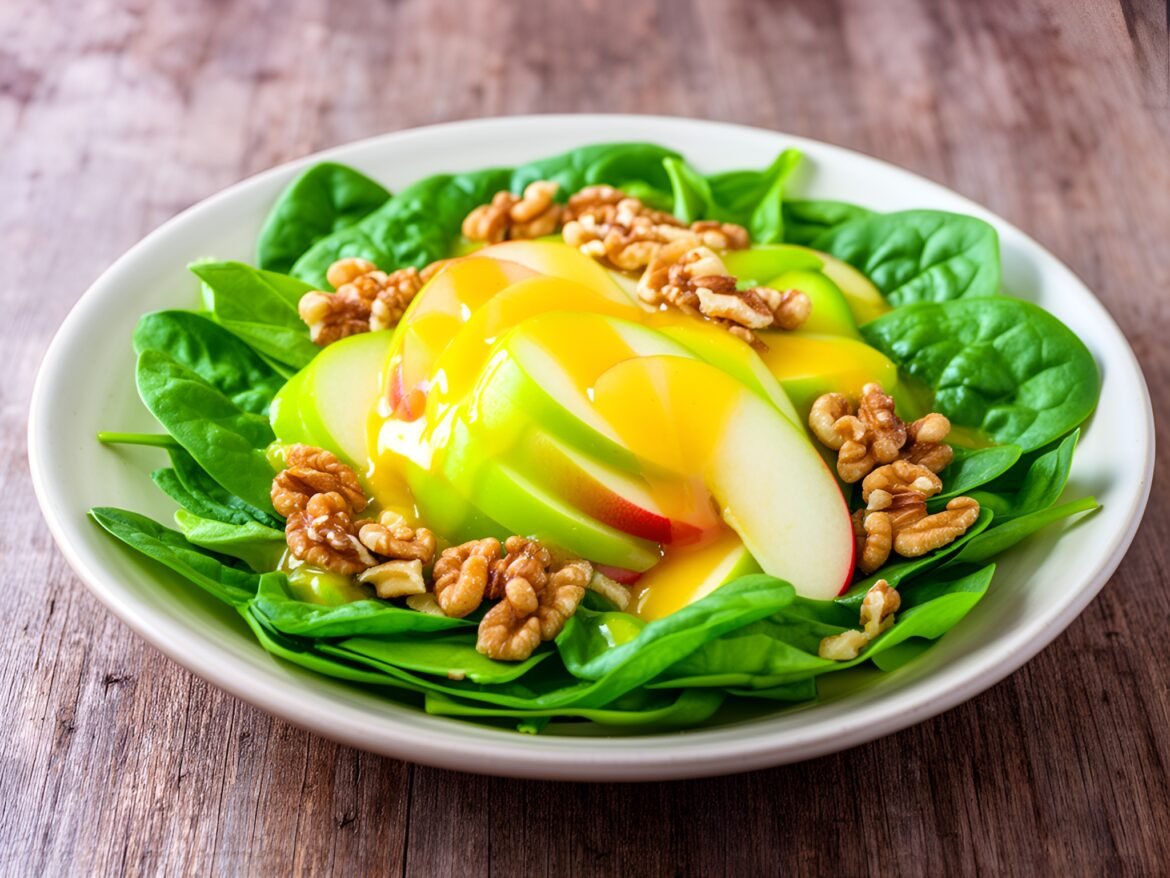
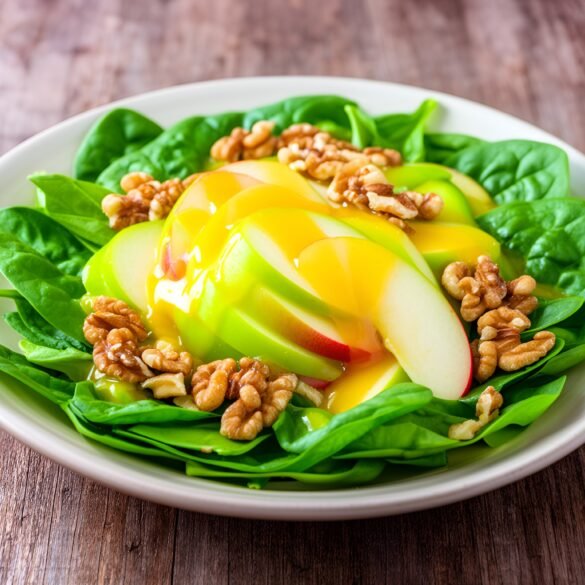
Crisp Apple-Walnut Spinach Salad with Maple-Citrus Vinaigrette
Gluten-FreeQuick & Easy (30-Min)Soups & SaladsVegetarian

Crisp Apple-Walnut Spinach Salad with Maple-Citrus Vinaigrette

by Linda September 4, 2026
written by Linda

Bright, refreshing, and full of texture, this Crisp Apple-Walnut Spinach Salad with Maple-Citrus Vinaigrette is perfect for any occasion. The combination of crisp apples, crunchy walnuts, and tender spinach creates a delightful contrast, while the homemade vinaigrette adds a zesty sweetness that ties the dish together beautifully.

This salad not only bursts with flavor but is also packed with nutrients, making it a great choice for a light lunch or as a colorful appetizer for dinner parties. Pair it with grilled chicken for a more substantial meal or serve it alongside your favorite protein for a balanced plate.

Crisp Apple-Walnut Spinach Salad with Maple-Citrus Vinaigrette

Crisp Apple-Walnut Spinach Salad with Maple-Citrus Vinaigrette

Serves: 4 Prep Time: 15 minutes Cooking Time: 5 minutes 5 minutes
Nutrition facts: 220 calories 15g fat
Rating: 5.0/5
( 1 voted )
Pin
Print

Ingredients

INGREDIENTS

  • 4 cups fresh spinach leaves
  • 1 large apple, thinly sliced (such as Granny Smith or Honeycrisp)
  • 1/2 cup walnuts, chopped
  • 1/4 cup crumbled feta cheese (optional)
  • 1/4 cup dried cranberries (optional)

FOR THE MAPLE-CITRUS VINAIGRETTE

  • 1/4 cup olive oil
  • 2 tablespoons pure maple syrup
  • 2 tablespoons fresh orange juice
  • 1 tablespoon apple cider vinegar
  • Salt and pepper to taste

Instructions

  1. Prepare the vinaigrette by whisking together olive oil, maple syrup, orange juice, apple cider vinegar, salt, and pepper in a bowl until well combined.
  2. In a large salad bowl, combine the fresh spinach, sliced apple, chopped walnuts, and optional feta cheese and cranberries.
  3. Drizzle the prepared vinaigrette over the salad and toss gently to coat all ingredients evenly.
  4. Serve immediately, garnishing with extra walnuts or cheese if desired.

Notes

For a nut-free version: Substitute walnuts with sunflower seeds or pumpkin seeds for added crunch without the nuts.

To toast walnuts, simply place them in a dry skillet over medium heat for 5-7 minutes, stirring frequently until fragrant. This enhances their flavor and adds an extra crunch to your salad.

Feel free to customize this salad by adding ingredients like feta cheese, dried cranberries, or even grilled chicken for a heartier option. If you prefer a vegan version, simply omit the cheese or replace it with a plant-based alternative.

Store any leftover salad components separately to keep the spinach crisp. The vinaigrette can be made in advance and stored in the refrigerator for up to a week.

September 4, 2026 0 comments
0 FacebookTwitterPinterestPocketEmail
Tangy BBQ Pulled Jackfruit Sliders with Crunchy Slaw
Main DishesQuick & Easy (30-Min)VeganVegetarian

Tangy BBQ Pulled Jackfruit Sliders with Crunchy Slaw

by Linda September 4, 2026
written by Linda

These Tangy BBQ Pulled Jackfruit Sliders are a game-changer in the world of plant-based eating. With their rich, smoky flavor and tender texture, jackfruit mimics pulled pork brilliantly, making it a fantastic alternative for BBQ lovers. Paired with a crunchy slaw, every bite is a delightful mix of tangy and crunchy elements.

Using a simple homemade BBQ sauce, you’ll achieve a depth of flavor that elevates the jackfruit to new heights. Plus, these sliders are easy to assemble, making them ideal for gatherings. Your guests will be raving about these sliders long after the last bite!

Tangy BBQ Pulled Jackfruit Sliders with Crunchy Slaw

Tangy BBQ Pulled Jackfruit Sliders with Crunchy Slaw

Serves: 4-6 Prep Time: 15 minutes Cooking Time: 30 minutes 30 minutes
Nutrition facts: 350 calories 12g fat
Rating: 5.0/5
( 1 voted )
Pin
Print

Ingredients

INGREDIENTS

  • 2 cans young green jackfruit in water or brine, drained and rinsed
  • 1 tablespoon olive oil
  • 1 small onion, diced
  • 2 cloves garlic, minced
  • 1 cup homemade or store-bought BBQ sauce
  • Salt and pepper to taste
  • 4-6 slider buns
  • 1 cup coleslaw mix
  • 1/2 cup mayonnaise
  • 1 tablespoon apple cider vinegar
  • 1 teaspoon sugar
  • Salt and pepper to taste

Instructions

  1. Heat olive oil in a large skillet over medium heat.
  2. Add diced onion and sauté until translucent, about 5 minutes.
  3. Stir in minced garlic and cook for another minute until fragrant.
  4. Add the drained jackfruit and cook for 10 minutes, stirring occasionally until it starts to soften.
  5. Using a fork, shred the jackfruit, breaking it apart into smaller pieces.
  6. Pour in the BBQ sauce, stirring to coat the jackfruit. Cook for an additional 10 minutes, allowing the sauce to thicken and the flavors to meld.
  7. In a separate bowl, mix together the coleslaw mix, mayonnaise, apple cider vinegar, sugar, salt, and pepper to taste until well combined.
  8. Toast the slider buns lightly for added texture.
  9. Assemble the sliders by spooning the BBQ jackfruit onto the bottom half of the buns, topping with a generous scoop of crunchy slaw, and placing the top bun on.
  10. Serve immediately and enjoy!

Notes

Note: For an extra kick, season the jackfruit with smoked paprika or cayenne pepper while cooking.

For the best texture, make sure to use young green jackfruit packed in water or brine, not the sweet varieties in syrup. If you’re short on time, you can use store-bought BBQ sauce. Feel free to customize the slaw by adding ingredients like shredded carrots or diced apples for added sweetness.

Store any leftover pulled jackfruit in an airtight container in the fridge for up to 3 days. Reheat gently on the stove before serving. These sliders are also great served on a fresh salad or in a wrap!

September 4, 2026 0 comments
0 FacebookTwitterPinterestPocketEmail
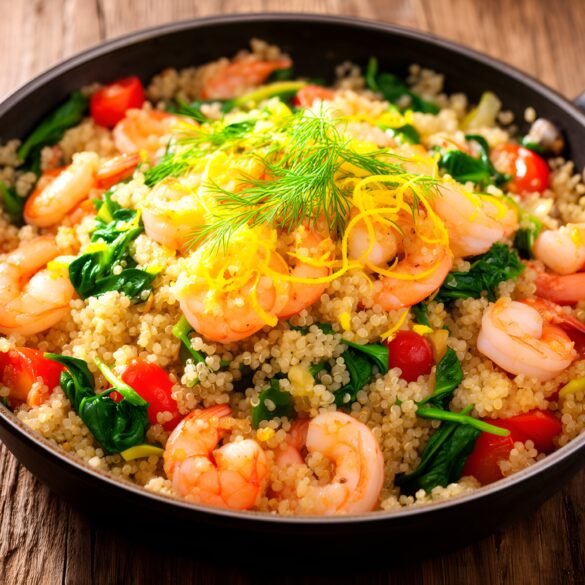
Zesty Lemon-Dill Shrimp and Quinoa Skillet
Healthy & Low-CalorieMain DishesQuick & Easy (30-Min)

Zesty Lemon-Dill Shrimp and Quinoa Skillet

by Linda September 4, 2026
written by Linda

This Lemon-Dill Shrimp and Quinoa Skillet is a refreshing and nutritious dish that brings together succulent shrimp, fluffy quinoa, and zesty flavors for a quick weeknight meal.

The combination of lemon and dill enhances the natural sweetness of the shrimp, making each bite lively and satisfying. With its one-pan preparation, cleanup is a breeze, allowing you more time to enjoy this delightful dish with your family or guests.

Zesty Lemon-Dill Shrimp and Quinoa Skillet

Zesty Lemon-Dill Shrimp and Quinoa Skillet

Serves: 4 Prep Time: 10 minutes Cooking Time: 15 minutes 15 minutes
Nutrition facts: 350 calories 10g fat
Rating: 5.0/5
( 1 voted )
Pin
Print

Ingredients

INGREDIENTS

  • 1 cup quinoa
  • 2 cups vegetable broth
  • 1 lb shrimp, peeled and deveined
  • 1 tablespoon olive oil
  • 2 cloves garlic, minced
  • 1 lemon, zested and juiced
  • 1/4 cup fresh dill, chopped
  • Salt and pepper to taste
  • 1 cup cherry tomatoes, halved
  • 1 cup spinach leaves

Instructions

  1. Rinse quinoa under cold water in a fine mesh strainer. In a medium saucepan, combine quinoa and vegetable broth, then bring to a boil. Reduce heat, cover, and simmer for about 15 minutes or until liquid is absorbed and quinoa is fluffy.
  2. In a large skillet, heat olive oil over medium heat. Add minced garlic and sauté for about 1 minute until fragrant.
  3. Add shrimp to the skillet and season with salt and pepper. Cook for 3-4 minutes until shrimp are pink and opaque, stirring occasionally.
  4. Stir in lemon zest, lemon juice, chopped dill, halved cherry tomatoes, and spinach. Cook for an additional 2-3 minutes until spinach is wilted and tomatoes are slightly softened.
  5. Fluff the cooked quinoa with a fork and then add it to the skillet. Gently mix everything together until well combined and heated through.

Notes

Storage: Store leftovers in an airtight container in the fridge for up to 3 days. Reheat gently before serving.

For best results, use fresh dill if possible, as it offers a brighter flavor compared to dried dill. If you don’t have quinoa on hand, you can substitute it with couscous or brown rice. For a bit of heat, consider adding a pinch of red pepper flakes.

This dish is perfect for meal prep; just store leftover portions in an airtight container in the fridge for up to three days. Reheat in the microwave or on the stovetop until warmed through.

September 4, 2026 0 comments
0 FacebookTwitterPinterestPocketEmail
Spicy Honey-Garlic Glazed Salmon Tacos
Healthy & Low-CalorieKid-FriendlyMain DishesQuick & Easy (30-Min)

Spicy Honey-Garlic Glazed Salmon Tacos

by Linda September 4, 2026
written by Linda

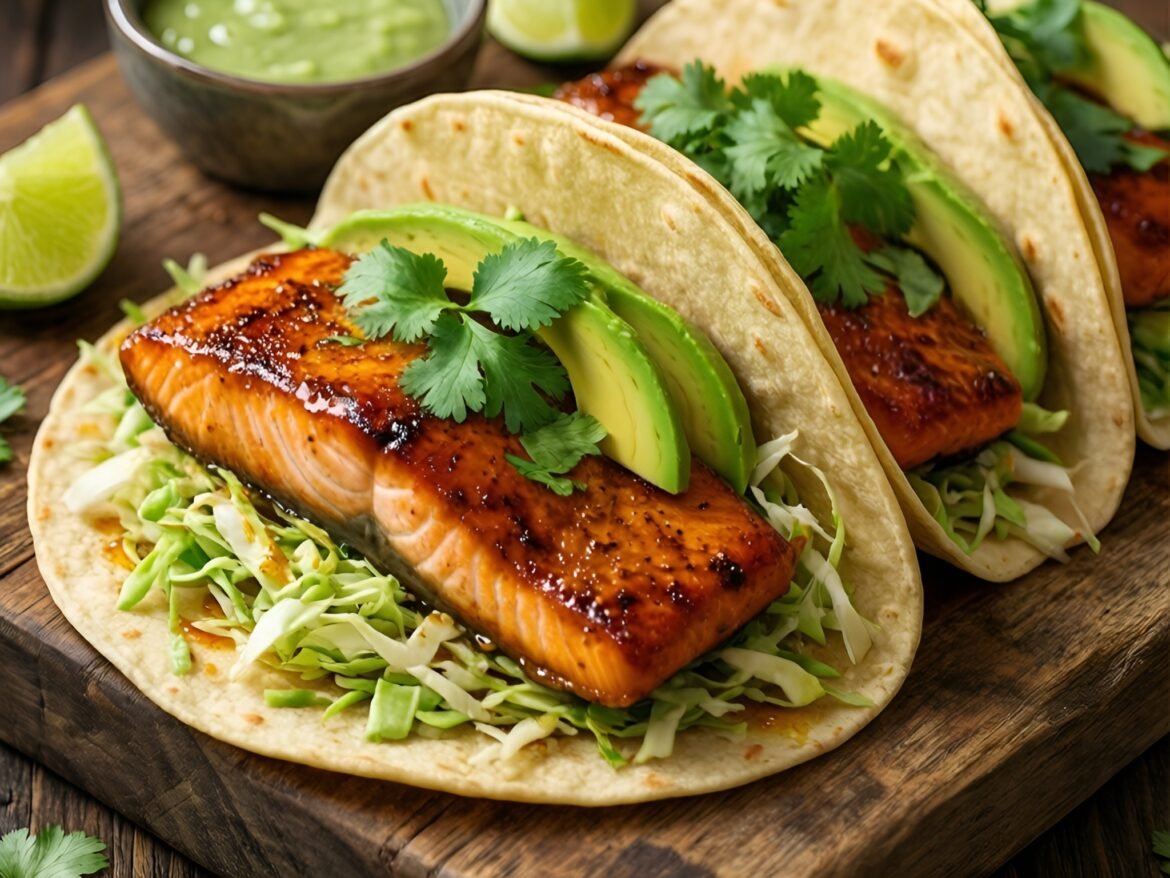
These Spicy Honey-Garlic Glazed Salmon Tacos are a delightful fusion of sweet and spicy flavors, making them an irresistible choice for taco night. The salmon is marinated in a rich honey-garlic sauce that caramelizes beautifully as it cooks, providing a perfect balance of sweetness and heat. This dish not only pleases the palate but is also quick to prepare, making it a great option for busy weeknights.

Each taco is loaded with fresh toppings like crunchy cabbage, ripe avocado, and a zesty lime crema that complements the salmon perfectly. Serve these tacos with your favorite sides for a complete meal that will impress family and friends alike.

Spicy Honey-Garlic Glazed Salmon Tacos

Spicy Honey-Garlic Glazed Salmon Tacos

Serves: 4 Prep Time: 15 minutes Cooking Time: 10 minutes 10 minutes
Nutrition facts: 350 calories 18g fat
Rating: 5.0/5
( 1 voted )
Pin
Print

Ingredients

INGREDIENTS

  • 1 lb salmon fillets
  • 3 tablespoons honey
  • 2 tablespoons soy sauce
  • 4 cloves garlic, minced
  • 1 teaspoon red pepper flakes
  • 8 small corn tortillas
  • 1 cup shredded cabbage
  • 1 avocado, sliced
  • 1/4 cup fresh cilantro, chopped
  • 1 lime, juiced
  • Salt and pepper to taste

Instructions

  1. Preheat your grill or a skillet over medium-high heat.
  2. In a bowl, mix honey, soy sauce, minced garlic, red pepper flakes, salt, and pepper to create the glaze.
  3. Brush the glaze generously over the salmon fillets.
  4. Place the salmon on the grill or in the skillet, cooking for about 4-5 minutes on each side, or until cooked through and caramelized.
  5. While the salmon cooks, warm the corn tortillas on a separate skillet until pliable, about 30 seconds on each side.
  6. Once the salmon is done, remove it from the heat and let it rest for a few minutes before flaking it into bite-sized pieces.
  7. Assemble the tacos by placing flaked salmon in each tortilla, topping with shredded cabbage, sliced avocado, and fresh cilantro.
  8. Drizzle with lime juice and serve immediately. Enjoy your flavorful tacos!

Notes

Tip: For a crunchier texture, try adding crushed tortilla chips inside the tacos before serving.

For the best results, use fresh salmon fillets for a flaky texture. If you prefer a milder flavor, reduce the amount of chili flakes in the glaze or use a milder sauce. Feel free to customize your toppings – try adding pickled red onions or cilantro for an extra flavor boost!

Store any leftover salmon in an airtight container in the fridge for up to 2 days. Reheat gently in a skillet over medium heat to prevent it from drying out. These tacos are best enjoyed fresh but can also be prepped ahead for quick assembly later.

September 4, 2026 0 comments
0 FacebookTwitterPinterestPocketEmail
Savory Herb-Infused Beef and Mushroom Bolognese Bake
Kid-FriendlyMain Dishes

Savory Herb-Infused Beef and Mushroom Bolognese Bake

by Linda September 4, 2026
written by Linda

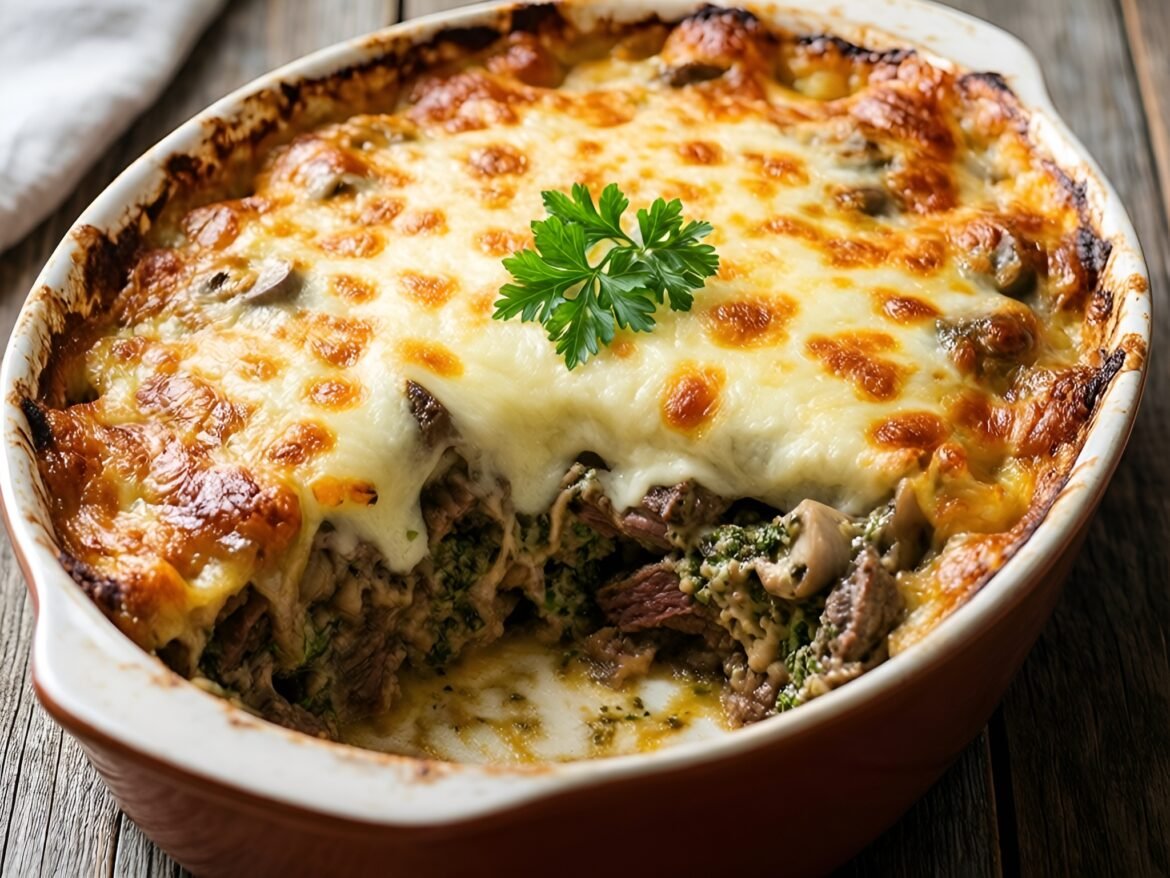
Indulge in the rich flavors of this Herb-Infused Beef and Mushroom Bolognese Bake, where tender beef meets earthy mushrooms in a savory sauce. This dish is perfect for a cozy family dinner or entertaining guests, featuring layers of pasta and a herbaceous twist that elevates traditional Bolognese to a new level.

The infusion of fresh herbs, like basil and thyme, complements the robust meatiness of the ground beef while adding a fragrant aroma. Topped with creamy béchamel and melted cheese, this bake offers a delightful combination of textures and flavors that everyone will love.

Savory Herb-Infused Beef and Mushroom Bolognese Bake

Savory Herb-Infused Beef and Mushroom Bolognese Bake

Serves: 6-8 Prep Time: 30 minutes Cooking Time: 60 minutes 60 minutes
Nutrition facts: 520 calories 25g fat
Rating: 5.0/5
( 1 voted )
Pin
Print

Ingredients

INGREDIENTS

  • 2 tablespoons olive oil
  • 1 onion, chopped
  • 2 cloves garlic, minced
  • 1 pound ground beef
  • 8 ounces mushrooms, chopped
  • 1 can (28 ounces) crushed tomatoes
  • 1 tablespoon tomato paste
  • 1 teaspoon dried oregano
  • 1 teaspoon dried basil
  • 1/2 teaspoon thyme
  • Salt and pepper to taste
  • 12 ounces lasagna noodles, cooked
  • 2 cups béchamel sauce
  • 1 cup shredded mozzarella cheese
  • 1/2 cup grated Parmesan cheese

Instructions

  1. Preheat your oven to 350°F (175°C).
  2. In a large pot, heat olive oil over medium heat and sauté the onion until translucent, about 5 minutes.
  3. Add the minced garlic and cook for another minute until fragrant.
  4. Stir in the ground beef and cook until browned, breaking it apart with a spoon as it cooks.
  5. Add the chopped mushrooms and cook until they release their moisture and begin to brown, about 5-7 minutes.
  6. Stir in the crushed tomatoes, tomato paste, oregano, basil, thyme, salt, and pepper. Simmer for 20 minutes, stirring occasionally.
  7. In a large baking dish, spread a layer of the beef and mushroom mixture on the bottom.
  8. Layer cooked lasagna noodles over the sauce, followed by a layer of béchamel sauce, then repeat the layers until all ingredients are used, finishing with béchamel on top.
  9. Sprinkle shredded mozzarella and grated Parmesan over the final layer.
  10. Cover with foil and bake for 30 minutes, then remove the foil and bake for another 15-20 minutes until golden and bubbly.
  11. Let it rest for 10 minutes before serving.

Notes

Tip: If you want a spicier kick, add a pinch of red pepper flakes to the sauce.

For a lighter option, consider using ground turkey or chicken instead of beef. You can also add vegetables like spinach or zucchini for extra nutrition. If you’re short on time, pre-cooked pasta can be used to cut down on prep time.

Leftovers can be stored in the refrigerator for up to 3 days and reheat beautifully in the oven. For a crispy top, broil for a few minutes before serving. This dish also freezes well; just ensure it’s properly sealed to avoid freezer burn!

September 4, 2026 0 comments
0 FacebookTwitterPinterestPocketEmail
Creamy Coconut-Curry Chicken with Jasmine Rice
Kid-FriendlyMain DishesQuick & Easy (30-Min)

Creamy Coconut-Curry Chicken with Jasmine Rice

by Linda September 4, 2026
written by Linda

If you’re looking for a dish that brings warmth and comfort to the table, this Creamy Coconut-Curry Chicken is a must-try. Rich in flavor and easy to prepare, it beautifully combines tender pieces of chicken with a luscious coconut curry sauce, all served over aromatic jasmine rice. The vibrant blend of spices not only tantalizes the taste buds but also fills your kitchen with an irresistible aroma.

This recipe highlights the use of coconut milk, which adds a creamy texture, while a medley of spices like curry powder and turmeric infuses the dish with a delightful warmth. It’s a simple yet satisfying meal perfect for weeknight dinners or impressing guests!

Creamy Coconut-Curry Chicken with Jasmine Rice

Creamy Coconut-Curry Chicken with Jasmine Rice

Serves: 4 Prep Time: 15 minutes Cooking Time: 30 minutes 30 minutes
Nutrition facts: 450 calories 20g fat
Rating: 5.0/5
( 1 voted )
Pin
Print

Ingredients

INGREDIENTS

  • 1 lb chicken breast, cut into bite-sized pieces
  • 2 tablespoons olive oil
  • 1 onion, finely chopped
  • 2 cloves garlic, minced
  • 1 tablespoon fresh ginger, grated
  • 2 tablespoons curry powder
  • 1 teaspoon turmeric
  • 1 can (14 oz) coconut milk
  • 1 cup chicken broth
  • Salt and pepper to taste
  • 2 cups jasmine rice
  • Fresh cilantro for garnish

Instructions

  1. Heat olive oil in a large pot over medium heat. Add chopped onion and cook until translucent, about 5 minutes.
  2. Stir in garlic and ginger, cooking for an additional minute until fragrant.
  3. Add chicken pieces to the pot, cooking until browned on all sides, about 5-7 minutes.
  4. Sprinkle curry powder and turmeric over the chicken, stirring to coat evenly.
  5. Pour in coconut milk and chicken broth, bringing the mixture to a simmer. Cook for 15-20 minutes until chicken is cooked through and sauce has thickened.
  6. Meanwhile, rinse jasmine rice under cold water until the water runs clear. Cook rice according to package instructions.
  7. Season the curry with salt and pepper to taste.
  8. Serve the coconut-curry chicken over jasmine rice, garnished with fresh cilantro.

Notes

Tip: For a bit of heat, add some diced chili peppers to the curry while it simmers.

For extra depth of flavor, consider marinating the chicken in yogurt and spices for a few hours before cooking. If you’re looking for a vegetarian option, substitute chicken with chickpeas or tofu. You can also add vegetables like bell peppers or spinach for added nutrition.

Store any leftovers in an airtight container in the refrigerator for up to three days. Reheat gently on the stove or in the microwave, adding a splash of water if needed to loosen the sauce.

September 4, 2026 0 comments
0 FacebookTwitterPinterestPocketEmail
Sweet and Spicy Mango-Guacamole Bites on Corn Totopos
Appetizers & SnacksKid-FriendlyQuick & Easy (30-Min)Vegetarian

Sweet and Spicy Mango-Guacamole Bites on Corn Totopos

by Linda September 4, 2026
written by Linda

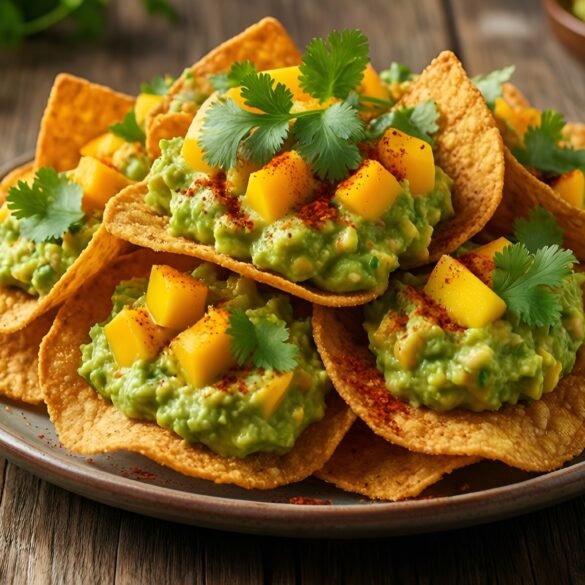
These Sweet and Spicy Mango-Guacamole Bites are the perfect combination of creamy, zesty, and sweet flavors, making them an irresistible appetizer for any gathering. The sweetness of ripe mango adds a refreshing twist to the classic guacamole, while a hint of spice elevates the experience, creating a balance that your taste buds will love.

Served on crispy corn totopos, these bites are not only delicious but also visually appealing, making them a standout dish at parties or casual get-togethers. Whether you’re entertaining friends or enjoying a casual night in, these bites are sure to impress with their vibrant flavors and textures.

Sweet and Spicy Mango-Guacamole Bites on Corn Totopos

Sweet and Spicy Mango-Guacamole Bites on Corn Totopos

Serves: 4-6 Prep Time: 15 minutes Cooking Time: 10 minutes 10 minutes
Nutrition facts: 150 calories 9g fat
Rating: 5.0/5
( 1 voted )
Pin
Print

Ingredients

INGREDIENTS

  • 2 ripe avocados
  • 1 medium ripe mango, diced
  • 1 small jalapeño, finely chopped
  • 1 lime, juiced
  • Salt to taste
  • 12-15 corn totopos
  • Fresh cilantro, for garnish
  • Chili powder, for garnish

Instructions

  1. Preheat the oven to 350°F (175°C).
  2. Arrange the corn totopos on a baking sheet and bake for 5-7 minutes or until crisp and lightly golden.
  3. In a mixing bowl, mash the ripe avocados with a fork until creamy but still chunky.
  4. Add the diced mango, chopped jalapeño, and lime juice to the mashed avocado; mix gently to combine.
  5. Season with salt to taste and stir until well blended.
  6. Once the totopos are ready, remove them from the oven and let them cool slightly.
  7. Spoon a generous amount of the mango-guacamole mixture onto each corn totopo.
  8. Garnish with fresh cilantro and a light dusting of chili powder before serving. Enjoy!

Notes

For a unique twist: Add diced red onion or a sprinkle of feta cheese on top for extra flavor.

For the best flavor, use ripe avocados and fresh mangoes. If you’re looking for a milder taste, you can adjust the amount of jalapeño or substitute it with a milder pepper. Additionally, these bites can be prepped ahead of time; just assemble the guacamole and keep it covered in the refrigerator until you’re ready to serve.

Leftover guacamole can be stored in an airtight container, but to prevent browning, make sure to press plastic wrap directly onto the surface of the guacamole before sealing. They are best enjoyed fresh, but you can reheat the totopos in the oven for a few minutes to re-crisp them before serving.

September 4, 2026 0 comments
0 FacebookTwitterPinterestPocketEmail
Newer Posts
Older Posts

Recent Posts

  • Vibrant Roasted Beet, Feta, and Citrus Salad with a Honey-Lime Dressing

    September 13, 2026
  • Creamy Tomato-Basil Bisque with a Twist

    September 13, 2026
  • Autumn Harvest Butternut Squash and Apple Salad with Spicy Maple Dressing

    September 13, 2026
  • Hearty Lentil and Spinach Rustic Summer Soup

    September 13, 2026
  • Chilled Avocado-Cucumber Frappe with Lime Zest

    September 13, 2026

About Me

About Me

I'm Linda, a health professional, university graduate, and author sharing tested, easy-to-follow recipes made from simple, everyday ingredients. Based in Finland, I bring together my culinary training, love of travel, and home-cooked roots to help you cook confidently, on any budget.

Products

  • Spooky Creative Starry Sky Ceramic Mug Spooky Creative Starry Sky Ceramic Mug 10,00 €

Categories

  • Appetizers & Snacks (157)
  • Breakfast & Brunch (126)
  • Desserts & Baking (160)
  • Drinks & Beverages (129)
  • Gluten-Free (200)
  • Grilling & BBQ (11)
  • Healthy & Low-Calorie (190)
  • Holiday & Seasonal (20)
  • Kid-Friendly (232)
  • Main Dishes (185)
  • Quick & Easy (30-Min) (668)
  • Slow Cooker & Instant Pot (4)
  • Soups & Salads (109)
  • Vegan (158)
  • Vegetarian (549)

About Me

I'm Linda, a health professional and food writer sharing tested, easy-to-follow recipes made from simple ingredients.

Email: jspiceygiftstv@gmail.com

Useful Links

  • Home
  • About
  • Contact
  • Free Cookbooks
  • Terms and Conditions
  • Privacy Policy

Newsletter

Subscribe to to our Newsletter to stay updated with all our recipes.

Recent Posts

  • Vibrant Roasted Beet, Feta, and Citrus Salad with a Honey-Lime Dressing

    September 13, 2026
  • Creamy Tomato-Basil Bisque with a Twist

    September 13, 2026
  • Instagram
  • Pinterest
  • Youtube
  • Tiktok

@2026 - All Right Reserved. Designed and Developed by JSpiceyGifts

J Spicey Gifts
  • Home
  • Recipes
    • Breakfast & Brunch
    • Appetizers & Snacks
    • Main Dishes
    • Soups & Salads
    • Desserts & Baking
    • Drinks & Beverages
  • Categories
    • Vegetarian
    • Vegan
    • Gluten-Free
    • Quick & Easy (30-Min)
    • Slow Cooker & Instant Pot
    • Grilling & BBQ
    • Healthy & Low-Calorie
    • Holiday & Seasonal
    • Kid-Friendly
  • About
  • Contact

Shopping Cart

Close

No products in the cart.

Close