J Spicey Gifts
  • Home
  • Recipes
    • Breakfast & Brunch
    • Appetizers & Snacks
    • Main Dishes
    • Soups & Salads
    • Desserts & Baking
    • Drinks & Beverages
  • Categories
    • Vegetarian
    • Vegan
    • Gluten-Free
    • Quick & Easy (30-Min)
    • Slow Cooker & Instant Pot
    • Grilling & BBQ
    • Healthy & Low-Calorie
    • Holiday & Seasonal
    • Kid-Friendly
  • About
  • Contact
Top Posts
Vibrant Roasted Beet, Feta, and Citrus Salad with...
Creamy Tomato-Basil Bisque with a Twist
Autumn Harvest Butternut Squash and Apple Salad with...
Hearty Lentil and Spinach Rustic Summer Soup
Chilled Avocado-Cucumber Frappe with Lime Zest
Mediterranean Lamb Skewers with Herbed Tzatziki Sauce
Sizzling Chipotle-Lime Chicken and Avocado Enchilada Bake
Zesty Mini Taco Cups with Spicy Salsa Verde
Tangy Avocado-Cilantro Hummus with Pita Crisps
Savory Honey-Mustard Pretzel Bites with Creamy Dip
J Spicey Gifts
  • Home
  • Recipes
    • Breakfast & Brunch
    • Appetizers & Snacks
    • Main Dishes
    • Soups & Salads
    • Desserts & Baking
    • Drinks & Beverages
  • Categories
    • Vegetarian
    • Vegan
    • Gluten-Free
    • Quick & Easy (30-Min)
    • Slow Cooker & Instant Pot
    • Grilling & BBQ
    • Healthy & Low-Calorie
    • Holiday & Seasonal
    • Kid-Friendly
  • About
  • Contact
J Spicey Gifts
J Spicey Gifts
  • Home
  • Recipes
    • Breakfast & Brunch
    • Appetizers & Snacks
    • Main Dishes
    • Soups & Salads
    • Desserts & Baking
    • Drinks & Beverages
  • Categories
    • Vegetarian
    • Vegan
    • Gluten-Free
    • Quick & Easy (30-Min)
    • Slow Cooker & Instant Pot
    • Grilling & BBQ
    • Healthy & Low-Calorie
    • Holiday & Seasonal
    • Kid-Friendly
  • About
  • Contact
Copyright 2021 - All Right Reserved
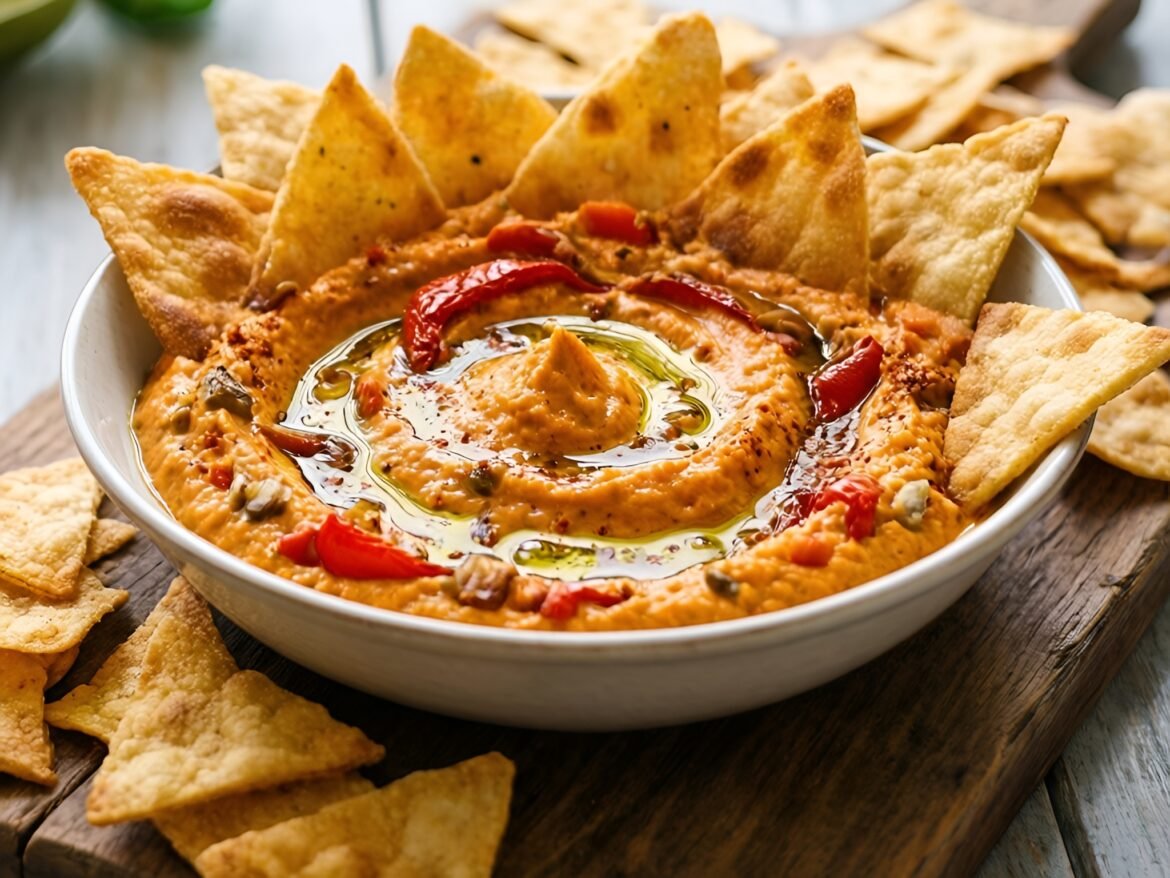
Creamy Zesty Greek Yogurt and Roasted Red Pepper Dip with Crunchy Pita Chips
Appetizers & SnacksHealthy & Low-CalorieQuick & Easy (30-Min)Vegetarian

Creamy Zesty Greek Yogurt and Roasted Red Pepper Dip with Crunchy Pita Chips

by Linda September 4, 2026
written by Linda

This creamy Zesty Greek Yogurt and Roasted Red Pepper Dip is a delightful blend of flavors that will elevate any snack table. The yogurt provides a rich and tangy base, while the roasted red peppers add a smoky sweetness that makes it irresistibly delicious. Perfect for entertaining or a quick afternoon snack, this dip is both nutritious and satisfying.

Making your own pita chips is simple and adds a wonderful crunch that complements the creaminess of the dip. Serve it at parties, game nights, or simply enjoy it with friends and family for a healthy yet indulgent treat.
Creamy Zesty Greek Yogurt and Roasted Red Pepper Dip with Crunchy Pita Chips

Creamy Zesty Greek Yogurt and Roasted Red Pepper Dip with Crunchy Pita Chips

Serves: 6 Prep Time: 15 minutes Cooking Time: 10 minutes 10 minutes
Nutrition facts: 150 calories 5g fat
Rating: 5.0/5
( 1 voted )
Pin
Print

Ingredients

INGREDIENTS

  • 1 cup Greek yogurt
  • 1 jar (12 oz) roasted red peppers, drained
  • 2 tablespoons lemon juice
  • 1 garlic clove, minced
  • 1 teaspoon cumin
  • Salt and pepper to taste
  • 6 pita breads
  • 2 tablespoons olive oil
  • 1/2 teaspoon paprika

Instructions

  1. Preheat your oven to 400°F (200°C).
  2. In a blender or food processor, combine Greek yogurt, roasted red peppers, lemon juice, minced garlic, cumin, salt, and pepper. Blend until smooth and creamy.
  3. Taste and adjust seasoning if necessary; set aside.
  4. Cut each pita bread into triangles and place them on a baking sheet.
  5. Drizzle olive oil over the pita triangles and sprinkle with paprika, tossing to coat evenly.
  6. Bake in the preheated oven for 8-10 minutes, or until golden and crispy.
  7. Remove from the oven and let cool slightly before serving with the dip.

Notes

Tip: Feel free to substitute the Greek yogurt with sour cream for a different flavor profile.

For added flavor, consider mixing in chopped fresh herbs like parsley or basil into the dip. If you prefer a spicier kick, add a pinch of red pepper flakes or a dash of hot sauce.

Store any leftovers in an airtight container in the refrigerator for up to three days. The dip can be served cold or at room temperature, and the pita chips are best enjoyed fresh but can be stored in a sealed bag for a couple of days.
September 4, 2026 0 comments
0 FacebookTwitterPinterestPocketEmail
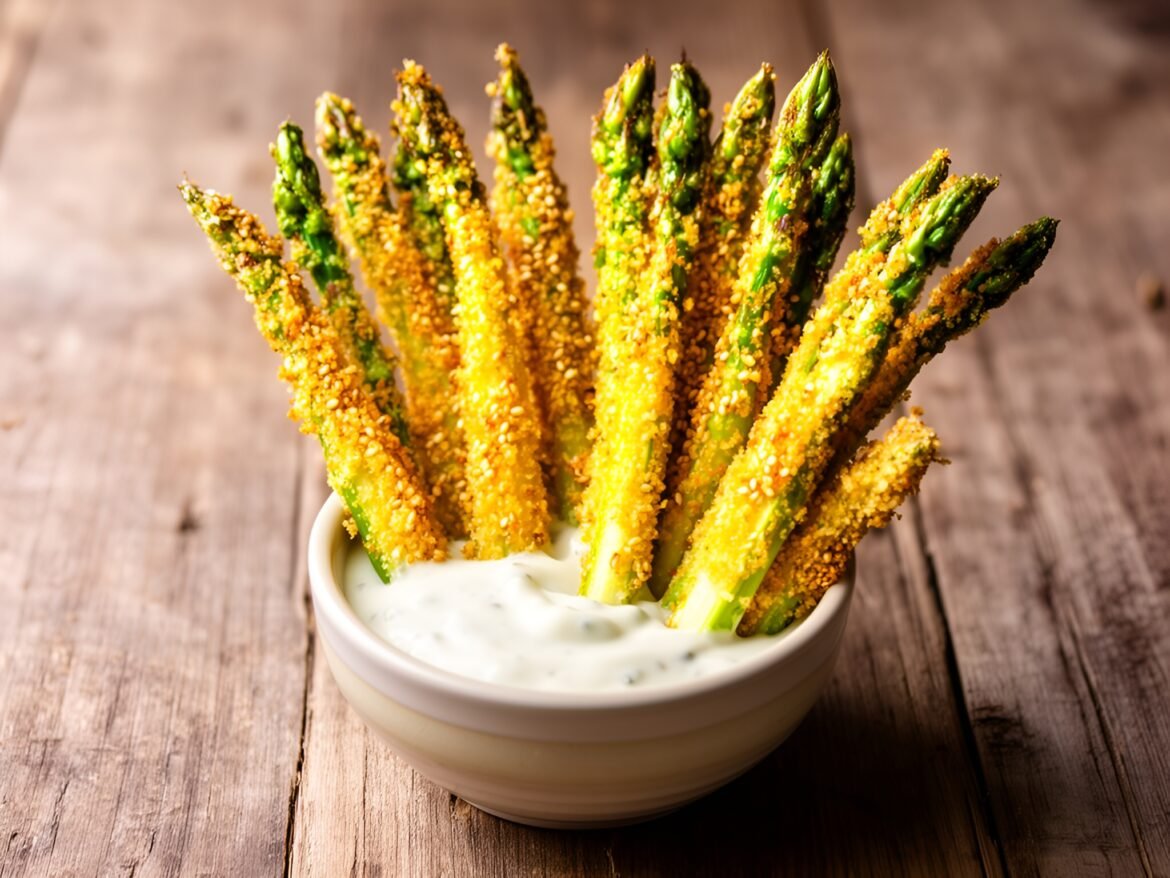
Crispy Sesame-Crusted Asparagus Sticks with Tangy Dipping Sauce
Appetizers & SnacksKid-FriendlyQuick & Easy (30-Min)Vegetarian

Crispy Sesame-Crusted Asparagus Sticks with Tangy Dipping Sauce

by Linda September 4, 2026
written by Linda

These Crispy Sesame-Crusted Asparagus Sticks are a fantastic way to enjoy a healthy vegetable in a deliciously crunchy form. Coated in a mixture of sesame seeds and breadcrumbs, they deliver an irresistible crunch that pairs perfectly with a tangy dipping sauce.

Ideal for appetizers or a light snack, this dish highlights the natural flavors of asparagus while adding a delightful crunch. Serve them warm for the best taste, and watch them disappear at your next gathering!

Crispy Sesame-Crusted Asparagus Sticks with Tangy Dipping Sauce

Crispy Sesame-Crusted Asparagus Sticks with Tangy Dipping Sauce

Serves: 4 Prep Time: 15 minutes Cooking Time: 20 minutes 20 minutes
Nutrition facts: 150 calories 8g fat
Rating: 5.0/5
( 1 voted )
Pin
Print

Ingredients

INGREDIENTS

  • 1 lb asparagus, trimmed
  • 1/2 cup breadcrumbs
  • 1/4 cup sesame seeds
  • 1/2 cup flour
  • 2 large eggs, beaten
  • Salt and pepper to taste
  • Oil for frying

FOR THE TANGY DIPPING SAUCE

  • 1/2 cup Greek yogurt
  • 1 tablespoon Dijon mustard
  • 1 tablespoon honey
  • 1 tablespoon lemon juice
  • Salt and pepper to taste

Instructions

  1. Preheat your oven to 400°F (200°C) for a healthier version or heat oil in a frying pan for frying.
  2. Set up a breading station with three bowls: one for flour mixed with salt and pepper, one for beaten eggs, and one for a mixture of breadcrumbs and sesame seeds.
  3. Dip each asparagus stick into the flour, then into the egg, and finally coat with the breadcrumb-sesame mixture, pressing gently to adhere.
  4. Arrange the coated asparagus sticks on a baking sheet lined with parchment paper if baking, or carefully place them in the hot oil if frying.
  5. For baking, oven-cook for 15-20 minutes until golden and crispy; for frying, cook until golden brown, about 3-4 minutes per side. Drain on paper towels after frying.
  6. While the asparagus is cooking, prepare the tangy dipping sauce by mixing together Greek yogurt, Dijon mustard, honey, lemon juice, and seasoning with salt and pepper.
  7. Serve the crispy asparagus sticks hot with the tangy dipping sauce on the side.

Notes

Tip: For a gluten-free option, substitute breadcrumbs with crushed gluten-free crackers or almond flour.

For an extra kick, consider adding some red pepper flakes to the breadcrumb mixture. You can also experiment with different types of seeds, like poppy or chia, for a unique twist.

Leftover asparagus sticks can be stored in an airtight container for up to 2 days in the fridge. Reheat them in an oven to regain their crispiness before serving.

September 4, 2026 0 comments
0 FacebookTwitterPinterestPocketEmail
Fiery Maple-Bacon Sweet Potato Skewers with a Kick
Appetizers & SnacksGluten-FreeKid-Friendly

Fiery Maple-Bacon Sweet Potato Skewers with a Kick

by Linda September 4, 2026
written by Linda

Experience the delightful combination of spicy and sweet with these fiery maple-bacon sweet potato skewers. The sweetness of roasted sweet potatoes pairs beautifully with crispy bacon, all enhanced by a kick of chili flakes and a drizzle of maple syrup.

This dish is not only visually appealing but also a crowd-pleaser, whether for a backyard BBQ or a cozy family dinner. Each bite offers a satisfying crunch followed by a sweet, smoky flavor that is sure to leave everyone wanting more.

Fiery Maple-Bacon Sweet Potato Skewers with a Kick

Fiery Maple-Bacon Sweet Potato Skewers with a Kick

Serves: 4 Prep Time: 15 minutes Cooking Time: 20 minutes 20 minutes
Nutrition facts: 250 calories 15g fat
Rating: 5.0/5
( 1 voted )
Pin
Print

Ingredients

INGREDIENTS

  • 2 large sweet potatoes, peeled and cubed
  • 8 slices of bacon, cut in half
  • 1/4 cup maple syrup
  • 1 teaspoon chili flakes
  • Salt and pepper to taste
  • Fresh parsley, chopped (for garnish)

Instructions

  1. Preheat the grill to medium-high heat.
  2. In a large bowl, combine the cubed sweet potatoes, maple syrup, chili flakes, salt, and pepper. Toss well to coat the sweet potatoes in the mixture.
  3. Wrap each sweet potato cube with a half slice of bacon and secure with a skewer.
  4. Place the skewers on the grill and cook for about 15-20 minutes, turning occasionally, until the bacon is crispy and the sweet potatoes are tender.
  5. Remove from the grill and garnish with chopped parsley before serving. Enjoy!

Notes

Tip: For added flavor, consider marinating the sweet potatoes in the maple syrup mixture for 30 minutes before wrapping them in bacon.

For the best results, soak your wooden skewers in water for about 30 minutes before grilling to prevent burning. If you want to reduce the heat, feel free to adjust the amount of chili flakes used.

These skewers can be served hot off the grill or at room temperature, making them versatile for any occasion. Leftovers can be stored in an airtight container in the fridge for up to three days. Simply reheat in the oven for a few minutes before serving.

September 4, 2026 0 comments
0 FacebookTwitterPinterestPocketEmail
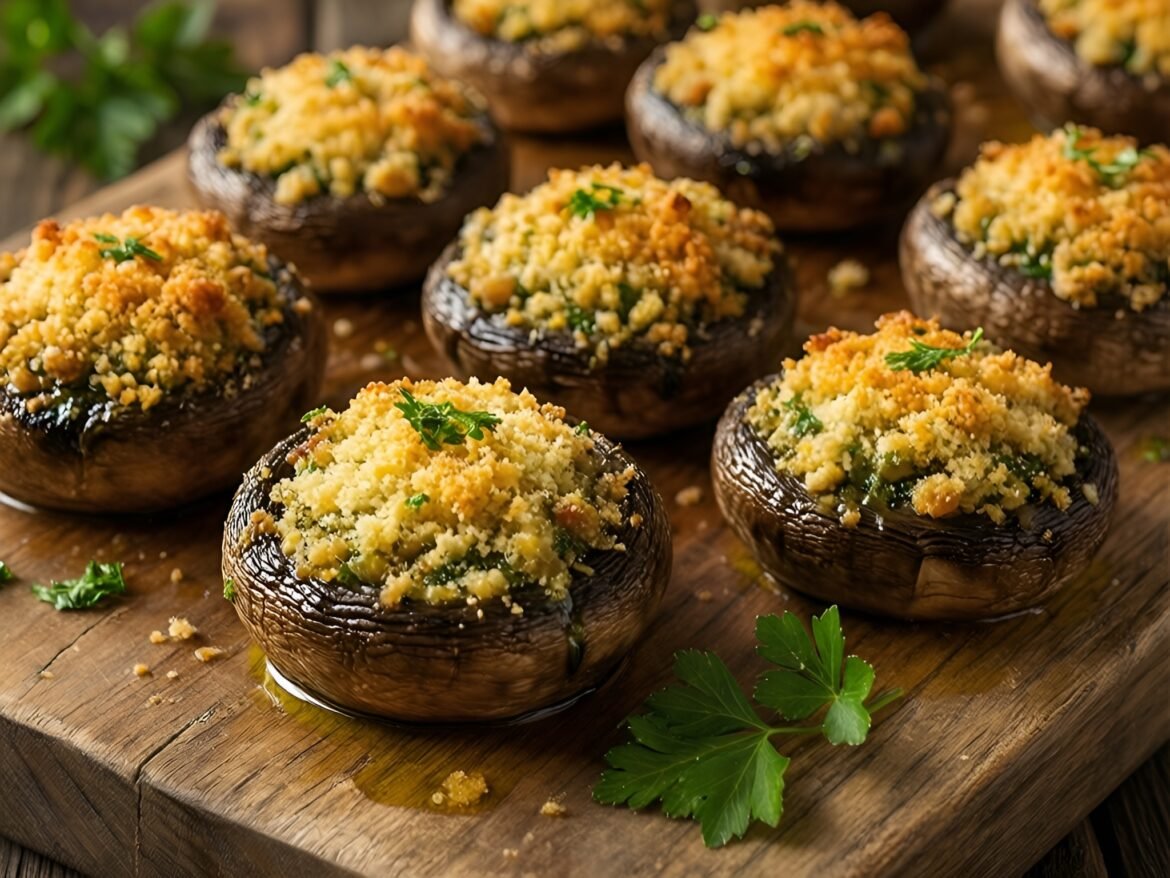
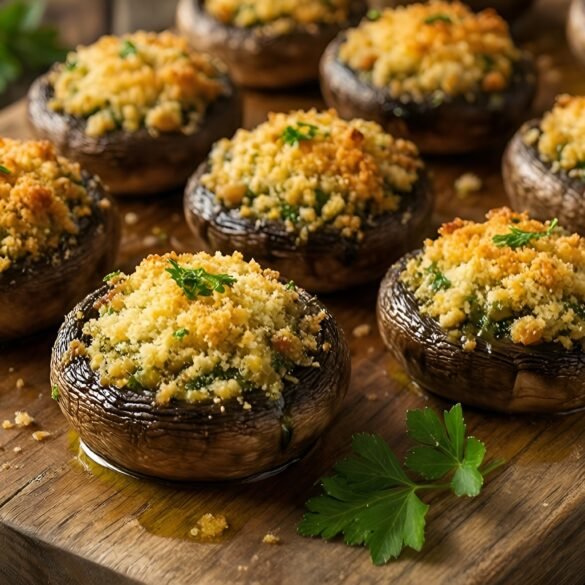
Savory Herb and Parmesan Stuffed Mushroom Caps
Appetizers & SnacksKid-FriendlyQuick & Easy (30-Min)Vegetarian

Savory Herb and Parmesan Stuffed Mushroom Caps

by Linda September 4, 2026
written by Linda

These Savory Herb and Parmesan Stuffed Mushroom Caps are a delicious appetizer that promises to impress your guests at any gathering. The combination of fresh herbs, creamy cheese, and the earthy flavor of mushrooms creates a dish that is both elegant and comforting.

Using large, meaty mushroom caps as the base, each one is filled with a flavorful mixture of garlic, parsley, and Parmesan cheese, then baked until golden and bubbly. They make for an excellent party treat or a delightful snack during movie night!

Savory Herb and Parmesan Stuffed Mushroom Caps

Savory Herb and Parmesan Stuffed Mushroom Caps

Serves: 4-6 Prep Time: 15 minutes Cooking Time: 20 minutes 20 minutes
Nutrition facts: 150 calories 8g fat
Rating: 5.0/5
( 1 voted )
Pin
Print

Ingredients

INGREDIENTS

  • 12 large white or cremini mushrooms
  • 1 cup breadcrumbs
  • 1/2 cup grated Parmesan cheese
  • 1/4 cup fresh parsley, chopped
  • 2 cloves garlic, minced
  • 1 teaspoon dried oregano
  • Salt and pepper to taste
  • 2 tablespoons olive oil
  • 1/4 teaspoon red pepper flakes (optional)

Instructions

  1. Preheat the oven to 375°F (190°C).
  2. Clean the mushrooms with a damp cloth and remove the stems. Set aside the caps and finely chop the stems.
  3. In a skillet over medium heat, add olive oil and sauté the chopped mushroom stems and minced garlic for about 3 minutes until soft.
  4. In a bowl, combine the sautéed mixture, breadcrumbs, Parmesan cheese, parsley, oregano, salt, pepper, and red pepper flakes (if using). Mix well until combined.
  5. Stuff each mushroom cap with the filling, pressing it down slightly to pack it in.
  6. Place the stuffed mushrooms on a baking sheet lined with parchment paper.
  7. Bake in the preheated oven for 15-20 minutes, or until the tops are golden brown and the mushrooms are tender.
  8. Remove from the oven and let cool for a few minutes before serving. Enjoy!

Notes

Storage: Leftover stuffed mushrooms can be stored in an airtight container in the refrigerator for up to 3 days. Reheat in the oven at 350°F (175°C) until warmed through.

When selecting mushrooms, choose firm, fresh caps that are large enough to hold a generous amount of filling. If you want to make these ahead of time, prepare the filling and stuff the mushrooms, then cover and refrigerate until ready to bake. Just add a couple of extra minutes to the baking time if they go into the oven straight from the fridge.

Feel free to experiment with different cheeses or herbs based on your taste preferences. For a spicy kick, consider adding a pinch of red pepper flakes to the filling.

September 4, 2026 0 comments
0 FacebookTwitterPinterestPocketEmail
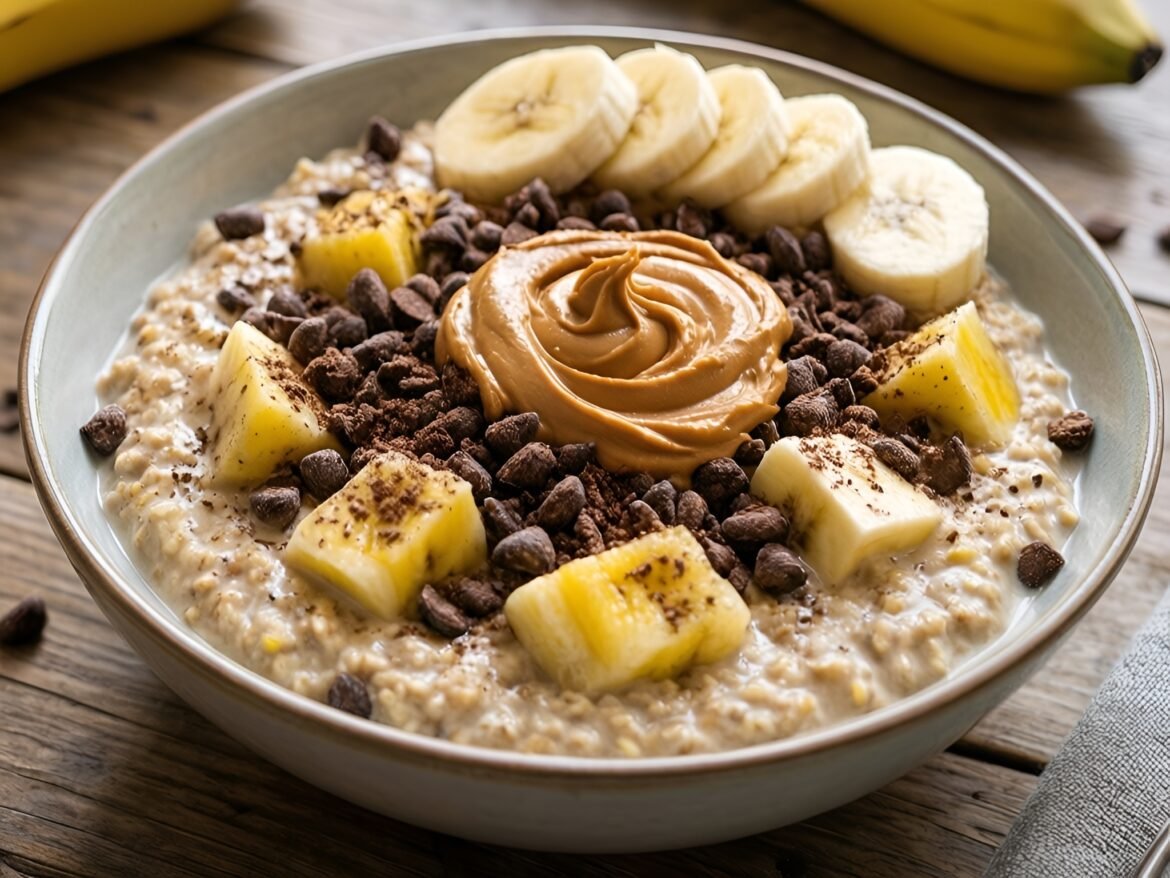
Decadent Peanut Butter-Banana Overnight Oats with Cocoa Nibs
Breakfast & BrunchGluten-FreeQuick & Easy (30-Min)Vegetarian

Decadent Peanut Butter-Banana Overnight Oats with Cocoa Nibs

by Linda September 4, 2026
written by Linda

These decadent Peanut Butter-Banana Overnight Oats are the perfect grab-and-go breakfast solution that combines the richness of peanut butter and the natural sweetness of ripe bananas. Not only are they incredibly filling, but they also provide a boost of energy to kickstart your day.

Infused with creamy almond milk, these oats soak overnight to achieve a luscious, pudding-like texture. The addition of cocoa nibs introduces a delightful crunch and a touch of dark chocolate flavor, making this dish a deliciously indulgent yet healthy choice for your morning routine.

Decadent Peanut Butter-Banana Overnight Oats with Cocoa Nibs

Decadent Peanut Butter-Banana Overnight Oats with Cocoa Nibs

Serves: 2 Prep Time: 10 minutes Cooking Time: 0 minutes 0 minutes
Nutrition facts: 400 calories 18g fat
Rating: 5.0/5
( 1 voted )
Pin
Print

Ingredients

INGREDIENTS

  • 1 cup rolled oats
  • 2 cups unsweetened almond milk
  • 2 ripe bananas, mashed
  • 1/4 cup peanut butter
  • 2 tablespoons maple syrup or honey
  • 1 teaspoon vanilla extract
  • 1/4 cup cocoa nibs
  • Pinch of salt

Instructions

  1. In a mixing bowl, combine the rolled oats, almond milk, mashed bananas, peanut butter, maple syrup, vanilla extract, and a pinch of salt.
  2. Stir the mixture well until all ingredients are fully combined and the oats are evenly coated.
  3. Divide the mixture into two jars or containers with lids, ensuring an even distribution of oats and liquid.
  4. Top each jar with cocoa nibs, pressing them gently into the oats.
  5. Seal the jars and refrigerate overnight (or for at least 4 hours) to allow the oats to soak and soften.
  6. In the morning, give the oats a good stir and enjoy straight from the jar or transfer to a bowl. Top with additional banana slices if desired.

Notes

Note: For an extra boost of flavor, add a pinch of cinnamon or nutmeg when mixing the ingredients.

For a creamier texture, consider using Greek yogurt along with the almond milk. You can also switch out the peanut butter for almond or cashew butter if you prefer. Don’t have cocoa nibs? Chocolate chips can be a great substitute, though they will add extra sweetness.

Store any leftovers in the fridge for up to 3 days. These oats can be enjoyed cold or warmed up for a cozy breakfast option. Feel free to top with additional banana slices or a drizzle of honey before serving!

September 4, 2026 0 comments
0 FacebookTwitterPinterestPocketEmail
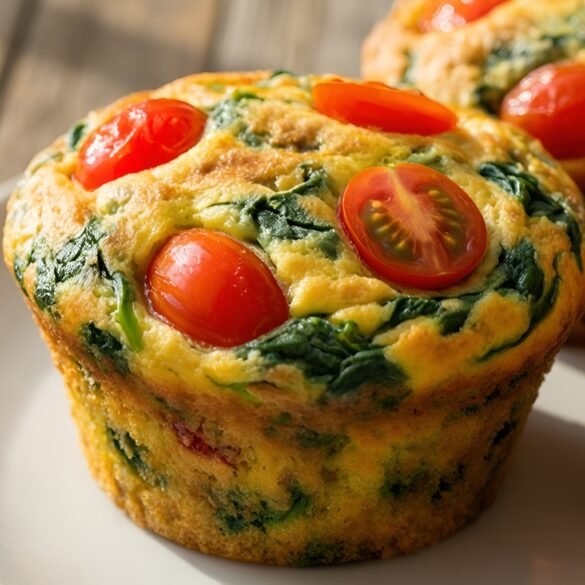
Wholesome Spinach and Tomato Frittata Muffins
Breakfast & BrunchKid-FriendlyQuick & Easy (30-Min)Vegetarian

Wholesome Spinach and Tomato Frittata Muffins

by Linda September 4, 2026
written by Linda

These Spinach and Tomato Frittata Muffins are a delicious and healthy way to kickstart your day. Packed with fresh spinach, juicy tomatoes, and fluffy eggs, they are not only nutritious but also incredibly easy to make. Perfect for meal prep, these muffins can be enjoyed hot or cold, making them an ideal grab-and-go breakfast option.

What sets this recipe apart is its versatility; you can customize the ingredients to include your favorite vegetables or cheeses. Whether you’re looking for a quick breakfast or a satisfying snack, these frittata muffins deliver in flavor and convenience.

Wholesome Spinach and Tomato Frittata Muffins

Wholesome Spinach and Tomato Frittata Muffins

Serves: 12 Prep Time: 10 minutes Cooking Time: 20 minutes 20 minutes
Nutrition facts: 130 calories 8g fat
Rating: 5.0/5
( 1 voted )
Pin
Print

Ingredients

INGREDIENTS

  • 6 large eggs
  • 1 cup fresh spinach, chopped
  • 1 cup cherry tomatoes, halved
  • 1/2 cup onion, finely chopped
  • 1/2 cup bell pepper, diced
  • 1/2 cup milk
  • Salt and pepper to taste
  • 1 teaspoon garlic powder
  • 1 teaspoon Italian seasoning
  • 1/2 cup shredded cheese (optional)

Instructions

  1. Preheat the oven to 350°F (175°C) and grease a muffin tin with cooking spray or oil.
  2. In a large bowl, whisk together the eggs and milk until well combined.
  3. Add the chopped spinach, halved cherry tomatoes, onion, bell pepper, salt, pepper, garlic powder, and Italian seasoning to the egg mixture. Stir until evenly mixed.
  4. If using, fold in the shredded cheese.
  5. Pour the mixture evenly into the prepared muffin tin, filling each cup about 3/4 full.
  6. Bake for 18-20 minutes, or until the muffins are set and lightly golden on top.
  7. Remove from the oven and let them cool for a few minutes before carefully removing the muffins from the tin.
  8. Serve warm or allow to cool completely before storing.

Notes

Tip: These frittata muffins are great for meal prep and can be stored in the fridge or freezer for easy breakfasts throughout the week.

To ensure your frittata muffins rise nicely, make sure to beat the eggs well and avoid overfilling the muffin tins. If you want to make them extra cheesy, feel free to add feta or shredded cheese of your choice. For storage, keep them in an airtight container in the fridge for up to 5 days. They also freeze well, so you can make a big batch and reheat as needed!

Common mistakes include not greasing the muffin tin properly, which can lead to sticking, and undercooking the muffins. Make sure they are fully set in the middle before removing them from the oven.

September 4, 2026 0 comments
0 FacebookTwitterPinterestPocketEmail
Decadent Maple-Bourbon Bacon French Toast Casserole
Breakfast & BrunchKid-FriendlyQuick & Easy (30-Min)

Decadent Maple-Bourbon Bacon French Toast Casserole

by Linda September 4, 2026
written by Linda

This Maple-Bourbon Bacon French Toast Casserole is the ultimate brunch showstopper! Combining the luscious flavors of maple syrup and bourbon with crispy bacon, this dish is sure to impress your guests.

Perfect for special occasions or a cozy weekend breakfast, this casserole is easy to prepare ahead of time. The bread absorbs all the delicious flavors overnight, making it a convenient choice for busy mornings.

Decadent Maple-Bourbon Bacon French Toast Casserole

Decadent Maple-Bourbon Bacon French Toast Casserole

Serves: 8 Prep Time: 20 minutes Cooking Time: 45 minutes 45 minutes
Nutrition facts: 450 calories 20g fat
Rating: 5.0/5
( 1 voted )
Pin
Print

Ingredients

INGREDIENTS

  • 12 slices of thick-cut bread (such as brioche or challah)
  • 8 large eggs
  • 2 cups milk
  • 1/2 cup maple syrup
  • 1/4 cup bourbon
  • 1 teaspoon vanilla extract
  • 1/2 teaspoon ground cinnamon
  • 1/4 teaspoon salt
  • 8 slices of cooked bacon, chopped
  • Optional: additional maple syrup for serving

Instructions

  1. Preheat your oven to 350°F (175°C).
  2. Grease a 9x13-inch baking dish with butter or cooking spray.
  3. Cut the bread into cubes and place them in the prepared baking dish.
  4. In a large bowl, whisk together the eggs, milk, maple syrup, bourbon, vanilla extract, cinnamon, and salt until well combined.
  5. Pour the egg mixture evenly over the bread cubes, ensuring all pieces are soaked.
  6. Sprinkle the chopped bacon over the top of the casserole.
  7. Cover the dish with plastic wrap and refrigerate for at least 4 hours, or overnight for best results.
  8. Remove the casserole from the refrigerator and let it sit at room temperature for 15 minutes before baking.
  9. Bake in the preheated oven for 40-45 minutes, or until the top is golden brown and set.
  10. Let it cool slightly before serving. Drizzle with additional maple syrup if desired.

Notes

Tip: This casserole can be assembled the night before for an easy, stress-free brunch.

For an extra touch, try adding chopped pecans or walnuts for crunch. You can also substitute the bread with challah or brioche for an even richer flavor.

To store leftovers, simply cover and refrigerate for up to 3 days. Reheat in a 350°F oven until warmed through. If it seems too dry, add a splash of milk while reheating.

September 4, 2026 0 comments
0 FacebookTwitterPinterestPocketEmail
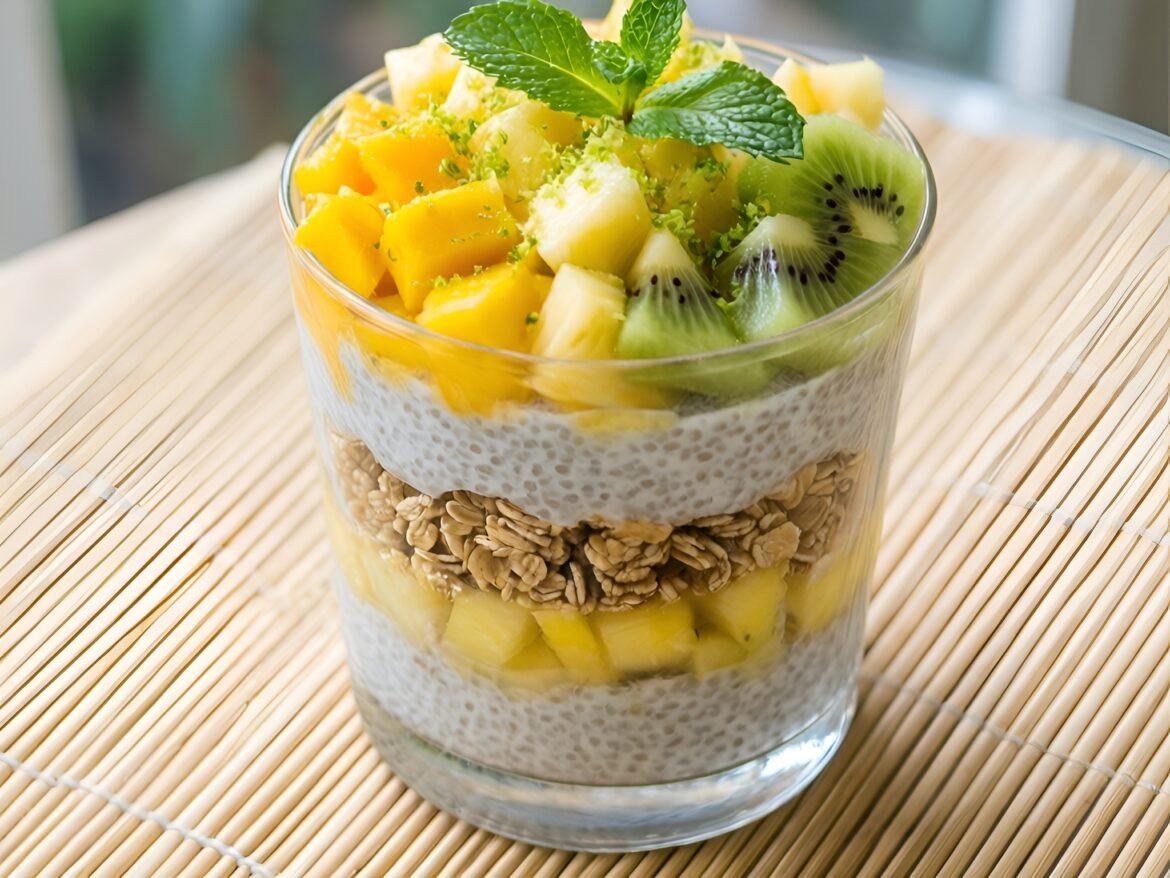
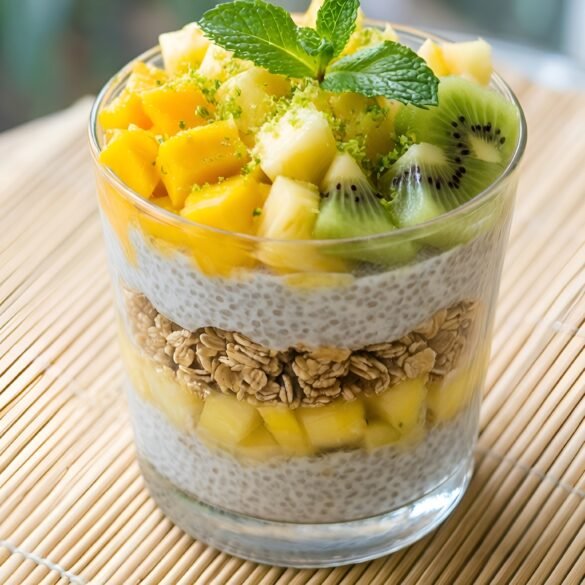
Creamy Coconut-Lime Chia Pudding Parfait with Tropical Toppings
Breakfast & BrunchQuick & Easy (30-Min)VeganVegetarian

Creamy Coconut-Lime Chia Pudding Parfait with Tropical Toppings

by Linda September 4, 2026
written by Linda

This Coconut-Lime Chia Pudding Parfait is the perfect blend of creamy, tangy, and sweet, making it an irresistible treat for breakfast or dessert. The chia seeds create a rich pudding-like texture, while the coconut milk adds a luscious creaminess infused with a bright lime zest that truly elevates the dish.

Layered with fresh tropical fruits and crunchy granola, this parfait is as pleasing to the eye as it is to the palate. It’s not only delicious but also packed with nutrients, making it a healthy choice for any time of the day!

Creamy Coconut-Lime Chia Pudding Parfait with Tropical Toppings

Creamy Coconut-Lime Chia Pudding Parfait with Tropical Toppings

Serves: 2 Prep Time: 10 minutes Cooking Time: 0 minutes 0 minutes
Nutrition facts: 320 calories 15g fat
Rating: 5.0/5
( 1 voted )
Pin
Print

Ingredients

INGREDIENTS

  • 1/2 cup chia seeds
  • 2 cups coconut milk
  • 1/4 cup honey or maple syrup
  • Zest of 1 lime
  • Juice of 1 lime
  • 1/2 teaspoon vanilla extract
  • 1 cup granola
  • 1 cup mixed tropical fruits (such as mango, pineapple, and kiwi), diced

Instructions

  1. In a bowl, combine chia seeds, coconut milk, honey (or maple syrup), lime zest, lime juice, and vanilla extract.
  2. Whisk together until well mixed, and let it sit for 5 minutes before whisking again to break up any clumps of chia seeds.
  3. Cover the bowl and refrigerate for at least 2 hours or overnight until the mixture thickens to a pudding-like consistency.
  4. Once thickened, layer the chia pudding in serving glasses with granola and diced tropical fruits.
  5. Repeat the layers until the glasses are full, finishing with a layer of fruit on top for garnish.

Notes

Tip: For a sweeter taste, adjust the amount of honey or maple syrup according to your preference.

For a quicker version, you can prepare the chia pudding the night before and refrigerate it overnight; this allows the seeds to fully absorb the liquid and swell up. If you prefer a sweeter pudding, feel free to add a bit of honey or maple syrup to taste.

Variations can include swapping out lime for lemon or adding different fruits like mango or kiwi. The parfait can be stored in the refrigerator for up to 3 days, but it’s best enjoyed fresh!

September 4, 2026 0 comments
0 FacebookTwitterPinterestPocketEmail
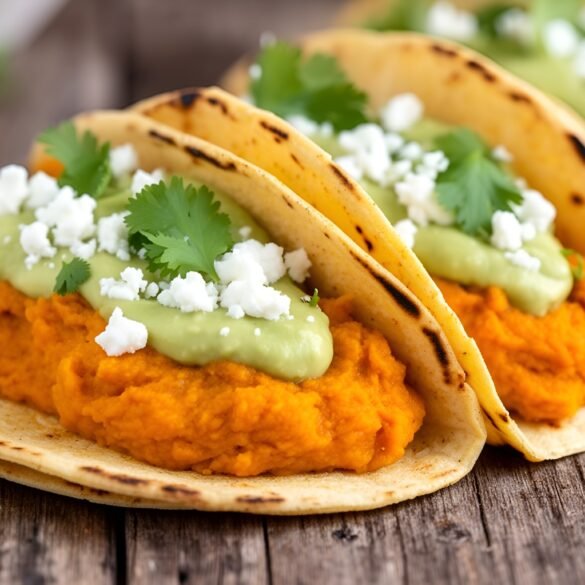
Spiced Pumpkin-Chipotle Breakfast Tacos with Avocado Crema
Breakfast & BrunchQuick & Easy (30-Min)Vegetarian

Spiced Pumpkin-Chipotle Breakfast Tacos with Avocado Crema

by Linda September 4, 2026
written by Linda

These Spiced Pumpkin-Chipotle Breakfast Tacos are a delightful way to awaken your breakfast routine, combining the earthiness of pumpkin with a smoky chipotle kick. The unique flavor profile not only satisfies your taste buds but also keeps you full and energized throughout the morning.

Made with warm tortillas, a savory pumpkin filling, and topped with an avocado crema, these tacos are not only delicious but also quick to prepare. Perfect for a leisurely weekend brunch or a busy weekday morning, they bring a burst of flavors and textures in each bite.

Spiced Pumpkin-Chipotle Breakfast Tacos with Avocado Crema

Spiced Pumpkin-Chipotle Breakfast Tacos with Avocado Crema

Serves: 4 Prep Time: 15 minutes Cooking Time: 20 minutes 20 minutes
Nutrition facts: 250 calories 12g fat
Rating: 5.0/5
( 1 voted )
Pin
Print

Ingredients

INGREDIENTS

  • 1 can (15 oz) pumpkin puree
  • 1 tablespoon chipotle in adobo sauce, minced
  • 1 teaspoon cumin
  • 1 teaspoon smoked paprika
  • Salt and pepper, to taste
  • 8 small corn tortillas
  • 1 ripe avocado
  • 1/4 cup Greek yogurt or sour cream
  • 1 tablespoon lime juice
  • Fresh cilantro, for garnish
  • Feta cheese, for topping (optional)

Instructions

  1. In a skillet over medium heat, combine the pumpkin puree, minced chipotle, cumin, smoked paprika, salt, and pepper. Stir well and cook for about 5-7 minutes until heated through.
  2. While the pumpkin mixture cooks, warm the corn tortillas in another skillet or microwave until pliable.
  3. In a small bowl, mash the avocado and mix in the Greek yogurt and lime juice until smooth. Season with salt to taste.
  4. To assemble the tacos, place a generous spoonful of the pumpkin filling on each tortilla, followed by a dollop of avocado crema.
  5. Garnish the tacos with fresh cilantro and crumbled feta cheese if desired. Serve warm and enjoy!

Notes

Tip: For added flavor, consider roasting the tortillas lightly on a skillet before filling them.

When making the avocado crema, feel free to add a squeeze of lime juice for an extra zesty kick. If chipotle is too spicy for your taste, you can use smoked paprika as a milder alternative.

To store leftovers, keep the filling and tortillas separate in the fridge. They can be reheated individually in a skillet over medium heat for a few minutes until warmed through.

September 4, 2026 0 comments
0 FacebookTwitterPinterestPocketEmail
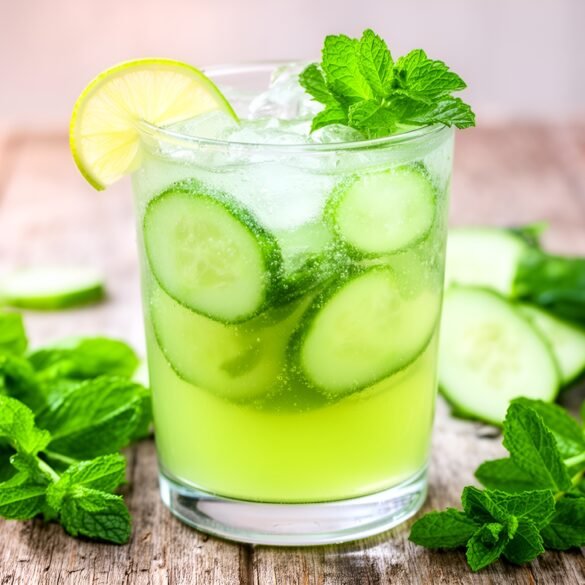
Refreshing Cucumber-Mint Spritz with a Citrus Twist
Drinks & BeveragesGluten-FreeQuick & Easy (30-Min)Vegan

Refreshing Cucumber-Mint Spritz with a Citrus Twist

by Linda September 3, 2026
written by Linda

Embrace the summer heat with this invigorating Cucumber-Mint Spritz! This light and refreshing beverage combines crisp cucumber, aromatic mint, and a splash of citrus, making it the ultimate thirst-quencher for hot days. Its vibrant flavors are perfect for outdoor gatherings, picnics, or simply unwinding after a long day.

The unique twist of lime and sparkling water adds a delightful fizz, enhancing the freshness of cucumber and mint. Serve it over ice for a visually stunning and deliciously hydrating drink that everyone will love. Ideal for family gatherings or casual brunches, this spritz is a must-try this season!

Refreshing Cucumber-Mint Spritz with a Citrus Twist

Refreshing Cucumber-Mint Spritz with a Citrus Twist

Serves: 4 Prep Time: 10 minutes Cooking Time: 0 minutes 0 minutes
Nutrition facts: 60 calories 0g fat
Rating: 5.0/5
( 1 voted )
Pin
Print

Ingredients

INGREDIENTS

  • 1 large cucumber, thinly sliced
  • 1/2 cup fresh mint leaves
  • Juice of 2 limes
  • 2 tablespoons honey or agave syrup (optional)
  • 3 cups sparkling water
  • Ice cubes
  • Lime wedges and mint sprigs for garnish

Instructions

  1. Muddle the cucumber slices and mint leaves in a large pitcher or bowl to release their flavors.
  2. Add the lime juice and honey/agave syrup (if using) to the pitcher and stir well until combined.
  3. Pour in the sparkling water and gently mix to combine the ingredients without losing the fizz.
  4. Fill glasses with ice cubes and pour the cucumber-mint mixture over the ice.
  5. Garnish with additional cucumber slices, lime wedges, and fresh mint sprigs before serving.

Notes

Note: This spritz is best enjoyed fresh, but you can prepare the cucumber and mint mixture ahead of time and add sparkling water just before serving.

For an added twist, try infusing your spritz with a hint of ginger or basil for a unique flavor profile. If you’re looking for a sweeter version, consider adding a splash of elderflower cordial or simple syrup.

To make this drink even more festive, garnish with extra cucumber slices and mint leaves. If you’re preparing for a crowd, you can easily scale the recipe up in a pitcher. This drink is best served fresh, but you can prepare the cucumber and mint mixture in advance and mix in the sparkling water just before serving.

September 3, 2026 0 comments
0 FacebookTwitterPinterestPocketEmail
Newer Posts
Older Posts

Recent Posts

  • Vibrant Roasted Beet, Feta, and Citrus Salad with a Honey-Lime Dressing

    September 13, 2026
  • Creamy Tomato-Basil Bisque with a Twist

    September 13, 2026
  • Autumn Harvest Butternut Squash and Apple Salad with Spicy Maple Dressing

    September 13, 2026
  • Hearty Lentil and Spinach Rustic Summer Soup

    September 13, 2026
  • Chilled Avocado-Cucumber Frappe with Lime Zest

    September 13, 2026

About Me

About Me

I'm Linda, a health professional, university graduate, and author sharing tested, easy-to-follow recipes made from simple, everyday ingredients. Based in Finland, I bring together my culinary training, love of travel, and home-cooked roots to help you cook confidently, on any budget.

Products

  • Spooky Creative Starry Sky Ceramic Mug Spooky Creative Starry Sky Ceramic Mug 10,00 €

Categories

  • Appetizers & Snacks (157)
  • Breakfast & Brunch (126)
  • Desserts & Baking (160)
  • Drinks & Beverages (129)
  • Gluten-Free (200)
  • Grilling & BBQ (11)
  • Healthy & Low-Calorie (190)
  • Holiday & Seasonal (20)
  • Kid-Friendly (232)
  • Main Dishes (185)
  • Quick & Easy (30-Min) (668)
  • Slow Cooker & Instant Pot (4)
  • Soups & Salads (109)
  • Vegan (158)
  • Vegetarian (549)

About Me

I'm Linda, a health professional and food writer sharing tested, easy-to-follow recipes made from simple ingredients.

Email: jspiceygiftstv@gmail.com

Useful Links

  • Home
  • About
  • Contact
  • Free Cookbooks
  • Terms and Conditions
  • Privacy Policy

Newsletter

Subscribe to to our Newsletter to stay updated with all our recipes.

Recent Posts

  • Vibrant Roasted Beet, Feta, and Citrus Salad with a Honey-Lime Dressing

    September 13, 2026
  • Creamy Tomato-Basil Bisque with a Twist

    September 13, 2026
  • Instagram
  • Pinterest
  • Youtube
  • Tiktok

@2026 - All Right Reserved. Designed and Developed by JSpiceyGifts

J Spicey Gifts
  • Home
  • Recipes
    • Breakfast & Brunch
    • Appetizers & Snacks
    • Main Dishes
    • Soups & Salads
    • Desserts & Baking
    • Drinks & Beverages
  • Categories
    • Vegetarian
    • Vegan
    • Gluten-Free
    • Quick & Easy (30-Min)
    • Slow Cooker & Instant Pot
    • Grilling & BBQ
    • Healthy & Low-Calorie
    • Holiday & Seasonal
    • Kid-Friendly
  • About
  • Contact

Shopping Cart

Close

No products in the cart.

Close