J Spicey Gifts
  • Home
  • Recipes
    • Breakfast & Brunch
    • Appetizers & Snacks
    • Main Dishes
    • Soups & Salads
    • Desserts & Baking
    • Drinks & Beverages
  • Categories
    • Vegetarian
    • Vegan
    • Gluten-Free
    • Quick & Easy (30-Min)
    • Slow Cooker & Instant Pot
    • Grilling & BBQ
    • Healthy & Low-Calorie
    • Holiday & Seasonal
    • Kid-Friendly
  • About
  • Contact
Top Posts
Decadent Salted Caramel Espresso Brownies with a Rich...
Brilliant Blackberry Lime Meringue Tart
Delicious Raspberry Almond Tartlets with Honey Drizzle
Layered Coconut Cream Pie Parfaits
Zesty Lemon Blueberry Swirl Cheesecake Delight
Crunchy Caramel Pecan Delight Bars
Cinnamon Spice Churro Cupcakes: A Sweet Twist on...
Decadent Chocolate Hazelnut Dream Pillows
Vibrant Roasted Beet, Feta, and Citrus Salad with...
Creamy Tomato-Basil Bisque with a Twist
J Spicey Gifts
  • Home
  • Recipes
    • Breakfast & Brunch
    • Appetizers & Snacks
    • Main Dishes
    • Soups & Salads
    • Desserts & Baking
    • Drinks & Beverages
  • Categories
    • Vegetarian
    • Vegan
    • Gluten-Free
    • Quick & Easy (30-Min)
    • Slow Cooker & Instant Pot
    • Grilling & BBQ
    • Healthy & Low-Calorie
    • Holiday & Seasonal
    • Kid-Friendly
  • About
  • Contact
J Spicey Gifts
J Spicey Gifts
  • Home
  • Recipes
    • Breakfast & Brunch
    • Appetizers & Snacks
    • Main Dishes
    • Soups & Salads
    • Desserts & Baking
    • Drinks & Beverages
  • Categories
    • Vegetarian
    • Vegan
    • Gluten-Free
    • Quick & Easy (30-Min)
    • Slow Cooker & Instant Pot
    • Grilling & BBQ
    • Healthy & Low-Calorie
    • Holiday & Seasonal
    • Kid-Friendly
  • About
  • Contact
Copyright 2021 - All Right Reserved
Decadent Cinnamon-Swirled Maple Nectar Cheesecake
Desserts & BakingQuick & Easy (30-Min)Vegetarian

Decadent Cinnamon-Swirled Maple Nectar Cheesecake

by Linda August 23, 2026
written by Linda

Experience a delightful fusion of flavors with this Cinnamon-Swirled Maple Nectar Cheesecake. The creamy texture, combined with the warm notes of cinnamon and the sweetness of maple syrup, creates a truly decadent dessert that is sure to impress.

This cheesecake is not only visually stunning with its beautiful swirls, but it also boasts a rich and smooth filling that melts in your mouth. The buttery graham cracker crust adds a perfect crunch, balancing the overall dessert beautifully.

Decadent Cinnamon-Swirled Maple Nectar Cheesecake

Decadent Cinnamon-Swirled Maple Nectar Cheesecake

Serves: 8 Prep Time: 30 minutes Cooking Time: 60 minutes 60 minutes
Nutrition facts: 350 calories 22g fat
Rating: 5.0/5
( 1 voted )
Pin
Print

Ingredients

INGREDIENTS

  • 1 1/2 cups graham cracker crumbs
  • 1/3 cup unsalted butter, melted
  • 1/4 cup sugar
  • 4 (8-ounce) packages cream cheese, softened
  • 1 cup maple nectar
  • 1 teaspoon vanilla extract
  • 4 large eggs
  • 1 teaspoon ground cinnamon
  • 1/4 teaspoon salt
  • 1/2 cup sour cream

Instructions

  1. Preheat the oven to 325°F (160°C).
  2. In a mixing bowl, combine graham cracker crumbs, melted butter, and sugar. Press the mixture into the bottom of a 9-inch springform pan to form the crust.
  3. In a large bowl, beat the cream cheese until smooth and creamy. Gradually add the maple nectar and vanilla extract, mixing until well combined.
  4. Add the eggs, one at a time, mixing on low speed until just incorporated. Be careful not to overmix.
  5. Stir in the ground cinnamon and salt. Pour the cream cheese mixture over the prepared crust in the springform pan.
  6. Use a spatula to create swirls in the cheesecake by drizzling some extra maple nectar on top and gently folding it into the batter.
  7. Bake in the preheated oven for about 60 minutes, or until the center is set but still slightly jiggly. Turn off the oven and leave the cheesecake inside for 1 hour to cool gradually.
  8. Remove the cheesecake from the oven and let it cool to room temperature before refrigerating for at least 4 hours or overnight.
  9. Before serving, spread sour cream over the top for added creaminess, if desired. Slice and enjoy!

Notes

Note: For best results, allow the cheesecake to chill overnight to enhance its flavors and texture.

For a successful cheesecake, ensure all ingredients are at room temperature before mixing to achieve a smooth batter. Avoid overmixing to prevent cracks in the surface.

Feel free to substitute the maple nectar with honey or agave syrup for a different flavor profile. You can also add a pinch of nutmeg or ginger for an extra spice kick. Store leftovers in the refrigerator for up to 5 days, and allow the cheesecake to come to room temperature before serving for the best texture.
August 23, 2026 0 comments
0 FacebookTwitterPinterestPocketEmail
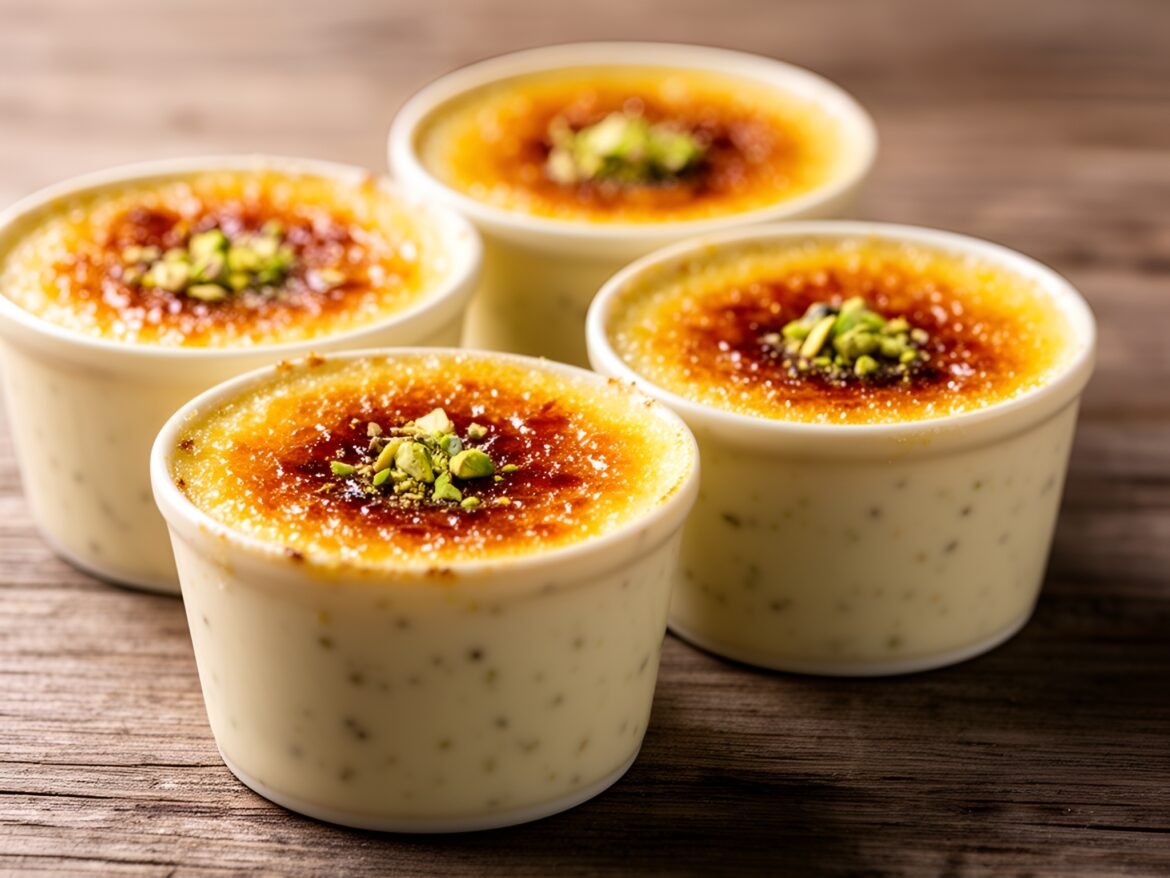
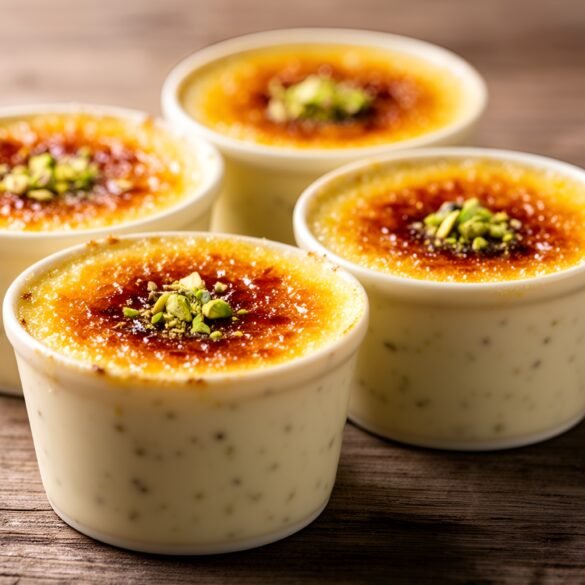
Creamy Vanilla-Pistachio Crème Brûlée Cups
Desserts & BakingVegetarian

Creamy Vanilla-Pistachio Crème Brûlée Cups

by Linda August 23, 2026
written by Linda

These creamy Vanilla-Pistachio Crème Brûlée Cups are a luxurious dessert that combines the rich flavors of vanilla and pistachio, creating a delightful treat that is sure to impress. The velvety custard base is infused with real vanilla bean and ground pistachios, yielding a unique flavor profile that pairs beautifully with the crispy caramelized sugar topping.

Perfect for special occasions or simply to satisfy your sweet cravings, these crème brûlées are not only elegant but also surprisingly easy to make. With a little patience, you can achieve that iconic crack when you break through the sugary crust, revealing the smooth custard underneath. This dessert is a true showstopper!

Creamy Vanilla-Pistachio Crème Brûlée Cups

Creamy Vanilla-Pistachio Crème Brûlée Cups

Serves: 4 Prep Time: 30 minutes Cooking Time: 40 minutes 40 minutes
Nutrition facts: 320 calories 25g fat
Rating: 5.0/5
( 1 voted )
Pin
Print

Ingredients

INGREDIENTS

  • 1 cup heavy cream
  • 1 cup whole milk
  • 1/2 cup granulated sugar
  • 1/4 cup ground pistachios
  • 1 vanilla bean, split and scraped
  • 4 large egg yolks
  • 1/4 teaspoon salt
  • 1/4 cup granulated sugar (for topping)

Instructions

  1. Preheat your oven to 325°F (160°C).
  2. In a medium saucepan, combine the heavy cream, whole milk, granulated sugar, ground pistachios, and the scraped vanilla bean along with its pod. Heat the mixture over medium heat until it is hot but not boiling, stirring occasionally.
  3. In a bowl, whisk together the egg yolks and salt until well combined.
  4. Gradually pour the hot cream mixture into the egg yolks, whisking constantly to temper the eggs and prevent scrambling.
  5. Strain the custard through a fine mesh sieve into a bowl to remove the vanilla pod and any lumps. Allow the mixture to cool slightly.
  6. Divide the custard evenly among four ramekins and place them in a baking dish. Carefully fill the baking dish with hot water until it reaches halfway up the sides of the ramekins.
  7. Bake for 35-40 minutes, or until the custard is set but still slightly wobbly in the center.
  8. Remove the ramekins from the water bath and let them cool to room temperature. Chill in the refrigerator for at least 4 hours or overnight.
  9. Before serving, sprinkle 1 tablespoon of granulated sugar evenly over each custard. Use a kitchen torch to caramelize the sugar until it forms a crispy top. Let the sugar harden for a minute before serving.

Notes

Tip: Use a kitchen torch for the best caramelization results. If you don’t have one, you can place the ramekins under the broiler for a minute or two, watching closely to prevent burning.

For the best flavor, use high-quality vanilla beans instead of vanilla extract. If you want a stronger pistachio flavor, feel free to add more ground pistachios to the custard mixture.

Watch the caramelizing process closely to avoid burning the sugar. You can use a kitchen torch for a precise melt, or broil the cups in the oven for a quick caramelized top.

Store any leftover crème brûlée cups in the refrigerator without the sugar topping. To serve later, simply sprinkle sugar on top and torch it just before enjoying.

August 23, 2026 0 comments
0 FacebookTwitterPinterestPocketEmail
Chocolate-Drenched Cherry Almond Dream
Desserts & BakingQuick & Easy (30-Min)Vegetarian

Chocolate-Drenched Cherry Almond Dream

by Linda August 23, 2026
written by Linda

Experience a dessert that perfectly balances sweet and nutty flavors with the Chocolate-Drenched Cherry Almond Dream. This decadent treat combines juicy cherries, creamy almond layers, and a luscious chocolate coating that will leave you dreaming for more.

Ideal for any occasion, whether a cozy night in or a festive gathering, this recipe is a showstopper. The combination of the bright cherry flavor with the richness of chocolate makes each bite an unforgettable experience.

Chocolate-Drenched Cherry Almond Dream

Chocolate-Drenched Cherry Almond Dream

Serves: 8 Prep Time: 30 minutes Cooking Time: 15 minutes 15 minutes
Nutrition facts: 320 calories 18g fat
Rating: 5.0/5
( 1 voted )
Pin
Print

Ingredients

INGREDIENTS

  • 1 cup fresh cherries, pitted and halved
  • 1 cup almond flour
  • 1/2 cup granulated sugar
  • 1/4 cup unsalted butter, melted
  • 1/2 teaspoon almond extract
  • 1/2 cup heavy cream
  • 8 oz dark chocolate, chopped
  • 1 tablespoon vegetable oil
  • 1/4 cup sliced almonds, for garnish

Instructions

  1. Preheat your oven to 350°F (175°C).
  2. In a mixing bowl, combine almond flour, sugar, and melted butter. Mix well until crumbly.
  3. Press the mixture into the bottom of a greased 9-inch square baking pan, forming an even layer.
  4. Bake for 10-15 minutes or until lightly golden brown. Remove from oven and let cool completely.
  5. In a separate bowl, whip the heavy cream until soft peaks form. Fold in the almond extract, being careful not to deflate the cream.
  6. Spread the whipped cream evenly over the cooled almond crust, then scatter the halved cherries on top.
  7. In a microwave-safe bowl, combine dark chocolate and vegetable oil. Microwave in 30-second intervals, stirring in between, until melted and smooth.
  8. Pour the melted chocolate over the cherry layer, ensuring an even coat. Tap the pan gently to remove any air bubbles.
  9. Sprinkle sliced almonds on top of the chocolate layer for garnish.
  10. Refrigerate for at least 2 hours or until chocolate is set. Cut into squares and serve. Enjoy!

Notes

Tip: For an even richer flavor, use bittersweet chocolate for the drizzle instead of dark chocolate.

To enhance the almond flavor, consider using almond extract in the cream layer. For a twist, try substituting the cherries with raspberries or strawberries!

Leftovers can be stored in the refrigerator for up to three days. Allow the dessert to sit at room temperature for 10 minutes before serving to soften the chocolate.

August 23, 2026 0 comments
0 FacebookTwitterPinterestPocketEmail
Blissful Berry Bombshell Bars
Desserts & BakingQuick & Easy (30-Min)Vegetarian

Blissful Berry Bombshell Bars

by Linda August 23, 2026
written by Linda

These Blissful Berry Bombshell Bars are a vibrant, delicious treat that combines the sweetness of mixed berries with a buttery oat crust. Perfect for a snack or dessert, they are sure to impress with their colorful appearance and delightful taste. The bars are easy to make and feature a luscious yogurt drizzle that adds a creamy finish to each bite.

Whether you’re hosting a summer gathering or simply craving something sweet, these bars are the perfect solution. With their fresh berry flavor and satisfying texture, they are a blissful addition to any occasion!

Blissful Berry Bombshell Bars

Blissful Berry Bombshell Bars

Serves: 12 Prep Time: 15 minutes Cooking Time: 30 minutes 30 minutes
Nutrition facts: 200 calories 9g fat
Rating: 5.0/5
( 1 voted )
Pin
Print

Ingredients

INGREDIENTS

  • 1 1/2 cups rolled oats
  • 1 cup all-purpose flour
  • 1/2 cup brown sugar
  • 1/2 teaspoon baking powder
  • 1/4 teaspoon salt
  • 1/2 cup unsalted butter, melted
  • 2 cups mixed berries (strawberries, blueberries, raspberries)
  • 1/2 cup Greek yogurt
  • 2 tablespoons honey
  • 1 teaspoon vanilla extract

Instructions

  1. Preheat the oven to 350°F (175°C) and grease an 8x8-inch baking pan.
  2. In a mixing bowl, combine rolled oats, flour, brown sugar, baking powder, and salt. Stir in melted butter until well mixed.
  3. Press the oat mixture firmly into the bottom of the prepared baking pan to form the crust.
  4. Spread the mixed berries evenly over the crust, pressing them in slightly.
  5. Bake for 25-30 minutes, or until the edges are golden brown and the berries are bubbly.
  6. While the bars are baking, whisk together Greek yogurt, honey, and vanilla extract in a small bowl. Set aside.
  7. Remove the bars from the oven and let cool in the pan for about 10 minutes before slicing into squares.
  8. Drizzle the yogurt mixture over the bars before serving. Enjoy!

Notes

Tip: For added sweetness, feel free to sprinkle a little extra brown sugar over the top before baking.

For a gluten-free version, substitute regular oats with gluten-free oats. You can also mix and match berries based on what’s in season or your personal preference—raspberries, blueberries, and strawberries work beautifully together.

If you want to make these bars ahead of time, store them in an airtight container in the fridge for up to 5 days. Reheat them slightly in the microwave for a warm treat!

August 23, 2026 0 comments
0 FacebookTwitterPinterestPocketEmail
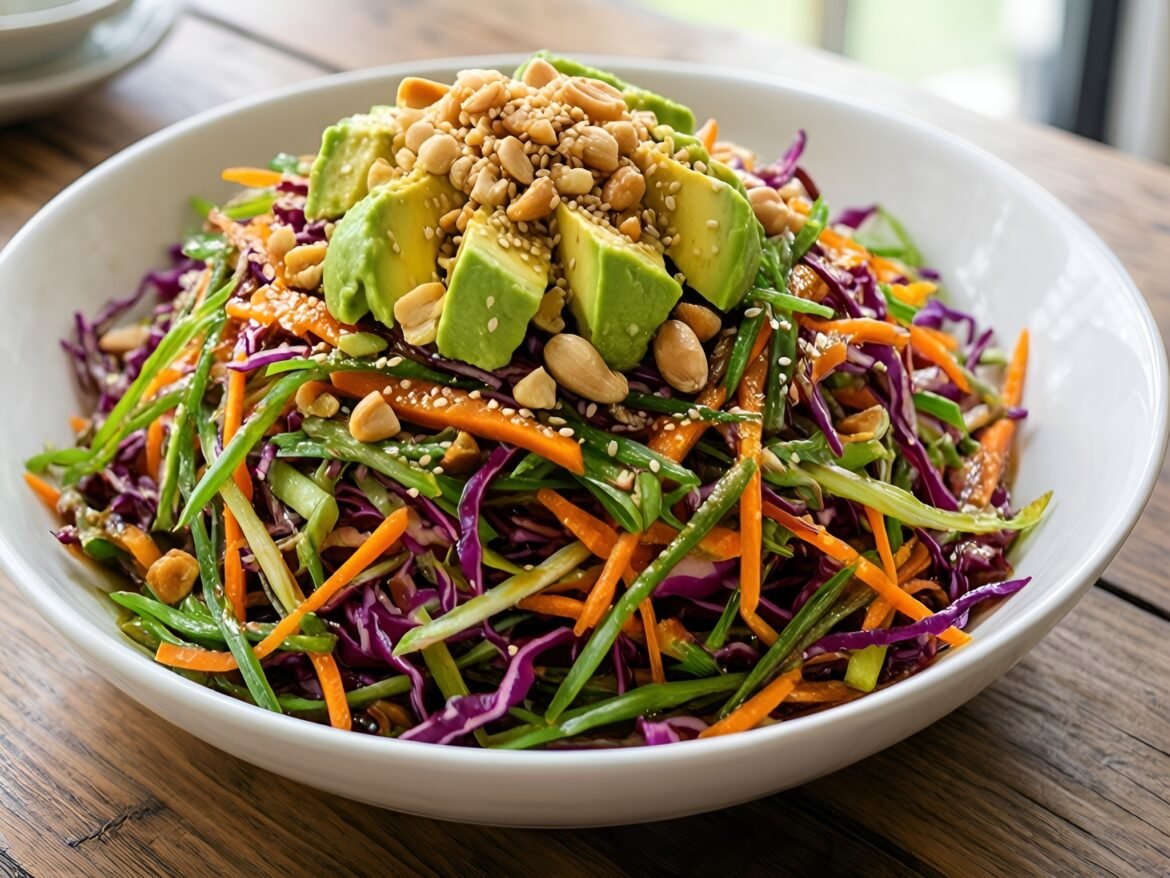
Crispy Asian Slaw with Creamy Avocado and Zesty Sesame-Ginger Dressing
Quick & Easy (30-Min)Soups & SaladsVegetarian

Crispy Asian Slaw with Creamy Avocado and Zesty Sesame-Ginger Dressing

by Linda August 23, 2026
written by Linda

This Crunchy Asian Slaw is not just another salad; it’s a vibrant medley of fresh vegetables tossed in a luscious sesame-ginger dressing. The addition of creamy avocado enhances the texture and adds a delightful richness to every bite.

Perfect for summer barbecues or as a light meal, this slaw is incredibly easy to prepare and loaded with flavor. The combination of crisp cabbage, colorful carrots, and crunchy peanuts makes it a visually appealing and satisfying dish.

Crispy Asian Slaw with Creamy Avocado and Zesty Sesame-Ginger Dressing

Crispy Asian Slaw with Creamy Avocado and Zesty Sesame-Ginger Dressing

Serves: 4 Prep Time: 15 minutes Cooking Time: 0 minutes 0 minutes
Nutrition facts: 180 calories 12g fat
Rating: 5.0/5
( 1 voted )
Pin
Print

Ingredients

INGREDIENTS

  • 4 cups green cabbage, finely shredded
  • 1 cup carrots, grated
  • 1/2 cup red cabbage, finely shredded
  • 1/2 cup green onions, sliced
  • 1/2 cup cilantro, chopped
  • 1 avocado, diced
  • 1/4 cup peanuts, chopped
  • 2 tablespoons sesame seeds

FOR THE DRESSING

  • 3 tablespoons sesame oil
  • 2 tablespoons rice vinegar
  • 1 tablespoon soy sauce
  • 1 tablespoon honey or maple syrup
  • 1 teaspoon fresh ginger, grated
  • 1 clove garlic, minced
  • Salt and pepper to taste

Instructions

  1. In a large bowl, combine the green cabbage, carrots, red cabbage, green onions, and cilantro.
  2. In a separate small bowl, whisk together sesame oil, rice vinegar, soy sauce, honey, ginger, garlic, salt, and pepper until well combined.
  3. Pour the dressing over the slaw and toss to coat evenly.
  4. Add the diced avocado and gently mix in without mashing it.
  5. Sprinkle chopped peanuts and sesame seeds on top before serving.

Notes

Tip: For added protein, include grilled chicken or tofu. This slaw pairs beautifully with Asian-inspired dishes or can be enjoyed on its own as a light meal.

For the best crunch, try to slice the vegetables just before serving. You can customize this slaw by adding ingredients like bell peppers or snap peas for extra color and texture.

Store any leftovers in an airtight container, but keep the dressing separate until serving to maintain the crunch.

August 23, 2026 0 comments
0 FacebookTwitterPinterestPocketEmail
Silky Roasted Red Pepper and Tomato Basil Soup with Crunchy Parmesan Croutons
Gluten-FreeQuick & Easy (30-Min)Soups & SaladsVegetarian

Silky Roasted Red Pepper and Tomato Basil Soup with Crunchy Parmesan Croutons

by Linda August 23, 2026
written by Linda

Experience the perfect blend of flavors in this silky roasted red pepper and tomato basil soup. The sweet and smoky roasted red peppers combined with ripe tomatoes create a rich, comforting base that warms the soul. Fresh basil adds a bright touch, enhancing the soup’s aromatic profile.

To elevate your soup experience, homemade parmesan croutons provide a satisfying crunch. Their golden, cheesy exterior contrasts beautifully with the creamy soup, making each spoonful a delightful journey of texture and taste.

Silky Roasted Red Pepper and Tomato Basil Soup with Crunchy Parmesan Croutons

Silky Roasted Red Pepper and Tomato Basil Soup with Crunchy Parmesan Croutons

Serves: 4 Prep Time: 15 minutes Cooking Time: 30 minutes 30 minutes
Nutrition facts: 250 calories 12g fat
Rating: 5.0/5
( 1 voted )
Pin
Print

Ingredients

INGREDIENTS

  • 4 large red bell peppers
  • 4 medium ripe tomatoes
  • 1 medium onion, chopped
  • 4 cloves garlic, minced
  • 2 cups vegetable broth
  • 1 cup fresh basil leaves
  • 1/2 cup heavy cream (optional)
  • Salt and pepper to taste
  • 1 cup cubed bread (for croutons)
  • 1/2 cup grated Parmesan cheese
  • 2 tablespoons olive oil

Instructions

  1. Preheat the oven to 400°F (200°C).
  2. Cut the red bell peppers in half, remove the seeds, and place them cut-side down on a baking sheet. Roast for 25-30 minutes until the skins are charred and blistered.
  3. In a pot, heat olive oil over medium heat. Add the chopped onion and minced garlic, sautéing until translucent, about 5 minutes.
  4. Add the tomatoes, roasted red peppers, and vegetable broth to the pot. Simmer for 10-15 minutes.
  5. Remove from heat and stir in the fresh basil leaves. Use an immersion blender to puree the soup until smooth. If desired, stir in the heavy cream for added richness.
  6. For the croutons, toss bread cubes with olive oil, salt, and grated Parmesan. Spread them on a baking sheet and bake until golden and crispy, about 10 minutes.
  7. Serve the soup hot, topped with crunchy parmesan croutons.

Notes

For extra flavor, consider adding roasted garlic or a hint of smoked paprika to the soup.

For an extra layer of flavor, try adding a splash of balsamic vinegar or a pinch of red pepper flakes to the soup. If you’re looking for a healthier option, you can replace the cream with coconut milk for a dairy-free version.

To store leftovers, keep the soup and croutons separate to maintain their texture. The soup can be refrigerated in an airtight container for up to 4 days and frozen for up to 3 months. Reheat gently on the stove, adding a bit of water or broth if needed.

August 23, 2026 0 comments
0 FacebookTwitterPinterestPocketEmail
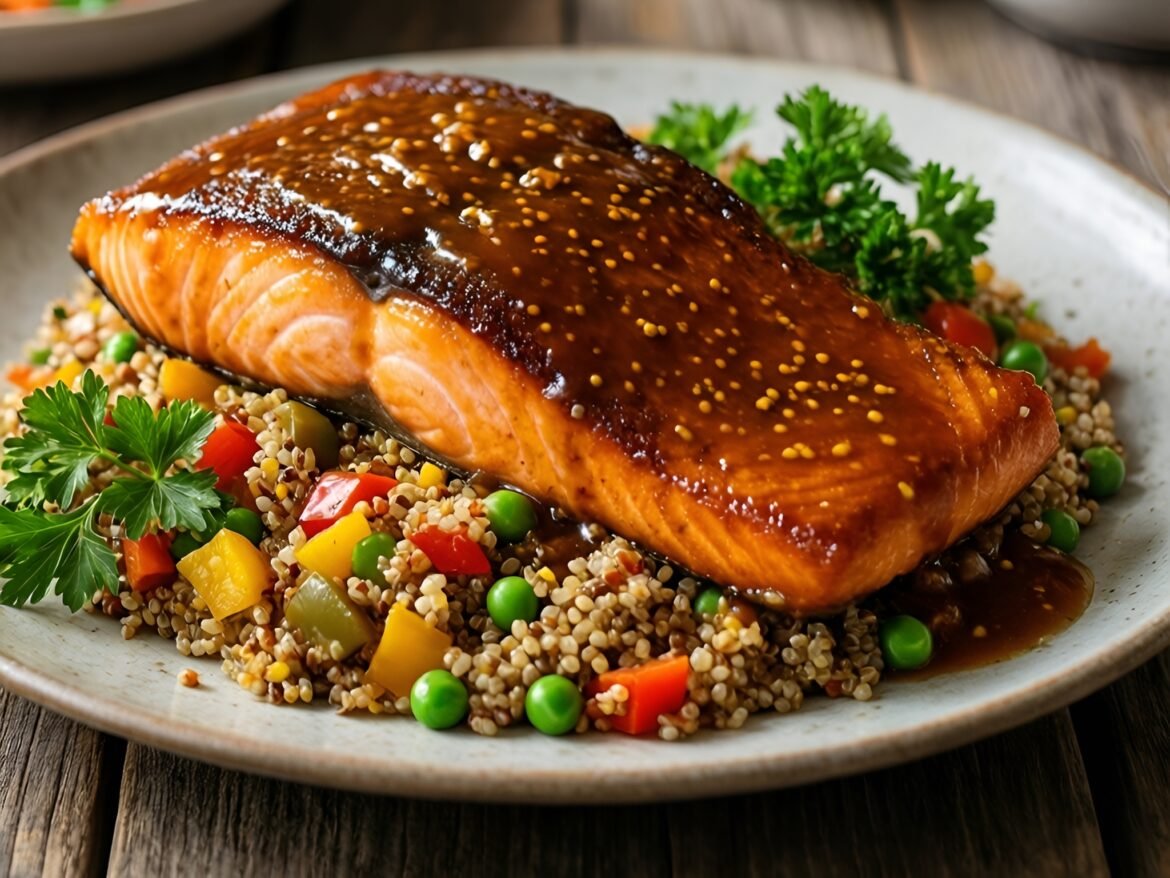
Savory Maple-Mustard Glazed Salmon with Quinoa Pilaf
Healthy & Low-CalorieMain DishesQuick & Easy (30-Min)

Savory Maple-Mustard Glazed Salmon with Quinoa Pilaf

by Linda August 22, 2026
written by Linda

This Maple-Mustard Glazed Salmon is a delightful twist on a classic seafood dish, boasting a sweet and tangy glaze that perfectly complements the richness of the fish. The glaze, made with pure maple syrup and zesty mustard, caramelizes beautifully as the salmon bakes, creating a glossy finish that is as appealing to the eyes as it is to the palate.

Paired with a light and fluffy quinoa pilaf, infused with fresh herbs and colorful vegetables, this dish is not only satisfying but also packed with nutrients. It’s an ideal choice for a wholesome weeknight dinner or a special gathering, showcasing vibrant flavors that everyone will enjoy.

Savory Maple-Mustard Glazed Salmon with Quinoa Pilaf

Savory Maple-Mustard Glazed Salmon with Quinoa Pilaf

Serves: 4 Prep Time: 15 minutes Cooking Time: 20 minutes 20 minutes
Nutrition facts: 350 calories 15g fat
Rating: 5.0/5
( 1 voted )
Pin
Print

Ingredients

INGREDIENTS

  • 4 salmon fillets
  • 1/4 cup pure maple syrup
  • 2 tablespoons Dijon mustard
  • 1 tablespoon olive oil
  • 1 cup quinoa
  • 2 cups vegetable broth
  • 1/2 cup diced bell pepper
  • 1/2 cup diced onion
  • 1/2 cup frozen peas
  • Salt and pepper to taste
  • Fresh parsley for garnish

Instructions

  1. Preheat your oven to 400°F (200°C).
  2. In a small bowl, whisk together the maple syrup, Dijon mustard, and olive oil until smooth.
  3. Place the salmon fillets on a parchment-lined baking sheet, skin-side down, and season with salt and pepper.
  4. Brush the maple-mustard glaze generously over each fillet.
  5. Bake the salmon in the preheated oven for 15-20 minutes, or until the salmon flakes easily with a fork.
  6. While the salmon is baking, rinse the quinoa under cold water.
  7. In a medium saucepan, combine the quinoa and vegetable broth. Bring to a boil, then reduce heat to low, cover, and simmer for 15 minutes.
  8. In a skillet, sauté the diced bell pepper and onion over medium heat until soft. Stir in the cooked quinoa and frozen peas, and season with salt and pepper to taste.
  9. Remove the salmon from the oven and let it rest for a few minutes before serving.
  10. Serve the glazed salmon over the quinoa pilaf, garnished with fresh parsley.

Notes

Tip: For a richer flavor, try using a mix of maple syrup and brown sugar in the glaze.

For added flavor, marinate the salmon in the maple-mustard mixture for 30 minutes before cooking. If you prefer a bit of heat, consider adding a pinch of cayenne pepper to the glaze.

Leftover salmon can be flaked and added to salads or wraps for a quick lunch. The quinoa pilaf stores well in the refrigerator for up to 3 days, making it a great meal prep option.

August 22, 2026 0 comments
0 FacebookTwitterPinterestPocketEmail
Savory Pumpkin and Sage Risotto with Crispy Shallots
Main DishesQuick & Easy (30-Min)Vegetarian

Savory Pumpkin and Sage Risotto with Crispy Shallots

by Linda August 22, 2026
written by Linda

This Savory Pumpkin and Sage Risotto is the perfect dish to celebrate the flavors of fall. Creamy arborio rice is infused with roasted pumpkin and fresh sage, creating a rich and comforting meal that’s perfect for cozy dinners.

Topping the risotto with crispy shallots adds a delightful crunch that contrasts beautifully with the smooth texture of the risotto. This dish not only tastes incredible but also brings a vibrant orange hue to your table, making it a feast for the eyes as well!

Savory Pumpkin and Sage Risotto with Crispy Shallots

Savory Pumpkin and Sage Risotto with Crispy Shallots

Serves: 4 Prep Time: 10 minutes Cooking Time: 30 minutes 30 minutes
Nutrition facts: 450 calories 15g fat
Rating: 5.0/5
( 1 voted )
Pin
Print

Ingredients

INGREDIENTS

  • 1 cup arborio rice
  • 2 cups pumpkin puree (canned or homemade)
  • 4 cups vegetable broth
  • 1 medium onion, finely chopped
  • 2 cloves garlic, minced
  • 1/2 cup dry white wine
  • 1/2 cup grated Parmesan cheese
  • 2 tablespoons fresh sage, chopped
  • 1/2 teaspoon salt
  • 1/2 teaspoon black pepper
  • 2 large shallots, thinly sliced
  • 1/4 cup all-purpose flour
  • Vegetable oil for frying
  • 2 tablespoons butter

Instructions

  1. Heat the vegetable broth in a saucepan and keep it warm over low heat.
  2. In a large skillet, melt 1 tablespoon of butter over medium heat. Add the chopped onion and sauté until translucent, about 5 minutes.
  3. Stir in the minced garlic and arborio rice, cooking for an additional 2 minutes until the rice is lightly toasted.
  4. Pour in the white wine and cook, stirring constantly, until the wine has mostly evaporated.
  5. Add the warm vegetable broth, one ladle at a time, stirring frequently until the liquid is absorbed before adding more. Repeat until the rice is creamy and al dente, about 18-20 minutes.
  6. Stir in the pumpkin puree, fresh sage, remaining butter, and Parmesan cheese. Season with salt and pepper to taste.
  7. In a separate pan, heat vegetable oil over medium-high heat. Dredge the shallots in flour, shaking off excess, and fry until golden brown and crispy, about 3-4 minutes. Drain on paper towels.
  8. Serve the risotto hot, garnished with crispy shallots on top. Enjoy!

Notes

Tip: For extra depth of flavor, consider roasting the pumpkin before adding it to the risotto.

To make this dish vegan, substitute the butter and cheese with olive oil and nutritional yeast. For a heartier version, consider adding cooked sausage or mushrooms.

Leftover risotto can be stored in the refrigerator for up to 3 days. Reheat with a splash of vegetable broth to restore its creamy texture. Enjoy it as a filling lunch or a side dish!

August 22, 2026 0 comments
0 FacebookTwitterPinterestPocketEmail
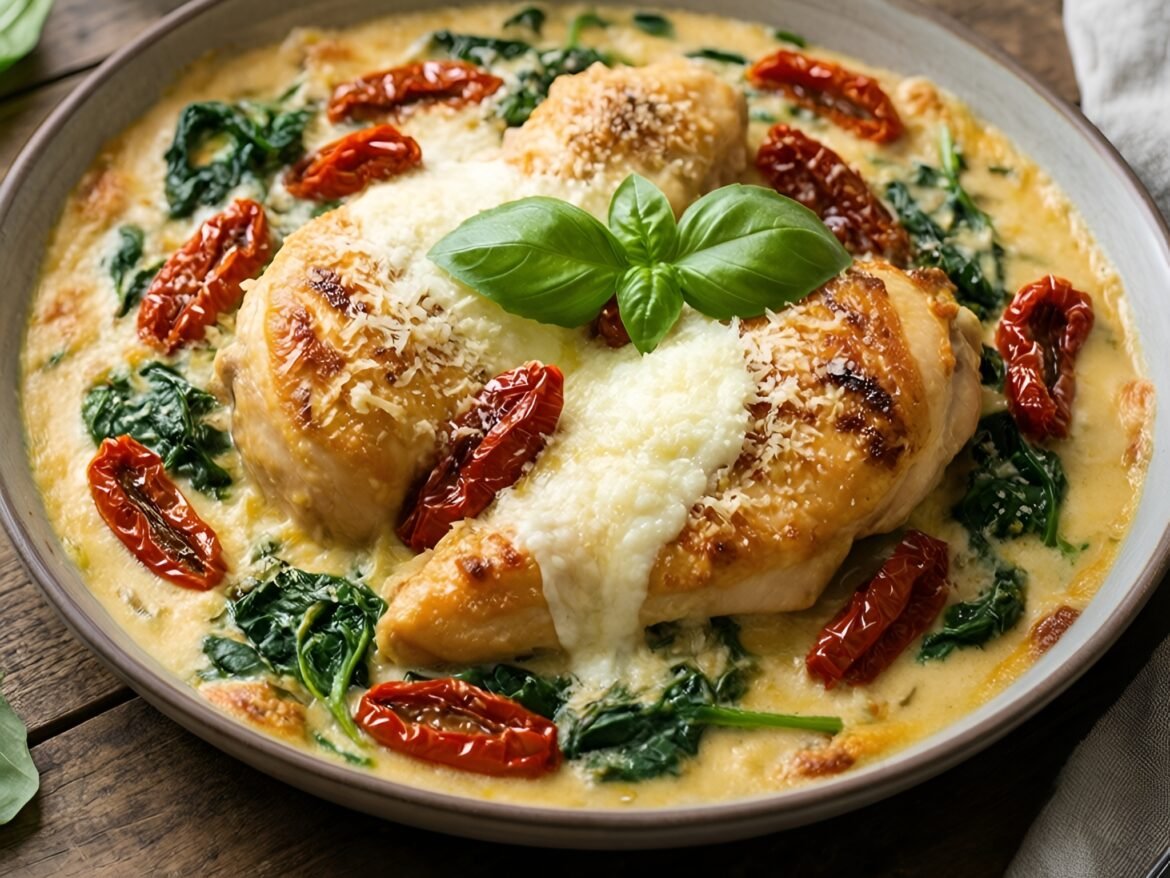
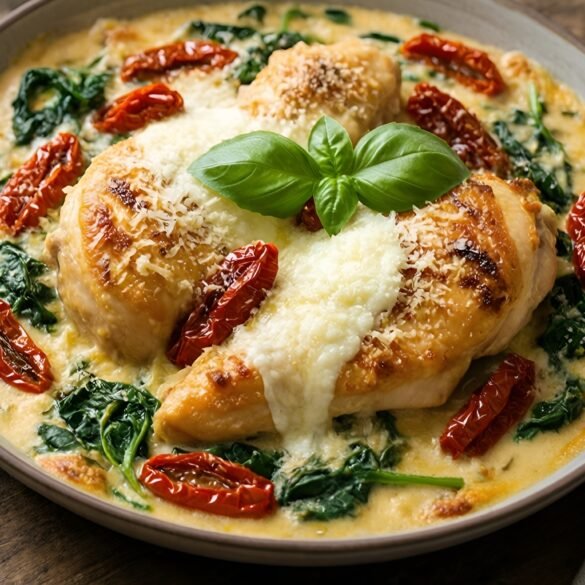
Creamy Tuscan Chicken Bake with Sun-Dried Tomatoes and Spinach
Kid-FriendlyMain DishesQuick & Easy (30-Min)

Creamy Tuscan Chicken Bake with Sun-Dried Tomatoes and Spinach

by Linda August 22, 2026
written by Linda

This Creamy Tuscan Chicken Bake is a delightful one-pan dish that combines tender chicken with the rich flavors of sun-dried tomatoes and fresh spinach. The creamy sauce, infused with garlic and Italian herbs, envelops the chicken, creating a satisfying and hearty meal that’s perfect for weeknight dinners or special occasions.

Using just a few simple ingredients, this dish is not only delicious but also quick to prepare. The sun-dried tomatoes add a lovely sweetness and depth, while the spinach brings a pop of color and nutrition. Bake it all together for a comforting meal that your family will love!

Creamy Tuscan Chicken Bake with Sun-Dried Tomatoes and Spinach

Creamy Tuscan Chicken Bake with Sun-Dried Tomatoes and Spinach

Serves: 4 Prep Time: 15 minutes Cooking Time: 30 minutes 30 minutes
Nutrition facts: 450 calories 30g fat
Rating: 5.0/5
( 1 voted )
Pin
Print

Ingredients

INGREDIENTS

  • 4 boneless, skinless chicken breasts
  • 1 cup sun-dried tomatoes, chopped
  • 2 cups fresh spinach
  • 1 cup heavy cream
  • 1 cup shredded mozzarella cheese
  • 1/2 cup grated parmesan cheese
  • 3 cloves garlic, minced
  • 1 teaspoon Italian seasoning
  • Salt and pepper to taste
  • 2 tablespoons olive oil
  • Fresh basil for garnish

Instructions

  1. Preheat your oven to 375°F (190°C).
  2. In a large skillet, heat olive oil over medium heat. Season the chicken breasts with salt and pepper, then sear them in the skillet for about 3-4 minutes per side until golden brown. Remove from skillet and set aside.
  3. In the same skillet, add minced garlic and cook for about 1 minute until fragrant. Reduce heat and add the sun-dried tomatoes, stirring to combine.
  4. Pour in the heavy cream and Italian seasoning, mixing well. Allow it to simmer for a few minutes until slightly thickened.
  5. Stir in the fresh spinach and let it wilt down, about 2-3 minutes. Remove from heat.
  6. Place the seared chicken breasts back into the skillet, spooning the creamy sauce over each piece. Top with shredded mozzarella and grated parmesan cheese.
  7. Transfer the skillet to the preheated oven and bake for 25-30 minutes, or until the chicken is cooked through and the cheese is bubbly and golden.
  8. Garnish with fresh basil before serving. Enjoy!

Notes

This dish is versatile; feel free to add your favorite vegetables such as mushrooms or bell peppers for extra flavor!

For added flavor, marinate the chicken in olive oil, garlic, and herbs for a few hours before baking. This will infuse the meat with extra taste!

If you’re looking for a lower-carb option, you can substitute the pasta with zucchini noodles or cauliflower rice. This dish can also be easily made ahead of time; simply assemble it and store it in the fridge until you’re ready to bake.

Leftovers can be stored in an airtight container in the refrigerator for up to 3 days and reheated in the oven or microwave. Serve it over rice or alongside a fresh salad for a complete meal!

August 22, 2026 0 comments
0 FacebookTwitterPinterestPocketEmail
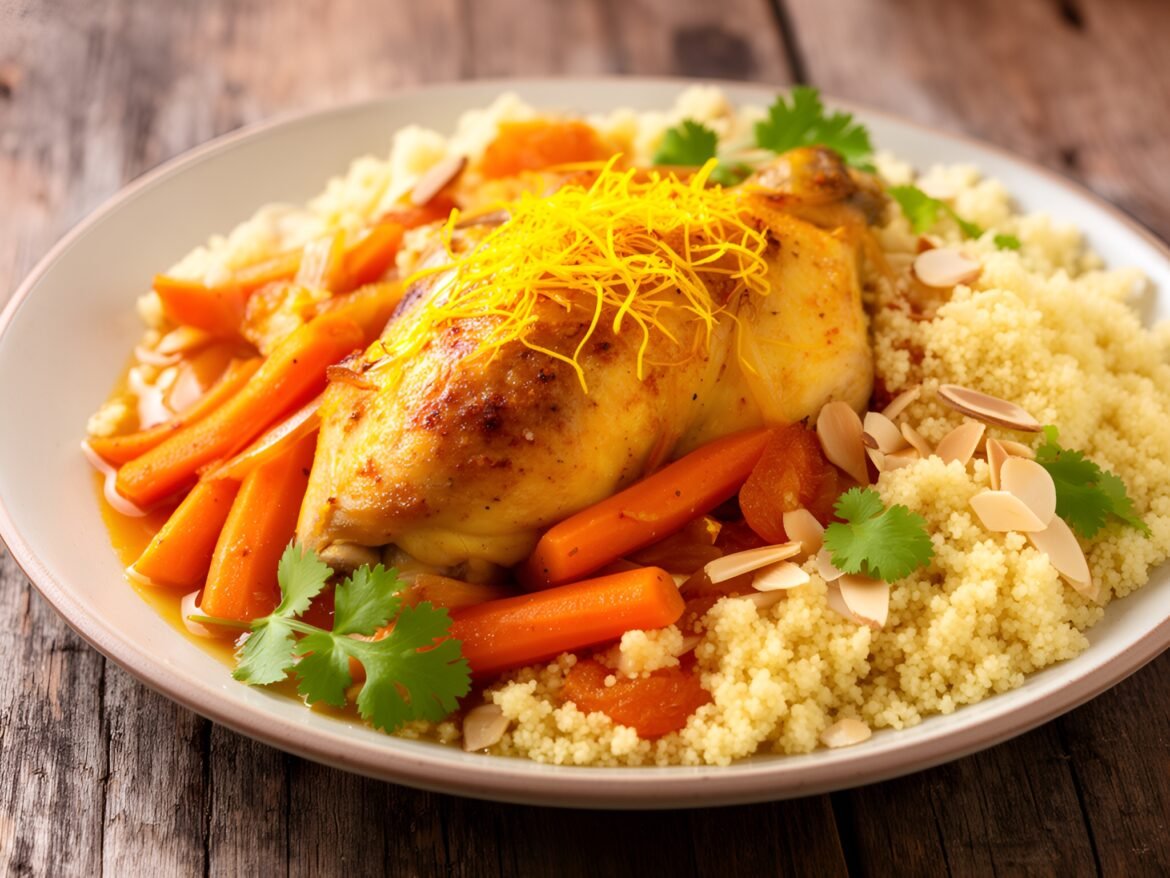
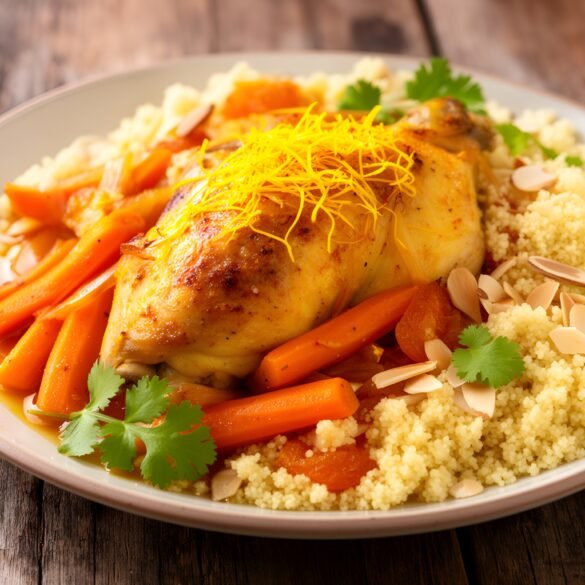
Saffron-Infused Chicken Tagine with Sweet Apricot Couscous
Gluten-FreeMain DishesQuick & Easy (30-Min)

Saffron-Infused Chicken Tagine with Sweet Apricot Couscous

by Linda August 22, 2026
written by Linda

Discover the rich, aromatic flavors of Morocco with this Saffron-Infused Chicken Tagine served over a luscious apricot couscous. This dish beautifully combines tender chicken with exotic spices and the unique flavor of saffron, creating a dish that is both comforting and elegant.

The gentle sweetness of apricots in the couscous perfectly balances the savory spices of the tagine, making this recipe an ideal centerpiece for any gathering or a special family dinner. It’s not only a feast for the taste buds but also a visual delight.

Saffron-Infused Chicken Tagine with Sweet Apricot Couscous

Saffron-Infused Chicken Tagine with Sweet Apricot Couscous

Serves: 4 Prep Time: 15 minutes Cooking Time: 45 minutes 45 minutes
Nutrition facts: 520 calories 28g fat
Rating: 5.0/5
( 1 voted )
Pin
Print

Ingredients

INGREDIENTS

  • 4 chicken thighs, bone-in and skin-on
  • 1 onion, finely chopped
  • 3 cloves garlic, minced
  • 1 tsp ground cumin
  • 1 tsp ground coriander
  • 1/2 tsp ground cinnamon
  • 1/4 tsp cayenne pepper
  • 1/2 tsp saffron threads
  • 1 cup chicken broth
  • 1 can (14 oz) diced tomatoes
  • 1 cup carrots, sliced
  • 1/2 cup dried apricots, chopped
  • 2 tbsp olive oil
  • Salt and pepper to taste
  • 1 cup couscous
  • 1/2 cup almonds, toasted (for garnish)
  • Fresh cilantro, for garnish

Instructions

  1. Heat olive oil in a tagine or heavy-bottomed pot over medium heat.
  2. Season the chicken thighs with salt and pepper, then add them to the pot, browning on all sides for about 5-7 minutes.
  3. Remove the chicken and set aside. In the same pot, add chopped onion and sauté until translucent, about 5 minutes.
  4. Stir in the minced garlic, cumin, coriander, cinnamon, and cayenne pepper; cook for another minute until fragrant.
  5. Add saffron threads steeped in a bit of warm broth, diced tomatoes, and chicken broth to the pot, stirring well.
  6. Return the chicken to the pot, along with sliced carrots and chopped apricots. Bring to a simmer, then cover and reduce heat to low.
  7. Cook for about 30 minutes, or until the chicken is tender and cooked through.
  8. Meanwhile, prepare the couscous according to package instructions, using the remaining chicken broth instead of water for extra flavor.
  9. Once cooked, fluff the couscous with a fork and stir in any remaining apricots if desired.
  10. Serve the saffron chicken tagine over the apricot couscous, garnishing with toasted almonds and fresh cilantro.

Notes

Tip: For an even richer flavor, marinate the chicken in the spice mixture for a few hours or overnight before cooking.

When preparing saffron, consider steeping it in warm water or broth for about 10 minutes before adding it to the dish to enhance its flavor and color. If you don’t have saffron, you can use turmeric as a substitute, although the flavor will be different.

For variations, feel free to add other dried fruits like raisins or figs to the couscous. Leftovers can be stored in the refrigerator for up to 3 days; reheat gently on the stove with a splash of water to keep it moist.

August 22, 2026 0 comments
0 FacebookTwitterPinterestPocketEmail
Newer Posts
Older Posts

Recent Posts

  • Decadent Salted Caramel Espresso Brownies with a Rich Chocolate Fudge Swirl

    September 14, 2026
  • Brilliant Blackberry Lime Meringue Tart

    September 14, 2026
  • Delicious Raspberry Almond Tartlets with Honey Drizzle

    September 13, 2026
  • Layered Coconut Cream Pie Parfaits

    September 13, 2026
  • Zesty Lemon Blueberry Swirl Cheesecake Delight

    September 13, 2026

About Me

About Me

I'm Linda, a health professional, university graduate, and author sharing tested, easy-to-follow recipes made from simple, everyday ingredients. Based in Finland, I bring together my culinary training, love of travel, and home-cooked roots to help you cook confidently, on any budget.

Products

  • Spooky Creative Starry Sky Ceramic Mug Spooky Creative Starry Sky Ceramic Mug 10,00 €

Categories

  • Appetizers & Snacks (157)
  • Breakfast & Brunch (126)
  • Desserts & Baking (168)
  • Drinks & Beverages (129)
  • Gluten-Free (200)
  • Grilling & BBQ (11)
  • Healthy & Low-Calorie (190)
  • Holiday & Seasonal (20)
  • Kid-Friendly (235)
  • Main Dishes (185)
  • Quick & Easy (30-Min) (672)
  • Slow Cooker & Instant Pot (4)
  • Soups & Salads (109)
  • Vegan (158)
  • Vegetarian (557)

About Me

I'm Linda, a health professional and food writer sharing tested, easy-to-follow recipes made from simple ingredients.

Email: jspiceygiftstv@gmail.com

Useful Links

  • Home
  • About
  • Contact
  • Free Cookbooks
  • Terms and Conditions
  • Privacy Policy

Newsletter

Subscribe to to our Newsletter to stay updated with all our recipes.

Recent Posts

  • Decadent Salted Caramel Espresso Brownies with a Rich Chocolate Fudge Swirl

    September 14, 2026
  • Brilliant Blackberry Lime Meringue Tart

    September 14, 2026
  • Instagram
  • Pinterest
  • Youtube
  • Tiktok

@2026 - All Right Reserved. Designed and Developed by JSpiceyGifts

J Spicey Gifts
  • Home
  • Recipes
    • Breakfast & Brunch
    • Appetizers & Snacks
    • Main Dishes
    • Soups & Salads
    • Desserts & Baking
    • Drinks & Beverages
  • Categories
    • Vegetarian
    • Vegan
    • Gluten-Free
    • Quick & Easy (30-Min)
    • Slow Cooker & Instant Pot
    • Grilling & BBQ
    • Healthy & Low-Calorie
    • Holiday & Seasonal
    • Kid-Friendly
  • About
  • Contact

Shopping Cart

Close

No products in the cart.

Close