J Spicey Gifts
  • Home
  • Recipes
    • Breakfast & Brunch
    • Appetizers & Snacks
    • Main Dishes
    • Soups & Salads
    • Desserts & Baking
    • Drinks & Beverages
  • Categories
    • Vegetarian
    • Vegan
    • Gluten-Free
    • Quick & Easy (30-Min)
    • Slow Cooker & Instant Pot
    • Grilling & BBQ
    • Healthy & Low-Calorie
    • Holiday & Seasonal
    • Kid-Friendly
  • About
  • Contact
Top Posts
Savory Garlic Butter Turkey Meatballs on Creamy Herbed...
Moroccan-Spiced Quinoa-Stuffed Eggplant Boats
Zesty Cajun Jambalaya with Shrimp and Andouille Sausage
Herb-Crusted Pork Tenderloin with Sweet Fig Reduction Sauce
Sweet and Spicy Chipotle-Mango Glazed Salmon with Coconut...
Crispy Balsamic Glazed Brussels Sprout Bites
Stuffed Mini Peppers with Spinach and Feta Delight
Savory Chive and Cheddar Breakfast Scones
Maple-Bourbon Pecan Overnight Oats
Luscious Coconut Avocado Smoothie Delight
J Spicey Gifts
  • Home
  • Recipes
    • Breakfast & Brunch
    • Appetizers & Snacks
    • Main Dishes
    • Soups & Salads
    • Desserts & Baking
    • Drinks & Beverages
  • Categories
    • Vegetarian
    • Vegan
    • Gluten-Free
    • Quick & Easy (30-Min)
    • Slow Cooker & Instant Pot
    • Grilling & BBQ
    • Healthy & Low-Calorie
    • Holiday & Seasonal
    • Kid-Friendly
  • About
  • Contact
J Spicey Gifts
J Spicey Gifts
  • Home
  • Recipes
    • Breakfast & Brunch
    • Appetizers & Snacks
    • Main Dishes
    • Soups & Salads
    • Desserts & Baking
    • Drinks & Beverages
  • Categories
    • Vegetarian
    • Vegan
    • Gluten-Free
    • Quick & Easy (30-Min)
    • Slow Cooker & Instant Pot
    • Grilling & BBQ
    • Healthy & Low-Calorie
    • Holiday & Seasonal
    • Kid-Friendly
  • About
  • Contact
Copyright 2021 - All Right Reserved
Fiery Mango Jalapeño Mocktail with a Twist
Drinks & Beverages

Fiery Mango Jalapeño Mocktail with a Twist

by Linda August 12, 2026
written by Linda

Bring a burst of tropical flavor to your next gathering with this Fiery Mango Jalapeño Mocktail. Combining the sweetness of ripe mango with the spicy kick of jalapeño, this drink is a delightful balance that will tantalize your taste buds.

This mocktail is not only refreshing but also versatile. It’s perfect for summer parties, barbecues, or anytime you want a non-alcoholic beverage that stands out. The vibrant colors and flavors make it a stunning addition to any table or occasion.

Fiery Mango Jalapeño Mocktail with a Twist

Fiery Mango Jalapeño Mocktail with a Twist

Serves: 4 Prep Time: 10 minutes Cooking Time: 0 minutes 0 minutes
Nutrition facts: 120 calories 0g fat
Rating: 5.0/5
( 1 voted )
Pin
Print

Ingredients

INGREDIENTS

  • 2 ripe mangoes, peeled and diced
  • 1 fresh jalapeño, seeded and chopped
  • 1 lime, juiced
  • 2 cups sparkling water
  • 2 tablespoons agave syrup (optional)
  • Ice cubes
  • Lime slices and jalapeño slices for garnish

Instructions

  1. In a blender, combine diced mango, chopped jalapeño, and lime juice.
  2. Blend until smooth and creamy. If desired, add agave syrup for additional sweetness.
  3. Strain the mixture through a fine mesh sieve to remove any pulp if you prefer a smoother texture.
  4. In a large pitcher, mix the mango-jalapeño puree with sparkling water. Stir gently to combine.
  5. Serve in glasses filled with ice and garnish with lime and jalapeño slices.

Notes

Tip: Adjust the sweetness by modifying the amount of agave syrup according to your taste.

For a milder drink, remove the seeds from the jalapeño before blending, as they contain most of the heat. You can also adjust the amount of jalapeño based on your heat preference.

Experiment with the garnish by adding fresh mint or a lime wheel for extra freshness. This mocktail pairs wonderfully with spicy snacks or tropical dishes.

Store any leftover mango puree in the refrigerator for up to three days, and feel free to double or triple the recipe for larger gatherings!


August 12, 2026 0 comments
0 FacebookTwitterPinterestPocketEmail
Lavender-Infused Frosted Vanilla Lemonade
Drinks & BeveragesQuick & Easy (30-Min)Vegetarian

Lavender-Infused Frosted Vanilla Lemonade

by Linda August 12, 2026
written by Linda

Imagine a refreshing lemonade blended to frosty perfection and infused with the delicate essence of lavender. This Lavender-Infused Frosted Vanilla Lemonade is not just a drink; it’s an experience that combines tart and sweet with a floral twist. The lavender offers a unique aromatic flavor that beautifully complements the zesty brightness of fresh lemons.

With its creamy frosted texture and a hint of vanilla, this drink is perfect for summer gatherings or a relaxing afternoon on the porch. It’s easy to make, and the stunning presentation will impress your guests. Enjoy it as a cooling treat or serve it at your next garden party for a delightful refreshment.

Lavender-Infused Frosted Vanilla Lemonade

Lavender-Infused Frosted Vanilla Lemonade

Serves: 4 Prep Time: 15 minutes Cooking Time: 0 minutes 0 minutes
Nutrition facts: 150 calories 5g fat
Rating: 5.0/5
( 1 voted )
Pin
Print

Ingredients

INGREDIENTS

  • 1 cup fresh lemon juice
  • 1/2 cup sugar
  • 1 cup water
  • 1 tablespoon dried culinary lavender
  • 1 teaspoon vanilla extract
  • 2 cups ice
  • 1 cup whole milk or a dairy-free alternative
  • Lemon slices and lavender sprigs for garnish

Instructions

  1. In a saucepan, combine water, sugar, and dried lavender. Heat gently over medium heat, stirring until the sugar dissolves. Remove from heat and let steep for 10 minutes.
  2. Strain the lavender syrup through a fine mesh sieve into a bowl, discarding the lavender flowers. Allow the syrup to cool completely.
  3. In a blender, combine the lemon juice, cooled lavender syrup, vanilla extract, ice, and milk. Blend until smooth and frosty.
  4. Taste and adjust sweetness if necessary by adding more sugar or syrup. Blend again if you add anything.
  5. Pour the frosted lemonade into glasses and garnish with lemon slices and lavender sprigs. Serve immediately.

Notes

Storage: This frosted lemonade is best enjoyed fresh but can be stored in the refrigerator for up to 2 days. Just give it a quick blend before serving again.

For the best flavor, use culinary-grade lavender and ensure it’s unsprayed. If you’re not a fan of lavender, feel free to substitute it with a few fresh mint leaves for a different refreshing flavor.

This lemonade can be made a day in advance. Just blend it before serving to restore that frosty texture. If you want it to be less creamy, reduce the amount of vanilla extract or swap some of the whole milk for coconut milk for a dairy-free option.

August 12, 2026 0 comments
0 FacebookTwitterPinterestPocketEmail
Irresistible S'mores Cookie Skillet Delight
Desserts & BakingKid-FriendlyQuick & Easy (30-Min)

Irresistible S’mores Cookie Skillet Delight

by Linda August 12, 2026
written by Linda

This Irresistible S’mores Cookie Skillet is a delightful twist on the classic campfire treat, featuring a warm, gooey cookie base loaded with rich chocolate and crunchy graham crackers. Topped with toasted marshmallows, it’s a dessert that’s perfect for gatherings or cozy nights in.

With its easy preparation and the joy of digging into one shared skillet, this recipe captures the essence of summer s’mores and brings it right to your kitchen. You’ll love the combination of textures and flavors in every bite!

Irresistible S'mores Cookie Skillet Delight

Irresistible S'mores Cookie Skillet Delight

Serves: 6 Prep Time: 15 minutes Cooking Time: 25 minutes 25 minutes
Nutrition facts: 320 calories 18g fat
Rating: 5.0/5
( 1 voted )
Pin
Print

Ingredients

INGREDIENTS

  • 1 cup all-purpose flour
  • 1/2 teaspoon baking soda
  • 1/4 teaspoon salt
  • 1/2 cup unsalted butter, softened
  • 1/3 cup granulated sugar
  • 1/3 cup brown sugar
  • 1 large egg
  • 1 teaspoon vanilla extract
  • 1 cup semi-sweet chocolate chips
  • 1/2 cup crushed graham crackers
  • 1 cup mini marshmallows

Instructions

  1. Preheat your oven to 350°F (175°C).
  2. In a mixing bowl, whisk together the flour, baking soda, and salt.
  3. In another bowl, cream the softened butter, granulated sugar, and brown sugar until light and fluffy.
  4. Add the egg and vanilla extract to the butter mixture, blending until well incorporated.
  5. Gradually mix in the dry ingredients until just combined, then fold in the chocolate chips and crushed graham crackers.
  6. Transfer the cookie dough into a greased oven-safe skillet, spreading it evenly across the bottom.
  7. Bake in the preheated oven for 20 minutes, or until the edges are golden brown but the center is still soft.
  8. Remove from the oven and sprinkle mini marshmallows on top, then return to the oven for an additional 5 minutes until the marshmallows are toasted and golden.
  9. Allow to cool for a few minutes before serving warm with extra chocolate, graham crackers, or ice cream.

Notes

Tip: For an even richer flavor, consider using a mix of milk and dark chocolate chips.

For a fun twist, try adding peanut butter chips or using dark chocolate for a richer flavor. If you prefer a less sweet cookie, reduce the sugars slightly.

Store any leftovers in an airtight container at room temperature for up to 2 days. Reheat in the oven or microwave for a few seconds to enjoy the gooeyness again!

August 12, 2026 0 comments
0 FacebookTwitterPinterestPocketEmail
Delightful Cinnamon-Spiced Pear and Almond Tartlets
Desserts & BakingQuick & Easy (30-Min)Vegetarian

Delightful Cinnamon-Spiced Pear and Almond Tartlets

by Linda August 12, 2026
written by Linda

These delightful cinnamon-spiced pear and almond tartlets are a perfect treat for any occasion, combining the warm sweetness of ripe pears with the rich nuttiness of almonds. The flaky pastry crust adds a delightful crunch, making each bite a heavenly experience.

Perfect for dessert or an afternoon snack, these tartlets are not only easy to make but also visually stunning. A sprinkle of cinnamon elevates the flavor, while the almond cream provides a luxurious, creamy texture that complements the juicy pears beautifully.

Delightful Cinnamon-Spiced Pear and Almond Tartlets

Delightful Cinnamon-Spiced Pear and Almond Tartlets

Serves: 6 Prep Time: 20 minutes Cooking Time: 25 minutes 25 minutes
Nutrition facts: 250 calories 14g fat
Rating: 5.0/5
( 1 voted )
Pin
Print

Ingredients

INGREDIENTS

  • 1 sheet puff pastry, thawed
  • 2 ripe pears, peeled, cored, and thinly sliced
  • 1/2 cup almond meal
  • 1/4 cup sugar
  • 1/4 cup unsalted butter, softened
  • 1 large egg
  • 1 teaspoon almond extract
  • 1/2 teaspoon ground cinnamon
  • 1/4 teaspoon salt
  • 1 egg, for egg wash
  • Sliced almonds, for garnish (optional)

Instructions

  1. Preheat the oven to 375°F (190°C) and line a baking sheet with parchment paper.
  2. Roll out the puff pastry on a lightly floured surface to smoothen and thin it out a bit.
  3. Cut the pastry into 6 equal squares and place them on the prepared baking sheet.
  4. In a mixing bowl, combine almond meal, sugar, softened butter, egg, almond extract, ground cinnamon, and salt. Mix until smooth and creamy.
  5. Spread the almond mixture evenly over the pastry squares, leaving a small border around the edges.
  6. Arrange the pear slices artfully on top of the almond mixture.
  7. Brush the edges of the pastry with beaten egg for a golden finish.
  8. Sprinkle sliced almonds on top if using, and bake in the preheated oven for 20-25 minutes or until the pastry is golden brown and puffed.
  9. Remove from the oven and let cool slightly before serving. Enjoy warm or at room temperature!

Notes

Storage: Keep any leftovers in an airtight container in the refrigerator for up to 3 days. Reheat in the oven for best texture.

For the best results, choose ripe but firm pears to maintain their shape during baking. If you don’t have almond extract, vanilla extract works well as a substitute, though it will alter the flavor slightly. These tartlets can be made ahead of time and stored in an airtight container for a couple of days; simply reheat them in a warm oven before serving for that fresh-baked taste.

If you want to add a twist, consider drizzling a little honey or maple syrup over the top before serving to enhance the sweetness.

August 12, 2026 0 comments
0 FacebookTwitterPinterestPocketEmail
Decadent Chocolate Orange Bliss Bombs
Desserts & BakingQuick & Easy (30-Min)Vegetarian

Decadent Chocolate Orange Bliss Bombs

by Linda August 12, 2026
written by Linda

These Chocolate Orange Bliss Bombs are the ultimate treat for chocolate lovers! Combining the deep, rich flavor of dark chocolate with the bright zesty notes of orange, these little bites of joy are sure to impress.

Perfect for a party or as a sweet pick-me-up, these bliss bombs are easy to make and even easier to enjoy. The velvety texture melts in your mouth, making each bite a delightful experience.

Decadent Chocolate Orange Bliss Bombs

Decadent Chocolate Orange Bliss Bombs

Serves: 12 Prep Time: 15 minutes Cooking Time: 10 minutes 10 minutes
Nutrition facts: 120 calories 9g fat
Rating: 5.0/5
( 1 voted )
Pin
Print

Ingredients

INGREDIENTS

  • 1 cup dark chocolate chips
  • 1/2 cup heavy cream
  • 1/4 cup orange juice
  • 2 teaspoons orange zest
  • 1/4 cup powdered sugar
  • 1 teaspoon vanilla extract
  • 1/2 cup crushed nuts (optional)

Instructions

  1. Melt the dark chocolate chips in a heatproof bowl over simmering water, stirring until smooth.
  2. In a separate saucepan, heat the heavy cream until just simmering, then remove from heat.
  3. Pour the hot cream into the melted chocolate and stir until well combined.
  4. Add the orange juice, orange zest, powdered sugar, and vanilla extract; mix until smooth and creamy.
  5. Refrigerate the mixture for about 30 minutes until it firms up slightly.
  6. Once firm, scoop out small portions and roll into balls using your hands.
  7. If desired, roll the chocolate balls in crushed nuts for added texture and flavor.
  8. Place the bliss bombs on a plate and refrigerate for another 10-15 minutes to set completely.
  9. Serve chilled and enjoy the blissful combination of chocolate and orange!

Notes

Tip: For a decorative touch, drizzle melted chocolate over the bliss bombs before serving!

To enhance the orange flavor, consider adding a few drops of orange extract to the mixture. If you prefer a healthier version, substitute the cream with coconut cream or Greek yogurt for a lighter option.

These bliss bombs can be stored in an airtight container in the fridge for up to a week. For a fun presentation, roll them in crushed nuts or sprinkle them with edible glitter before serving!

August 12, 2026 0 comments
0 FacebookTwitterPinterestPocketEmail
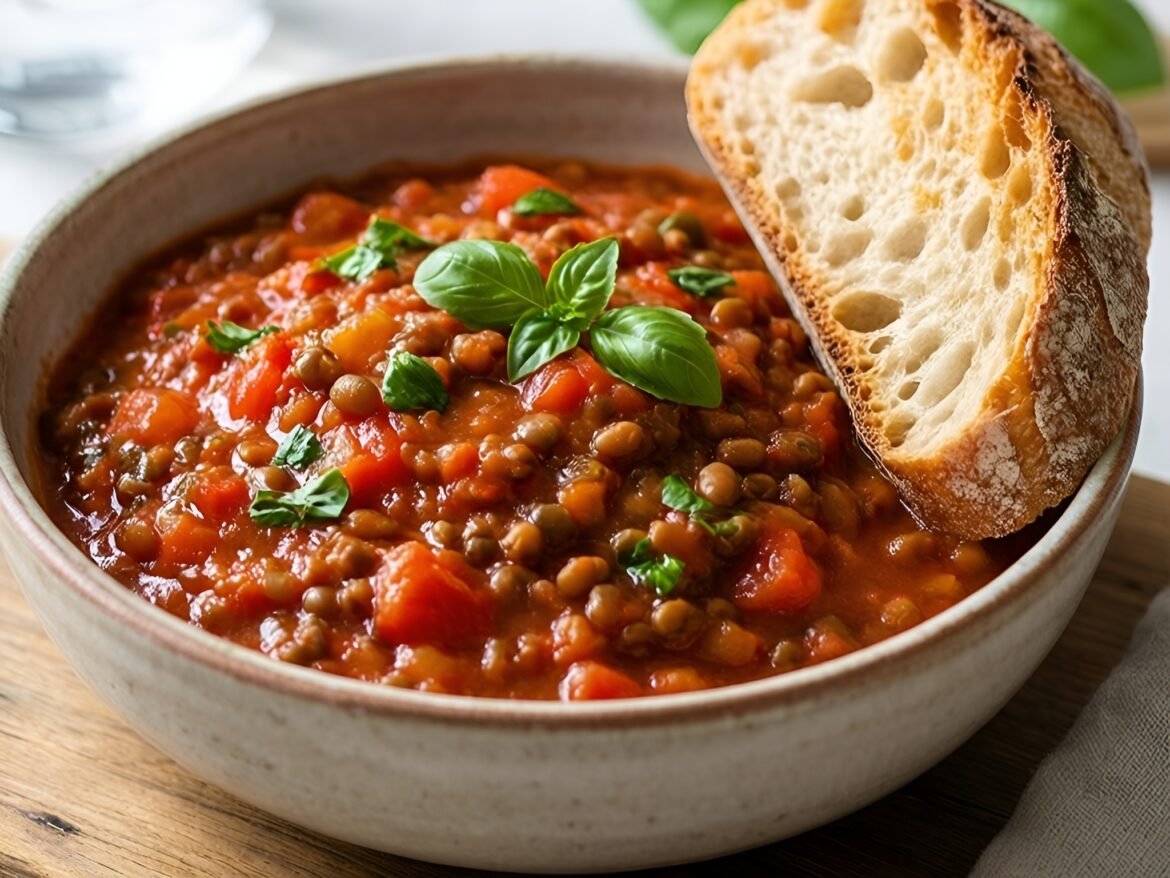
Hearty Tomato-Basil Lentil Stew with Crunchy Artisan Bread
Healthy & Low-CalorieSoups & SaladsVeganVegetarian

Hearty Tomato-Basil Lentil Stew with Crunchy Artisan Bread

by Linda August 12, 2026
written by Linda

There’s nothing quite like a hearty stew to warm the soul, and this Tomato-Basil Lentil Stew is no exception. Packed with protein-rich lentils and bursting with fresh flavors, it’s a nourishing meal that comes together effortlessly. The combination of tomatoes and basil creates a comforting aroma that fills your kitchen, making it perfect for chilly evenings.

What truly elevates this stew is the addition of fresh herbs and a touch of garlic, bringing depth and brightness to each spoonful. Paired with crunchy artisan bread, this dish is both filling and satisfying, making it a staple for any home cook.

Hearty Tomato-Basil Lentil Stew with Crunchy Artisan Bread

Hearty Tomato-Basil Lentil Stew with Crunchy Artisan Bread

Serves: 4-6 Prep Time: 15 minutes Cooking Time: 30 minutes 30 minutes
Nutrition facts: 320 calories 5g fat
Rating: 5.0/5
( 1 voted )
Pin
Print

Ingredients

INGREDIENTS

  • 1 tablespoon olive oil
  • 1 medium onion, diced
  • 3 cloves garlic, minced
  • 2 large carrots, diced
  • 2 stalks celery, diced
  • 1 bell pepper, diced
  • 1 can (14 oz) diced tomatoes
  • 4 cups vegetable broth
  • 1 cup dried green or brown lentils, rinsed
  • 1 teaspoon dried basil
  • 1 teaspoon dried oregano
  • Salt and pepper to taste
  • Fresh basil leaves for garnish
  • Crusty artisan bread for serving

Instructions

  1. Heat olive oil in a large pot over medium heat. Add diced onion, garlic, carrots, celery, and bell pepper. Sauté until vegetables are softened, about 5-7 minutes.
  2. Stir in the diced tomatoes, vegetable broth, lentils, dried basil, and oregano. Season with salt and pepper.
  3. Bring the stew to a boil, then reduce heat to low. Cover and simmer for about 25 minutes, or until lentils are tender.
  4. Taste the stew and adjust seasoning if needed. If you prefer a thicker consistency, mash some lentils against the pot with a fork.
  5. Serve hot, garnished with fresh basil leaves, alongside slices of crusty artisan bread.

Notes

Storage: This stew can be stored in an airtight container in the fridge for up to 4 days or frozen for up to 3 months. Just be sure to let it cool completely before freezing.

For the best flavor, use ripe, seasonal tomatoes if possible. Canned tomatoes work well too, especially San Marzano tomatoes for added sweetness. If you want to add a kick, consider adding a pinch of red pepper flakes to the stew.

Feel free to swap out the lentils for other legumes like chickpeas or black beans if you prefer. This stew keeps well in the refrigerator for up to 4 days and can also be frozen for future meals. Reheat gently on the stove or in the microwave, adding a splash of water if it thickens too much.

August 12, 2026 0 comments
0 FacebookTwitterPinterestPocketEmail
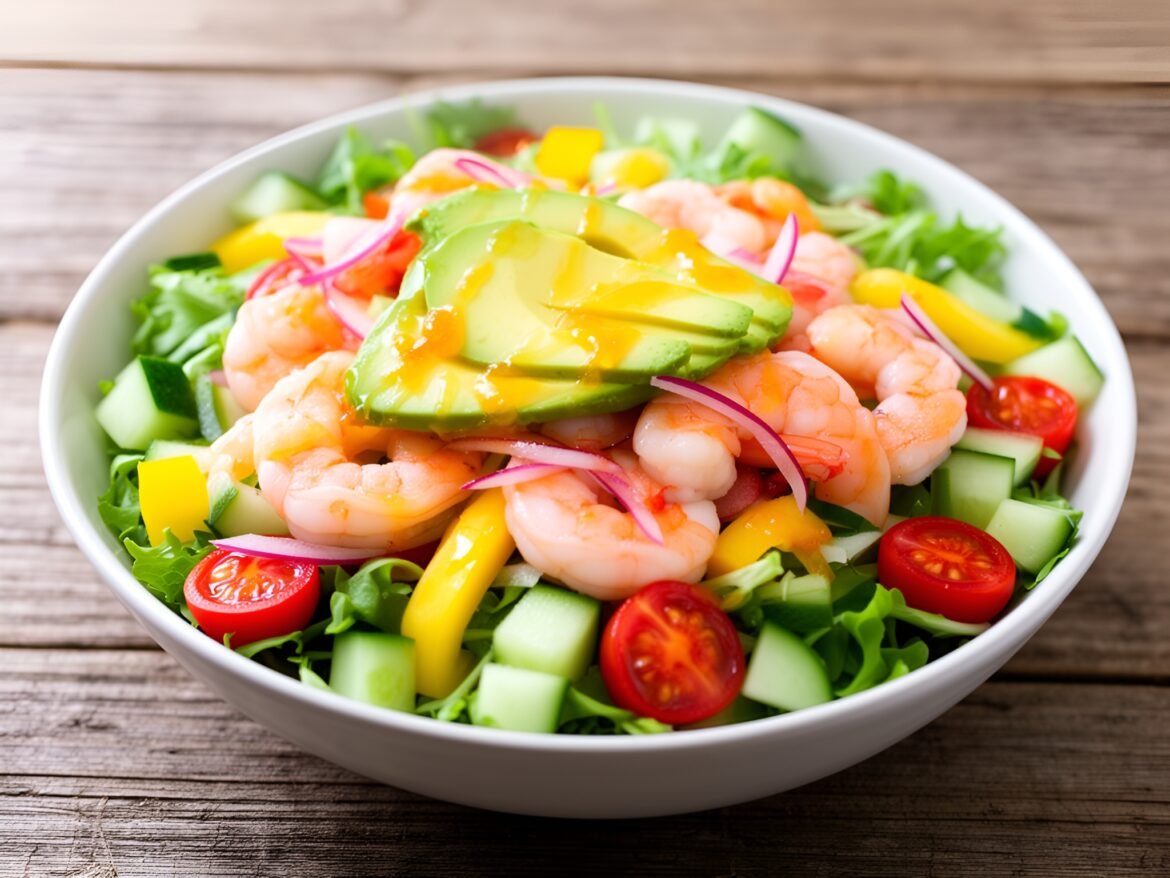
Whimsical Rainbow Shrimp Salad with Citrus Dressing
Healthy & Low-CalorieKid-FriendlyMain DishesQuick & Easy (30-Min)

Whimsical Rainbow Shrimp Salad with Citrus Dressing

by Linda August 12, 2026
written by Linda

This Whimsical Rainbow Shrimp Salad is as vibrant as it is delicious, featuring succulent shrimp and a medley of colorful, crisp vegetables. The zesty citrus dressing not only enhances the flavors but adds a refreshing brightness to every bite. Perfect for a light lunch or as a stunning side dish for your next gathering, this salad promises to bring joy to your table.

Using a combination of seasonal veggies and perfectly cooked shrimp, this dish balances texture and taste beautifully. The addition of citrus not only elevates the flavors but also gives the salad a cheerful appearance that’s sure to impress guests or family alike.

Whimsical Rainbow Shrimp Salad with Citrus Dressing

Whimsical Rainbow Shrimp Salad with Citrus Dressing

Serves: 4 Prep Time: 20 minutes Cooking Time: 10 minutes 10 minutes
Nutrition facts: 320 calories 15g fat
Rating: 5.0/5
( 1 voted )
Pin
Print

Ingredients

INGREDIENTS

  • 1 pound shrimp, peeled and deveined
  • 1 tablespoon olive oil
  • Salt and pepper, to taste
  • 4 cups mixed salad greens
  • 1 cup cherry tomatoes, halved
  • 1 cup cucumber, diced
  • 1 bell pepper, diced (any color)
  • 1 avocado, sliced
  • 1/4 cup red onion, thinly sliced
  • 1/4 cup cilantro, chopped

FOR THE CITRUS DRESSING

  • 1/4 cup fresh orange juice
  • 2 tablespoons lemon juice
  • 1 tablespoon lime juice
  • 1 tablespoon honey or maple syrup
  • 1/4 cup olive oil
  • Salt and pepper, to taste

Instructions

  1. In a large skillet, heat olive oil over medium heat.
  2. Season shrimp with salt and pepper, then add to the skillet.
  3. Cook shrimp for 2-3 minutes per side until pink and opaque. Remove from heat and let cool slightly.
  4. In a large bowl, combine salad greens, cherry tomatoes, cucumber, bell pepper, avocado, red onion, and cilantro.
  5. In a small bowl, whisk together orange juice, lemon juice, lime juice, honey, olive oil, salt, and pepper to create the dressing.
  6. Add the cooked shrimp to the salad bowl and drizzle with the citrus dressing.
  7. Toss gently to combine all ingredients and coat with dressing. Serve immediately.

Notes

Tip: For an extra burst of flavor, add a sprinkle of toasted sesame seeds or chopped nuts on top before serving.

To ensure your shrimp are perfectly cooked, avoid overcooking them; they should turn pink and opaque, usually taking just a few minutes per side. For a fun twist, feel free to substitute the shrimp with grilled chicken or firm tofu for a vegetarian option.

This salad is best served fresh, but you can prep the components ahead of time. Store the vegetables and shrimp separately in airtight containers in the fridge. When ready to serve, simply toss everything together with the dressing!

August 12, 2026 0 comments
0 FacebookTwitterPinterestPocketEmail
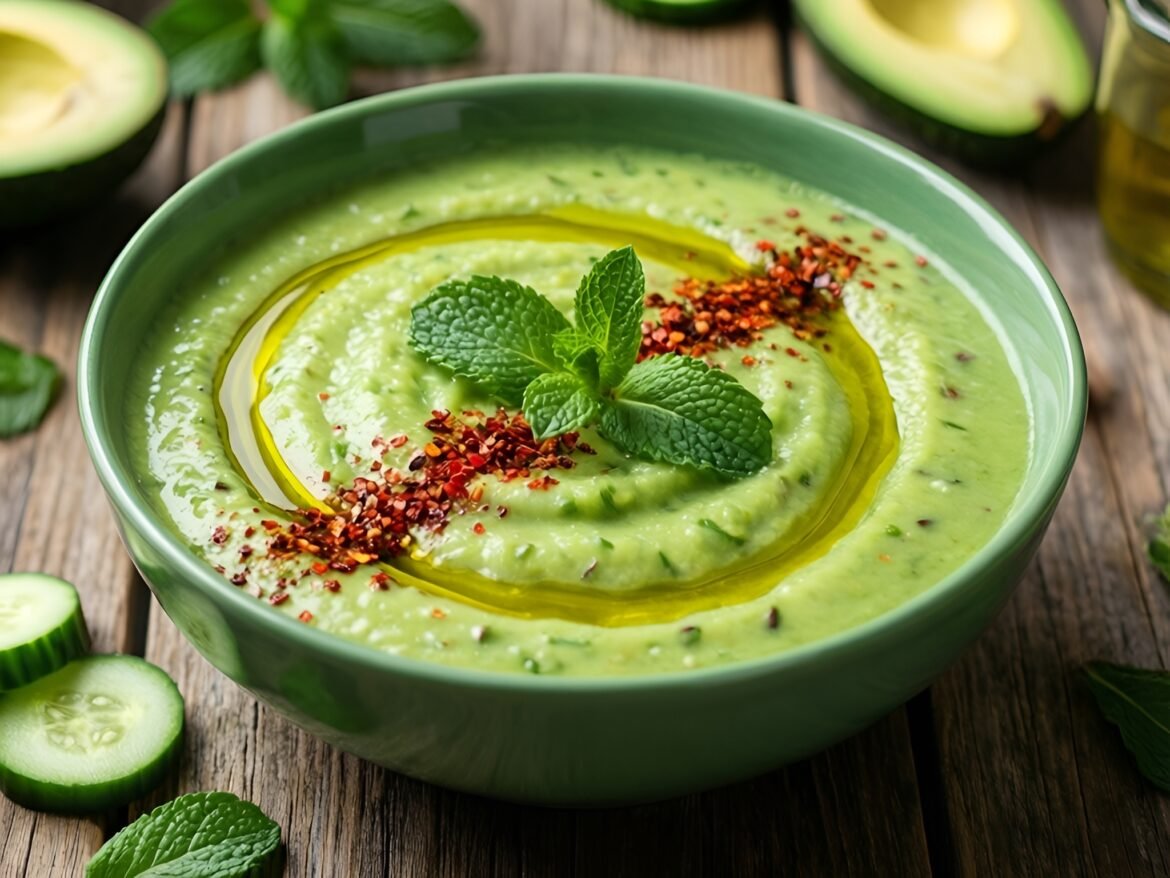
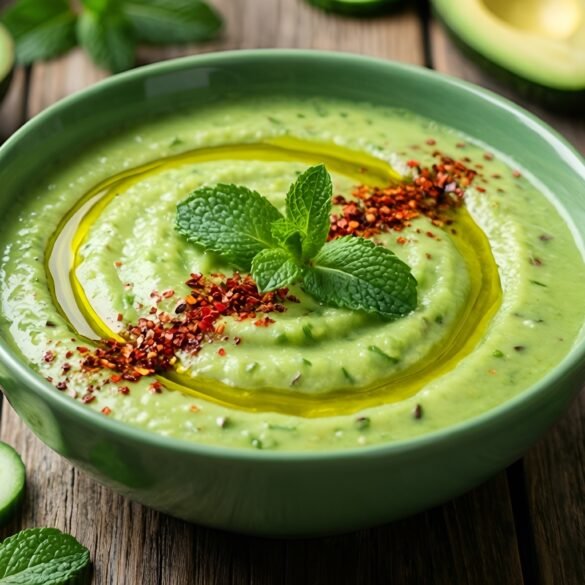
Chilled Avocado-Cucumber Gazpacho with Mint Infusion
Gluten-FreeSoups & SaladsVeganVegetarian

Chilled Avocado-Cucumber Gazpacho with Mint Infusion

by Linda August 12, 2026
written by Linda

Beat the heat with this Chilled Avocado-Cucumber Gazpacho, a delightful blend of creamy avocados and crisp cucumbers. This refreshing soup is not only vibrant in color but also rich in nutrients, making it the perfect appetizer or light meal for hot summer days.

The addition of fresh mint elevates this dish, giving it a unique twist that will impress your guests. Serve it chilled, garnished with a sprinkle of chili flakes or a drizzle of olive oil for an extra touch of flavor and sophistication.

Chilled Avocado-Cucumber Gazpacho with Mint Infusion

Chilled Avocado-Cucumber Gazpacho with Mint Infusion

Serves: 4 Prep Time: 15 minutes Cooking Time: 0 minutes 0 minutes
Nutrition facts: 180 calories 12g fat
Rating: 5.0/5
( 1 voted )
Pin
Print

Ingredients

INGREDIENTS

  • 2 ripe avocados
  • 1 large cucumber, peeled and chopped
  • 1/2 cup red onion, chopped
  • 2 cloves garlic, minced
  • 2 cups vegetable broth
  • 1/4 cup fresh mint leaves
  • 2 tablespoons lime juice
  • Salt and pepper to taste
  • Olive oil for drizzling (optional)
  • Chili flakes for garnish (optional)

Instructions

  1. Combine avocados, cucumber, red onion, garlic, vegetable broth, mint leaves, and lime juice in a blender.
  2. Blend until smooth and creamy, adding more broth if needed to achieve desired consistency.
  3. Season with salt and pepper to taste.
  4. Chill in the refrigerator for at least 1 hour before serving.
  5. Serve in bowls, drizzled with olive oil and garnished with chili flakes, if desired.

Notes

Tip: For a creamier texture, you can add a dollop of Greek yogurt or sour cream before blending.

For the best flavor, let the gazpacho chill in the refrigerator for at least an hour before serving. This allows the ingredients to meld beautifully, enhancing the overall taste.

If you want to add a bit of heat, consider mixing in some diced jalapeños or a dash of hot sauce. Additionally, this soup can be a great base for added proteins; try topping it with grilled shrimp or shredded chicken for a heartier option.

Store any leftovers in an airtight container in the fridge for up to 3 days. However, the freshness is best enjoyed within the first day or two.

August 12, 2026 0 comments
0 FacebookTwitterPinterestPocketEmail
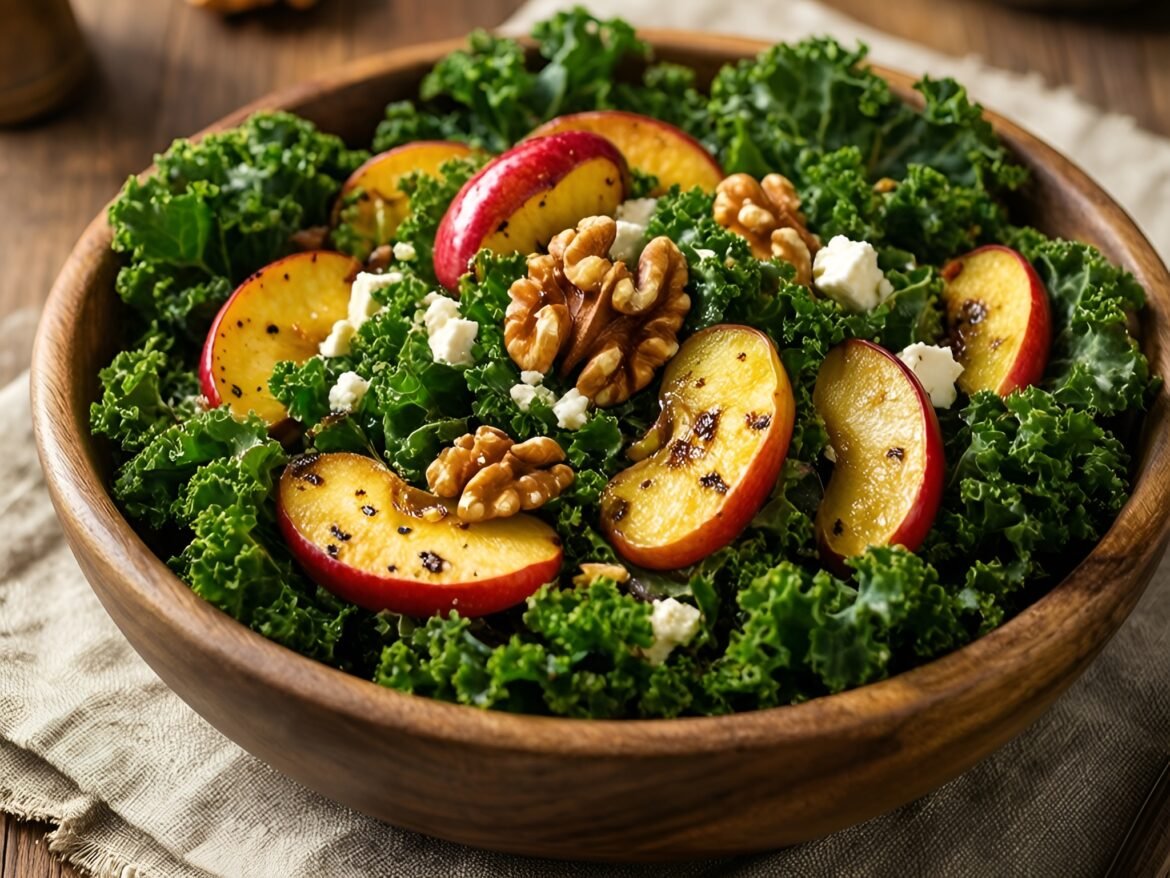
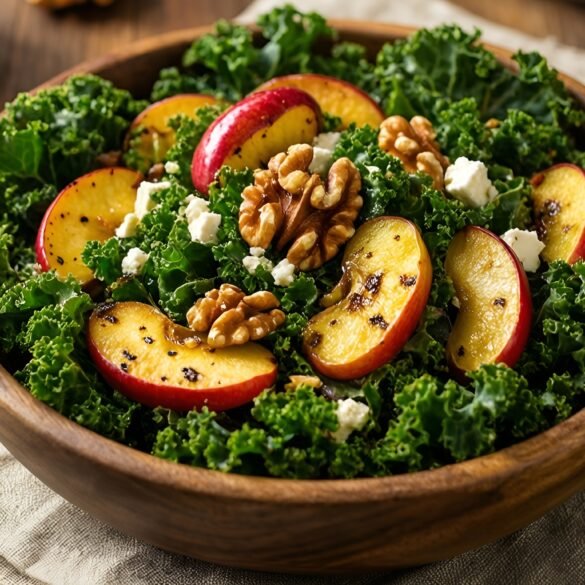
Rustic Autumn Harvest Kale Salad with Spiced Apples
Healthy & Low-CalorieSoups & SaladsVegetarian

Rustic Autumn Harvest Kale Salad with Spiced Apples

by Linda August 12, 2026
written by Linda

This Rustic Autumn Harvest Kale Salad is a celebration of fall flavors! Fresh kale serves as a hearty base, complemented by sweet, spiced apples and crunchy walnuts, creating a delightful combination of textures and tastes.

The addition of a zesty dressing ties everything together and enhances the natural sweetness of the apples, making this salad a perfect side for any autumn meal or a stand-alone lunch option.

Rustic Autumn Harvest Kale Salad with Spiced Apples

Rustic Autumn Harvest Kale Salad with Spiced Apples

Serves: 4 Prep Time: 15 minutes Cooking Time: 10 minutes 10 minutes
Nutrition facts: 250 calories 15g fat
Rating: 5.0/5
( 1 voted )
Pin
Print

Ingredients

INGREDIENTS

  • 1 bunch kale, stems removed and leaves chopped
  • 2 medium apples, cored and sliced
  • 1 tablespoon olive oil
  • 1 teaspoon cinnamon
  • 1 tablespoon honey
  • 1/2 cup walnuts, toasted
  • 1/4 cup feta cheese, crumbled (optional)
  • 1/4 cup red onion, thinly sliced
  • Juice of 1 lemon
  • Salt and pepper to taste

Instructions

  1. Preheat the oven to 350°F (175°C).
  2. Toss the apple slices in olive oil, cinnamon, and honey, then spread them on a baking sheet.
  3. Roast the apples for about 10 minutes until tender and caramelized, then remove from the oven and let cool.
  4. In a large bowl, combine the chopped kale, lemon juice, salt, and pepper. Massage the kale leaves for a couple of minutes until they soften.
  5. Add the roasted apples, walnuts, red onion, and feta cheese (if using) to the kale.
  6. Toss gently to combine all ingredients, adjusting seasoning to taste before serving.

Notes

Tip: This salad is perfect for meal prep and will stay fresh in the refrigerator for 1-2 days. Just keep the dressing separate until you're ready to eat.

For a twist, try swapping the walnuts for pecans or adding some dried cranberries for an extra burst of flavor.

Ensure to massage the kale with the dressing for a more tender texture. This salad can be made ahead of time; just keep the dressing separate until serving to prevent wilting the kale.

August 12, 2026 0 comments
0 FacebookTwitterPinterestPocketEmail
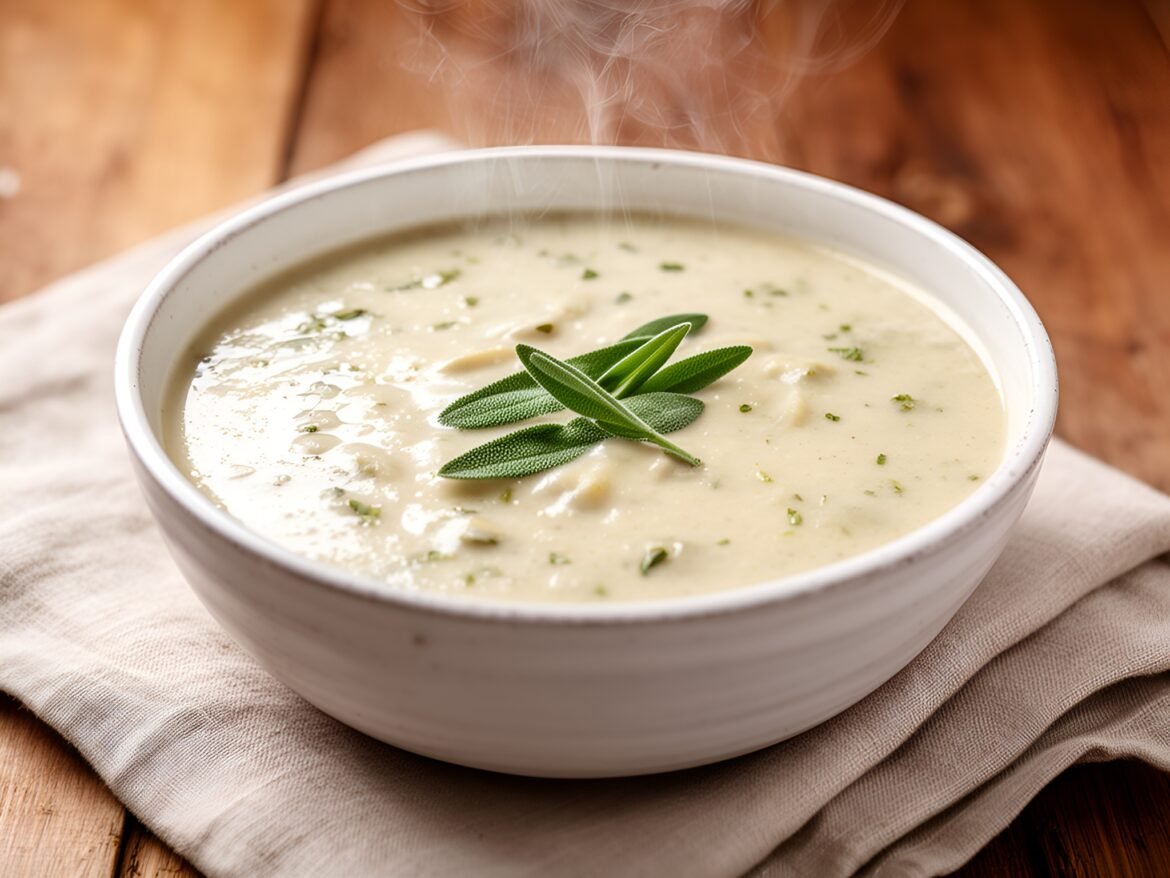
Silky Roasted Cauliflower and Sage Soup with a Hint of Nutmeg
Quick & Easy (30-Min)Soups & SaladsVegetarian

Silky Roasted Cauliflower and Sage Soup with a Hint of Nutmeg

by Linda August 12, 2026
written by Linda

Warm up with a bowl of this Silky Roasted Cauliflower and Sage Soup, perfect for chilly evenings. The combination of roasted cauliflower and fresh sage creates a depth of flavor that is both comforting and sophisticated.

This soup is not only delicious but also easy to make, using simple ingredients that come together to create a creamy, dreamy texture. The nutty notes from roasted cauliflower and the earthy flavor of sage, combined with a hint of nutmeg, make this dish a seasonal favorite.

Silky Roasted Cauliflower and Sage Soup with a Hint of Nutmeg

Silky Roasted Cauliflower and Sage Soup with a Hint of Nutmeg

Serves: 4 Prep Time: 15 minutes Cooking Time: 30 minutes 30 minutes
Nutrition facts: 240 calories 12g fat
Rating: 5.0/5
( 1 voted )
Pin
Print

Ingredients

INGREDIENTS

  • 1 large head of cauliflower, chopped into florets
  • 2 tablespoons olive oil
  • 1 onion, diced
  • 2 cloves garlic, minced
  • 4 cups vegetable broth
  • 1/2 cup heavy cream
  • 1 tablespoon fresh sage, chopped (or 1 teaspoon dried sage)
  • 1/4 teaspoon ground nutmeg
  • Salt and pepper to taste
  • Fresh sage leaves for garnish

Instructions

  1. Preheat your oven to 400°F (200°C).
  2. Toss the cauliflower florets with olive oil, salt, and pepper on a baking sheet. Roast for 25 minutes or until golden and tender.
  3. In a large pot over medium heat, sauté the onion and garlic until soft and translucent, about 5 minutes.
  4. Add the roasted cauliflower to the pot along with the vegetable broth and bring to a simmer. Cook for another 5 minutes.
  5. Stir in the heavy cream, sage, and nutmeg, then remove from heat.
  6. Blend the soup using an immersion blender until smooth or transfer to a blender in batches. Adjust seasoning to taste.
  7. Serve hot, garnished with fresh sage leaves. Enjoy your creamy soup!

Notes

Tip: For a vegan version, replace heavy cream with coconut milk and ensure vegetable broth is used.

For a thicker consistency, consider reducing the amount of broth used in the recipe. If you prefer a lighter option, swap out heavy cream for coconut milk. This soup pairs beautifully with crusty bread or a fresh salad.

When storing leftovers, keep the soup in an airtight container in the fridge for up to three days. Reheat gently on the stove, adding a splash of broth to loosen it if necessary.

August 12, 2026 0 comments
0 FacebookTwitterPinterestPocketEmail
Newer Posts
Older Posts

Recent Posts

  • Savory Garlic Butter Turkey Meatballs on Creamy Herbed Polenta

    September 14, 2026
  • Moroccan-Spiced Quinoa-Stuffed Eggplant Boats

    September 14, 2026
  • Zesty Cajun Jambalaya with Shrimp and Andouille Sausage

    September 14, 2026
  • Herb-Crusted Pork Tenderloin with Sweet Fig Reduction Sauce

    September 14, 2026
  • Sweet and Spicy Chipotle-Mango Glazed Salmon with Coconut Rice

    September 14, 2026

About Me

About Me

I'm Linda, a health professional, university graduate, and author sharing tested, easy-to-follow recipes made from simple, everyday ingredients. Based in Finland, I bring together my culinary training, love of travel, and home-cooked roots to help you cook confidently, on any budget.

Products

  • Spooky Creative Starry Sky Ceramic Mug Spooky Creative Starry Sky Ceramic Mug 10,00 €

Categories

  • Appetizers & Snacks (159)
  • Breakfast & Brunch (128)
  • Desserts & Baking (168)
  • Drinks & Beverages (134)
  • Gluten-Free (204)
  • Grilling & BBQ (11)
  • Healthy & Low-Calorie (192)
  • Holiday & Seasonal (20)
  • Kid-Friendly (239)
  • Main Dishes (190)
  • Quick & Easy (30-Min) (684)
  • Slow Cooker & Instant Pot (4)
  • Soups & Salads (109)
  • Vegan (162)
  • Vegetarian (562)

About Me

I'm Linda, a health professional and food writer sharing tested, easy-to-follow recipes made from simple ingredients.

Email: jspiceygiftstv@gmail.com

Useful Links

  • Home
  • About
  • Contact
  • Free Cookbooks
  • Terms and Conditions
  • Privacy Policy

Newsletter

Subscribe to to our Newsletter to stay updated with all our recipes.

Recent Posts

  • Savory Garlic Butter Turkey Meatballs on Creamy Herbed Polenta

    September 14, 2026
  • Moroccan-Spiced Quinoa-Stuffed Eggplant Boats

    September 14, 2026
  • Instagram
  • Pinterest
  • Youtube
  • Tiktok

@2026 - All Right Reserved. Designed and Developed by JSpiceyGifts

J Spicey Gifts
  • Home
  • Recipes
    • Breakfast & Brunch
    • Appetizers & Snacks
    • Main Dishes
    • Soups & Salads
    • Desserts & Baking
    • Drinks & Beverages
  • Categories
    • Vegetarian
    • Vegan
    • Gluten-Free
    • Quick & Easy (30-Min)
    • Slow Cooker & Instant Pot
    • Grilling & BBQ
    • Healthy & Low-Calorie
    • Holiday & Seasonal
    • Kid-Friendly
  • About
  • Contact

Shopping Cart

Close

No products in the cart.

Close