J Spicey Gifts
  • Home
  • Recipes
    • Breakfast & Brunch
    • Appetizers & Snacks
    • Main Dishes
    • Soups & Salads
    • Desserts & Baking
    • Drinks & Beverages
  • Categories
    • Vegetarian
    • Vegan
    • Gluten-Free
    • Quick & Easy (30-Min)
    • Slow Cooker & Instant Pot
    • Grilling & BBQ
    • Healthy & Low-Calorie
    • Holiday & Seasonal
    • Kid-Friendly
  • About
  • Contact
Top Posts
Fresh Strawberry Spinach Salad with Creamy Poppyseed Dressing
Silky Curried Carrot and Coconut Soup with Fresh...
Savory Garlic Butter Turkey Meatballs on Creamy Herbed...
Moroccan-Spiced Quinoa-Stuffed Eggplant Boats
Zesty Cajun Jambalaya with Shrimp and Andouille Sausage
Herb-Crusted Pork Tenderloin with Sweet Fig Reduction Sauce
Sweet and Spicy Chipotle-Mango Glazed Salmon with Coconut...
Crispy Balsamic Glazed Brussels Sprout Bites
Stuffed Mini Peppers with Spinach and Feta Delight
Savory Chive and Cheddar Breakfast Scones
J Spicey Gifts
  • Home
  • Recipes
    • Breakfast & Brunch
    • Appetizers & Snacks
    • Main Dishes
    • Soups & Salads
    • Desserts & Baking
    • Drinks & Beverages
  • Categories
    • Vegetarian
    • Vegan
    • Gluten-Free
    • Quick & Easy (30-Min)
    • Slow Cooker & Instant Pot
    • Grilling & BBQ
    • Healthy & Low-Calorie
    • Holiday & Seasonal
    • Kid-Friendly
  • About
  • Contact
J Spicey Gifts
J Spicey Gifts
  • Home
  • Recipes
    • Breakfast & Brunch
    • Appetizers & Snacks
    • Main Dishes
    • Soups & Salads
    • Desserts & Baking
    • Drinks & Beverages
  • Categories
    • Vegetarian
    • Vegan
    • Gluten-Free
    • Quick & Easy (30-Min)
    • Slow Cooker & Instant Pot
    • Grilling & BBQ
    • Healthy & Low-Calorie
    • Holiday & Seasonal
    • Kid-Friendly
  • About
  • Contact
Copyright 2021 - All Right Reserved
Choco-Matcha Mint Fusion Shake
Drinks & BeveragesQuick & Easy (30-Min)Vegetarian

Choco-Matcha Mint Fusion Shake

by Linda August 10, 2026
written by Linda

Cool down with this Choco-Matcha Mint Fusion Shake, a delightful treat that combines the rich flavors of chocolate and the earthy tones of matcha green tea. This shake is not only refreshing but also packed with antioxidants and a burst of minty freshness, making it a perfect pick-me-up for any time of the day.

The balance between the creamy chocolate base and the subtly bitter matcha creates a multi-layered flavor experience that will satisfy your cravings. Whether you’re enjoying it after a workout or as a midday indulgence, this shake is sure to impress.

Choco-Matcha Mint Fusion Shake

Choco-Matcha Mint Fusion Shake

Serves: 2 Prep Time: 10 minutes Cooking Time: 0 minutes 0 minutes
Nutrition facts: 250 calories 8g fat
Rating: 5.0/5
( 1 voted )
Pin
Print

Ingredients

INGREDIENTS

  • 2 cups milk (dairy or non-dairy)
  • 2 tablespoons cocoa powder
  • 2 tablespoons matcha powder
  • 1/4 cup fresh mint leaves
  • 2 tablespoons honey or agave syrup
  • 1 cup ice cubes
  • Whipped cream for topping (optional)
  • Dark chocolate shavings for garnish (optional)

Instructions

  1. In a blender, combine milk, cocoa powder, matcha powder, mint leaves, honey, and ice cubes.
  2. Blend until smooth and creamy, ensuring all ingredients are well incorporated.
  3. Taste and adjust sweetness if necessary by adding more honey or agave syrup.
  4. Pour the shake into glasses and top with whipped cream if desired.
  5. Garnish with dark chocolate shavings or a sprig of mint for a final touch. Serve immediately.

Notes

Tip: For a richer taste, let the matcha and cocoa mix sit in the milk for a couple of minutes before blending to enhance the flavors.

For an extra creamy texture, use frozen bananas or a scoop of vanilla ice cream instead of ice cubes. You can adjust the sweetness by adding honey or agave syrup based on your preference. If you’re looking for a vegan option, substitute regular milk with almond or oat milk.

Store any leftovers in the fridge for up to a day, but consume them quickly as the flavors are best when fresh. This shake is also great as a base for smoothie bowls; just top it with your favorite nuts, seeds, and fruits!


August 10, 2026 0 comments
0 FacebookTwitterPinterestPocketEmail
Refreshing Spiced Hibiscus Iced Tea Elixir
Drinks & BeveragesHealthy & Low-CalorieQuick & Easy (30-Min)Vegan

Refreshing Spiced Hibiscus Iced Tea Elixir

by Linda August 10, 2026
written by Linda

Experience the vibrant flavors of summer with this refreshing Spiced Hibiscus Iced Tea Elixir. This drink combines the tartness of hibiscus tea with aromatic spices, creating a beautifully balanced iced beverage that is both invigorating and soothing.

With its deep ruby red color and a hint of sweetness, this elixir is not just eye-catching but also packed with health benefits. Hibiscus tea is known for its antioxidants, while spices like cinnamon and ginger add warmth and depth, making it a delightful choice for any occasion.

Refreshing Spiced Hibiscus Iced Tea Elixir

Refreshing Spiced Hibiscus Iced Tea Elixir

Serves: 4 Prep Time: 10 minutes Cooking Time: 15 minutes 15 minutes
Nutrition facts: 80 calories 0g fat
Rating: 5.0/5
( 1 voted )
Pin
Print

Ingredients

INGREDIENTS

  • 4 cups water
  • 1 cup dried hibiscus flowers
  • 1 cinnamon stick
  • 1 tablespoon grated ginger
  • 1/2 cup honey or to taste
  • 1 tablespoon lemon juice
  • Ice cubes
  • Fresh mint leaves for garnish

Instructions

  1. Bring water to a boil in a saucepan.
  2. Remove from heat and add dried hibiscus flowers, cinnamon stick, and grated ginger.
  3. Cover and let steep for about 10-15 minutes.
  4. Strain the tea into a pitcher and stir in honey and lemon juice until dissolved.
  5. Allow the tea to cool to room temperature, then refrigerate until chilled.
  6. Serve over ice and garnish with fresh mint leaves. Enjoy!

Notes

This drink can be made ahead of time and stored in the fridge for up to 3 days.

For a more intense flavor, allow the hibiscus tea to steep longer, but be cautious not to overdo it, as it can become overly tart. You can also adjust the sweetness with honey or agave syrup based on your preference.

Feel free to experiment with additional spices like cardamom or cloves for a unique twist. This elixir can be stored in the refrigerator for up to three days, making it an excellent make-ahead option for gatherings.

August 10, 2026 0 comments
0 FacebookTwitterPinterestPocketEmail
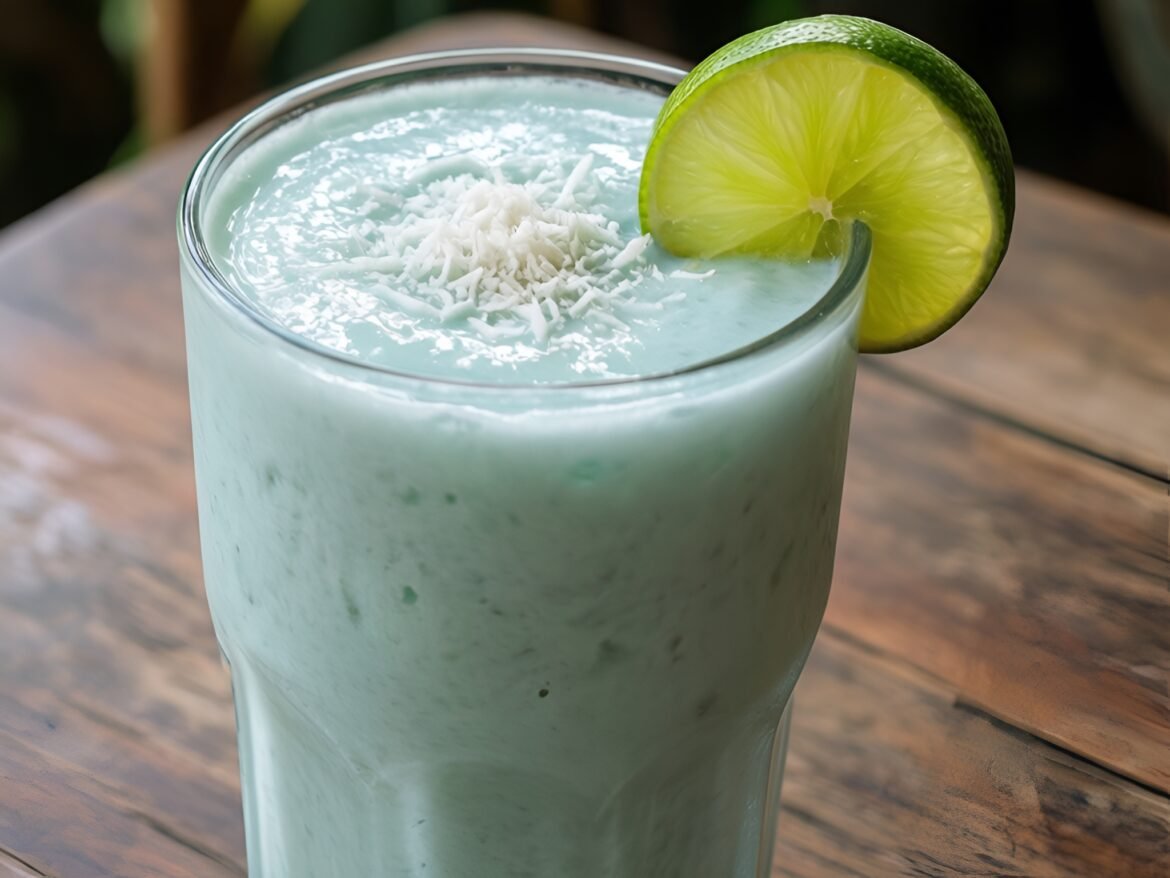
Tropical Creamy Coconut-Lime Dream Smoothie
Drinks & BeveragesQuick & Easy (30-Min)Vegetarian

Tropical Creamy Coconut-Lime Dream Smoothie

by Linda August 10, 2026
written by Linda

Elevate your mornings with this Tropical Creamy Coconut-Lime Dream Smoothie that brings a taste of the tropics right to your kitchen. The combination of coconut milk and fresh lime creates a delightfully creamy texture with a zesty kick, making it the perfect refreshing beverage for hot days.

This smoothie is not only delicious but also packed with nutrients. The natural sweetness from ripe bananas and a hint of honey complement the tropical flavors beautifully. Blend this up for a quick breakfast on the go or a revitalizing afternoon pick-me-up!

Tropical Creamy Coconut-Lime Dream Smoothie

Tropical Creamy Coconut-Lime Dream Smoothie

Serves: 2 Prep Time: 5 minutes Cooking Time: 0 minutes 0 minutes
Nutrition facts: 220 calories 9g fat
Rating: 5.0/5
( 1 voted )
Pin
Print

Ingredients

INGREDIENTS

  • 1 ripe banana
  • 1 cup coconut milk
  • 1/2 cup Greek yogurt
  • Juice of 1 lime
  • 1 tablespoon honey (or agave syrup)
  • 1/2 teaspoon vanilla extract
  • 1/2 cup ice cubes

Instructions

  1. Peel the banana and place it in a blender.
  2. Add the coconut milk, Greek yogurt, lime juice, honey, and vanilla extract to the blender.
  3. Add the ice cubes for a refreshing chill.
  4. Blend on high speed until smooth and creamy, ensuring there are no chunks of banana or ice left.
  5. Taste and adjust sweetness if necessary by adding more honey or lime juice.
  6. Pour the smoothie into glasses and serve immediately, garnished with a lime wedge or a sprinkle of shredded coconut if desired.

Notes

Tip: For added flavor, consider adding a dash of coconut extract or a handful of fresh mint leaves during blending.

For a thicker smoothie, freeze the banana beforehand. You can also add a handful of spinach or kale for an extra health boost without altering the flavor significantly.

Storing leftovers? Keep them in the fridge for up to 24 hours, but note that the smoothie may separate. Simply give it a good shake or stir before enjoying!

August 10, 2026 0 comments
0 FacebookTwitterPinterestPocketEmail
Citrus-Basil Sparkling Refresher: A Zesty Summer Sip
Drinks & BeveragesQuick & Easy (30-Min)Vegan

Citrus-Basil Sparkling Refresher: A Zesty Summer Sip

by Linda August 10, 2026
written by Linda

Experience a burst of flavor with this Citrus-Basil Sparkling Refresher, a delightful beverage that combines the bright notes of citrus with the aromatic essence of fresh basil. Perfect for summer gatherings or a cozy afternoon on the porch, this drink is sure to impress with its refreshing taste and sparkling fizz.

Utilizing fresh orange, lemon, and lime juices, this recipe capitalizes on the natural sweetness of fruit balanced with the herbal notes of basil. The addition of sparkling water makes it an effervescent treat that can be enjoyed by all ages!

Citrus-Basil Sparkling Refresher: A Zesty Summer Sip

Citrus-Basil Sparkling Refresher: A Zesty Summer Sip

Serves: 4 Prep Time: 10 minutes Cooking Time: 0 minutes 0 minutes
Nutrition facts: 80 calories 0g fat
Rating: 5.0/5
( 1 voted )
Pin
Print

Ingredients

INGREDIENTS

  • 1/2 cup fresh orange juice
  • 1/4 cup fresh lemon juice
  • 1/4 cup fresh lime juice
  • 1/4 cup simple syrup
  • 1 cup fresh basil leaves
  • 3 cups sparkling water
  • Ice
  • Orange and lemon slices for garnish

Instructions

  1. In a large pitcher, combine the fresh orange juice, lemon juice, lime juice, and simple syrup.
  2. Add the fresh basil leaves and muddle gently to release the basil's aroma and flavor.
  3. Fill glasses with ice and pour the citrus mixture over the ice until each glass is about half full.
  4. Top each glass with sparkling water and stir gently to combine.
  5. Garnish with slices of orange and lemon, and a sprig of basil if desired. Serve immediately.

Notes

Tip: For a more intense basil flavor, let the basil steep in the citrus juices for about an hour before adding the sparkling water.

For a fun twist, try muddling some fresh berries or cucumber slices with the basil before adding the citrus juices. This can enhance the flavor profile and add a beautiful color to your drink.

If you prefer a less sweet version, reduce the amount of simple syrup, or use a sugar substitute. The drink can also be made in advance; just combine the juices and basil, refrigerate, and add sparkling water just before serving for maximum fizz.

August 10, 2026 0 comments
0 FacebookTwitterPinterestPocketEmail
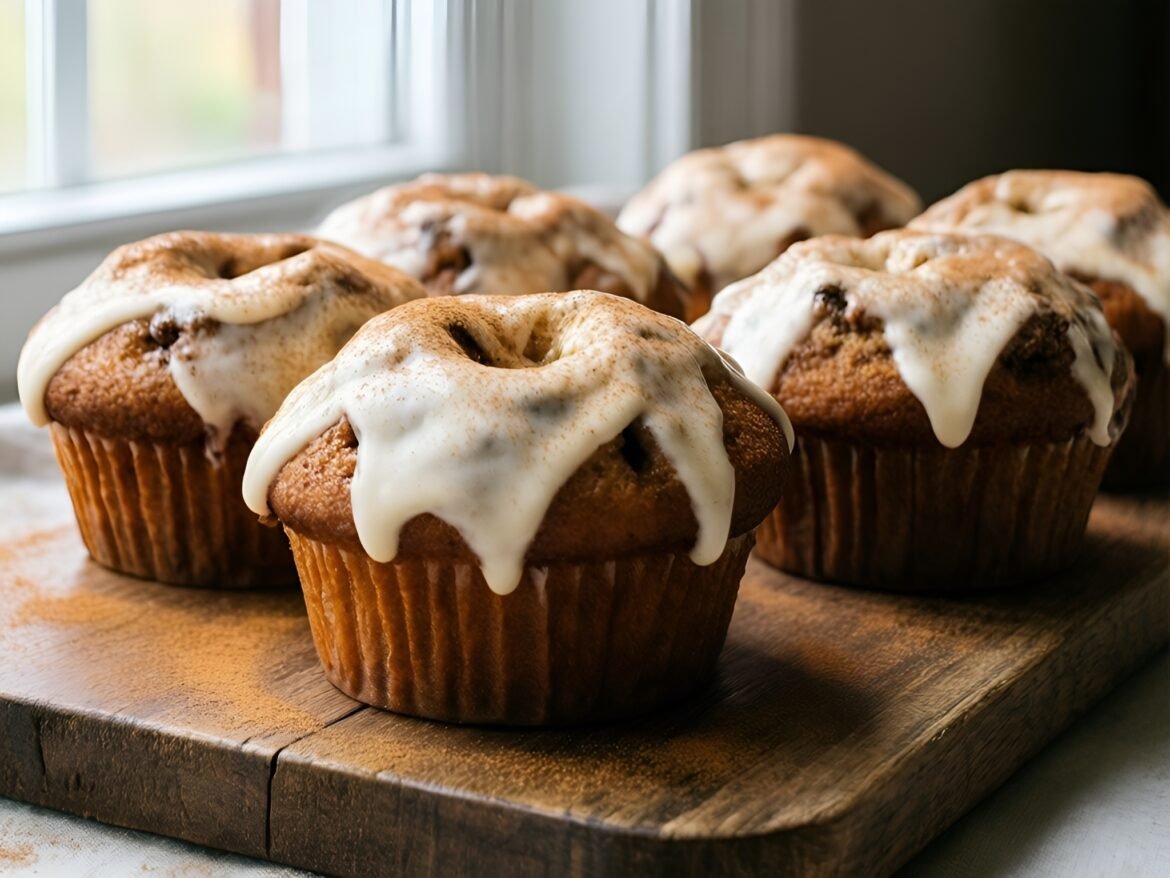
Delightful Cinnamon Roll Doughnut Muffins with Cream Cheese Frosting
Breakfast & BrunchQuick & Easy (30-Min)

Delightful Cinnamon Roll Doughnut Muffins with Cream Cheese Frosting

by Linda August 10, 2026
written by Linda

These Cinnamon Roll Doughnut Muffins combine the best of both worlds: the tender, fluffy texture of muffins and the delightful sweetness of cinnamon rolls. Perfect for breakfast or brunch, these muffins are easy to make and will leave your kitchen smelling heavenly.

What truly sets these muffins apart is their luscious cream cheese frosting. Drizzled on top, it adds a rich and tangy sweetness that perfectly complements the warm cinnamon flavor. With a few simple ingredients, you can create a batch that will impress family and friends alike!

Delightful Cinnamon Roll Doughnut Muffins with Cream Cheese Frosting

Delightful Cinnamon Roll Doughnut Muffins with Cream Cheese Frosting

Serves: 12 Prep Time: 20 minutes Cooking Time: 15 minutes 15 minutes
Nutrition facts: 220 calories 10g fat
Rating: 5.0/5
( 1 voted )
Pin
Print

Ingredients

INGREDIENTS

  • 2 cups all-purpose flour
  • 1 cup granulated sugar
  • 1 tablespoon baking powder
  • 1/2 teaspoon salt
  • 1 teaspoon ground cinnamon
  • 1/2 cup unsalted butter, melted
  • 1 cup milk
  • 2 large eggs
  • 1 teaspoon vanilla extract
  • 1/2 cup brown sugar
  • 1 tablespoon ground cinnamon (for filling)
  • 1/2 cup cream cheese, softened
  • 1/2 cup powdered sugar
  • 1-2 tablespoons milk (for frosting)

Instructions

  1. Preheat the oven to 350°F (175°C) and grease a muffin tin or line with muffin liners.
  2. In a large bowl, whisk together the flour, granulated sugar, baking powder, salt, and ground cinnamon.
  3. In another bowl, combine the melted butter, milk, eggs, and vanilla extract until well blended.
  4. Pour the wet ingredients into the dry ingredients and mix until just combined, being careful not to overmix.
  5. In a small bowl, combine the brown sugar and ground cinnamon for the filling.
  6. Spoon a small amount of muffin batter into each muffin cup, followed by a teaspoon of the cinnamon filling, and then cover with more batter until the cups are about 3/4 full.
  7. Bake for 15-18 minutes or until a toothpick inserted into the center comes out clean.
  8. While the muffins are baking, prepare the cream cheese frosting by beating together the softened cream cheese and powdered sugar; add milk until desired consistency is reached.
  9. Once the muffins are done, allow them to cool slightly before drizzling with cream cheese frosting. Serve warm or at room temperature.

Notes

Note: You can substitute almond milk or oat milk for a dairy-free version of these muffins.

For the best flavor, allow the muffins to cool slightly before adding the cream cheese frosting. This will prevent the frosting from melting too much. If you want to experiment, try adding chopped nuts or raisins to the batter for added texture.

Storage-wise, these muffins keep well in an airtight container for up to three days at room temperature. Reheat them briefly in the microwave for that fresh-baked taste!

August 10, 2026 0 comments
0 FacebookTwitterPinterestPocketEmail
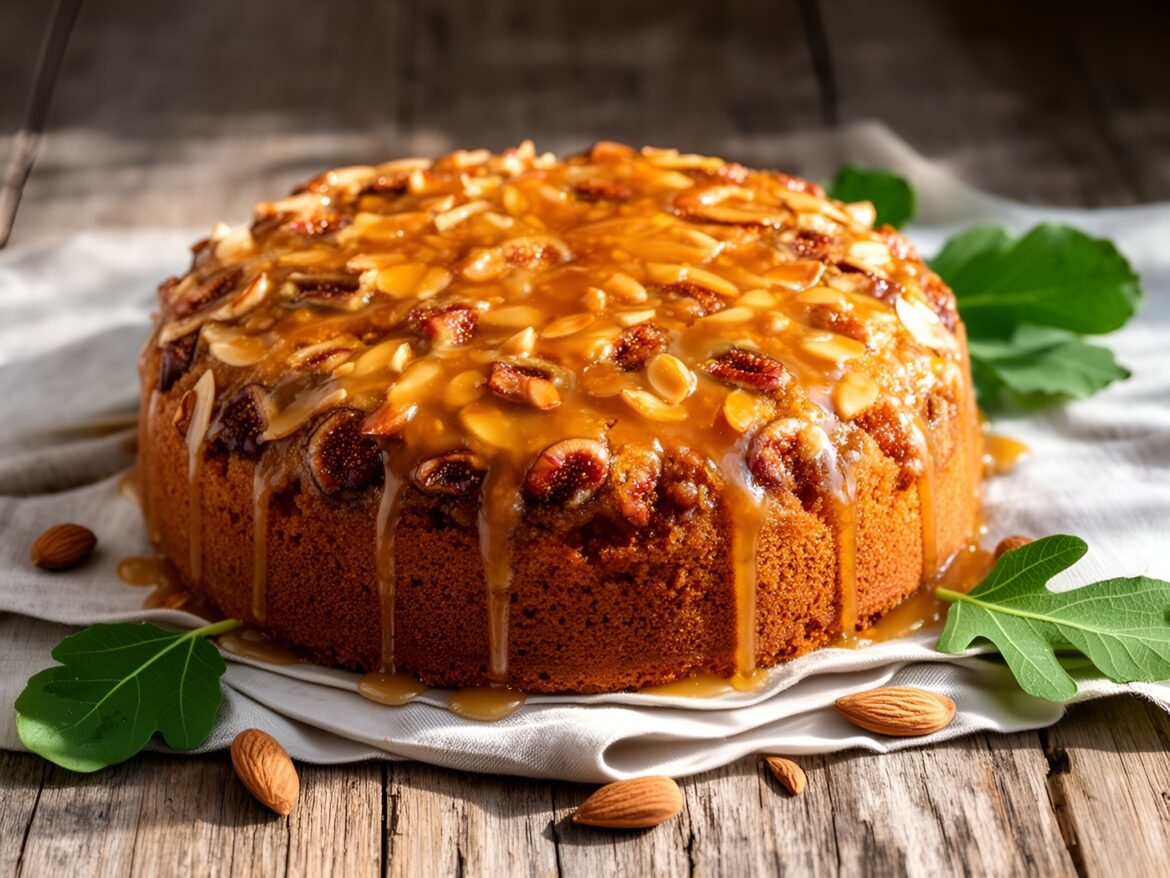
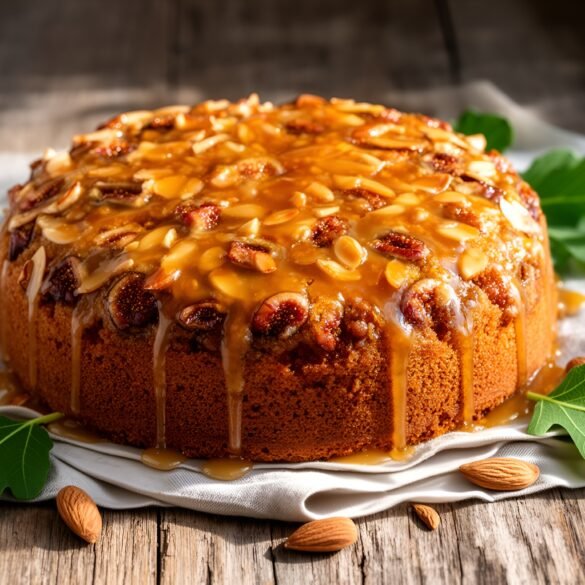
Decadent Toasted Almond Fig Cake with Maple Drizzle
Desserts & BakingQuick & Easy (30-Min)Vegetarian

Decadent Toasted Almond Fig Cake with Maple Drizzle

by Linda August 10, 2026
written by Linda

This Toasted Almond Fig Cake is a delightful treat that balances the nutty richness of toasted almonds with the natural sweetness of figs. The moist, tender crumb of the cake is perfectly complemented by a luscious maple glaze that adds a hint of warmth and sweetness, making it an ideal dessert for any occasion.

Using fresh or dried figs, this cake is not only simple to make but also offers a unique flavor profile that will impress your guests. Serve it warm or at room temperature with a cup of coffee or tea for a cozy afternoon delight!

Decadent Toasted Almond Fig Cake with Maple Drizzle

Decadent Toasted Almond Fig Cake with Maple Drizzle

Serves: 8 Prep Time: 20 minutes Cooking Time: 40 minutes 40 minutes
Nutrition facts: 320 calories 15g fat
Rating: 5.0/5
( 1 voted )
Pin
Print

Ingredients

INGREDIENTS

  • 1 1/2 cups all-purpose flour
  • 1/2 teaspoon baking powder
  • 1/2 teaspoon baking soda
  • 1/4 teaspoon salt
  • 1/2 cup unsalted butter, softened
  • 1 cup granulated sugar
  • 2 large eggs
  • 1 teaspoon pure vanilla extract
  • 1/2 cup milk
  • 1 cup figs, chopped (fresh or dried)
  • 1/2 cup toasted almonds, roughly chopped
  • 1/2 cup maple syrup (for glaze)

Instructions

  1. Preheat your oven to 350°F (175°C) and grease a 9-inch round cake pan.
  2. In a medium bowl, whisk together flour, baking powder, baking soda, and salt. Set aside.
  3. In a large mixing bowl, cream together the softened butter and sugar until light and fluffy.
  4. Add the eggs one at a time, mixing well after each addition, then stir in the vanilla extract.
  5. Gradually add the dry ingredients to the wet mixture, alternating with the milk, and mix until just combined.
  6. Fold in the chopped figs and toasted almonds gently until evenly distributed.
  7. Pour the batter into the prepared cake pan and smooth the top with a spatula.
  8. Bake for 35-40 minutes, or until a toothpick inserted in the center comes out clean.
  9. While the cake is baking, prepare the maple glaze by warming the maple syrup in a small saucepan over low heat.
  10. Remove the cake from the oven and let it cool for 10 minutes before transferring it to a wire rack.
  11. Once cooled, drizzle the warm maple glaze over the top of the cake before serving.

Notes

Tip: For an extra touch, sprinkle some additional toasted almonds on top of the glaze before it sets for added crunch and presentation.

For a lighter version, you can substitute half of the all-purpose flour with almond flour to enhance the nutty flavor. Make sure to chop the figs into small pieces to ensure even distribution throughout the cake.

If you’re short on time, you can prepare the cake in advance and store it in an airtight container at room temperature for up to 3 days. Reheat individual slices in the microwave for a few seconds before serving.

August 10, 2026 0 comments
0 FacebookTwitterPinterestPocketEmail
Desserts & BakingGluten-FreeKid-FriendlyVegan

Luxurious Matcha Velvet Mousse Tarts with Creamy Coconut Whip

by Linda August 10, 2026
written by Linda

Experience a heavenly dessert with these Luxurious Matcha Velvet Mousse Tarts. With a luscious matcha mousse filling that melts in your mouth, these tarts bring a delightful green tea flavor that is both refreshing and satisfying.

The silky coconut whip on top adds a creamy texture and balances the earthy tones of the matcha. Perfect for special occasions or a sweet treat at home, these tarts are as beautiful as they are delicious.

Luxurious Matcha Velvet Mousse Tarts with Creamy Coconut Whip

Serves: 4 Prep Time: 20 minutes Cooking Time: 30 minutes 30 minutes
Nutrition facts: 250 calories 15g fat
Rating: 5.0/5
( 1 voted )
Pin
Print

Ingredients

INGREDIENTS

  • 1 cup almond flour
  • 2 tablespoons melted coconut oil
  • 2 tablespoons maple syrup
  • 1/4 cup coconut milk
  • 3 tablespoons matcha powder
  • 2 tablespoons agave syrup
  • 1/2 cup coconut cream
  • 1 teaspoon vanilla extract
  • Pinch of salt

Instructions

  1. Preheat your oven to 350°F (175°C).
  2. In a mixing bowl, combine almond flour, melted coconut oil, and maple syrup to form a dough.
  3. Press the dough into tartlet pans evenly and bake for 10-12 minutes until lightly golden.
  4. In another bowl, whisk together coconut milk, matcha powder, agave syrup, and a pinch of salt until smooth and well combined.
  5. Once the tart shells are cool, fill them with the matcha mousse mixture.
  6. Refrigerate the tarts for at least 2 hours to set the mousse completely.
  7. For the coconut whip, chill the coconut cream overnight, then whip it until fluffy and add vanilla extract.
  8. Top the tarts with coconut whip before serving and garnish with matcha powder.

Notes

Tip: Chill the tart pans before filling them to ensure easier removal later on.

For the best results, use high-quality matcha powder for a vibrant color and rich flavor. If you’re looking for an alternative for coconut whip, you can substitute it with a vegan whipped topping or regular whipped cream.

Store any leftover mousse in the refrigerator for up to two days, and serve it chilled for the best experience. These tarts are best enjoyed fresh but can be prepared a day in advance for convenience.

August 10, 2026 0 comments
0 FacebookTwitterPinterestPocketEmail
Decadent Chocolate Hazelnut Bliss Bombs
Desserts & BakingGluten-FreeQuick & Easy (30-Min)Vegan

Decadent Chocolate Hazelnut Bliss Bombs

by Linda August 10, 2026
written by Linda

These Chocolate Hazelnut Bliss Bombs are a delightful bite-sized treat that combines rich chocolate and the nutty flavor of hazelnuts. They are not only delicious but also packed with energy, making them an excellent snack for any time of the day.

Made with simple, wholesome ingredients, these bliss bombs are naturally sweetened and require no baking. Just mix, roll, and enjoy! Perfect for satisfying those chocolate cravings while keeping things healthy.

Decadent Chocolate Hazelnut Bliss Bombs

Decadent Chocolate Hazelnut Bliss Bombs

Serves: 12 Prep Time: 15 minutes Cooking Time: 0 minutes 0 minutes
Nutrition facts: 120 calories 6g fat
Rating: 5.0/5
( 1 voted )
Pin
Print

Ingredients

INGREDIENTS

  • 1 cup hazelnuts
  • 1 cup Medjool dates, pitted
  • 1/2 cup unsweetened cocoa powder
  • 1/4 cup almond flour
  • 1/4 cup pure maple syrup
  • 1 teaspoon vanilla extract
  • Pinch of sea salt
  • 1/4 cup dark chocolate chips (optional for coating)

Instructions

  1. In a food processor, blend the hazelnuts until finely ground but not pasty.
  2. Add the pitted dates, cocoa powder, almond flour, maple syrup, vanilla extract, and sea salt. Pulse until the mixture is well combined and sticky.
  3. With your hands, scoop out about a tablespoon of the mixture and roll it into a ball. Repeat with the remaining mixture.
  4. If using, melt the dark chocolate chips in a microwave or double boiler. Dip each bliss bomb into the melted chocolate, then place on a parchment-lined tray.
  5. Refrigerate for at least 30 minutes to set the chocolate before serving.

Notes

Tip: Adjust sweetness by adding more or less maple syrup according to your taste preference.

For variations, try adding a pinch of sea salt or a sprinkle of chia seeds for added texture and nutritional benefits. If you prefer a different nut, almonds or walnuts work well too.

Store your bliss bombs in an airtight container in the refrigerator for up to a week. They can also be frozen for longer storage; just thaw them in the fridge before enjoying.

August 10, 2026 0 comments
0 FacebookTwitterPinterestPocketEmail
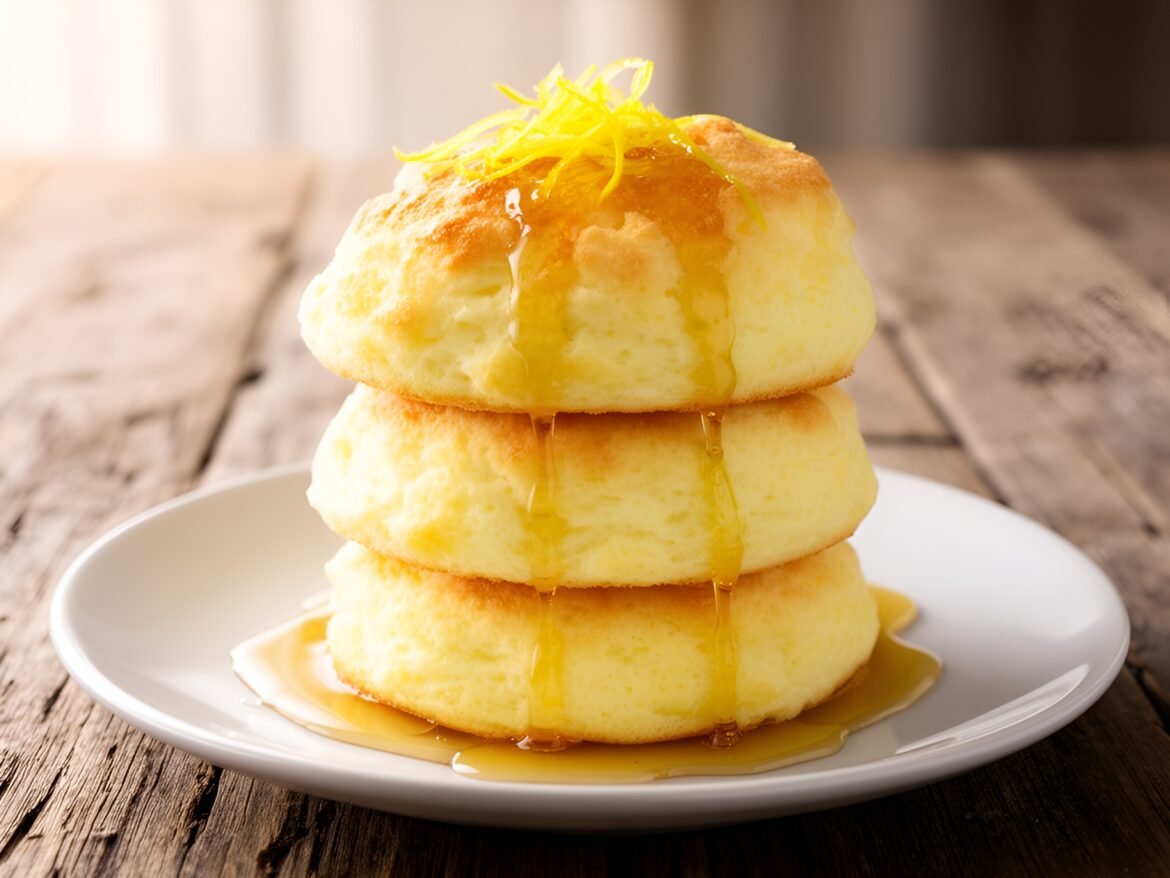
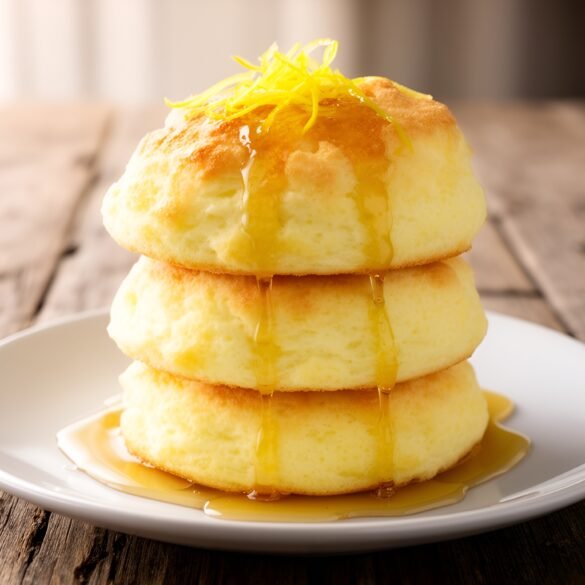
Fluffy Lemon-Ricotta Cloud Cakes with Sweet Honey Drizzle
Breakfast & BrunchQuick & Easy (30-Min)Vegetarian

Fluffy Lemon-Ricotta Cloud Cakes with Sweet Honey Drizzle

by Linda August 10, 2026
written by Linda

These fluffy Lemon-Ricotta Cloud Cakes are a delightful twist on traditional pancakes, offering a light and airy texture that melts in your mouth. The ricotta cheese adds creaminess while the zesty lemon brightens every bite, making them a refreshing choice for breakfast or brunch.

Drizzled with a touch of honey, these cloud cakes are not only delicious but also visually appealing. They are incredibly easy to whip up and can be served with fresh fruits or a dollop of whipped cream for an indulgent touch. Perfect for lazy weekends or special occasions!

Fluffy Lemon-Ricotta Cloud Cakes with Sweet Honey Drizzle

Fluffy Lemon-Ricotta Cloud Cakes with Sweet Honey Drizzle

Serves: 4 Prep Time: 15 minutes Cooking Time: 20 minutes 20 minutes
Nutrition facts: 210 calories 7g fat
Rating: 5.0/5
( 1 voted )
Pin
Print

Ingredients

INGREDIENTS

  • 1 cup ricotta cheese
  • 2 large eggs
  • 1/4 cup sugar
  • 1/2 cup all-purpose flour
  • 1 tsp baking powder
  • 1/4 tsp salt
  • 1/2 cup milk
  • Zest of 1 lemon
  • 2 tbsp lemon juice
  • Butter or oil for cooking
  • Honey for drizzling

Instructions

  1. In a large mixing bowl, combine ricotta cheese, eggs, and sugar; whisk until smooth.
  2. Add flour, baking powder, salt, milk, lemon zest, and lemon juice; mix until just combined, being careful not to overmix.
  3. Heat a non-stick skillet over medium heat and lightly grease with butter or oil.
  4. Pour 1/4 cup of the batter onto the skillet for each cake; cook until bubbles form on the surface, about 2-3 minutes.
  5. Flip the cakes and cook for another 2-3 minutes, until golden brown and cooked through.
  6. Remove from skillet and keep warm; repeat with remaining batter.
  7. Serve the cloud cakes warm, drizzled with honey. Optionally, garnish with fresh fruits or a dusting of powdered sugar.

Notes

Storage: Store any leftover cloud cakes in an airtight container in the fridge for up to 3 days. Reheat in the microwave or on a skillet before serving.

For the best texture, ensure your eggs are at room temperature before whipping them; this helps incorporate more air for fluffiness. If you’re looking for a healthier alternative, consider using Greek yogurt instead of ricotta.

Try adding some fresh berries or lemon zest for extra flavor. These cloud cakes can be stored in an airtight container in the fridge for up to three days, and they reheat well in the microwave or on a skillet.

August 10, 2026 0 comments
0 FacebookTwitterPinterestPocketEmail
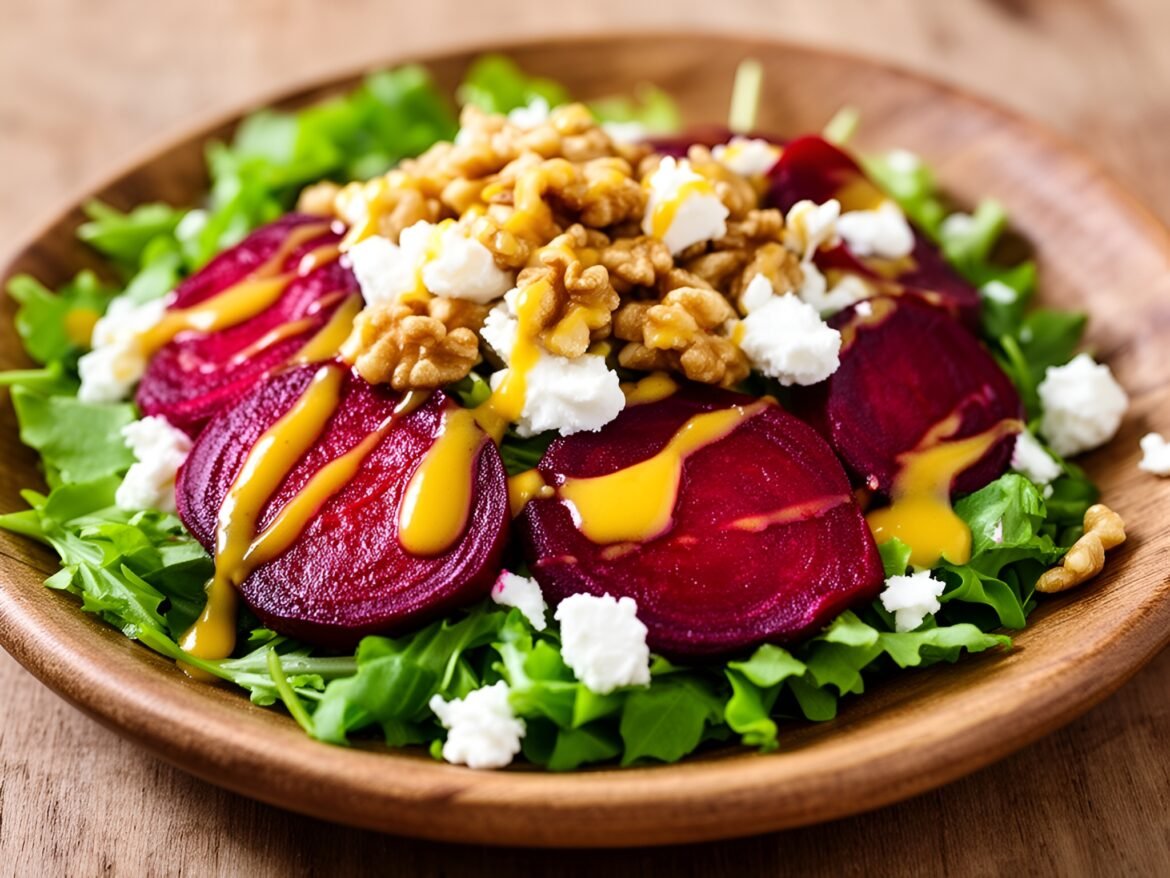
Crisp Honey-Mustard Roasted Beet Salad with Goat Cheese and Walnuts
Gluten-FreeHealthy & Low-CalorieSoups & SaladsVegetarian

Crisp Honey-Mustard Roasted Beet Salad with Goat Cheese and Walnuts

by Linda August 10, 2026
written by Linda

This Crisp Honey-Mustard Roasted Beet Salad is a delightful blend of flavors and textures. The earthy sweetness of roasted beets pairs beautifully with a tangy honey-mustard dressing, making it a standout dish for any occasion.

Roasting the beets enhances their natural sweetness and adds a lovely depth of flavor. Topped with creamy goat cheese and crunchy walnuts, this salad is as visually stunning as it is delicious. Perfect for a light lunch or as a side dish for dinner!

Crisp Honey-Mustard Roasted Beet Salad with Goat Cheese and Walnuts

Crisp Honey-Mustard Roasted Beet Salad with Goat Cheese and Walnuts

Serves: 4 Prep Time: 15 minutes Cooking Time: 45 minutes 45 minutes
Nutrition facts: 250 calories 18g fat
Rating: 5.0/5
( 1 voted )
Pin
Print

Ingredients

INGREDIENTS

  • 4 medium beets, scrubbed and trimmed
  • 2 tablespoons olive oil
  • Salt and pepper, to taste
  • 2 cups mixed greens (arugula, spinach, or lettuce)
  • 1/2 cup goat cheese, crumbled
  • 1/3 cup walnuts, toasted
  • For the Honey-Mustard Dressing:
  • 3 tablespoons Dijon mustard
  • 2 tablespoons honey
  • 3 tablespoons apple cider vinegar
  • 1/4 cup olive oil
  • Salt and pepper, to taste

Instructions

  1. Preheat the oven to 400°F (200°C).
  2. Wrap each beet individually in aluminum foil and place them on a baking sheet.
  3. Roast the beets in the preheated oven for about 45 minutes, or until tender when pierced with a fork.
  4. Allow the beets to cool slightly, then peel the skins off using your hands or a paper towel.
  5. Cut the roasted beets into wedges or slices and season with salt and pepper.
  6. In a small bowl, whisk together the Dijon mustard, honey, apple cider vinegar, olive oil, salt, and pepper until well combined.
  7. In a large bowl, toss the mixed greens with the honey-mustard dressing until evenly coated.
  8. Arrange the dressed greens on a serving platter and top with the roasted beet slices, crumbled goat cheese, and toasted walnuts.

Notes

Tip: For a sweeter dressing, adjust the honey to your taste. You can also substitute the goat cheese with feta for a different flavor profile.

For optimal flavor, allow the beets to cool slightly before tossing them in the dressing. This salad can be made ahead of time; just add the goat cheese and walnuts right before serving to keep them fresh.

If you’re looking for a variation, try substituting the walnuts with pecans or adding some fresh arugula for extra peppery flavor. Leftovers can be stored in the fridge for up to two days, but for the best texture, consume them within a day.

August 10, 2026 0 comments
0 FacebookTwitterPinterestPocketEmail
Newer Posts
Older Posts

Recent Posts

  • Fresh Strawberry Spinach Salad with Creamy Poppyseed Dressing

    September 14, 2026
  • Silky Curried Carrot and Coconut Soup with Fresh Herbs

    September 14, 2026
  • Savory Garlic Butter Turkey Meatballs on Creamy Herbed Polenta

    September 14, 2026
  • Moroccan-Spiced Quinoa-Stuffed Eggplant Boats

    September 14, 2026
  • Zesty Cajun Jambalaya with Shrimp and Andouille Sausage

    September 14, 2026

About Me

About Me

I'm Linda, a health professional, university graduate, and author sharing tested, easy-to-follow recipes made from simple, everyday ingredients. Based in Finland, I bring together my culinary training, love of travel, and home-cooked roots to help you cook confidently, on any budget.

Products

  • Spooky Creative Starry Sky Ceramic Mug Spooky Creative Starry Sky Ceramic Mug 10,00 €

Categories

  • Appetizers & Snacks (159)
  • Breakfast & Brunch (128)
  • Desserts & Baking (168)
  • Drinks & Beverages (134)
  • Gluten-Free (204)
  • Grilling & BBQ (11)
  • Healthy & Low-Calorie (193)
  • Holiday & Seasonal (20)
  • Kid-Friendly (239)
  • Main Dishes (190)
  • Quick & Easy (30-Min) (685)
  • Slow Cooker & Instant Pot (4)
  • Soups & Salads (111)
  • Vegan (163)
  • Vegetarian (564)

About Me

I'm Linda, a health professional and food writer sharing tested, easy-to-follow recipes made from simple ingredients.

Email: jspiceygiftstv@gmail.com

Useful Links

  • Home
  • About
  • Contact
  • Free Cookbooks
  • Terms and Conditions
  • Privacy Policy

Newsletter

Subscribe to to our Newsletter to stay updated with all our recipes.

Recent Posts

  • Fresh Strawberry Spinach Salad with Creamy Poppyseed Dressing

    September 14, 2026
  • Silky Curried Carrot and Coconut Soup with Fresh Herbs

    September 14, 2026
  • Instagram
  • Pinterest
  • Youtube
  • Tiktok

@2026 - All Right Reserved. Designed and Developed by JSpiceyGifts

J Spicey Gifts
  • Home
  • Recipes
    • Breakfast & Brunch
    • Appetizers & Snacks
    • Main Dishes
    • Soups & Salads
    • Desserts & Baking
    • Drinks & Beverages
  • Categories
    • Vegetarian
    • Vegan
    • Gluten-Free
    • Quick & Easy (30-Min)
    • Slow Cooker & Instant Pot
    • Grilling & BBQ
    • Healthy & Low-Calorie
    • Holiday & Seasonal
    • Kid-Friendly
  • About
  • Contact

Shopping Cart

Close

No products in the cart.

Close