J Spicey Gifts
  • Home
  • Recipes
    • Breakfast & Brunch
    • Appetizers & Snacks
    • Main Dishes
    • Soups & Salads
    • Desserts & Baking
    • Drinks & Beverages
  • Categories
    • Vegetarian
    • Vegan
    • Gluten-Free
    • Quick & Easy (30-Min)
    • Slow Cooker & Instant Pot
    • Grilling & BBQ
    • Healthy & Low-Calorie
    • Holiday & Seasonal
    • Kid-Friendly
  • About
  • Contact
Top Posts
Refreshing Lavender Citrus Sparkling Elixir for Summer Sips
Refreshing Cucumber Mint Cooler for Hot Days
Delightfully Decadent Toasted Almond Joy Cheesecake Bites
Raspberry Lemonade Tart with Meringue Clouds
Choco-Coconut Whirlwind Cookies
Elegant Saffron-Infused Vanilla Chiffon Cake
Caramelized Banana Pecan Bliss Bars
Fresh Strawberry Spinach Salad with Creamy Poppyseed Dressing
Silky Curried Carrot and Coconut Soup with Fresh...
Savory Garlic Butter Turkey Meatballs on Creamy Herbed...
J Spicey Gifts
  • Home
  • Recipes
    • Breakfast & Brunch
    • Appetizers & Snacks
    • Main Dishes
    • Soups & Salads
    • Desserts & Baking
    • Drinks & Beverages
  • Categories
    • Vegetarian
    • Vegan
    • Gluten-Free
    • Quick & Easy (30-Min)
    • Slow Cooker & Instant Pot
    • Grilling & BBQ
    • Healthy & Low-Calorie
    • Holiday & Seasonal
    • Kid-Friendly
  • About
  • Contact
J Spicey Gifts
J Spicey Gifts
  • Home
  • Recipes
    • Breakfast & Brunch
    • Appetizers & Snacks
    • Main Dishes
    • Soups & Salads
    • Desserts & Baking
    • Drinks & Beverages
  • Categories
    • Vegetarian
    • Vegan
    • Gluten-Free
    • Quick & Easy (30-Min)
    • Slow Cooker & Instant Pot
    • Grilling & BBQ
    • Healthy & Low-Calorie
    • Holiday & Seasonal
    • Kid-Friendly
  • About
  • Contact
Copyright 2021 - All Right Reserved
Tuscan Herb-Infused White Bean Pasta with Roasted Tomatoes
Main DishesQuick & Easy (30-Min)Vegetarian

Tuscan Herb-Infused White Bean Pasta with Roasted Tomatoes

by Linda August 6, 2026
written by Linda

This Tuscan Herb-Infused White Bean Pasta with Roasted Tomatoes is a delightful dish that brings the warmth and richness of Italian cuisine to your table. The creamy texture of white beans pairs beautifully with the sweetness of roasted tomatoes, creating a dish that is both satisfying and nutritious.

Utilizing fragrant herbs like basil and rosemary elevates the dish, while the simple yet effective cooking techniques allow the natural flavors to shine. Whether you’re looking for a comforting weeknight meal or a dish to impress guests, this pasta is sure to become a favorite!

Tuscan Herb-Infused White Bean Pasta with Roasted Tomatoes

Tuscan Herb-Infused White Bean Pasta with Roasted Tomatoes

Serves: 4 Prep Time: 15 minutes Cooking Time: 30 minutes 30 minutes
Nutrition facts: 450 calories 12g fat
Rating: 5.0/5
( 1 voted )
Pin
Print

Ingredients

INGREDIENTS

  • 12 oz pasta (like penne or fusilli)
  • 1 can (15 oz) white beans, drained and rinsed
  • 2 cups cherry tomatoes
  • 3 cloves garlic, minced
  • 2 tbsp olive oil
  • 1 tsp dried Italian herbs
  • 1 tsp fresh rosemary, chopped
  • Salt and pepper, to taste
  • 1/4 cup fresh basil, chopped
  • 1/4 cup grated Parmesan cheese (optional)

Instructions

  1. Preheat the oven to 400°F (200°C).
  2. On a baking sheet, toss cherry tomatoes with olive oil, minced garlic, dried Italian herbs, salt, and pepper. Roast for 20-25 minutes until tomatoes are blistered.
  3. Meanwhile, cook the pasta according to package instructions until al dente. Reserve 1 cup of pasta water, then drain the pasta.
  4. In a large skillet, combine the cooked pasta, white beans, roasted tomatoes, and rosemary. Mix gently, adding reserved pasta water as needed to create a creamy sauce.
  5. Stir in chopped basil and adjust seasoning with salt and pepper to taste.
  6. Serve hot, garnished with grated Parmesan cheese if desired.

Notes

Tip: For a vegan version, simply omit the Parmesan cheese.

For an extra layer of flavor, consider adding a pinch of red pepper flakes for a bit of heat. You can also substitute the white beans with chickpeas or lentils for a different texture.

If you have leftovers, store them in an airtight container in the refrigerator for up to 3 days. Reheat gently on the stove, adding a splash of water or vegetable broth to loosen the sauce.
August 6, 2026 0 comments
0 FacebookTwitterPinterestPocketEmail
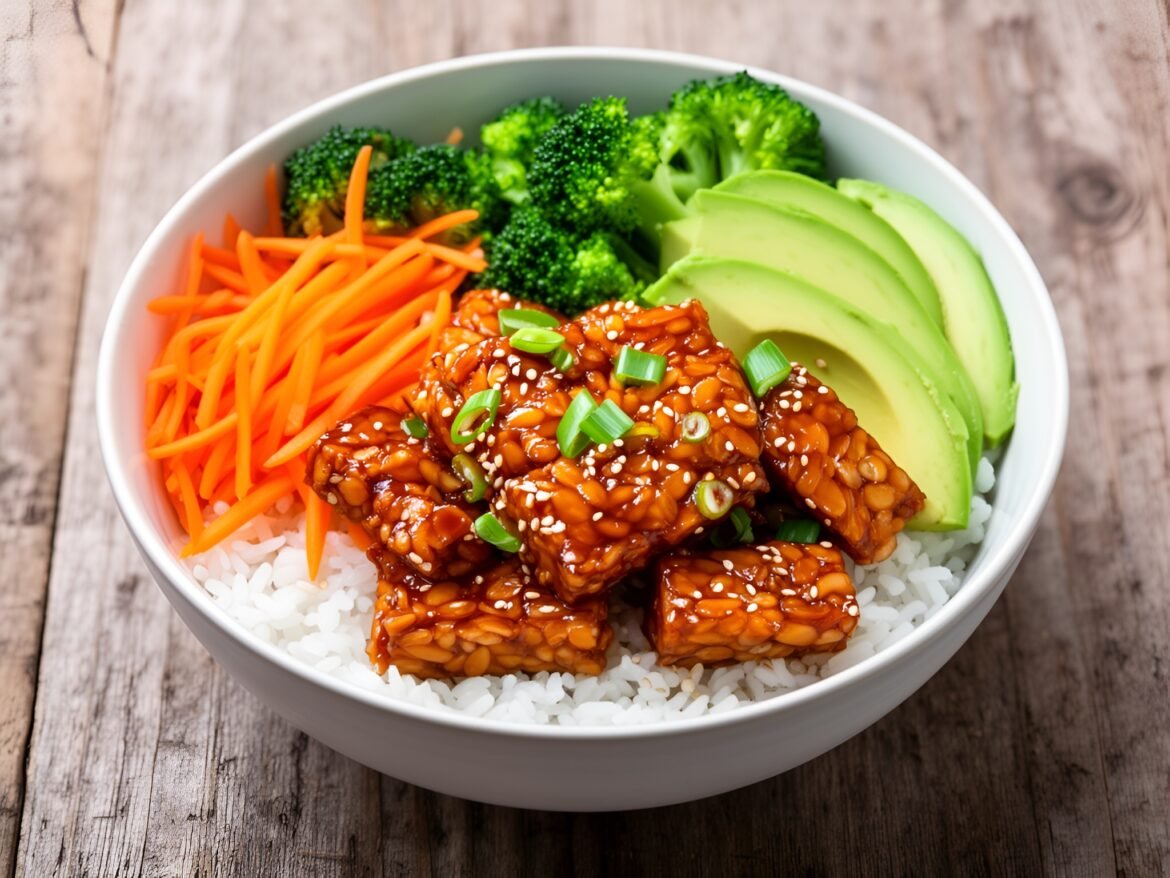
Crispy Maple-Sriracha Tempeh Bowls
Healthy & Low-CalorieMain DishesQuick & Easy (30-Min)Vegan

Crispy Maple-Sriracha Tempeh Bowls

by Linda August 6, 2026
written by Linda

Indulge in the perfect balance of sweet and spicy with these Crispy Maple-Sriracha Tempeh Bowls. This dish features crispy tempeh marinated in a luscious maple-sriracha sauce, providing a unique flavor experience that’s both satisfying and delicious.

Not only is this recipe easy to prepare, but it’s also packed with protein and perfect for meal prep. Serve it over a bed of fluffy rice or quinoa, topped with fresh vegetables and a drizzle of extra sauce to elevate your bowl!

Crispy Maple-Sriracha Tempeh Bowls

Crispy Maple-Sriracha Tempeh Bowls

Serves: 4 Prep Time: 15 minutes Cooking Time: 20 minutes 20 minutes
Nutrition facts: 350 calories 15g fat
Rating: 5.0/5
( 1 voted )
Pin
Print

Ingredients

INGREDIENTS

  • 8 oz tempeh, sliced
  • 3 tablespoons maple syrup
  • 2 tablespoons sriracha
  • 1 tablespoon soy sauce
  • 1 tablespoon olive oil
  • 2 cups cooked rice or quinoa
  • 1 cup steamed broccoli
  • 1 cup shredded carrots
  • 1 avocado, sliced
  • Sesame seeds for garnish
  • Chopped green onions for garnish

Instructions

  1. Preheat your oven to 400°F (200°C).
  2. In a bowl, whisk together maple syrup, sriracha, soy sauce, and olive oil to create the marinade.
  3. Place the sliced tempeh in the marinade and let it sit for at least 15 minutes to absorb the flavors.
  4. Line a baking sheet with parchment paper and arrange the marinated tempeh in a single layer.
  5. Bake in the preheated oven for 15-20 minutes, flipping halfway, until crispy and golden brown.
  6. Prepare serving bowls by layering the cooked rice or quinoa at the base.
  7. Top with steamed broccoli, shredded carrots, and crispy tempeh pieces.
  8. Add sliced avocado on top and sprinkle with sesame seeds and chopped green onions before serving.

Notes

Storage: These bowls can be stored in the refrigerator for up to 3 days. Reheat before serving.

For the crispiest tempeh, ensure it’s well-marinated and allow it to cook undisturbed in the pan. If you prefer a milder flavor, reduce the amount of sriracha in the marinade. You can also substitute tempeh with tofu or chicken if desired.

These bowls store well in the fridge for up to 3 days, making them great for meal prep. Just reheat them in the microwave or on the stovetop. Top with fresh herbs or a squeeze of lime before serving for added freshness!

August 6, 2026 0 comments
0 FacebookTwitterPinterestPocketEmail
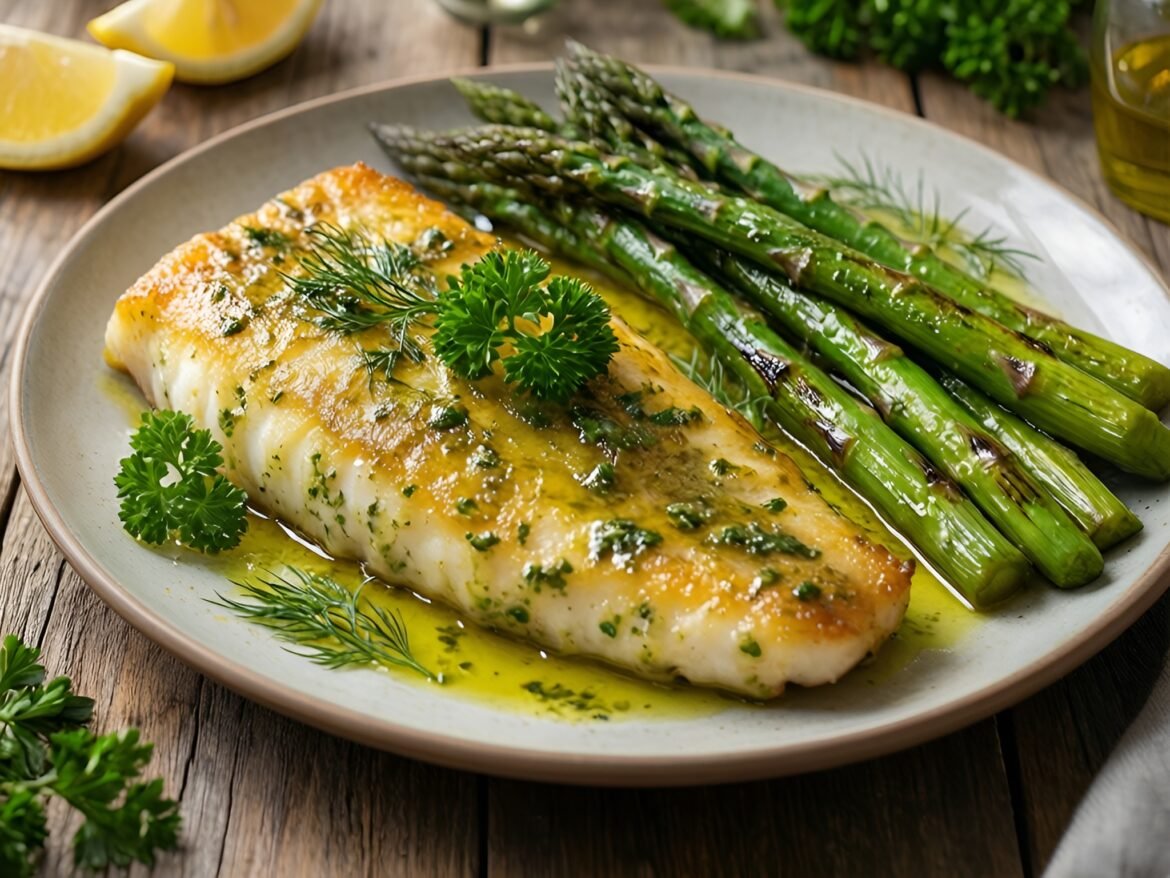
Lemon Herb-Butter Cod with Asparagus Delight
Healthy & Low-CalorieMain DishesQuick & Easy (30-Min)

Lemon Herb-Butter Cod with Asparagus Delight

by Linda August 6, 2026
written by Linda

This Lemon Herb-Butter Cod is a delightful way to enjoy a light, healthy meal. The cod fillets are flaky and tender, enhanced by a rich herb-butter mixture that brings out the fish’s natural flavors. Pairing the cod with bright, zesty lemon asparagus adds a pop of color and freshness to the plate.

With simple ingredients and quick cooking time, this dish is perfect for a weeknight dinner or entertaining guests. The combination of buttery herbs with crisp asparagus makes it both comforting and sophisticated, appealing to a variety of palates.

Lemon Herb-Butter Cod with Asparagus Delight

Lemon Herb-Butter Cod with Asparagus Delight

Serves: 4 Prep Time: 10 minutes Cooking Time: 15 minutes 15 minutes
Nutrition facts: 320 calories 15g fat
Rating: 5.0/5
( 1 voted )
Pin
Print

Ingredients

INGREDIENTS

  • 4 cod fillets
  • 2 tablespoons unsalted butter
  • 2 cloves garlic, minced
  • 1 tablespoon fresh parsley, chopped
  • 1 tablespoon fresh dill, chopped
  • 1 lemon, juiced and zested
  • 1 pound asparagus, trimmed
  • Salt and pepper to taste
  • Olive oil for drizzling

Instructions

  1. Preheat oven to 400°F (200°C).
  2. In a small bowl, mix together butter, minced garlic, chopped parsley, dill, lemon juice, and lemon zest. Set aside.
  3. Place cod fillets on a baking sheet lined with parchment paper. Season with salt and pepper.
  4. Spread the herb-butter mixture evenly over the top of each cod fillet.
  5. In a separate bowl, toss the trimmed asparagus with olive oil, salt, and pepper. Arrange the asparagus around the cod on the baking sheet.
  6. Bake for 12-15 minutes, or until the cod is opaque and flakes easily with a fork and the asparagus is tender.
  7. Serve immediately, garnished with lemon wedges if desired.

Notes

Tip: For added texture, broil the cod for the last 2 minutes of cooking for a crispy top.

When cooking the cod, avoid overcooking to maintain its flaky texture. You can substitute the cod with any firm white fish, such as haddock or tilapia, if desired.

If you’re short on time, you can prepare the herb-butter in advance and store it in the fridge. Just slice it and place it on the hot cod just before serving. Leftover asparagus can be enjoyed cold in salads or reheated briefly in a pan.

August 6, 2026 0 comments
0 FacebookTwitterPinterestPocketEmail
Golden Turmeric Coconut Curry Chicken
Gluten-FreeKid-FriendlyMain DishesQuick & Easy (30-Min)

Golden Turmeric Coconut Curry Chicken

by Linda August 6, 2026
written by Linda

Golden Turmeric Coconut Curry Chicken is a vibrant, aromatic dish that promises to transport your taste buds to a tropical paradise. The combination of turmeric and coconut milk creates a creamy, flavorful sauce that’s perfect for soaking into tender chicken pieces. This dish not only bursts with flavor but also offers the health benefits of turmeric, known for its anti-inflammatory properties.

Perfect for a family dinner or a special occasion, this curry is as easy to prepare as it is delicious. Serve it over steamed rice or with warm naan for a complete meal that will warm your heart and satisfy your cravings.

Golden Turmeric Coconut Curry Chicken

Golden Turmeric Coconut Curry Chicken

Serves: 4 Prep Time: 15 minutes Cooking Time: 30 minutes 30 minutes
Nutrition facts: 450 calories 22g fat
Rating: 5.0/5
( 1 voted )
Pin
Print

Ingredients

INGREDIENTS

  • 2 tablespoons coconut oil
  • 1 pound boneless, skinless chicken thighs, cut into bite-sized pieces
  • 1 medium onion, finely chopped
  • 3 cloves garlic, minced
  • 1 tablespoon fresh ginger, grated
  • 1 tablespoon ground turmeric
  • 1 tablespoon curry powder
  • 1 can (14 oz) coconut milk
  • 1 cup chicken broth
  • Salt and pepper to taste
  • Fresh cilantro for garnish
  • Juice of 1 lime

Instructions

  1. Heat coconut oil in a large skillet over medium heat.
  2. Add the chopped onion and sautƩ until translucent, about 5 minutes.
  3. Stir in the garlic and ginger, cooking until fragrant, about 1 minute.
  4. Add the chicken pieces and cook until browned on all sides, about 7-10 minutes.
  5. Sprinkle in the turmeric and curry powder, stirring to coat the chicken evenly.
  6. Pour in the coconut milk and chicken broth, bringing the mixture to a simmer.
  7. Season with salt and pepper, then reduce heat and let simmer for 15-20 minutes until chicken is cooked through and sauce thickens.
  8. Remove from heat and stir in lime juice before serving.
  9. Garnish with fresh cilantro and serve with rice or naan.

Notes

Note: For added flavor, marinate the chicken in turmeric and lime juice for 30 minutes before cooking.

For a vegetarian version, substitute chicken with chickpeas or tofu, adjusting the cooking time accordingly. If you prefer a spicier kick, add some chopped fresh chili or a dash of cayenne pepper to the curry. Don’t hesitate to experiment with additional vegetables like bell peppers or spinach to enhance the dish’s nutritional value.

Store any leftovers in an airtight container in the refrigerator for up to 3 days. Reheat gently on the stove or in the microwave, adding a splash of coconut milk to restore creaminess. Enjoy your delicious curry with a side of cooling cucumber salad!

August 6, 2026 0 comments
0 FacebookTwitterPinterestPocketEmail
Savory Sweet Potato and Chive Frittata
Breakfast & BrunchGluten-FreeQuick & Easy (30-Min)Vegetarian

Savory Sweet Potato and Chive Frittata

by Linda August 5, 2026
written by Linda

Start your day with a burst of flavor in this Savory Sweet Potato and Chive Frittata! This dish features creamy eggs combined with the natural sweetness of roasted sweet potatoes and the fresh, vibrant taste of chives.

It’s not just delicious; it’s also packed with nutrients, making it an ideal choice for a wholesome meal. Preparing a frittata is straightforward, and it can be customized with your favorite vegetables or herbs for a personal touch.

Savory Sweet Potato and Chive Frittata

Savory Sweet Potato and Chive Frittata

Serves: 4 Prep Time: 15 minutes Cooking Time: 25 minutes 25 minutes
Nutrition facts: 230 calories 12g fat
Rating: 5.0/5
( 1 voted )
Pin
Print

Ingredients

INGREDIENTS

  • 1 large sweet potato, peeled and diced
  • 1 tablespoon olive oil
  • 4 large eggs
  • 1/4 cup milk
  • 1/4 cup fresh chives, chopped
  • Salt and pepper to taste
  • 1/2 cup shredded cheese (optional)

Instructions

  1. Preheat your oven to 400°F (200°C).
  2. In a skillet, heat the olive oil over medium heat. Add the diced sweet potato and season with salt and pepper. Cook until tender, about 10-12 minutes.
  3. In a bowl, whisk together the eggs and milk. Stir in the chopped chives and season with salt and pepper.
  4. Once the sweet potatoes are cooked, spread them evenly in the skillet. Pour the egg mixture over the sweet potatoes and sprinkle with cheese if using.
  5. Transfer the skillet to the preheated oven and bake for 15-20 minutes, or until the eggs are set and lightly golden.
  6. Remove from the oven, let cool slightly, then slice and serve warm.

Notes

Tip: You can add cooked bacon or ham for a heartier frittata!

For perfect results, ensure your sweet potatoes are cooked until tender but not mushy. You can easily swap chives for other fresh herbs like parsley or thyme, depending on your preference. Leftovers can be stored in the refrigerator for up to 3 days and reheated in the oven or microwave.

Feel free to add cheese for extra creaminess and flavor, or incorporate other veggies like bell peppers or spinach for added nutrition.

August 5, 2026 0 comments
0 FacebookTwitterPinterestPocketEmail
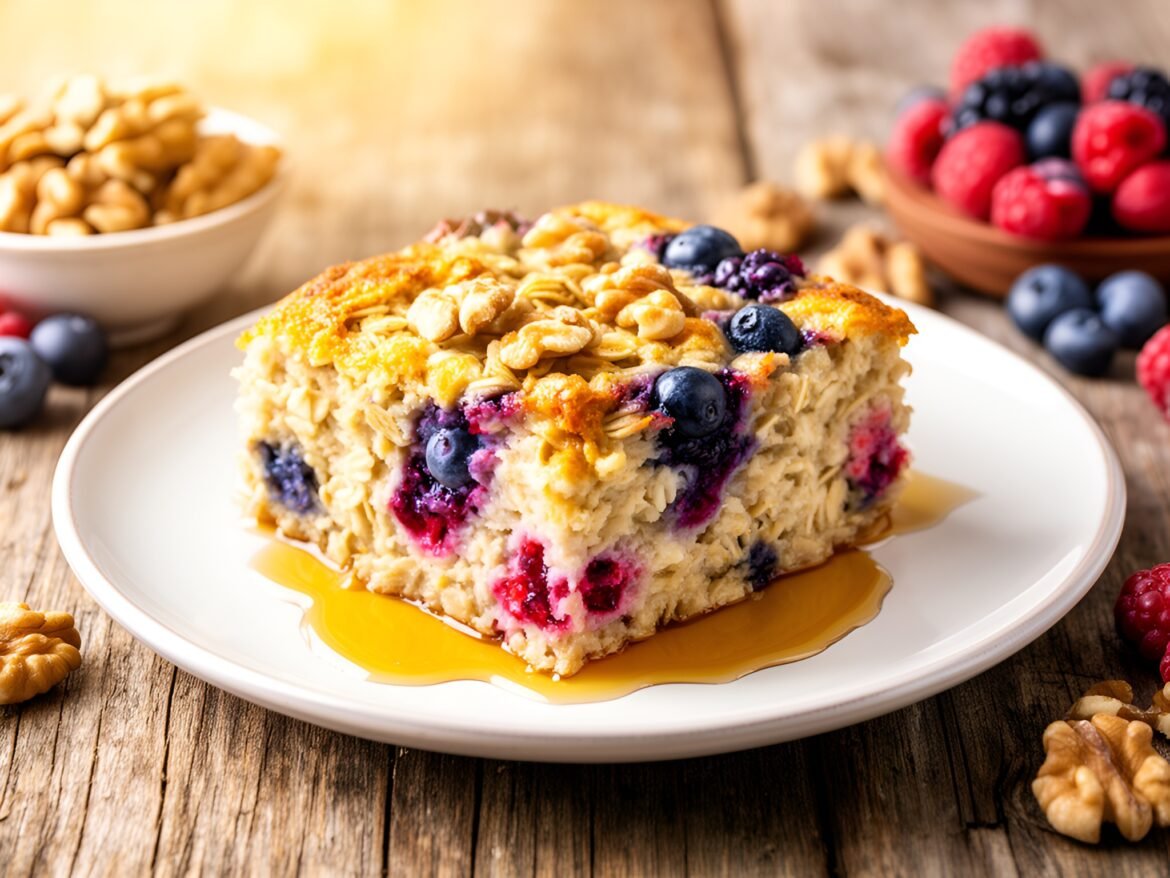
Sun-Kissed Berry-Walnut Oatmeal Bake Delight
Breakfast & BrunchKid-FriendlyQuick & Easy (30-Min)Vegetarian

Sun-Kissed Berry-Walnut Oatmeal Bake Delight

by Linda August 5, 2026
written by Linda

Indulge in a delightful and nourishing breakfast with this Berry-Walnut Sunrise Oatmeal Bake. This warm, baked dish is not only incredibly easy to make, but it also brings together the wholesome goodness of oats, fresh berries, and crunchy walnuts into a single pan. Perfect for busy mornings or leisurely weekends, it can be prepared ahead of time and simply reheated!

The combination of sweet, juicy berries with the nutty flavor of walnuts creates a symphony of textures and flavors that everyone will love. Plus, the addition of maple syrup adds a touch of natural sweetness, making it a balanced breakfast option that will keep you energized throughout the day.

Sun-Kissed Berry-Walnut Oatmeal Bake Delight

Sun-Kissed Berry-Walnut Oatmeal Bake Delight

Serves: 6 Prep Time: 15 minutes Cooking Time: 35 minutes 35 minutes
Nutrition facts: 220 calories 8g fat
Rating: 5.0/5
( 1 voted )
Pin
Print

Ingredients

INGREDIENTS

  • 2 cups rolled oats
  • 1 1/2 cups almond milk (or milk of choice)
  • 1/2 cup maple syrup
  • 1 teaspoon vanilla extract
  • 1 teaspoon baking powder
  • 1/2 teaspoon cinnamon
  • 1/4 teaspoon salt
  • 1 cup mixed berries (blueberries, strawberries, raspberries)
  • 1/2 cup walnuts, chopped
  • 1 banana, sliced

Instructions

  1. Preheat the oven to 350°F (175°C) and lightly grease a 9x9 inch baking dish.
  2. In a large mixing bowl, combine the rolled oats, almond milk, maple syrup, vanilla extract, baking powder, cinnamon, and salt. Stir well to combine.
  3. Fold in the mixed berries, chopped walnuts, and sliced banana until evenly distributed within the mixture.
  4. Pour the oatmeal mixture into the greased baking dish, spreading it evenly with a spatula.
  5. Bake in the preheated oven for 30-35 minutes, or until the top is golden brown and the oatmeal is set.
  6. Remove from the oven and let it cool for a few minutes before slicing into squares and serving. Enjoy warm!

Notes

Tip: For added flavor, you can sprinkle a few more walnuts and berries on top before baking.

For a creamier texture, consider adding a dollop of Greek yogurt on top before serving. This oatmeal bake can also be customized with your favorite nuts or fruits, such as pecans or bananas. If you don’t have fresh berries on hand, frozen berries work just as well—just be sure to adjust the baking time slightly if they are still frozen.

Store any leftovers in an airtight container in the refrigerator for up to three days. To reheat, simply warm individual portions in the microwave or the oven until heated through.

August 5, 2026 0 comments
0 FacebookTwitterPinterestPocketEmail
Chili-Mango Sparkler with Mint Infusion
Drinks & BeveragesGluten-FreeQuick & Easy (30-Min)Vegan

Chili-Mango Sparkler with Mint Infusion

by Linda August 5, 2026
written by Linda

Quench your thirst with this vibrant Chili-Mango Sparkler with Mint Infusion, a perfect blend of tropical flavors and a hint of heat. The sweet mango pairs perfectly with a kick of chili powder and refreshing mint, making it an irresistible summer beverage.

This drink is not only refreshing but also visually stunning, making it a great choice for entertaining. The fizzy finish adds a delightful effervescence, turning any gathering into a festive occasion.Ā 

Chili-Mango Sparkler with Mint Infusion

Chili-Mango Sparkler with Mint Infusion

Serves: 4 Prep Time: 10 minutes Cooking Time: 0 minutes 0 minutes
Nutrition facts: 120 calories 0g fat
Rating: 5.0/5
( 1 voted )
Pin
Print

Ingredients

INGREDIENTS

  • 1 ripe mango, peeled and chopped
  • 1 tablespoon chili powder
  • 1 tablespoon honey or agave syrup
  • 1 cup fresh mint leaves
  • 2 cups sparkling water
  • Ice cubes
  • Lime wedges for garnish

Instructions

  1. In a blender, combine the chopped mango, chili powder, and honey. Blend until smooth.
  2. Strain the mango mixture through a fine sieve into a pitcher to remove any pulp if desired.
  3. Add the fresh mint leaves into the pitcher and gently muddle them with a muddler or spoon to release their flavor.
  4. Pour in the sparkling water and stir gently to combine all the ingredients.
  5. Fill glasses with ice cubes and pour the chili-mango mixture over the ice.
  6. Garnish each glass with a lime wedge and a sprig of mint before serving.

Notes

Tip: Adjust the sweetness by adding more honey or agave syrup according to your taste preferences.

For an extra unique twist, try adding a splash of coconut water for a tropical vibe. If you’re looking to make this drink a bit spicier, adjust the chili powder to your taste. You can also use fresh mango if you have it on hand, just make sure to blend it well to avoid any chunky bits.

To store leftovers, keep the base mix in the fridge without the soda added. When you’re ready to serve, pour over ice and top with sparkling water or soda for the best fizz.

August 5, 2026 0 comments
0 FacebookTwitterPinterestPocketEmail
Frosty Ginger-Lime Chai Cooler
Drinks & BeveragesKid-FriendlyQuick & Easy (30-Min)Vegetarian

Frosty Ginger-Lime Chai Cooler

by Linda August 5, 2026
written by Linda

Beat the heat with a Frosty Ginger-Lime Chai Cooler! This delightful drink combines the warm spices of chai with the invigorating zing of ginger and lime, making it a perfect refreshment for hot summer days. The result is a beautifully balanced cooler that’s both soothing and energizing.

Utilizing brewed chai tea as the base adds a depth of flavor while the ginger provides a subtle kick. Serve it over ice for a frosty treat that will tantalize your taste buds!

Frosty Ginger-Lime Chai Cooler

Frosty Ginger-Lime Chai Cooler

Serves: 4 Prep Time: 10 minutes Cooking Time: 5 minutes 5 minutes
Nutrition facts: 85 calories 0g fat
Rating: 5.0/5
( 1 voted )
Pin
Print

Ingredients

INGREDIENTS

  • 4 cups brewed chai tea, cooled
  • 1/4 cup fresh lime juice
  • 1/4 cup honey or agave syrup
  • 1 tablespoon grated fresh ginger
  • Ice cubes
  • Lime slices for garnish
  • Fresh mint leaves for garnish

Instructions

  1. Brew the chai tea according to package instructions and allow it to cool completely.
  2. In a pitcher, combine the cooled chai tea, fresh lime juice, honey (or agave syrup), and grated ginger. Stir well until the honey is fully dissolved.
  3. Fill glasses with ice cubes and pour the chai mixture over the ice.
  4. Garnish each glass with a slice of lime and a few fresh mint leaves before serving. Enjoy your frosty cooler!

Notes

Storage: This drink is best enjoyed fresh, but you can store any leftovers in the refrigerator for up to 2 days. Stir well before serving again.

For an extra layer of flavor, consider adding a splash of coconut milk for creaminess or a sprig of fresh mint as a garnish. If you prefer a sweeter drink, adjust the honey to taste or try using agave syrup as a substitute. You can also make this drink in larger batches for parties; just multiply the ingredients and store it in the refrigerator until you’re ready to serve!

August 5, 2026 0 comments
0 FacebookTwitterPinterestPocketEmail
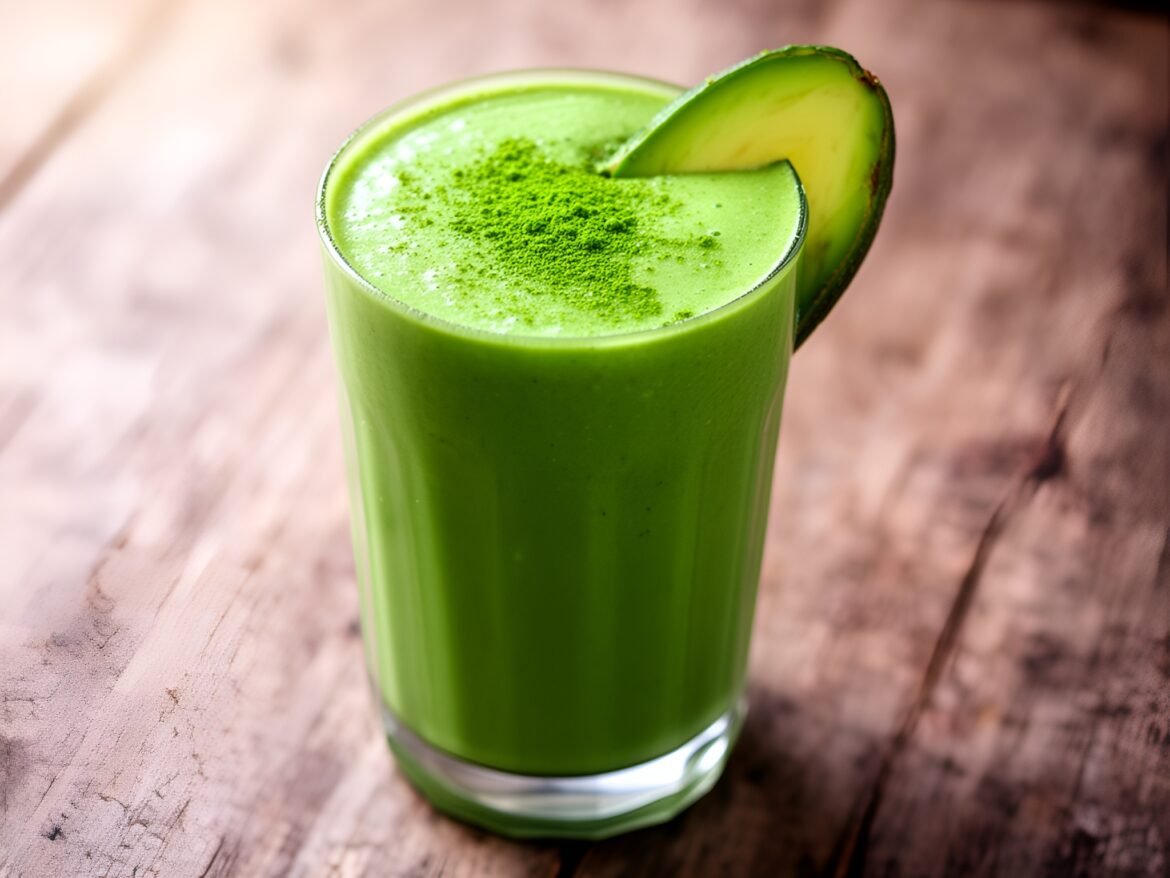
Creamy Avocado-Matcha Smoothie Bliss
Breakfast & BrunchHealthy & Low-CalorieQuick & Easy (30-Min)Vegetarian

Creamy Avocado-Matcha Smoothie Bliss

by Linda August 5, 2026
written by Linda

Experience a delightful fusion of flavors with this Creamy Avocado-Matcha Smoothie Bliss. The rich creaminess of ripe avocados pairs seamlessly with the earthy notes of matcha, creating a smoothie that’s as nourishing as it is delicious.

This smoothie not only satisfies your taste buds but also provides a plethora of health benefits. Avocados contribute healthy fats and fiber, while matcha is packed with antioxidants. Enjoy this smoothie as a breakfast option or a refreshing afternoon pick-me-up!

Creamy Avocado-Matcha Smoothie Bliss

Creamy Avocado-Matcha Smoothie Bliss

Serves: 2 Prep Time: 5 minutes Cooking Time: 0 minutes 0 minutes
Nutrition facts: 250 calories 15g fat
Rating: 5.0/5
( 1 voted )
Pin
Print

Ingredients

INGREDIENTS

  • 1 ripe avocado
  • 1 tablespoon matcha powder
  • 1 banana (optional for sweetness)
  • 1 cup almond milk (or any milk of choice)
  • 1 tablespoon honey or maple syrup (optional)
  • 1/2 cup ice cubes

Instructions

  1. Scoop the flesh of the avocado into a blender.
  2. Add the matcha powder, banana, almond milk, and honey or maple syrup (if using).
  3. Blend on high until smooth and creamy.
  4. Add the ice cubes and blend again until the mixture is frosty and well combined.
  5. Pour into glasses and serve immediately, garnished with a sprinkle of matcha if desired.

Notes

Tip: Adjust the consistency by adding more milk for a thinner smoothie or more ice for a thicker texture.

For the best flavor, use ripe avocados that yield slightly to gentle pressure. If you want to enhance the sweetness, consider adding a banana or a tablespoon of honey.

Feel free to customize by adding spinach for a nutrient boost or changing up the milk base according to your preference—almond, coconut, or oat milk all work wonderfully.

Store any leftovers in an airtight container in the fridge for up to 1 day, though it’s best enjoyed fresh to preserve the vibrant green color and creamy texture.

August 5, 2026 0 comments
0 FacebookTwitterPinterestPocketEmail
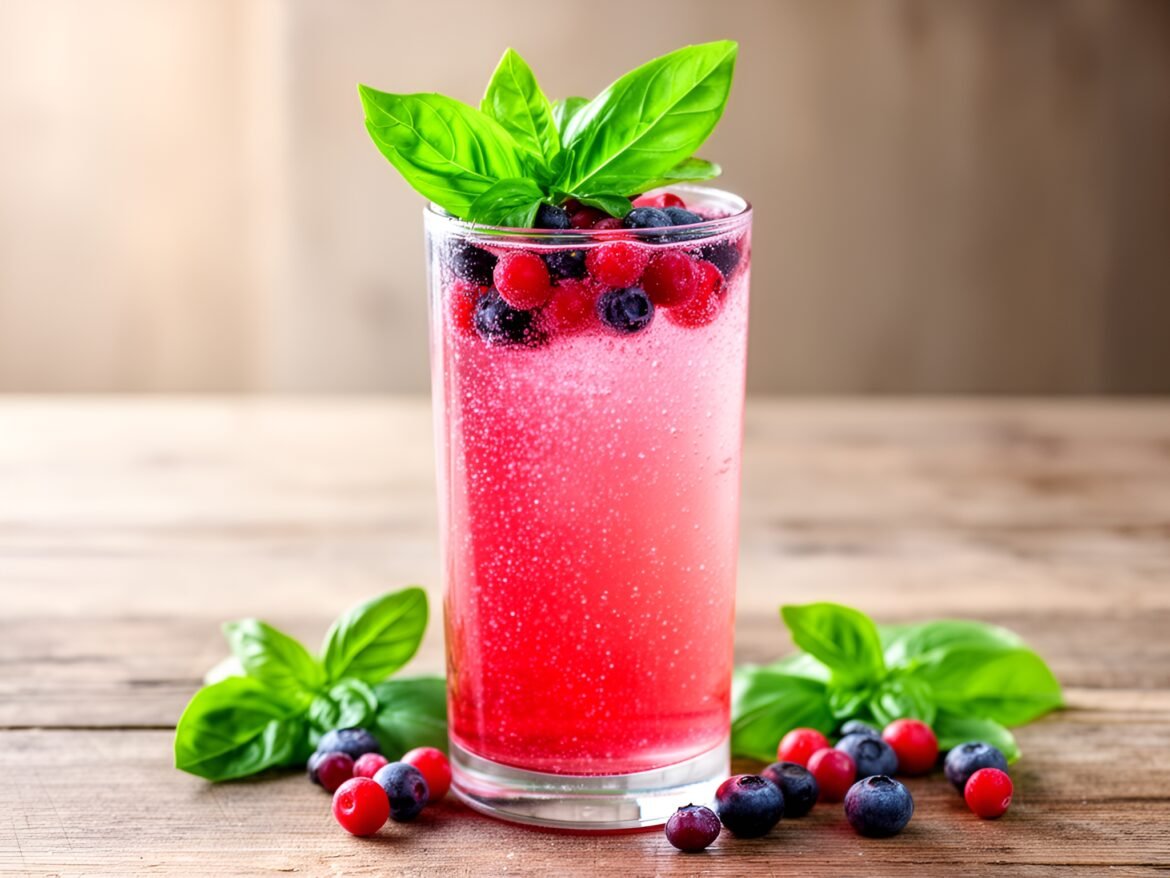
Sparkling Berry Basil Refresher
Drinks & BeveragesHealthy & Low-CalorieQuick & Easy (30-Min)Vegan

Sparkling Berry Basil Refresher

by Linda August 5, 2026
written by Linda

Beat the heat with our Sparkling Berry Basil Refresher, a vibrant drink that balances the sweetness of fresh berries with the aromatic touch of basil. This refreshing beverage is perfect for summer gatherings or a relaxing afternoon on the porch.

The burst of bubbles from sparkling water enhances the flavors of the mixed berries, while the basil adds a unique herbal note that elevates this drink beyond the ordinary. Whether you serve it at a party or enjoy it solo, it’s a guaranteed hit!

Sparkling Berry Basil Refresher

Sparkling Berry Basil Refresher

Serves: 4 Prep Time: 10 minutes Cooking Time: 0 minutes 0 minutes
Nutrition facts: 80 calories 0g fat
Rating: 5.0/5
( 1 voted )
Pin
Print

Ingredients

INGREDIENTS

  • 1 cup mixed fresh berries (strawberries, blueberries, raspberries)
  • 2 tablespoons fresh basil leaves, plus extra for garnish
  • 2 tablespoons honey or agave syrup (adjust to taste)
  • 2 cups sparkling water (chilled)
  • Ice cubes (optional)

Instructions

  1. In a blender, combine the mixed berries and honey. Blend until smooth and strain through a fine mesh sieve to remove seeds, if desired.
  2. In a large pitcher, add the berry puree and gently stir in the fresh basil leaves.
  3. Pour in the chilled sparkling water and stir gently to combine, ensuring not to lose too much fizz.
  4. Serve in glasses filled with ice, if using, and garnish with additional basil leaves and whole berries for a vibrant presentation.

Notes

Storage: This refresher is best served fresh, but you can prepare the berry mixture in advance and add sparkling water just before serving for optimal fizz.

For a stronger basil flavor, muddle some extra basil leaves before adding the sparkling water. You can also experiment with different types of berries based on your preference—raspberries, blueberries, or even blackberries work wonderfully!

To make a batch ahead of time, simply mix the berry puree and syrup, then add sparkling water just before serving for maximum fizz. This refresher is best enjoyed chilled, so keep your glasses cool or serve over ice!

August 5, 2026 0 comments
0 FacebookTwitterPinterestPocketEmail
Newer Posts
Older Posts

Recent Posts

  • Refreshing Lavender Citrus Sparkling Elixir for Summer Sips

    September 15, 2026
  • Refreshing Cucumber Mint Cooler for Hot Days

    September 15, 2026
  • Delightfully Decadent Toasted Almond Joy Cheesecake Bites

    September 15, 2026
  • Raspberry Lemonade Tart with Meringue Clouds

    September 15, 2026
  • Choco-Coconut Whirlwind Cookies

    September 15, 2026

About Me

About Me

I'm Linda, a health professional, university graduate, and author sharing tested, easy-to-follow recipes made from simple, everyday ingredients. Based in Finland, I bring together my culinary training, love of travel, and home-cooked roots to help you cook confidently, on any budget.

Products

  • Spooky Creative Starry Sky Ceramic Mug Spooky Creative Starry Sky Ceramic Mug 10,00 €

Categories

  • Appetizers & Snacks (159)
  • Breakfast & Brunch (128)
  • Desserts & Baking (173)
  • Drinks & Beverages (136)
  • Gluten-Free (205)
  • Grilling & BBQ (11)
  • Healthy & Low-Calorie (194)
  • Holiday & Seasonal (20)
  • Kid-Friendly (241)
  • Main Dishes (190)
  • Quick & Easy (30-Min) (691)
  • Slow Cooker & Instant Pot (4)
  • Soups & Salads (111)
  • Vegan (165)
  • Vegetarian (569)

About Me

I'm Linda, a health professional and food writer sharing tested, easy-to-follow recipes made from simple ingredients.

Email: jspiceygiftstv@gmail.com

Useful Links

  • Home
  • About
  • Contact
  • Free Cookbooks
  • Terms and Conditions
  • Privacy Policy

Newsletter

Subscribe to to our Newsletter to stay updated with all our recipes.

Recent Posts

  • Refreshing Lavender Citrus Sparkling Elixir for Summer Sips

    September 15, 2026
  • Refreshing Cucumber Mint Cooler for Hot Days

    September 15, 2026
  • Instagram
  • Pinterest
  • Youtube
  • Tiktok

@2026 - All Right Reserved. Designed and Developed by JSpiceyGifts

J Spicey Gifts
  • Home
  • Recipes
    • Breakfast & Brunch
    • Appetizers & Snacks
    • Main Dishes
    • Soups & Salads
    • Desserts & Baking
    • Drinks & Beverages
  • Categories
    • Vegetarian
    • Vegan
    • Gluten-Free
    • Quick & Easy (30-Min)
    • Slow Cooker & Instant Pot
    • Grilling & BBQ
    • Healthy & Low-Calorie
    • Holiday & Seasonal
    • Kid-Friendly
  • About
  • Contact

Shopping Cart

Close

No products in the cart.

Close