J Spicey Gifts
  • Home
  • Recipes
    • Breakfast & Brunch
    • Appetizers & Snacks
    • Main Dishes
    • Soups & Salads
    • Desserts & Baking
    • Drinks & Beverages
  • Categories
    • Vegetarian
    • Vegan
    • Gluten-Free
    • Quick & Easy (30-Min)
    • Slow Cooker & Instant Pot
    • Grilling & BBQ
    • Healthy & Low-Calorie
    • Holiday & Seasonal
    • Kid-Friendly
  • About
  • Contact
Top Posts
Delicious Raspberry Almond Tartlets with Honey Drizzle
Layered Coconut Cream Pie Parfaits
Zesty Lemon Blueberry Swirl Cheesecake Delight
Crunchy Caramel Pecan Delight Bars
Cinnamon Spice Churro Cupcakes: A Sweet Twist on...
Decadent Chocolate Hazelnut Dream Pillows
Vibrant Roasted Beet, Feta, and Citrus Salad with...
Creamy Tomato-Basil Bisque with a Twist
Autumn Harvest Butternut Squash and Apple Salad with...
Hearty Lentil and Spinach Rustic Summer Soup
J Spicey Gifts
  • Home
  • Recipes
    • Breakfast & Brunch
    • Appetizers & Snacks
    • Main Dishes
    • Soups & Salads
    • Desserts & Baking
    • Drinks & Beverages
  • Categories
    • Vegetarian
    • Vegan
    • Gluten-Free
    • Quick & Easy (30-Min)
    • Slow Cooker & Instant Pot
    • Grilling & BBQ
    • Healthy & Low-Calorie
    • Holiday & Seasonal
    • Kid-Friendly
  • About
  • Contact
J Spicey Gifts
J Spicey Gifts
  • Home
  • Recipes
    • Breakfast & Brunch
    • Appetizers & Snacks
    • Main Dishes
    • Soups & Salads
    • Desserts & Baking
    • Drinks & Beverages
  • Categories
    • Vegetarian
    • Vegan
    • Gluten-Free
    • Quick & Easy (30-Min)
    • Slow Cooker & Instant Pot
    • Grilling & BBQ
    • Healthy & Low-Calorie
    • Holiday & Seasonal
    • Kid-Friendly
  • About
  • Contact
Copyright 2021 - All Right Reserved
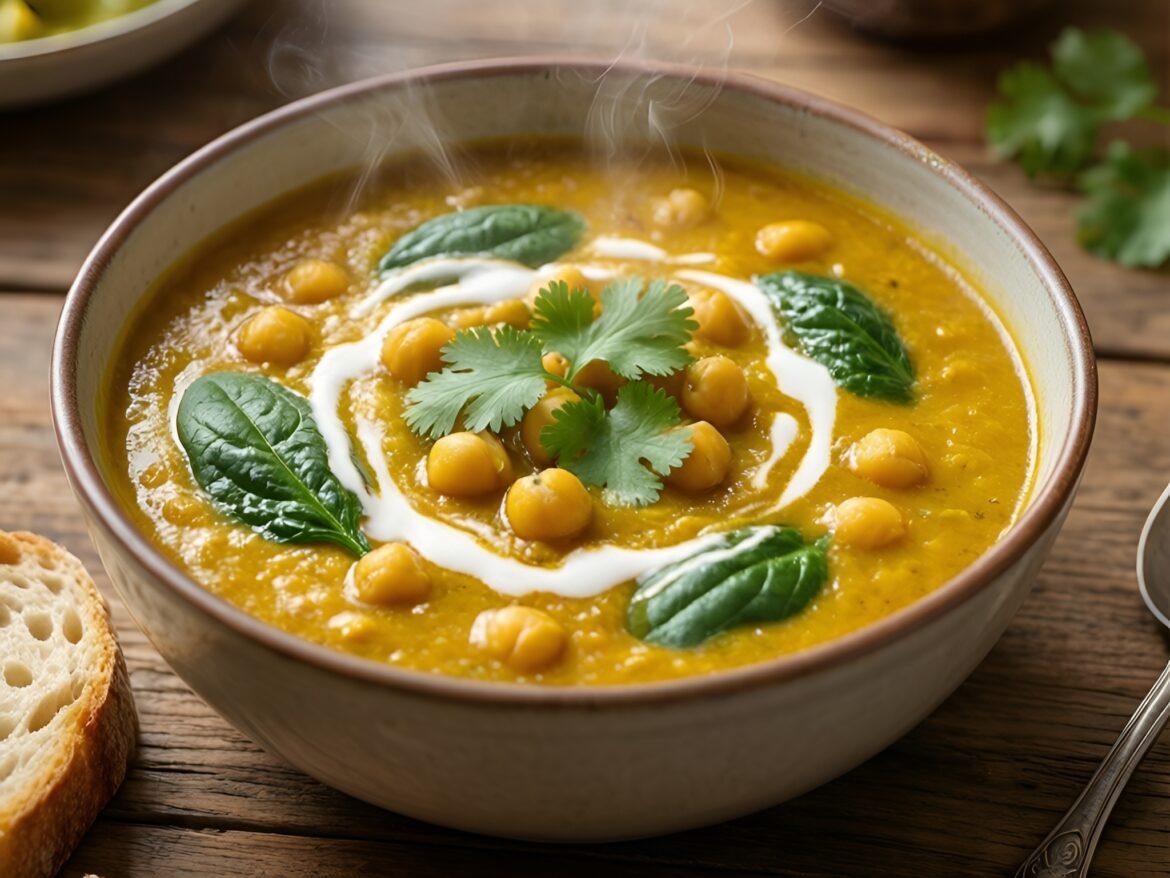
Lime-Infused Curried Coconut Chickpea Soup with Spinach
Gluten-FreeSoups & SaladsVeganVegetarian

Lime-Infused Curried Coconut Chickpea Soup with Spinach

by Linda September 3, 2026
written by Linda

This Lime-Infused Curried Coconut Chickpea Soup with Spinach is a delightful fusion of flavors and textures, perfect for a comforting meal. The creamy coconut base is enriched with aromatic curry spices, making each spoonful a warm embrace for your taste buds.

Chickpeas add a hearty protein punch, while fresh spinach brings a pop of color and nutrients. The bright splash of lime juice elevates the dish, providing a refreshing contrast to the rich coconut cream. This soup is not only delicious but also incredibly easy to prepare, making it a fantastic choice for both busy weeknights and special occasions.

Lime-Infused Curried Coconut Chickpea Soup with Spinach

Lime-Infused Curried Coconut Chickpea Soup with Spinach

Serves: 4 Prep Time: 15 minutes Cooking Time: 30 minutes 30 minutes
Nutrition facts: 350 calories 20g fat
Rating: 5.0/5
( 1 voted )
Pin
Print

Ingredients

INGREDIENTS

  • 1 can (15 oz) chickpeas, drained and rinsed
  • 1 can (14 oz) coconut milk
  • 1 medium onion, chopped
  • 2 cloves garlic, minced
  • 1 tablespoon curry powder
  • 1 teaspoon ground cumin
  • 4 cups vegetable broth
  • 4 cups fresh spinach
  • Juice of 1 lime
  • Salt and pepper to taste
  • 2 tablespoons olive oil
  • Chopped cilantro for garnish

Instructions

  1. Heat olive oil in a large pot over medium heat. Add chopped onion and sauté until translucent, about 5 minutes.
  2. Stir in minced garlic, curry powder, and cumin, cooking for another minute until fragrant.
  3. Add the chickpeas, coconut milk, and vegetable broth. Bring to a simmer and let it cook for 15-20 minutes.
  4. Stir in the fresh spinach, allowing it to wilt for about 2-3 minutes.
  5. Remove from heat and add lime juice. Season with salt and pepper to taste.
  6. Serve hot, garnished with chopped cilantro. Enjoy!

Notes

This soup can be enjoyed with crusty bread or a side of rice for a complete meal!

To enhance the flavor, consider adding a bit of ginger or garlic to the base. If you prefer a spicier kick, add some chopped jalapeños or a sprinkle of red pepper flakes.

For storage, keep any leftovers in an airtight container in the fridge for up to 3 days. Reheat gently on the stove and feel free to add a little water or coconut milk if it thickens too much. This soup also freezes beautifully, so feel free to make a double batch for future meals!
September 3, 2026 0 comments
0 FacebookTwitterPinterestPocketEmail
Quinoa-Stuffed Acorn Squash with Cranberry Maple Drizzle
Healthy & Low-CalorieMain DishesVegetarian

Quinoa-Stuffed Acorn Squash with Cranberry Maple Drizzle

by Linda September 3, 2026
written by Linda

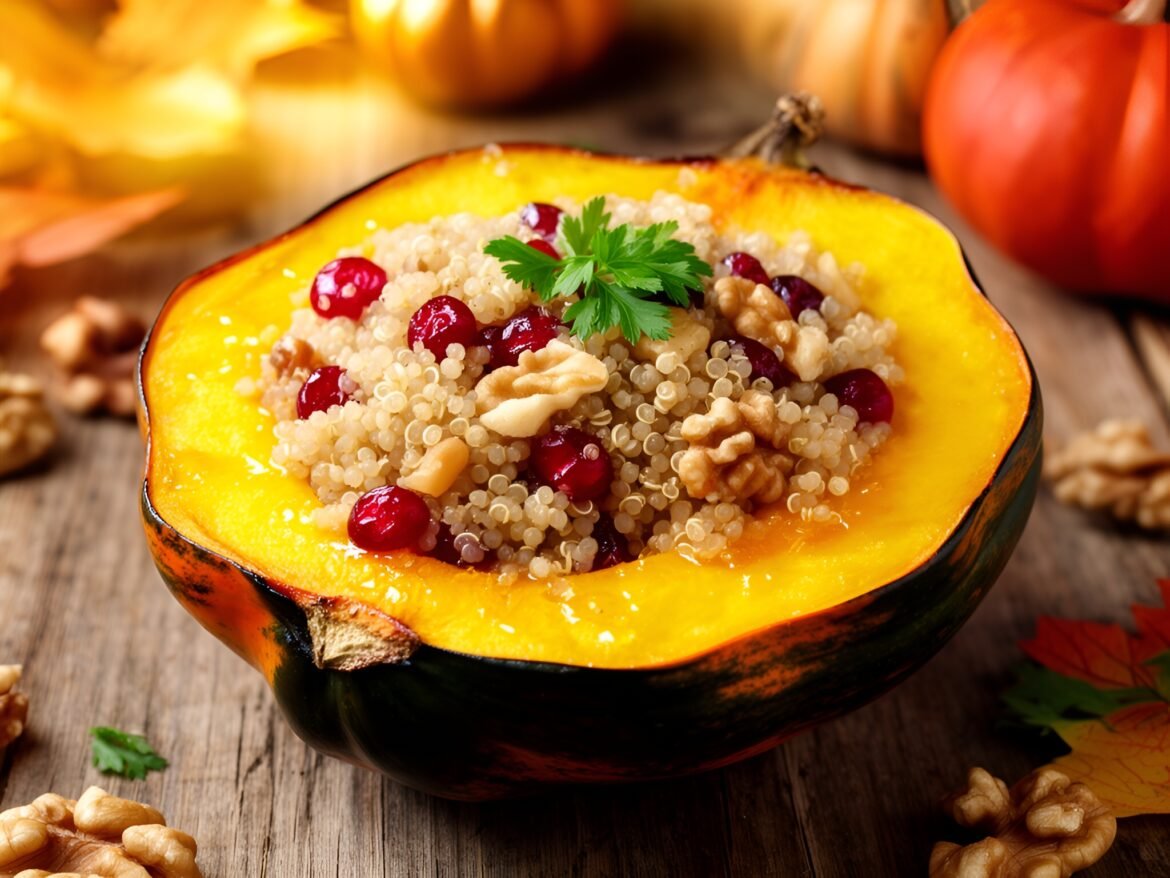
This Quinoa-Stuffed Acorn Squash is a festive and nutritious dish that perfectly embodies the essence of fall. With its sweet and savory filling of quinoa, tart cranberries, and crunchy nuts, it’s not only visually appealing but also a wholesome option for any meal.

The acorn squash acts as a beautiful edible bowl, and when roasted, it develops a tender texture with a hint of natural sweetness. The addition of a maple glaze ties all the flavors together, creating a dish that is both comforting and elegant.

Quinoa-Stuffed Acorn Squash with Cranberry Maple Drizzle

Quinoa-Stuffed Acorn Squash with Cranberry Maple Drizzle

Serves: 4 Prep Time: 15 minutes Cooking Time: 45 minutes 45 minutes
Nutrition facts: 320 calories 14g fat
Rating: 5.0/5
( 1 voted )
Pin
Print

Ingredients

INGREDIENTS

  • 2 medium acorn squash
  • 1 cup quinoa, rinsed
  • 2 cups vegetable broth
  • 1/2 cup dried cranberries
  • 1/2 cup chopped walnuts (or pecans)
  • 1/4 cup maple syrup
  • 1 tsp cinnamon
  • 1/2 tsp nutmeg
  • Salt and pepper to taste
  • 1 tablespoon olive oil
  • Fresh parsley for garnish

Instructions

  1. Preheat the oven to 400°F (200°C).
  2. Cut the acorn squashes in half and scoop out the seeds. Brush the insides with olive oil and sprinkle with salt and pepper.
  3. Place the squash halves cut-side down on a baking sheet and roast for 25-30 minutes until tender.
  4. Meanwhile, in a saucepan, combine quinoa and vegetable broth. Bring to a boil, then reduce heat to low, cover, and simmer for 15 minutes until the quinoa is fluffy and liquid is absorbed.
  5. In a mixing bowl, combine cooked quinoa, dried cranberries, chopped walnuts, cinnamon, nutmeg, and season with salt and pepper. Stir in half of the maple syrup.
  6. Remove the roasted squash from the oven and carefully flip them over. Fill each half with the quinoa mixture, pressing gently to pack it in.
  7. Drizzle the remaining maple syrup over the stuffed squash and return them to the oven. Bake for an additional 10-15 minutes.
  8. Remove from oven, garnish with fresh parsley, and serve warm.

Notes

For a vegan option: Simply omit the honey or maple syrup if avoiding animal products completely. Use agave syrup as an alternative.

To ensure the acorn squash cooks evenly, cut the squash in half lengthwise and scoop out the seeds prior to roasting. A drizzle of olive oil and a sprinkle of salt will enhance its flavor.

If you want to add variety, consider substituting the cranberries with dried cherries or apricots for a different taste. You can also add cooked black beans for an extra protein boost.

Store any leftovers in an airtight container in the refrigerator for up to 3 days. Reheat in the oven or microwave before serving.

September 3, 2026 0 comments
0 FacebookTwitterPinterestPocketEmail
Harissa-Spiced Chicken Thighs Over Roasted Vegetable Couscous
Gluten-FreeMain DishesQuick & Easy (30-Min)

Harissa-Spiced Chicken Thighs Over Roasted Vegetable Couscous

by Linda September 3, 2026
written by Linda

Experience a burst of flavors with these harissa-spiced chicken thighs, perfectly grilled to achieve a crispy exterior and juicy interior. The harissa adds a delightful heat, complemented by the earthy notes of the roasted vegetable couscous, making this dish a satisfying and colorful meal.

Roasting the vegetables enhances their natural sweetness and provides a beautiful contrast to the spices in the chicken. This combination not only pleases the palate but also creates an appealing plate that is sure to impress family and friends!

Harissa-Spiced Chicken Thighs Over Roasted Vegetable Couscous

Harissa-Spiced Chicken Thighs Over Roasted Vegetable Couscous

Serves: 4 Prep Time: 15 minutes Cooking Time: 40 minutes 40 minutes
Nutrition facts: 480 calories 25g fat
Rating: 5.0/5
( 1 voted )
Pin
Print

Ingredients

INGREDIENTS

  • 4 chicken thighs, skin-on
  • 2 tablespoons harissa
  • 2 tablespoons olive oil
  • 1 teaspoon paprika
  • Salt and pepper to taste
  • 1 cup couscous
  • 2 cups vegetable broth
  • 1 cup bell peppers, diced
  • 1 cup zucchini, diced
  • 1 cup cherry tomatoes, halved
  • 1 teaspoon dried oregano
  • Fresh parsley, for garnish

Instructions

  1. Preheat the oven to 400°F (200°C).
  2. In a bowl, mix harissa, olive oil, paprika, salt, and pepper. Rub this mixture all over the chicken thighs.
  3. Arrange the chicken thighs on a baking sheet and roast in the oven for 25-30 minutes or until the internal temperature reaches 165°F (74°C).
  4. While the chicken is roasting, prepare the vegetables. Toss diced bell peppers, zucchini, and cherry tomatoes with olive oil, oregano, salt, and pepper. Spread on a separate baking sheet.
  5. Roast the vegetables in the oven for 20-25 minutes until tender and slightly caramelized.
  6. In a medium saucepan, bring the vegetable broth to a boil. Stir in the couscous, cover, and remove from heat. Let it sit for 5 minutes, then fluff with a fork.
  7. Once the chicken and vegetables are done, layer the couscous on a serving plate, top with roasted vegetables, and place the harissa chicken thighs on top. Garnish with fresh parsley before serving.

Notes

For added richness, consider drizzling with a yogurt sauce or tahini dressing before serving.

For a milder version, reduce the amount of harissa used or substitute it with a mild chili paste. You can also switch the vegetables based on what you have on hand; zucchini or asparagus would make excellent alternatives.

Leftovers can be stored in an airtight container in the refrigerator for up to 3 days. Reheat in the oven to maintain the chicken’s crispiness or microwave for a quick meal.

September 3, 2026 0 comments
0 FacebookTwitterPinterestPocketEmail
Fiery Roasted Chickpea and Creamy Avocado Toasts
Appetizers & SnacksHealthy & Low-CalorieQuick & Easy (30-Min)Vegetarian

Fiery Roasted Chickpea and Creamy Avocado Toasts

by Linda September 3, 2026
written by Linda

Spicy Roasted Chickpea and Avocado Toasts are a vibrant and nutritious way to enjoy a favorite snack. The crunchy, fiery chickpeas offer an exciting texture and flavor contrast to the creamy avocado spread, making this dish not only tasty but also visually appealing.

Whether you need a quick breakfast, a satisfying lunch, or a delightful appetizer, these toasts deliver. The addition of spices and the freshness of the avocado elevate this simple dish into something truly special.

Fiery Roasted Chickpea and Creamy Avocado Toasts

Fiery Roasted Chickpea and Creamy Avocado Toasts

Serves: 2 Prep Time: 10 minutes Cooking Time: 25 minutes 25 minutes
Nutrition facts: 350 calories 18g fat
Rating: 5.0/5
( 1 voted )
Pin
Print

Ingredients

INGREDIENTS

  • 1 can (15 oz) chickpeas, drained and rinsed
  • 1 tablespoon olive oil
  • 1 teaspoon smoked paprika
  • 1/2 teaspoon cayenne pepper
  • Salt and pepper to taste
  • 2 ripe avocados
  • 1 tablespoon lemon juice
  • 2 slices whole-grain bread
  • Fresh cilantro or parsley for garnish

Instructions

  1. Preheat your oven to 400°F (200°C).
  2. On a baking sheet, spread the rinsed chickpeas and drizzle with olive oil. Sprinkle smoked paprika, cayenne pepper, salt, and pepper. Toss to coat evenly.
  3. Roast the chickpeas for about 20-25 minutes, shaking the pan halfway through, until they are crispy and golden brown.
  4. While the chickpeas are roasting, mash the avocados in a bowl and mix in lemon juice, salt, and pepper to taste.
  5. Toast the whole-grain bread slices until golden brown and crispy.
  6. Spread a generous layer of the avocado mixture on each slice of toast, then top with the spicy roasted chickpeas.
  7. Garnish with fresh cilantro or parsley before serving. Enjoy!

Notes

Storage: Store leftover chickpeas in an airtight container for up to 3 days. Reheat in the oven before serving for the best texture.

To achieve the best texture for your chickpeas, ensure they are thoroughly dried before roasting. This helps them become extra crispy!

If you’re short on time, you can use canned chickpeas, but don’t forget to rinse and dry them well. You can also customize the spices based on your heat tolerance; try smoked paprika or add a pinch of cayenne for extra kick.

These toasts are best enjoyed fresh, but you can store leftover chickpeas in an airtight container. Reheat them in the oven for a few minutes to regain their crunch!

September 3, 2026 0 comments
0 FacebookTwitterPinterestPocketEmail
Tangy Goat Cheese and Honey Fig Crostini
Appetizers & SnacksQuick & Easy (30-Min)Vegetarian

Tangy Goat Cheese and Honey Fig Crostini

by Linda September 3, 2026
written by Linda

These Tangy Goat Cheese and Honey Fig Crostini are a delightful fusion of flavors that will elevate any appetizer spread. The creamy tang of goat cheese pairs perfectly with the natural sweetness of fresh figs and a drizzle of honey, creating a palate-pleasing experience.

Perfect for entertaining, these crostini are quick to prepare and visually stunning, making them an impressive addition to your next gathering. Each bite offers a satisfying crunch from the toasted bread, balanced with the smoothness of the cheese and the rich sweetness from the figs and honey.

Tangy Goat Cheese and Honey Fig Crostini

Tangy Goat Cheese and Honey Fig Crostini

Serves: 12 Prep Time: 15 minutes Cooking Time: 10 minutes 10 minutes
Nutrition facts: 120 calories 7g fat
Rating: 5.0/5
( 1 voted )
Pin
Print

Ingredients

INGREDIENTS

  • 1 French baguette, sliced into 1/2-inch pieces
  • 8 oz goat cheese, softened
  • 1/4 cup honey
  • 8-10 fresh figs, sliced
  • 1-2 tbsp olive oil
  • Fresh thyme leaves for garnish (optional)

Instructions

  1. Preheat the oven to 375°F (190°C).
  2. Arrange the baguette slices on a baking sheet. Drizzle with olive oil on both sides.
  3. Toast the bread in the preheated oven for about 5-7 minutes, or until golden and crispy.
  4. Spread a generous layer of softened goat cheese on each toasted baguette slice.
  5. Top each slice with a few fig slices, arranging them neatly over the cheese.
  6. Drizzle each crostini with honey for added sweetness.
  7. Garnish with fresh thyme leaves if desired, and serve immediately.

Notes

Tip: Use a mix of fresh and dried figs for a complex flavor profile.

For the best flavor, use fresh figs when in season. If figs are not available, you can substitute with dried figs, but soak them in warm water for a few minutes to soften. Experiment with different types of honey; a wildflower or lavender honey can add a unique twist to the flavor profile.

These crostini can be made ahead of time; simply prepare the components and assemble just before serving to keep the bread crunchy. Store any leftover crostini in an airtight container for up to two days, although they are best enjoyed fresh!

September 3, 2026 0 comments
0 FacebookTwitterPinterestPocketEmail
Crispy Cauliflower Buffalo Bites with Creamy Ranch Dip
Appetizers & SnacksGluten-FreeQuick & Easy (30-Min)Vegetarian

Crispy Cauliflower Buffalo Bites with Creamy Ranch Dip

by Linda September 3, 2026
written by Linda

Transform your snacking with these Crispy Cauliflower Buffalo Bites! Coated in a flavorful buffalo sauce, these bites are perfect for game day, movie nights, or any gathering. The cauliflower becomes perfectly crispy, satisfying your craving for something crunchy and spicy.

Paired with a creamy ranch dip, these bites are not only delicious but also offer a healthier alternative to traditional buffalo wings. You’ll love the combination of the spicy sauce and the cool, tangy dip that complements each bite beautifully.

Crispy Cauliflower Buffalo Bites with Creamy Ranch Dip

Crispy Cauliflower Buffalo Bites with Creamy Ranch Dip

Serves: 4-6 Prep Time: 15 minutes Cooking Time: 25 minutes 25 minutes
Nutrition facts: 250 calories 12g fat
Rating: 5.0/5
( 1 voted )
Pin
Print

Ingredients

INGREDIENTS

  • 1 medium head of cauliflower, cut into bite-sized florets
  • 1 cup all-purpose flour
  • 1 teaspoon garlic powder
  • 1 teaspoon paprika
  • 1/2 teaspoon salt
  • 1/2 teaspoon black pepper
  • 1 cup water
  • 1 1/2 cups breadcrumbs
  • 1/2 cup buffalo sauce
  • 2 tablespoons olive oil
  • 1/2 cup sour cream
  • 1/2 cup mayonnaise
  • 1 tablespoon dried dill
  • 1 tablespoon chopped chives
  • 1 tablespoon lemon juice

Instructions

  1. Preheat the oven to 450°F (230°C) and line a baking sheet with parchment paper.
  2. In a large bowl, whisk together the flour, garlic powder, paprika, salt, black pepper, and water until smooth.
  3. Dip each cauliflower floret into the batter, allowing excess to drip off, then coat with breadcrumbs.
  4. Arrange the coated cauliflower on the baking sheet and drizzle with olive oil.
  5. Bake for 20-25 minutes or until golden brown and crispy, flipping halfway through.
  6. In a separate bowl, mix together the buffalo sauce and baked cauliflower until well coated.
  7. Return to the baking sheet and bake for an additional 5 minutes for extra crunch.
  8. While the cauliflower is baking, prepare the ranch dip by combining sour cream, mayonnaise, dill, chives, and lemon juice in a bowl. Mix well until smooth and creamy.
  9. Serve the crispy buffalo cauliflower bites hot with the creamy ranch dip on the side.

Notes

Storage: Store any leftover cauliflower bites in an airtight container in the fridge for up to 2 days. To reheat, place them back in the oven to restore crispiness.

For a gluten-free version, use almond flour instead of breadcrumbs. You can also adjust the heat level of your buffalo sauce by choosing mild or hot varieties depending on your preference.

If you have leftovers, store them in an airtight container in the fridge. Reheat in the oven to maintain crispiness rather than using the microwave.

September 3, 2026 0 comments
0 FacebookTwitterPinterestPocketEmail
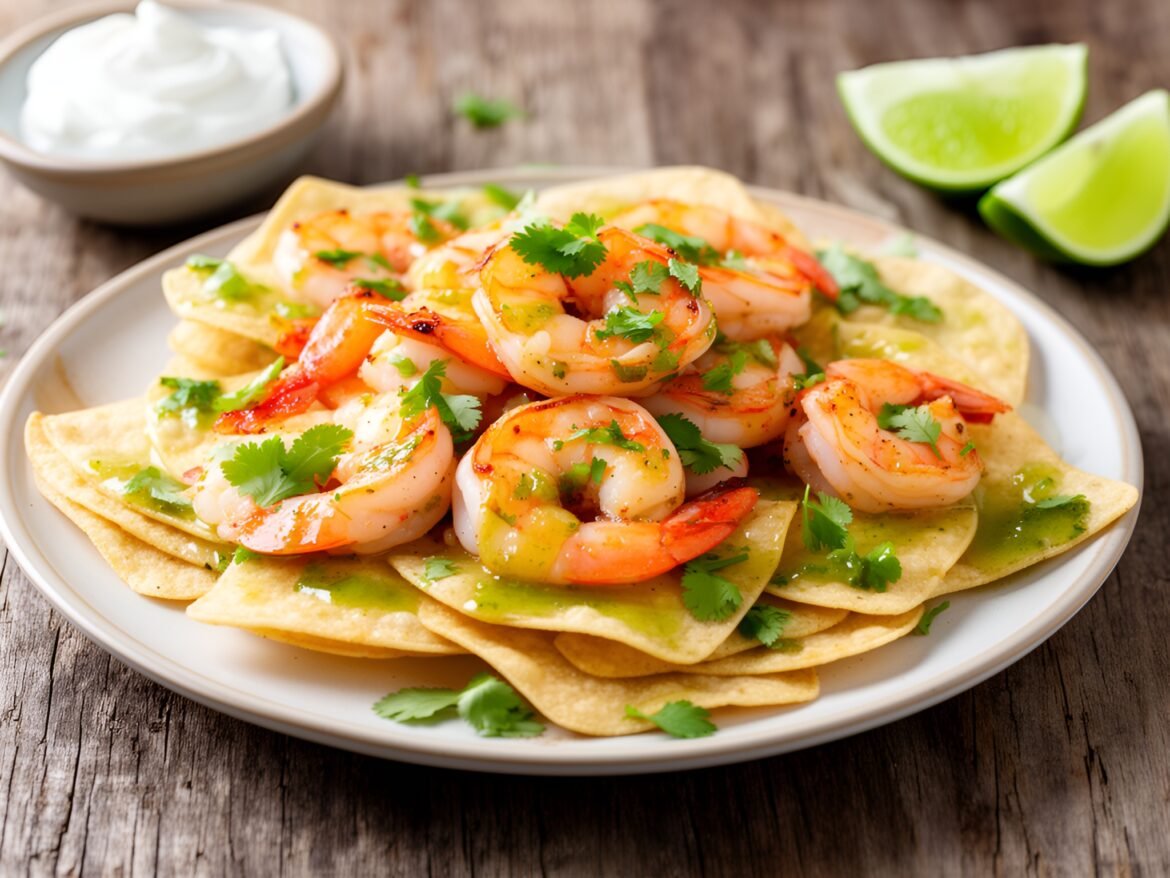
Zingy Cilantro-Lime Shrimp Bites on Tortilla Crisps
Appetizers & SnacksKid-FriendlyQuick & Easy (30-Min)

Zingy Cilantro-Lime Shrimp Bites on Tortilla Crisps

by Linda September 3, 2026
written by Linda

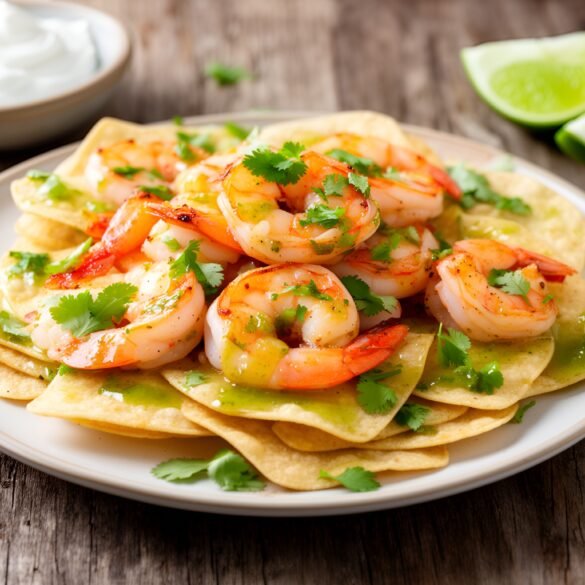
These Zingy Cilantro-Lime Shrimp Bites are the perfect appetizer for your next gathering! The combination of juicy shrimp, fresh cilantro, and a tangy lime dressing creates a burst of flavor that will leave your guests wanting more.

Served on crispy tortilla crisps, these bites are not only delicious but also visually appealing. Each bite delivers a satisfying crunch followed by the succulent shrimp, making them a delightful finger food option for any occasion.

Zingy Cilantro-Lime Shrimp Bites on Tortilla Crisps

Zingy Cilantro-Lime Shrimp Bites on Tortilla Crisps

Serves: 4-6 Prep Time: 15 minutes Cooking Time: 10 minutes 10 minutes
Nutrition facts: 220 calories 8g fat
Rating: 5.0/5
( 1 voted )
Pin
Print

Ingredients

INGREDIENTS

  • 1 lb large shrimp, peeled and deveined
  • 1 tablespoon olive oil
  • 1 teaspoon garlic powder
  • 1 teaspoon cumin
  • Salt and pepper to taste
  • 1/4 cup fresh cilantro, chopped
  • Juice of 2 limes
  • 12 tortilla chips or rounds
  • Sour cream and additional lime wedges for serving

Instructions

  1. Preheat the grill or a skillet over medium-high heat.
  2. In a bowl, toss the shrimp with olive oil, garlic powder, cumin, salt, and pepper until evenly coated.
  3. Cook the shrimp for 2-3 minutes on each side until they are pink and opaque. Remove from heat.
  4. In a separate bowl, mix together the chopped cilantro and lime juice to create the dressing.
  5. On each tortilla chip, place a cooked shrimp and drizzle with the cilantro-lime dressing.
  6. Serve immediately with sour cream and lime wedges on the side.

Notes

Tip: For extra flavor, marinate the shrimp in the cilantro-lime mixture for 30 minutes before cooking.

To ensure your shrimp are perfectly cooked, avoid overcooking them; they should turn pink and opaque in about 2-3 minutes per side. For a twist, try adding diced mango or avocado on top for added creaminess and freshness.

Store leftover shrimp in an airtight container in the fridge for up to two days. Reheat gently or enjoy cold in salads or tacos!

September 3, 2026 0 comments
0 FacebookTwitterPinterestPocketEmail
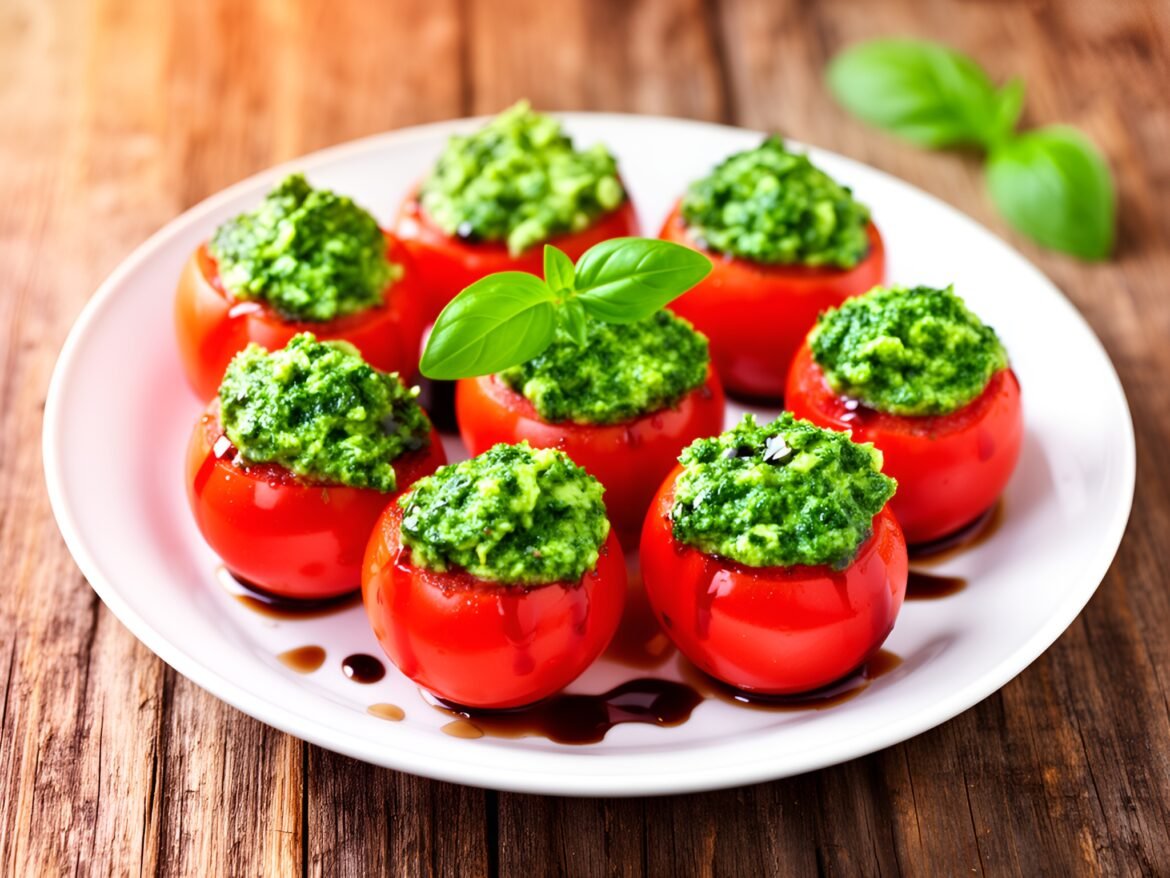
Savory Pesto-Stuffed Cherry Tomatoes with Balsamic Drizzle
Appetizers & SnacksGluten-FreeQuick & Easy (30-Min)Vegetarian

Savory Pesto-Stuffed Cherry Tomatoes with Balsamic Drizzle

by Linda September 3, 2026
written by Linda

These Savory Pesto-Stuffed Cherry Tomatoes are a vibrant and flavorful appetizer that will impress your guests at any gathering. Bursting with the rich taste of homemade pesto and the sweetness of ripe cherry tomatoes, each bite is a delightful explosion of flavor.

The combination of creamy pesto and juicy tomatoes not only makes for a visually stunning presentation but also offers a refreshing contrast in textures. Topped with a drizzle of balsamic reduction, this dish is not just tasty but also incredibly easy to prepare, making it a perfect choice for both casual and elegant occasions.

Savory Pesto-Stuffed Cherry Tomatoes with Balsamic Drizzle

Savory Pesto-Stuffed Cherry Tomatoes with Balsamic Drizzle

Serves: 4 Prep Time: 15 minutes Cooking Time: 0 minutes 0 minutes
Nutrition facts: 140 calories 10g fat
Rating: 5.0/5
( 1 voted )
Pin
Print

Ingredients

INGREDIENTS

  • 12 cherry tomatoes
  • 1/2 cup homemade or store-bought pesto
  • 1 tablespoon cream cheese (optional, for creaminess)
  • 1 tablespoon balsamic glaze
  • Salt and pepper to taste
  • Fresh basil leaves for garnish

Instructions

  1. Preheat your work surface and prepare the cherry tomatoes by cutting the tops off and hollowing them out gently using a small spoon or a melon baller.
  2. In a bowl, mix the pesto with the cream cheese until well combined. Adjust the seasoning with salt and pepper if needed.
  3. Using a small spoon or piping bag, fill each cherry tomato with the pesto mixture, ensuring they are generously stuffed.
  4. Drizzle the balsamic glaze over the stuffed tomatoes for an added layer of flavor and sweetness.
  5. Garnish with fresh basil leaves before serving. Enjoy cold or at room temperature!

Notes

Tip: For best flavor, allow the stuffed tomatoes to sit for about 15 minutes after filling before serving. This lets the flavors meld beautifully.

For an extra burst of flavor, consider adding diced mozzarella or feta cheese to the pesto mixture. If you’re short on time, store-bought pesto can be a great shortcut, but homemade really elevates the dish.

To store leftover stuffed tomatoes, keep them in an airtight container in the refrigerator for up to 2 days. Enjoy them cold or briefly reheated in the oven at a low temperature. Serve them as a light lunch or snack!

September 3, 2026 0 comments
0 FacebookTwitterPinterestPocketEmail
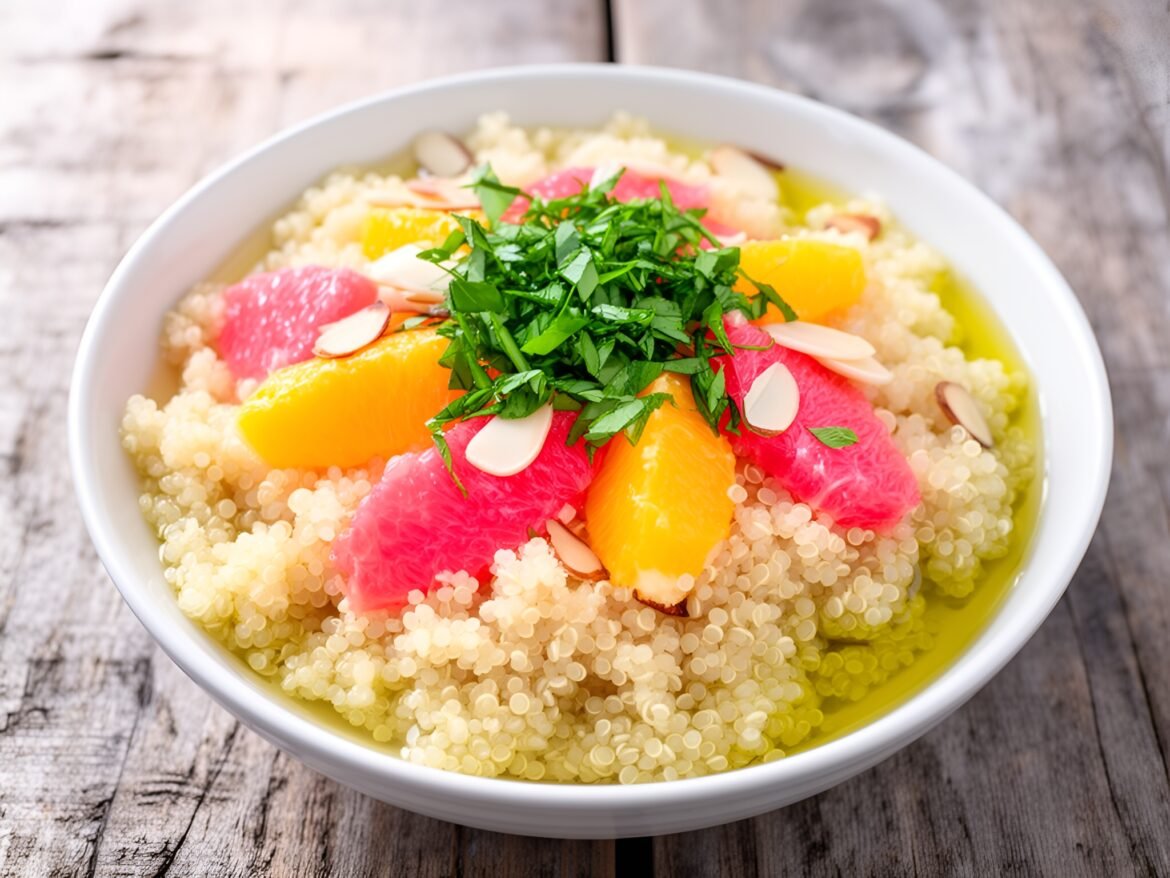
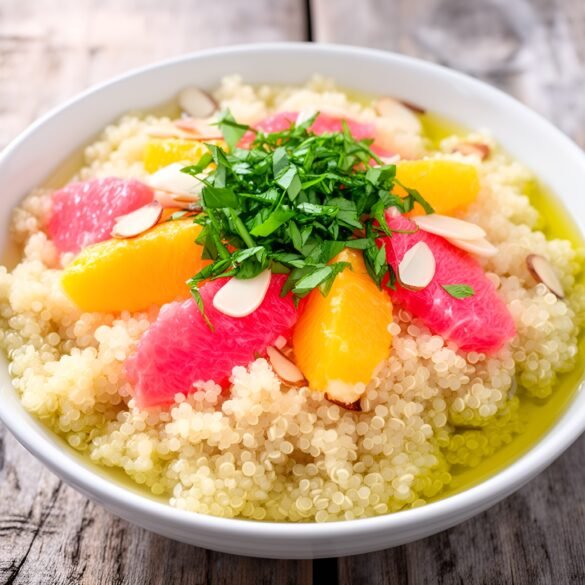
Vibrant Citrus and Herb Quinoa Breakfast Bowl
Breakfast & BrunchHealthy & Low-CalorieQuick & Easy (30-Min)Vegetarian

Vibrant Citrus and Herb Quinoa Breakfast Bowl

by Linda September 3, 2026
written by Linda

Kick off your morning with a refreshing and nutritious bowl of Zesty Citrus Quinoa Breakfast Bowl. This vibrant dish combines fluffy quinoa with the bright tang of citrus and a medley of fresh herbs, creating a delightful harmony of flavors that will awaken your senses.

This breakfast bowl not only fuels your body with protein and fiber but also provides a refreshing twist that can be easily customized. Whether you prefer the sweetness of oranges or the tartness of grapefruit, this recipe allows you to mix and match your favorite citrus fruits.

Vibrant Citrus and Herb Quinoa Breakfast Bowl

Vibrant Citrus and Herb Quinoa Breakfast Bowl

Serves: 2 Prep Time: 10 minutes Cooking Time: 15 minutes 15 minutes
Nutrition facts: 350 calories 10g fat
Rating: 5.0/5
( 1 voted )
Pin
Print

Ingredients

INGREDIENTS

  • 1 cup quinoa
  • 2 cups water or vegetable broth
  • 1 orange, segmented
  • 1 grapefruit, segmented
  • 1/2 cup chopped fresh parsley
  • 1/4 cup chopped fresh mint
  • 1 tablespoon olive oil
  • Juice of 1 lemon
  • Salt and pepper to taste
  • Optional toppings: sliced almonds, chia seeds, or feta cheese

Instructions

  1. Rinse the quinoa under cold water to remove any bitterness.
  2. In a medium saucepan, combine the quinoa and water or vegetable broth. Bring to a boil, then reduce heat to low, cover, and simmer for about 15 minutes until the quinoa is fluffy and the liquid is absorbed.
  3. Remove from heat and let it sit covered for 5 minutes. Fluff with a fork.
  4. In a large bowl, combine the cooked quinoa, orange segments, grapefruit segments, parsley, and mint.
  5. Drizzle with olive oil and lemon juice, then season with salt and pepper. Toss gently to combine.
  6. Serve immediately, topped with your choice of optional toppings like sliced almonds, chia seeds, or feta cheese.

Notes

Note: Feel free to customize the citrus fruits based on your preference or what is in season.

For a creamier texture, add a dollop of Greek yogurt or a splash of almond milk to your bowl. If you want to switch things up, try adding nuts or seeds for an extra crunch.

Store any leftovers in an airtight container in the fridge for up to 3 days. You can enjoy it cold or warm it up in the microwave.

September 3, 2026 0 comments
0 FacebookTwitterPinterestPocketEmail
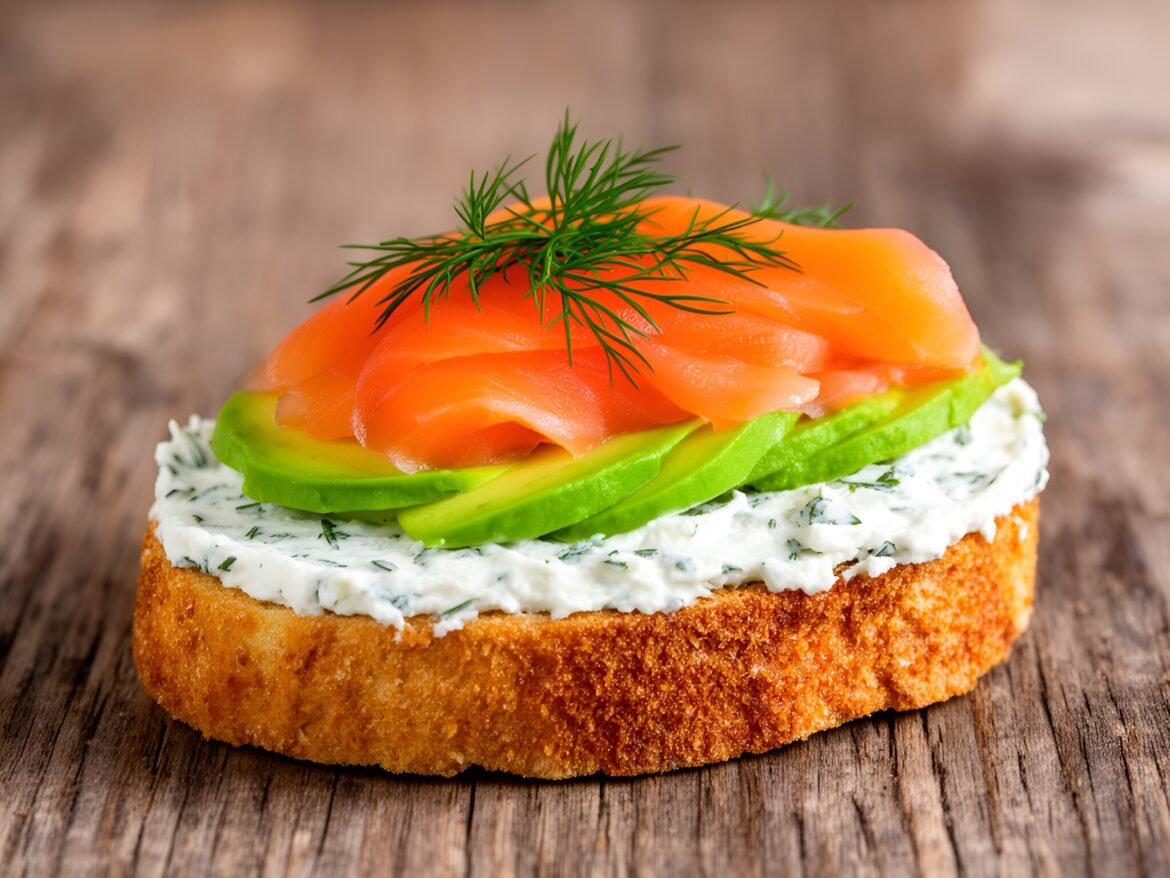
Elegant Smoked Salmon and Avocado Tartine with Dill Cream Cheese
Breakfast & BrunchHealthy & Low-CalorieKid-FriendlyQuick & Easy (30-Min)

Elegant Smoked Salmon and Avocado Tartine with Dill Cream Cheese

by Linda September 3, 2026
written by Linda

This Smoked Salmon and Avocado Tartine is a perfect blend of flavors and textures, making it an ideal choice for breakfast or brunch. The richness of the creamy dill-infused cream cheese pairs beautifully with the silky avocado and the smoky, savory notes of the salmon.

Toast your favorite bread to a perfect golden crisp, then layer on the luscious toppings for a dish that not only tastes divine but also looks stunning. Whether you’re hosting a brunch gathering or treating yourself to a special morning meal, this tartine is sure to impress.

Elegant Smoked Salmon and Avocado Tartine with Dill Cream Cheese

Elegant Smoked Salmon and Avocado Tartine with Dill Cream Cheese

Serves: 2 Prep Time: 10 minutes Cooking Time: 5 minutes 5 minutes
Nutrition facts: 320 calories 22g fat
Rating: 5.0/5
( 1 voted )
Pin
Print

Ingredients

INGREDIENTS

  • 2 slices of your favorite bread (sourdough or whole grain is ideal)
  • 1 ripe avocado
  • 4 ounces smoked salmon
  • 4 ounces cream cheese (softened)
  • 1 tablespoon fresh dill (chopped)
  • 1 teaspoon lemon juice
  • Salt and pepper to taste
  • Optional: fresh dill sprigs for garnish

Instructions

  1. Toast the bread slices until golden brown and crispy.
  2. In a small bowl, combine the softened cream cheese, chopped dill, lemon juice, and a pinch of salt and pepper. Mix until smooth and creamy.
  3. Spread a generous layer of the dill cream cheese on each slice of toasted bread.
  4. Slice the avocado and arrange it evenly on top of the cream cheese layer.
  5. Layer the smoked salmon over the avocado slices, adding more if desired.
  6. Garnish with additional dill sprigs if desired, and serve immediately. Enjoy your elegant tartine!

Notes

Note: For a different flavor profile, try adding capers or a squeeze of lime juice to the avocado.

For the best flavor, choose high-quality smoked salmon and fresh avocados. If you don’t have fresh dill, dried dill can be used, but reduce the amount by half.

Feel free to customize your tartine by adding sliced tomatoes or radishes for extra freshness and crunch. Leftover tartine can be stored in the fridge, but is best enjoyed fresh to maintain the texture of the bread.

September 3, 2026 0 comments
0 FacebookTwitterPinterestPocketEmail
Newer Posts
Older Posts

Recent Posts

  • Delicious Raspberry Almond Tartlets with Honey Drizzle

    September 13, 2026
  • Layered Coconut Cream Pie Parfaits

    September 13, 2026
  • Zesty Lemon Blueberry Swirl Cheesecake Delight

    September 13, 2026
  • Crunchy Caramel Pecan Delight Bars

    September 13, 2026
  • Cinnamon Spice Churro Cupcakes: A Sweet Twist on a Classic

    September 13, 2026

About Me

About Me

I'm Linda, a health professional, university graduate, and author sharing tested, easy-to-follow recipes made from simple, everyday ingredients. Based in Finland, I bring together my culinary training, love of travel, and home-cooked roots to help you cook confidently, on any budget.

Products

  • Spooky Creative Starry Sky Ceramic Mug Spooky Creative Starry Sky Ceramic Mug 10,00 €

Categories

  • Appetizers & Snacks (157)
  • Breakfast & Brunch (126)
  • Desserts & Baking (166)
  • Drinks & Beverages (129)
  • Gluten-Free (200)
  • Grilling & BBQ (11)
  • Healthy & Low-Calorie (190)
  • Holiday & Seasonal (20)
  • Kid-Friendly (235)
  • Main Dishes (185)
  • Quick & Easy (30-Min) (671)
  • Slow Cooker & Instant Pot (4)
  • Soups & Salads (109)
  • Vegan (158)
  • Vegetarian (555)

About Me

I'm Linda, a health professional and food writer sharing tested, easy-to-follow recipes made from simple ingredients.

Email: jspiceygiftstv@gmail.com

Useful Links

  • Home
  • About
  • Contact
  • Free Cookbooks
  • Terms and Conditions
  • Privacy Policy

Newsletter

Subscribe to to our Newsletter to stay updated with all our recipes.

Recent Posts

  • Delicious Raspberry Almond Tartlets with Honey Drizzle

    September 13, 2026
  • Layered Coconut Cream Pie Parfaits

    September 13, 2026
  • Instagram
  • Pinterest
  • Youtube
  • Tiktok

@2026 - All Right Reserved. Designed and Developed by JSpiceyGifts

J Spicey Gifts
  • Home
  • Recipes
    • Breakfast & Brunch
    • Appetizers & Snacks
    • Main Dishes
    • Soups & Salads
    • Desserts & Baking
    • Drinks & Beverages
  • Categories
    • Vegetarian
    • Vegan
    • Gluten-Free
    • Quick & Easy (30-Min)
    • Slow Cooker & Instant Pot
    • Grilling & BBQ
    • Healthy & Low-Calorie
    • Holiday & Seasonal
    • Kid-Friendly
  • About
  • Contact

Shopping Cart

Close

No products in the cart.

Close